Note: This article is written from synthesized, verified gameplay information about Animal Crossing: New Horizons, including DIY recipes, bridge progression, crafting materials, customization, and early-island building strategy.
In Animal Crossing: New Horizons, few items look as humble as log stakes. They are not shiny. They do not sparkle. They do not make your villagers gasp and clap like you just invented interior design. Yet these little wooden posts quietly carry a lot of early-game importance. If you are trying to build your first bridge, decorate a rustic campsite, frame a garden path, or simply make your island look less like a confused raccoon business experiment, learning how to craft log stakes is a must.
The good news? Crafting log stakes is delightfully simple. You do not need rare flowers, meteor showers, golden tools, or a degree from Nook University. You only need the DIY recipe, three pieces of regular wood, and access to a DIY workbench. The slightly sneaky part is knowing where the recipe lives, what kind of wood to collect, and why the game suddenly asks for log stakes when you are building your first bridge.
This guide walks you through how to craft log stakes in Animal Crossing in five quick steps, plus extra tips for finding wood faster, avoiding common mistakes, and using log stakes creatively around your island.
What Are Log Stakes in Animal Crossing?
Log stakes are a craftable houseware item in Animal Crossing: New Horizons. Visually, they look like a small bundle of sharpened wooden posts tied together, which makes them perfect for rustic outdoor designs. Functionally, they are especially important because they are one of the required materials for the bridge construction kit during early island development.
Players often search for “how to get log stakes” because the game may ask for them before they realize the item is not something you buy from Nook’s Cranny like a toaster, a suspiciously expensive chair, or a wallpaper that looks like it was designed by a fever dream. Instead, log stakes are crafted through the DIY system.
Basic Log Stakes Recipe
- Item: Log stakes
- Game: Animal Crossing: New Horizons
- Crafting material: 3 pieces of regular wood
- Crafting station: Any DIY workbench
- Used for: Decoration and bridge construction kit
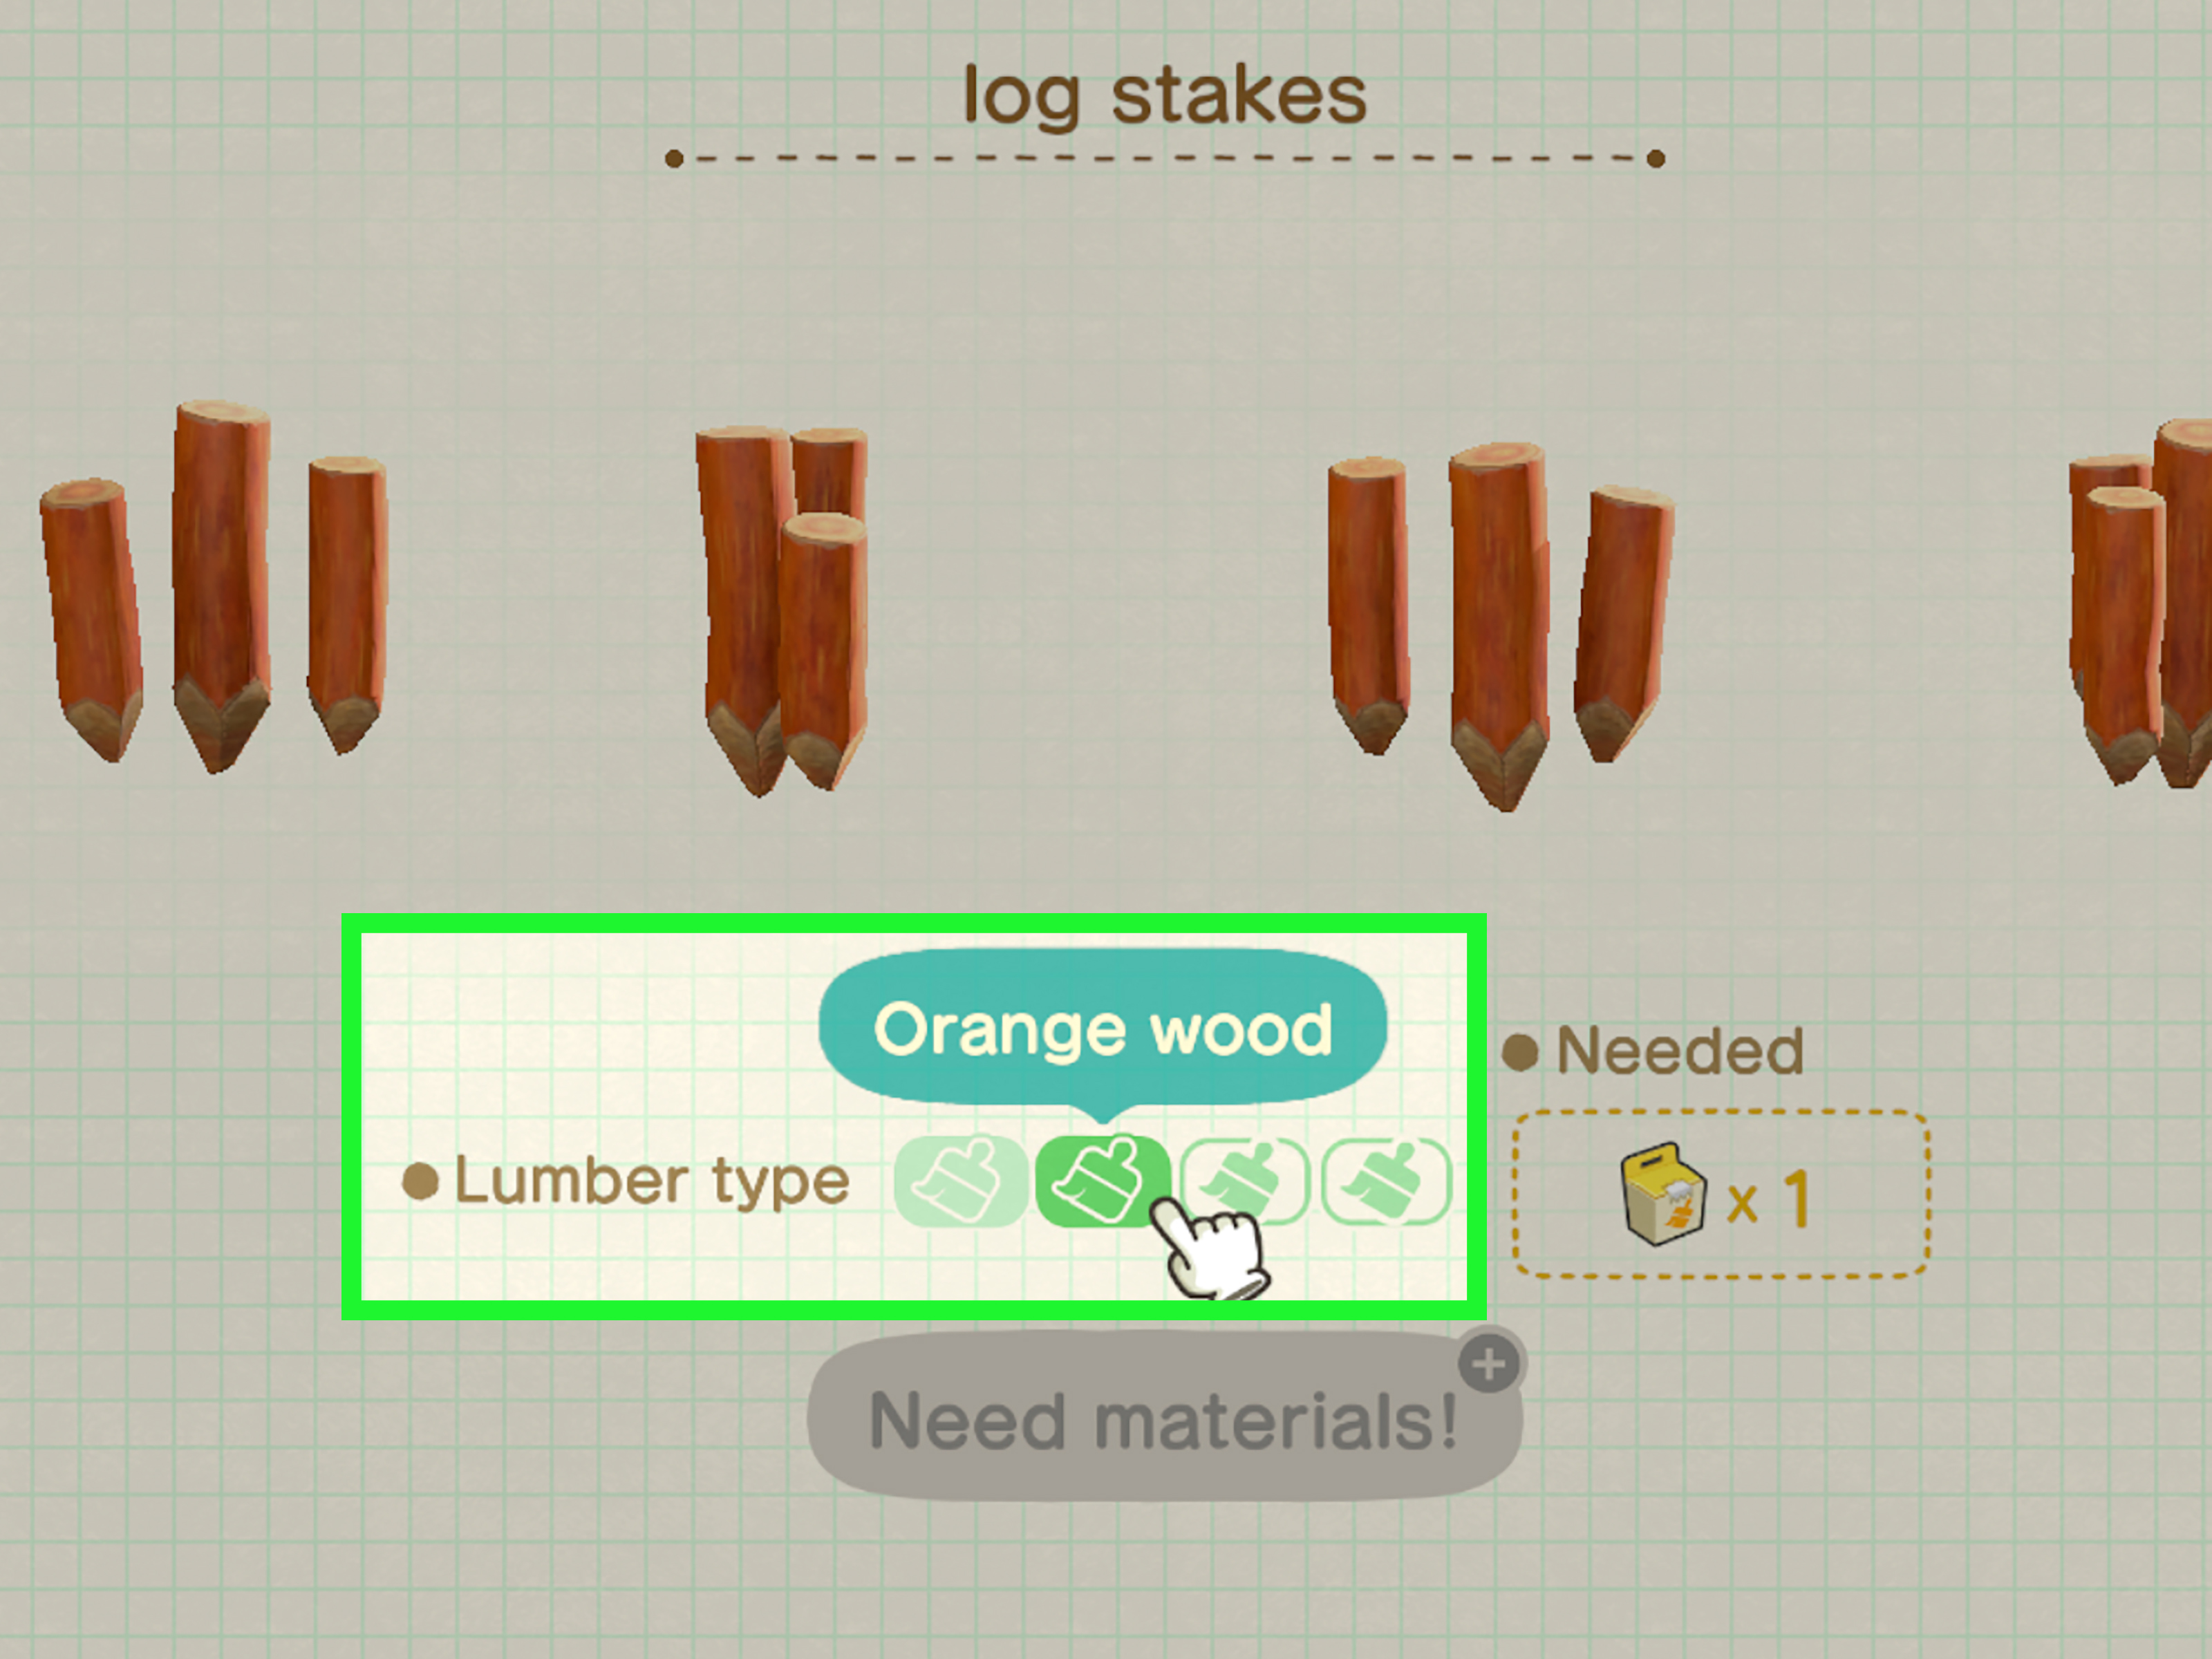
- Customizable: Yes, using customization kits or Cyrus on Harv’s Island
The most important detail is the word “regular.” Animal Crossing has three common wood types: wood, hardwood, and softwood. Log stakes require regular wood, not hardwood and not softwood. The game is very polite about this, but it will still refuse your materials like a tiny wooden bouncer if you bring the wrong type.
How to Craft Log Stakes in Animal Crossing: 5 Quick Steps
Here is the fast version for players who want the answer without wandering through a forest of extra explanation.
Step 1: Check Your DIY Recipes App
Open your NookPhone and select the DIY Recipes app. Look under the housewares or craftable furniture section for “Log stakes.” Many players already have this recipe earlier than they realize, especially if they are progressing through Tom Nook’s early island tasks.
If you are the island representative, you typically receive important early-game DIY recipes from Tom Nook as part of island development. Log stakes may also be obtained from certain villagers, including smug villagers, when they are crafting or through recipe sources such as message bottles. If the recipe is already in your app, you do not need to buy the stakes or search the entire island like a detective wearing leaf-print socks.
Step 2: Gather 3 Pieces of Regular Wood
To craft one set of log stakes, you need exactly three pieces of regular wood. You can collect wood by hitting trees with an axe. Each tree can drop up to three pieces of wood per day, and the type that appears may be regular wood, hardwood, or softwood.
For early players, a flimsy axe or stone axe is usually safer because it lets you collect wood without chopping the tree down. A regular axe can cut down a tree after repeated hits, which is useful sometimes, but accidentally turning half your island into a stump museum is not ideal.
Step 3: Go to a DIY Workbench
Once you have the recipe and three pieces of regular wood, head to a DIY workbench. You can use Tom Nook’s workbench inside Resident Services, a workbench you crafted yourself, or any accessible DIY table on your island.
Open the crafting menu, find log stakes, and select the recipe. If the item is grayed out, check your materials. Most of the time, the problem is that you collected hardwood or softwood instead of regular wood. Animal Crossing wood types look similar when you are in a hurry, so do not feel bad. Many players have had a backpack full of the wrong lumber and a face full of disappointment.
Step 4: Craft the Log Stakes
Select “Craft it!” and your character will perform the classic DIY animation, complete with cheerful hammering that somehow turns three loose pieces of wood into a neat bundle of stakes in seconds. If only real-life furniture assembly worked like that, nobody would fear flat-pack bookshelves.
After crafting, the log stakes will appear in your pockets. You can place them outside, move them around, store them, or use them as a material for another recipe, most notably the bridge construction kit.
Step 5: Use, Place, or Customize Your Log Stakes
Once crafted, log stakes can be placed around your island as decoration. They fit naturally near rivers, campsites, forest trails, farms, orchards, and cottagecore builds. They can also be customized into different lumber styles, such as darker or lighter wood tones, depending on your design theme.
If you are crafting them for your first bridge, remember that the bridge construction kit requires four sets of log stakes, plus clay and stone. Since each set of log stakes takes three regular wood, you will need twelve regular wood total for the log stakes portion of that bridge recipe.
Why Do You Need Log Stakes for the First Bridge?
One of the earliest major upgrades in Animal Crossing: New Horizons is building your first bridge. Before that, crossing rivers can feel like running errands in a town designed by a mischievous beaver. You can use a vaulting pole, but eventually Tom Nook asks you to build a bridge construction kit to connect parts of the island more permanently.
The bridge construction kit requires:
- 4 log stakes
- 4 clay
- 4 stone
This is where many players get stuck. They see “log stakes” listed as a bridge material and assume it is a raw resource, like iron nuggets or clay. It is not. Log stakes are a crafted item, which means you must make them first, then use them to craft the bridge construction kit.
Think of it as crafting inside crafting. Animal Crossing loves this. It is the cozy version of opening a box, only to find another box, only to find Tom Nook smiling gently beside a bill.
How Much Wood Do You Need for Bridge Log Stakes?
If you are crafting log stakes for decoration, one set requires three regular wood. If you are crafting them for the bridge construction kit, you need four sets. That means:
- 1 log stakes recipe = 3 regular wood
- 4 log stakes = 12 regular wood total
This is a useful number to remember because early-game wood farming can take a little time. Trees drop random wood types, so you may need to hit several trees before collecting enough regular wood. If your pockets fill with hardwood and softwood instead, keep them. They are used in many other DIY recipes, and future-you will be grateful. Future-you may also still be in debt to Tom Nook, but at least future-you will have lumber.
Best Ways to Get Regular Wood Fast
Regular wood is one of the core DIY materials in Animal Crossing. Since log stakes require regular wood specifically, here are a few reliable ways to collect it more efficiently.
Hit Every Tree Once Per Day
Each tree can produce up to three pieces of wood per day when hit with an axe. Walk around your island and hit trees systematically so you do not miss any. A good pattern is to start near Resident Services and move clockwise around your island.
Use a Flimsy Axe or Stone Axe
A flimsy axe or stone axe helps you gather wood without chopping down the tree. This is especially useful early in the game when trees are valuable for fruit, bugs, shade, and general island charm. Nobody wants a tropical getaway that looks like a lumber accident.
Visit Mystery Islands
If you have Nook Miles Tickets, mystery islands can be great for gathering extra wood. Bring tools, empty your pockets as much as possible, and hit every tree. Mystery islands are also useful for collecting stone, clay, weeds, flowers, and fruit, depending on the island layout.
Store Extra Wood
Do not sell all your wood just because your pockets are crowded. Wood, hardwood, and softwood appear in many DIY recipes, so storing extra materials at home saves time later. Animal Crossing rewards the player who hoards responsibly. Not “17 sea bass in the living room” responsibly, but close.
Common Mistakes When Crafting Log Stakes
Crafting log stakes is simple, but a few small mistakes can slow players down. Here are the big ones to avoid.
Mistake 1: Looking for Log Stakes in the Shop
Log stakes are crafted, not usually purchased as a standard shop item. If you need them, check your DIY Recipes app first. The answer is probably sitting in your NookPhone, quietly waiting while you interrogate Timmy and Tommy for no reason.
Mistake 2: Collecting the Wrong Wood
Hardwood and softwood do not work for this recipe. You need regular wood. In your inventory, regular wood usually has a medium brown appearance, while softwood is lighter and hardwood is darker. Check the item name before heading to the workbench.
Mistake 3: Forgetting You Need Four Sets for the Bridge
The bridge construction kit requires four log stakes, not one. Since each set costs three regular wood, gather at least twelve regular wood if your goal is bridge building.
Mistake 4: Using the Wrong Player Profile
Animal Crossing’s island representative system can affect early progression. Some key tasks and recipes are tied to the main player who started the island. If you are playing as a secondary resident and cannot trigger certain Tom Nook tasks, check with the island representative profile.
Mistake 5: Accidentally Chopping Down Trees
If you use a regular axe and hit the same tree repeatedly, you may chop it down. That is not always a disaster, but if you are trying to preserve your island layout, use a flimsy axe or stone axe instead.
How to Customize Log Stakes
Log stakes can be customized, making them more flexible than they first appear. You can change their lumber type with a customization kit at a workbench, or use Cyrus on Harv’s Island once that service is available. Customization lets you match log stakes to your island theme, whether you are going for deep forest, bright cottagecore, natural campgrounds, or “I swear this messy backyard is intentional.”
Popular Log Stake Design Ideas
- Forest entrance: Place log stakes near trees, weeds, and mushroom items for a woodland trail.
- River edge: Use them beside bridges or fishing spots for a natural boundary.
- Campsite decor: Pair log stakes with campfires, log benches, and lanterns.
- Farm fencing: Place them around pumpkin patches or vegetable gardens.
- Rustic yard: Use them near cabins, outdoor baths, or picnic areas.
They are small, cheap, and easy to craft, which makes them excellent filler items for areas that feel empty. In island design, tiny details matter. A few log stakes can make a random patch of grass look like a planned rustic corner instead of a place where you dropped furniture while panicking before an island rating check.
Are Log Stakes Worth Crafting After the First Bridge?
Yes, especially if you enjoy outdoor decorating. While log stakes are most famous for their role in the bridge construction kit, they remain useful as decorative items long after your first bridge is built. They fit naturally with many popular Animal Crossing island themes, including cottagecore, forestcore, farmcore, natural, rustic, and campsite builds.
Because they require only three regular wood, log stakes are cheap compared with larger log furniture. You can craft several without draining your storage. They also occupy a small footprint, so you can use them in narrow spaces where larger furniture would feel bulky.
They may not be the flashiest item in the catalog, but they are one of those quiet design pieces that make an island feel more complete. Think of them as the garnish of island decorating. Nobody visits a restaurant for parsley, but somehow the plate looks better when it is there.
Quick Troubleshooting: Why Can’t I Craft Log Stakes?
If you cannot craft log stakes, run through this checklist:
- Do you have the log stakes DIY recipe learned in your NookPhone?
- Do you have at least three pieces of regular wood?
- Are you using a DIY workbench?
- Are you checking the correct crafting category?
- Are you playing as the island representative for early Tom Nook tasks?
If the recipe is missing, continue progressing through early island tasks, speak with Tom Nook, check message bottles on the beach, visit crafting villagers, or trade with another player if multiplayer is available. Animal Crossing’s DIY system has several recipe sources, so patience usually solves the problem. Patience, and occasionally shaking every tree like it owes you rent.
Extra Player Experience: Crafting Log Stakes Without Losing Your Mind
The first time many players encounter log stakes, it happens during the bridge-building stage. You are excited. Your island is expanding. Tom Nook has handed you responsibilities with the calm confidence of someone who will not be doing the manual labor. Then the recipe asks for log stakes, and suddenly you are standing in front of a workbench wondering whether a “log stake” is a tree, a fence, a tool, or possibly a medieval snack.
My best advice is to treat log stakes as a small early-game lesson in how Animal Crossing thinks. The game often asks you to craft one item so that item can become part of another item. At first, this can feel confusing. But once you understand the rhythm, it becomes satisfying. Gather materials, check recipes, craft components, build the final piece, place it, admire it, then immediately move it three inches because the angle feels wrong. That is the Animal Crossing lifestyle.
For a smooth experience, start by checking your DIY app before searching online or running to the shop. A lot of players already have the log stakes recipe and simply overlook it because the DIY menu grows quickly. The item can hide among other wooden recipes, especially if you are unlocking tools, furniture, and early housewares at the same time. Sorting through recipes may not feel glamorous, but it saves time.
Next, gather more regular wood than you think you need. If your goal is one decorative set, three wood is enough. If your goal is the bridge construction kit, collect twelve regular wood for the four required log stakes. I recommend gathering a little extra because regular wood is useful in many other recipes, and because nothing ruins crafting momentum like being one piece short. Animal Crossing is peaceful, yes, but being short one piece of wood can turn anyone into a tiny island goblin.
Use a stone axe if you have one. It is one of the best tools for gathering wood because it will not chop down trees. Early islands need trees for fruit, bugs, wasps, furniture drops, and atmosphere. If you use a regular axe too aggressively, you may create accidental stumps everywhere. Stumps can be charming in moderation, but a whole island of stumps looks like a forest had a dramatic breakup.
When placing log stakes, experiment with natural areas. They look great beside inclines, near diagonal paths, around campsites, and along riverbanks. Try placing weeds, shrubs, flowers, or custom dirt paths nearby. Animal Crossing design often works best when items look slightly imperfect and lived-in. A perfectly straight row of log stakes can look nice, but a staggered arrangement often feels more organic.
Customization is also worth trying. Darker log stakes can make a forest feel cozy and grounded, while lighter versions work well near beaches, farms, and bright cottagecore builds. If your island has a strong color palette, matching your log stakes to nearby fences and furniture can make the area feel intentional. It is a small touch, but small touches are what separate a charming island from a yard sale hosted by a raccoon.
Finally, do not underestimate log stakes just because they are basic. In Animal Crossing, basic items often become design heroes. A simple wooden post can guide a path, frame a view, support a campsite theme, or make a bridge entrance look more natural. Craft a few extra, walk around your island, and place them wherever an area feels a little empty. You may be surprised how often the answer to “What does this corner need?” is “apparently, three pieces of wood tied together.”
Conclusion
Crafting log stakes in Animal Crossing: New Horizons is quick once you know the recipe: open your DIY app, gather three regular wood, head to a workbench, craft the item, and use it for decoration or bridge construction. The biggest trick is remembering that log stakes are not raw materials. They are crafted components, and for your first bridge you need four sets, which means twelve regular wood total.
Beyond the bridge, log stakes are surprisingly useful for island design. They add rustic texture to forests, campsites, gardens, farms, and river paths without costing many resources. They are simple, flexible, customizable, and wonderfully low-drama. In a game where a single misplaced flower can send you into a landscaping spiral, that kind of reliability deserves applause.
So grab your axe, be nice to your trees, collect regular wood, and craft those log stakes. Your future bridge, campsite, and suspiciously adorable island entrance will thank you.