Mason jars are the blue jeans of home decor: affordable, reliable, strangely charming, and somehow appropriate almost everywhere. With a little paint, twine, ribbon, lace, or imagination, a simple glass jar can become a farmhouse centerpiece, a wedding table accent, a porch decoration, or the tiny vase on your desk that says, “Yes, I have my life together,” even when your inbox says otherwise.
DIY Mason jar vases are popular because they hit the sweet spot between easy and impressive. You do not need a garage full of tools, a professional craft room, or the patience of a museum conservator. Most projects require clean jars, basic craft paint, flowers, and a few decorative supplies. The result can look rustic, modern, romantic, coastal, vintage, or playful depending on the colors and finishes you choose.
This guide walks you through the best ways to make Mason jar vases, including painted jars, tinted glass, wrapped designs, hanging vases, centerpiece groupings, seasonal arrangements, and practical tips that help your flowers look fresh instead of flopping over like they just heard bad news.
Why Mason Jars Make Great DIY Vases
Mason jars were originally designed for food preservation, but their sturdy glass, wide mouths, and classic shape make them ideal for decorating. They are easy to find, easy to clean, and available in multiple sizes, from small jelly jars to quart-size jars that can hold fuller bouquets. Their ridged sides and embossed lettering also add texture, which is one reason they look charming even before you decorate them.
Another big advantage is flexibility. A clear jar filled with wildflowers feels casual and summery. A matte white painted jar with eucalyptus looks clean and modern. A distressed pastel jar can bring instant farmhouse style. A gold-dipped jar can dress up a wedding or dinner party. Basically, Mason jars are the craft world’s polite little chameleons.
Materials You’ll Need
You can make a basic DIY Mason jar vase with very few supplies, but having the right materials helps the project look more polished and last longer.
Basic Supplies
- Clean Mason jars or recycled glass jars
- Dish soap and warm water
- Rubbing alcohol or white vinegar for final cleaning
- Acrylic paint, chalk paint, spray paint, or glass paint
- Foam brushes or small paintbrushes
- Painter’s tape for stripes or dipped designs
- Twine, ribbon, lace, burlap, raffia, or fabric scraps
- Hot glue gun or strong craft adhesive
- Clear sealer, if needed
- Fresh, dried, or faux flowers
Optional Decorative Extras
- Wood beads
- Small charms or tags
- Pressed flowers
- Mod Podge or decoupage glue
- Stencils
- Letter stickers
- Battery-operated fairy lights
- Floral tape or chicken wire for flower support
Step-by-Step: How to Make a Painted Mason Jar Vase
Painted Mason jar vases are the classic version for a reason. They are simple, customizable, and forgiving. If your brushstroke looks uneven, call it “handmade texture” and move on with confidence.
Step 1: Clean the Jar Thoroughly
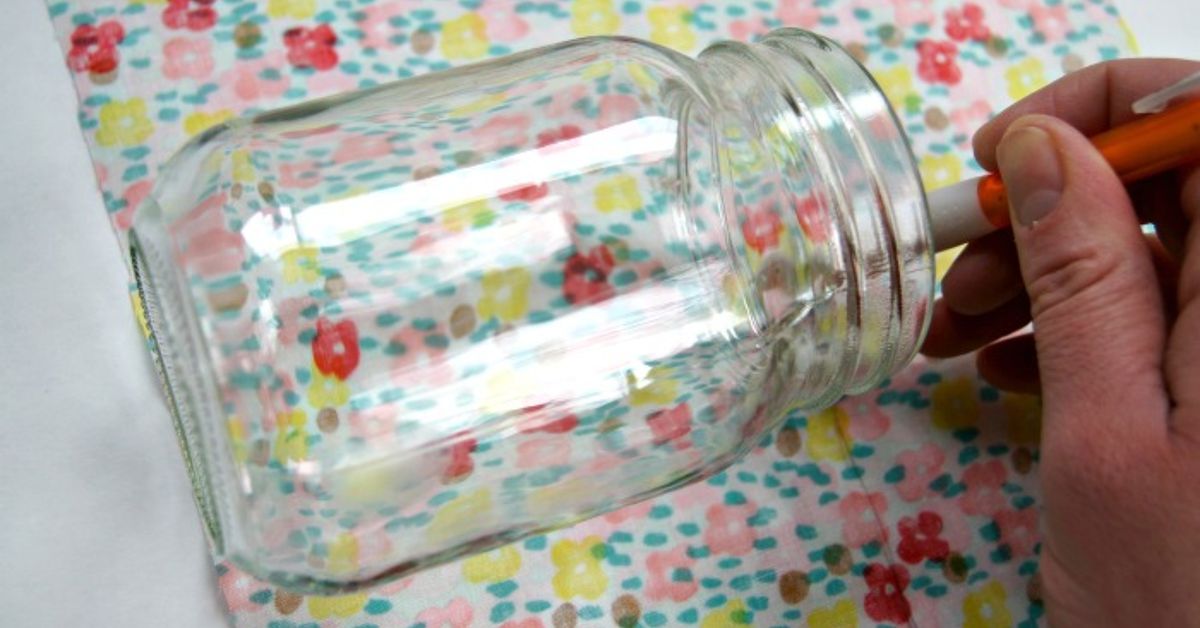
Start by washing the jar with warm water and dish soap. Remove labels, glue residue, dust, and grease. Once the jar is dry, wipe the outside with rubbing alcohol or white vinegar. This final cleaning step helps paint stick better to the glass surface.
Step 2: Choose the Right Paint
Chalk paint creates a soft matte finish and is great for farmhouse or vintage-style vases. Acrylic paint is affordable and comes in endless colors, but it may need multiple coats. Glass paint is designed specifically for slick surfaces and can create a more durable finish. Spray paint works well for smooth coverage, especially if you want metallic, ombré, or color-blocked designs.
Step 3: Apply Thin Coats
Use a foam brush or soft paintbrush to apply thin layers of paint. Thick coats may drip, peel, or dry unevenly. Let each coat dry before adding the next one. Most Mason jar vases need two to three coats for solid coverage.
Step 4: Distress the Details
For a rustic look, gently sand raised areas after the paint dries. Focus on the embossed lettering, rim, and edges. This allows a little glass to show through and gives the vase a worn, vintage feel. The goal is “charming antique market find,” not “dragged behind a truck,” so sand lightly.
Step 5: Seal the Paint
If the vase will be handled often, add a clear sealer. A matte sealer keeps the soft chalky look, while a gloss sealer adds shine. Always follow the paint and sealer instructions for drying and curing times.
Interior Paint vs. Exterior Paint: Which Is Better?
Some DIY tutorials pour paint inside the jar, swirl it around, and let the excess drip out. This method creates a glossy, smooth look from the outside because the glass itself protects the paint. However, interior-painted jars are not ideal for holding water directly because moisture can soften or peel the paint.
If you want to use fresh flowers, painting the outside is usually better. Another option is to place a small glass, floral tube, or plastic liner inside the painted jar to hold water. That way, your vase stays pretty, and your flowers do not accidentally become part of a paint-removal experiment.
Creative DIY Mason Jar Vase Ideas
1. Farmhouse White Mason Jar Vase
Paint the jar with matte white chalk paint, distress the raised lettering, and tie jute twine around the neck. Add eucalyptus, baby’s breath, lavender, or white daisies. This style works beautifully on mantels, kitchen shelves, entryway tables, and wedding reception tables.
2. Gold-Dipped Mason Jar Vase
Use painter’s tape to mark a diagonal line or bottom section of the jar. Paint the lower portion with metallic gold spray paint or acrylic paint. Pair it with blush roses, white ranunculus, or greenery for a modern romantic look. Gold-dipped jars are excellent for bridal showers, birthday dinners, and holiday tables.
3. Tinted Glass Mason Jar Vase
For a softer stained-glass effect, tint the jar with a transparent glass paint or a decoupage mixture designed for glass crafts. Blue, amber, green, and rose tones are especially popular. Tinted jars look beautiful on windowsills because sunlight makes the color glow.
4. Lace-Wrapped Mason Jar Vase
Wrap lace around the jar and secure it with small dots of hot glue. Add ribbon or twine over the lace for extra texture. This design gives a romantic vintage look and pairs well with soft flowers such as peonies, roses, hydrangeas, and sweet peas.
5. Rustic Burlap Mason Jar Vase
Cut a strip of burlap and wrap it around the center of the jar. Add twine, a wooden tag, or a small charm. This is one of the easiest Mason jar vase ideas for fall decorating, outdoor parties, or casual farmhouse-style homes.
6. Modern Black Mason Jar Vase
Paint the jar matte black and keep the decoration minimal. Add a single white flower, pampas grass, or dried stems. The contrast looks elegant and works well in modern interiors where traditional rustic decor might feel too sweet.
7. Ombre Mason Jar Vase
Choose two or three shades of the same color family, such as pale pink, coral, and terracotta. Blend from light to dark using a sponge brush or spray paint. Ombre jars are fun for spring, summer, baby showers, and cheerful kitchen decor.
8. Hanging Mason Jar Vases
Wrap sturdy wire around the jar’s neck and create a handle. Hang the vase from hooks, a fence, a wooden board, or a shepherd’s hook. Use lightweight flowers and avoid overfilling with water. Hanging Mason jar vases are perfect for patios, garden parties, and porch decor.
9. Pressed Flower Mason Jar Vase
Apply pressed flowers to the outside of a clear jar using decoupage glue. Seal carefully and let it dry. This design looks delicate, botanical, and handmade in the best possible way. Use it with simple stems so the decoration remains the star.
10. Seasonal Mason Jar Vase Set
Create a group of three jars in seasonal colors. For spring, use soft pastels. For summer, try clear jars with bright flowers. For fall, use amber, cream, sage, and copper. For winter, choose white, silver, deep green, or navy. Grouping jars gives your display more visual impact than one lonely jar trying to carry the whole table by itself.
Best Flowers for Mason Jar Vases
Mason jars have wide openings, which means flowers can spread outward if they are not supported. The best flowers are sturdy enough to hold their shape or full enough to create volume.
Fresh Flowers That Work Well
- Sunflowers
- Daisies
- Hydrangeas
- Roses
- Carnations
- Tulips
- Baby’s breath
- Lavender
- Zinnias
- Wildflowers
- Eucalyptus
- Ferns
If your flowers are thin-stemmed, create a grid across the jar opening with floral tape. This helps stems stay upright and gives your arrangement a fuller, more professional shape. You can also tuck a small ball of floral chicken wire inside the jar to support the stems.
How to Arrange Flowers in a Mason Jar Vase
Start by trimming stems at an angle. Remove leaves that would sit below the waterline because submerged leaves encourage cloudy water and shorten the life of the bouquet. Add greenery first to create a base, then place larger flowers, and finish with smaller filler blooms.
For a balanced arrangement, vary the height of the stems. The tallest flowers should sit near the center, while shorter blooms can lean slightly outward. Turn the jar as you work so the arrangement looks good from every angle, especially if it will be used as a centerpiece.
For a casual farmhouse look, let the flowers feel loose and natural. For a more formal table, keep the shape compact and rounded. For a modern style, use fewer stems and more negative space. A single branch in a painted Mason jar can look surprisingly chic, especially if the branch has interesting leaves or blossoms.
DIY Mason Jar Vases for Weddings and Events
Mason jar vases are a favorite for weddings because they are affordable, customizable, and easy to arrange in large quantities. For a rustic wedding, use clear jars with twine and wildflowers. For a romantic wedding, paint jars in ivory, blush, or champagne tones. For a boho wedding, mix amber jars, dried grasses, pampas, and macramé accents.
To keep event decor consistent, choose one color palette and repeat it across all jars. You can vary the jar sizes, but keep the paint finish or ribbon style similar. This creates a collected look without making the tables feel mismatched in a chaotic “craft store exploded” kind of way.
For budget-friendly centerpieces, place three small jars together instead of one large floral arrangement. Use one jar for greenery, one for a focal flower, and one for filler blooms. Add tea lights nearby if the venue allows them, or use battery-operated candles for a safer, low-maintenance glow.
DIY Mason Jar Vases for Every Season
Spring
Use pastel paint, gingham ribbon, and fresh tulips, daffodils, or hyacinths. A pale blue or mint green Mason jar instantly makes a room feel brighter.
Summer
Keep jars clear or tinted and fill them with sunflowers, zinnias, daisies, or garden clippings. Tie raffia around the neck for an easy picnic-table look.
Fall
Choose warm colors like terracotta, mustard, cream, and copper. Add dried wheat, eucalyptus, mums, or faux maple leaves. Burlap and twine are especially useful for fall designs.
Winter
Paint jars white, silver, navy, or forest green. Add pine sprigs, berries, white flowers, or fairy lights. For a holiday look, wrap the jar with velvet ribbon or attach a small ornament.
Common Mistakes to Avoid
Skipping the Cleaning Step
Paint does not like grease, dust, or label residue. If your jar is not clean, the finish may peel or bubble. Take the extra five minutes to prep the glass properly.
Using Too Much Paint at Once
Thick paint can drip and dry unevenly. Thin layers create a smoother finish and reduce the chance of peeling.
Forgetting About Water
If the inside of the jar is painted, do not pour water directly into it unless the paint product specifically says it can handle that. Use a liner or floral tube instead.
Overcrowding the Flowers
A Mason jar bouquet should look full, not suffocated. Give the stems room to breathe and remove extra leaves.
Ignoring Proportion
Small jars need small arrangements. Large jars can handle taller flowers. If the flowers are too tall, the vase may tip or look awkward.
Budget-Friendly Tips
You do not need to buy brand-new Mason jars for every project. Recycled pasta sauce jars, jam jars, and pickle jars can also work as DIY vases once the labels are removed. For a more uniform look, paint them the same color or wrap each one with matching twine.
Shop your home before shopping the craft aisle. Old ribbon, leftover wall paint, fabric scraps, buttons, gift tags, and broken jewelry pieces can become decorations. Thrift stores are also excellent places to find inexpensive jars, lace, faux flowers, and vintage embellishments.
For flowers, mix grocery-store blooms with backyard greenery. A small bunch of carnations or daisies looks fuller when paired with clipped herbs, fern leaves, or eucalyptus. Even simple branches can look intentional in a beautiful jar.
Care Tips for Mason Jar Vases
For fresh flowers, change the water every one to two days. Trim the stems slightly when you refresh the water. Keep the arrangement away from direct heat, strong sunlight, and fruit bowls, since ripening fruit can speed up flower aging.
For painted jars, wipe the outside gently with a soft damp cloth. Avoid soaking painted jars unless the paint and sealer are specifically designed for that. Many DIY-painted jars are decorative rather than dishwasher-safe, so hand care is the safest route.
If you use dried flowers, keep the vase away from humid areas. Dried stems last longer in dry rooms and can be lightly dusted with a soft brush or cool air from a hair dryer on the lowest setting.
Where to Use DIY Mason Jar Vases
DIY Mason jar vases work in almost every room. Place one on a kitchen windowsill with herbs or daisies. Use a set of three on a dining table. Add a small jar to a bathroom shelf with eucalyptus. Decorate a desk with a single stem. Hang jars on a fence for a backyard gathering. Line them along a mantel with seasonal flowers.
They also make thoughtful handmade gifts. Fill a painted jar with fresh flowers for a hostess gift, teacher appreciation present, Mother’s Day surprise, or neighborly “thanks for lending me that thing I forgot to return for six months” gesture.
Personal Experience: What Actually Works When Making DIY Mason Jar Vases
After making several DIY Mason jar vases, the first lesson is simple: the prep work matters more than the fancy decoration. The jars that turned out best were the ones cleaned carefully before painting. A jar can look spotless and still have invisible oil from your hands, old label glue, or dish soap residue. Wiping the glass with rubbing alcohol before painting made the finish smoother and helped the paint grip better. It is not glamorous, but neither is watching paint peel off like a bad sunburn.
Chalk paint was the easiest option for a soft farmhouse look. It covered well, dried quickly, and looked intentionally handmade. Acrylic paint worked too, but it needed more patience and thinner layers. Spray paint gave the smoothest finish, especially for metallic designs, but it required good ventilation and careful light coats. The biggest mistake was trying to rush the drying process. Mason jar vases are easy, but they are not magic. Paint needs time to cure, and if you handle the jar too soon, fingerprints and smudges will appear like tiny craft gremlins.
For flower arranging, the wide mouth of the jar can be both a blessing and a problem. It allows room for full bouquets, but thin stems tend to lean outward. A simple floral tape grid across the opening fixed that issue immediately. It made grocery-store flowers look more arranged and less like they had been dropped into the jar during a mild emergency. Greenery also made a huge difference. A few eucalyptus stems or leafy clippings gave structure before adding the main flowers.
One of the most useful tricks was grouping jars in odd numbers. Three jars in different heights looked much better than one jar by itself. A small jelly jar, a pint jar, and a quart jar created movement on the table without needing expensive flowers. Painting them in the same color family kept the display cohesive. For example, cream, sage, and dusty blue looked calm and elegant, while coral, yellow, and white felt cheerful for summer.
The most successful designs were not the most complicated ones. A clear jar with twine and daisies looked fresh and sweet. A matte white jar with lavender looked polished. A black jar with one dramatic stem looked modern. The lesson: do not overload the jar with every ribbon, charm, stencil, sticker, and bead you own. Let the shape of the jar and the flowers do some of the work.
Finally, Mason jar vases are best when they match the mood of the space. Rustic jars look great in kitchens and patios. Metallic jars work well for parties. Tinted glass fits windowsills beautifully. Simple painted jars are perfect for everyday decor. The charm of this project is that it does not demand perfection. A tiny brush mark, uneven twine wrap, or slightly distressed edge often makes the vase feel warmer and more personal. In other words, DIY Mason jar vases are forgiving, affordable, and surprisingly stylishwhich is exactly the kind of craft worth keeping around.
Conclusion
DIY Mason jar vases prove that beautiful home decor does not have to be expensive or complicated. With a clean jar, a little paint, and a handful of flowers, you can create centerpieces, gifts, seasonal decorations, and everyday accents that feel personal and charming. Whether you prefer rustic farmhouse style, soft romantic details, modern matte finishes, or colorful party decor, Mason jars offer endless room for creativity.
The best part is that each vase can be adapted to your space, budget, and skill level. Start with one simple painted jar, then experiment with tinted glass, twine wraps, hanging designs, and seasonal groupings. Before long, you may find yourself saving every empty jar in the kitchen “just in case.” Congratulations: that is not clutter. That is future decor.
Note: This article is written as original, publish-ready web content based on practical DIY craft, home decor, floral styling, and Mason jar repurposing guidance from reputable U.S. home and lifestyle sources.