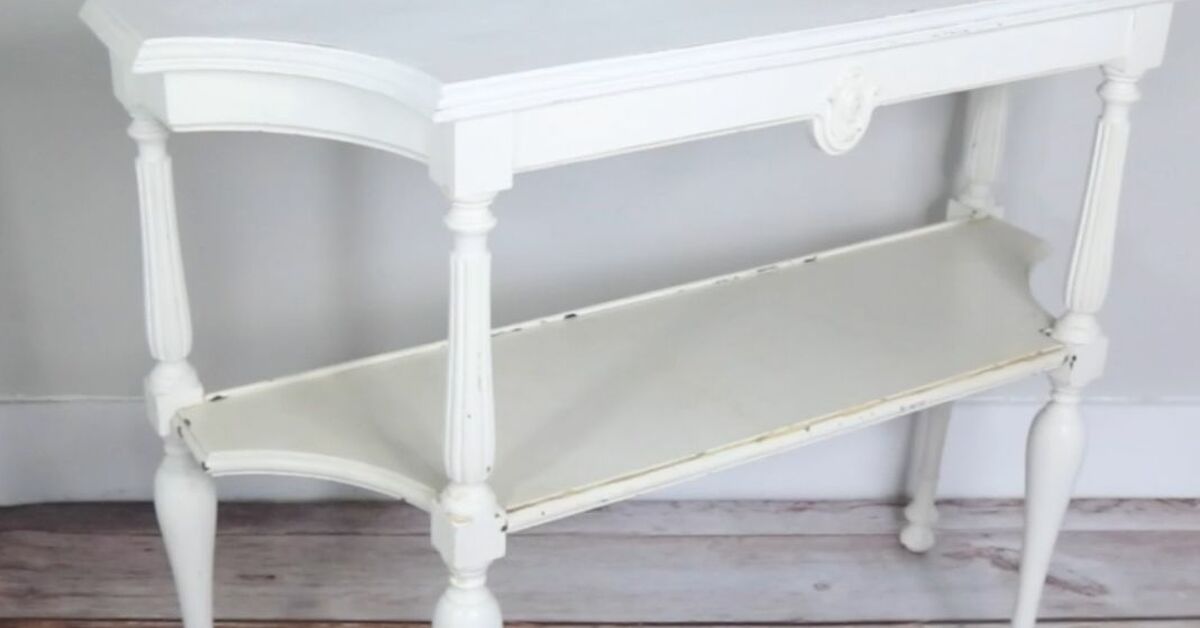
A console table is the Swiss Army knife of home furniture: slim enough to squeeze into a hallway, useful enough to catch keys and mail, and stylish enough to make guests think you have your life together. Even better, a tired console table can be transformed with paint, stain, hardware, texture, and a little weekend determination. You do not need a designer budget or a garage full of professional tools. You need a smart plan, patient prep work, and the emotional strength to ignore the voice that says, “Maybe one thick coat of paint is fine.” It is not fine. The table will remember.
This DIY console table makeover idea is designed for real homes, real budgets, and real furniture that may have scratches, orange-toned wood, mystery sticky spots, or hardware from an era we do not need to revisit. Whether your console table lives in an entryway, behind a sofa, in a dining room, or under a mirror, the right makeover can turn it from background furniture into a hardworking style moment.
Why a Console Table Is the Perfect DIY Makeover Project
A console table is one of the easiest furniture pieces to refresh because it usually has a simple shape, a manageable surface area, and a big visual payoff. Unlike a dining table, it does not have to survive spaghetti night. Unlike kitchen cabinets, it does not involve 47 doors and a mild identity crisis. A console table gives you enough room to experiment with color, texture, and finish without taking over your entire house.
Console tables also work in many decorating styles. A dark stained table can look dramatic and traditional. A whitewashed wood finish feels relaxed and coastal. A matte black console table adds modern contrast. A sage green or navy painted table can bring personality to a neutral hallway. Add cane webbing, fluted wood trim, new knobs, or a marble-look top, and suddenly your “old little table” becomes the piece everyone asks about.
Start With the Right Makeover Vision
Before buying paint, take a few minutes to decide what your console table needs to become. Is it a statement piece, a quiet storage hero, or a bridge between different rooms? This step matters because a makeover should solve both style and function. A gorgeous table that cannot hold a basket, lamp, or keys is just a decorative runway for dust.
Ask These Questions First
Look at the table and ask: Where will it live? What colors already exist nearby? Does the table need to hide clutter? Is the current finish damaged or just outdated? Do you want the wood grain to show, or would paint create a cleaner look? If your entryway is narrow, consider a light color and simple styling. If the table sits behind a sofa, a deeper tone can anchor the room. If the piece has drawers, new hardware may be the quickest glow-up in furniture history.
Popular DIY Console Table Makeover Ideas
The best makeover depends on your table material, home style, and patience level. Some projects can be finished in an afternoon, while others require dry time, sanding, and the kind of careful measuring that makes you question your relationship with fractions.
1. Classic Painted Console Table
A painted console table is the most flexible makeover option. Paint can cover dated wood tones, minor discoloration, and mismatched materials. For a modern farmhouse look, try warm white, soft black, mushroom gray, or muted olive. For a bolder design, choose navy, terracotta, deep green, or a rich burgundy. Satin or semi-gloss finishes are practical because they are easier to wipe clean than flat paint.
2. Two-Tone Wood and Paint Makeover
If the tabletop is in good shape, consider staining or sealing the top while painting the base. This creates contrast and keeps the warmth of wood. A natural wood top with a black base feels timeless. A walnut top with a creamy white base works beautifully in cottage, transitional, and modern rustic spaces. This is a great option when the table has pretty grain but the legs are scuffed, dated, or simply screaming for help.
3. Fluted Trim Console Table
Fluted furniture is popular because it adds texture without feeling too busy. You can attach half-round wood molding, dowels, or fluted trim panels to the drawer fronts or side panels of a console table. Paint everything one color for a high-end built-in look. This makeover is especially effective on flat-front tables from thrift stores, big-box retailers, or old hallway pieces that have good bones but zero personality.
4. Cane Webbing or Rattan Insert
Cane and rattan details add warmth, texture, and a relaxed designer feel. If your console table has cabinet doors or open panels, you can replace the center area with cane webbing. The result works well in boho, coastal, organic modern, and vintage-inspired interiors. Use a clean frame, secure the cane neatly, and keep the surrounding paint color simple so the texture can shine.
5. Faux Marble or Stone Top
A peel-and-stick marble-look film or contact paper can refresh a damaged tabletop quickly. This is ideal for renters, beginners, or anyone who wants the look of stone without the price tag or the back injury. The trick is to clean the surface thoroughly, apply slowly, smooth bubbles as you go, and wrap the edges carefully. It will not fool a geologist, but it can absolutely fool your hallway.
6. Hardware Swap Makeover
Sometimes the table does not need a full makeover. It just needs better jewelry. Replacing knobs or pulls can instantly update a console table. Brass hardware warms up dark paint. Matte black hardware adds contrast to light finishes. Glass knobs create vintage charm. Leather pulls add a casual handcrafted look. Always measure the existing screw holes before buying new hardware unless you enjoy drilling holes while muttering motivational speeches to yourself.
Tools and Materials You May Need
Your exact supply list depends on the makeover style, but most console table refreshes use the same basic items: drop cloth, screwdriver, mild cleaner, microfiber cloth, wood filler, putty knife, painter’s tape, sandpaper or sanding sponge, primer, paint or stain, brushes, small foam roller, topcoat, and new hardware. For textured upgrades, you may also need wood trim, cane webbing, wood glue, clamps, a small saw, brad nails, or contact paper.
Do not skip safety basics. Work in a well-ventilated area, wear a mask when sanding, and use gloves when handling stain, primer, deglosser, or strong cleaners. If you are working on a very old painted piece, be cautious before sanding because older finishes can contain lead. When in doubt, use a proper test kit or choose a safer refinishing method.
Step-by-Step DIY Console Table Makeover
Step 1: Clean the Table Thoroughly
Every great furniture makeover begins with cleaning. Paint does not stick well to dust, grease, wax, or that mysterious film old furniture collects while waiting in a garage. Remove drawers and hardware. Wipe the table with a mild cleaner or a degreasing solution appropriate for furniture. Pay attention to corners, drawer edges, legs, and carved details. Let everything dry completely before moving on.
Step 2: Repair Scratches, Dents, and Holes
Use wood filler to repair small dents, chips, and old hardware holes. Apply it with a putty knife, slightly overfill the area, and let it dry according to the product instructions. Once dry, sand it smooth. This small step makes the final finish look intentional instead of “I painted over problems and hoped for emotional closure.”
Step 3: Sand or Degloss the Surface
Sanding helps primer and paint grip the surface. You usually do not need to remove every bit of the old finish unless you are staining bare wood. For painting, the goal is to dull the glossy surface and create light texture. A 120-grit sanding sponge works well for scuff sanding, followed by 180- or 220-grit for smoothing. If the table has lots of curves or carved details, a liquid deglosser can help, but use it carefully and follow the label directions.
Step 4: Prime for Durability
Primer is not glamorous, but it is the difference between a makeover that lasts and one that chips when someone looks at it too aggressively. Use a primer suited to your table material. Wood, veneer, laminate, MDF, and metal may require different products. For slick laminate, choose a bonding primer. For wood with knots or stains, a stain-blocking primer is helpful. Apply thin coats and allow proper drying time.
Step 5: Paint in Thin, Even Coats
Use a brush for corners and details, and a small foam roller for flat surfaces. Paint with the grain when possible. Two thin coats usually look better and last longer than one heavy coat. Let each coat dry fully before adding the next. If the surface feels rough between coats, sand lightly with fine-grit sandpaper and wipe away dust. This is where patience pays rent.
Step 6: Add Design Details
Once the base finish is complete, add your chosen details. Attach fluted trim to drawer fronts, install cane webbing in door panels, apply contact paper to the top, or tape off a painted stripe. If you want a checkerboard or geometric design, measure carefully and use high-quality painter’s tape. For a subtle designer look, paint the body one color and the drawer fronts a slightly darker or lighter shade.
Step 7: Seal the Finish
A protective topcoat is especially important for console tables in entryways because they deal with keys, bags, sunglasses, mail, and the occasional coffee cup pretending it belongs there. Use a water-based polyurethane, furniture wax, or clear protective finish that works with your paint. Apply thin coats, avoid over-brushing, and let the finish cure before heavy use. Dry and cured are not the same thing. Dry means you can touch it. Cured means it is ready for daily life.
Step 8: Install Hardware and Style the Table
Reattach drawers, install new hardware, and move the table into place. Then style it with purpose. A lamp, mirror, small tray, stack of books, vase, plant, or basket can make the console table feel finished. Keep the arrangement balanced but not stiff. Vary the height of objects, mix textures, and leave some empty space. The goal is “collected and useful,” not “home store shelf during a very dramatic sale.”
Color Ideas for a Console Table Makeover
Color can completely change the mood of your console table. Matte black feels sophisticated and works well with brass, wood, and stone accents. Warm white brightens small entryways and pairs beautifully with woven baskets. Sage green adds softness and looks great with natural wood. Navy blue brings classic depth without feeling harsh. Greige, taupe, and mushroom tones are excellent if you want a neutral color that still looks custom.
If your room already has bold wallpaper, colorful rugs, or busy art, choose a quieter table finish. If the surrounding space is plain, the table can handle more personality. A console table is small enough to take a color risk, so do not be afraid to try something richer than basic white. Your hallway might be waiting for drama. Not family drama. Paint drama.
Budget-Friendly Upgrade Ideas
A DIY console table makeover can be surprisingly affordable. Shop your home first for leftover paint, unused knobs, baskets, or decorative objects. Check thrift stores, yard sales, online marketplaces, and clearance sections for tables with sturdy frames. A scratched top or ugly finish can be fixed. Wobbly legs, water-swollen particleboard, and broken drawers require more judgment.
For low-cost impact, focus on three upgrades: paint, hardware, and styling. These deliver the biggest visual change for the least money. If you have a larger budget, add wood trim, cane webbing, a new tabletop, or professional-quality enamel paint. Even then, the project usually costs far less than buying a brand-new console table with the same custom look.
Common Mistakes to Avoid
The biggest mistake is rushing the prep. Cleaning, sanding, and priming may not be exciting, but they are the foundation of a smooth, durable finish. Another common mistake is choosing the wrong paint for the material. Laminate and glossy veneer need bonding primer. MDF edges need sealing. Metal needs a compatible primer. Using wall paint without a protective finish can also lead to scratches and peeling.
Another mistake is overdecorating after the makeover. A console table should not become a storage swamp. Use a tray for small items, a basket underneath for practical storage, and one or two decorative pieces for style. If every inch is covered, the makeover disappears under clutter, which is furniture tragedy in its most avoidable form.
How to Style Your Finished Console Table
Styling is where the makeover becomes part of the room. Start with one anchor piece above the table, such as a mirror, framed art, or a gallery arrangement. A mirror is excellent for entryways because it reflects light and offers one final “Do I have toothpaste on my shirt?” checkpoint before leaving the house.
Next, add height with a lamp, tall vase, or branches. Add a medium object like stacked books, a bowl, or a decorative box. Then add something organic, such as greenery, flowers, or a small plant. Finally, include a practical landing zone for keys and mail. Good styling blends beauty with usefulness. The prettiest table in the world still needs somewhere to put the car keys.
Real-Life Experience: What I Learned From DIY Console Table Makeovers
The first lesson from any DIY console table makeover is that the “quick refresh” is rarely as quick as your optimistic Saturday morning brain believes. You begin with coffee, confidence, and a vision. Two hours later, you are standing in the middle of the room holding a sanding sponge, wondering why one drawer front looks smoother than the other three. This is normal. Furniture makeovers have a way of revealing every shortcut you hoped no one would notice.
One of the most useful experiences is learning how much cleaning matters. A console table may look clean, but once you remove the hardware and drawers, you often find dust, old polish, fingerprints, and sticky residue hiding in corners. If you paint over that, the finish can bubble, streak, or chip. Taking extra time at the beginning saves frustration later. It is not the glamorous part of the project, but neither is brushing your teeth, and we still agree it is important.
Another lesson is to test colors before committing. A color that looks soft beige in the store can become suspiciously yellow in a dark hallway. A dramatic black can look amazing in daylight but too heavy in a narrow entry. Paint a small sample on poster board or the back of the table and look at it throughout the day. Natural light, lamp light, and nearby wall color all change how the finish appears.
Hardware also makes a bigger difference than expected. Swapping basic knobs for brass pulls, ceramic knobs, or simple black handles can make an inexpensive table look custom. However, measuring matters. If the old pulls have two holes, measure the center-to-center distance before buying replacements. Otherwise, you may end up filling holes, drilling new ones, and learning new vocabulary that should not be used around freshly painted furniture.
The most satisfying part is watching a forgotten piece become useful again. A console table makeover can turn a cluttered entryway into a welcoming drop zone. It can make a living room feel more layered. It can give an old family piece a second life without erasing its character. Small imperfections may remain, but that is part of the charm. Handmade does not mean flawless. It means someone cared enough to sand, paint, wait, repaint, seal, and style. That effort gives the piece a story, and in a home, stories are always better than showroom perfection.
Conclusion
A DIY console table makeover is one of the smartest home projects for beginners and experienced DIYers alike. It is affordable, creative, and practical. With proper cleaning, sanding, priming, painting, sealing, and styling, you can transform a dated or damaged table into a custom-looking piece that fits your home beautifully. Whether you choose a classic painted finish, a two-tone wood look, fluted trim, cane webbing, faux marble, or new hardware, the best makeover is the one that improves both function and personality.
The secret is simple: do not rush the prep, choose materials that match the table surface, and finish with styling that supports everyday life. A console table may be narrow, but its design potential is huge. Give it color, texture, and a little attention, and it can become the first thing guests notice instead of the place where old receipts go to disappear.
Note: This article is based on widely accepted DIY furniture-refinishing, painting, sealing, and interior styling practices synthesized from reputable U.S. home improvement and home decor sources, rewritten in original language for web publishing.