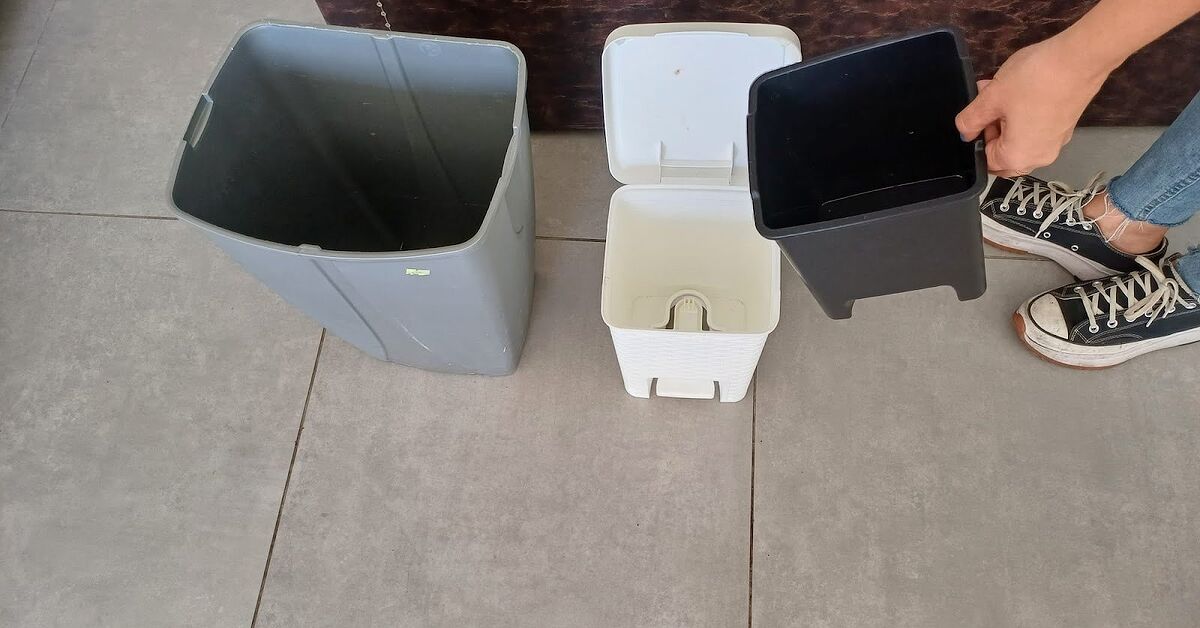
Note: Shaving cream is best used as a deodorizing and light-cleaning helper for trash bins. It can loosen grime, trap odors, and leave a fresher scent, but it is not a substitute for a disinfectant when a bin has raw meat juice, pet waste, mold, or heavy contamination.
Why Your Trash Bin Smells Like It Has a Villain Origin Story
A trash bin has one job: hold the things we do not want to think about anymore. Unfortunately, it remembers everything. Coffee grounds, onion skins, takeout containers, banana peels, mystery fridge leftovers, and that one yogurt cup that somehow leaked despite looking innocent all leave behind residue. Even after the bag is gone, the smell can stay like an unwanted houseguest wearing damp socks.
The reason is simple: odor does not only come from the trash itself. It comes from bacteria, food residue, moisture, and trapped organic material clinging to the inside walls, bottom, lid, rim, foot pedal, and hidden seams of the can. A bin can look empty and still smell like a raccoon hosted a seafood buffet in it. That is where a smart trash bin cleaner routine comes in.
Traditional cleaning methods usually involve dish soap, warm water, scrubbing, rinsing, drying, and sometimes disinfecting. Those steps still matter. But shaving cream has become a surprisingly handy helper for freshening up small indoor trash cans, bathroom bins, diaper pails, and lightly smelly kitchen cans. It is cheap, easy to spread, clings to vertical surfaces, and has a foamy texture that makes cleaning feel less like punishment and more like you are giving your garbage can a spa day it absolutely did not earn.
Can Shaving Cream Really Clean a Trash Bin?
Yes, shaving cream can help freshen a trash bin, especially when the problem is light odor, sticky film, or general funk. The key is understanding what shaving cream actually does. Classic foaming shaving cream often contains surfactants, emulsifiers, moisturizers, fragrance, and ingredients designed to help lift oils and create a slippery foam. Those same qualities can help loosen greasy residue and clingy grime inside a trash can.
Think of shaving cream as a foam-based deodorizing cleaner, not a heavy-duty germ killer. It can make a trash bin smell better, help remove light residue, and leave the surface easier to wipe. But if your bin has visible food sludge, raw meat drippings, mold, pest activity, or a smell that could legally qualify as a weather event, you need to wash and disinfect it properly.
Best Uses for the Shaving Cream Trash Bin Hack
This method works best for indoor trash cans that are smelly but not disgusting beyond reason. Bathroom bins, office bins, bedroom wastebaskets, laundry room cans, and kitchen bins after a normal week are good candidates. It is also useful for freshening the lid, rim, and exterior of a trash can, where fingerprints and invisible splatter tend to collect.
For outdoor garbage cans, shaving cream can still help with odor on the lid or handle, but it should not replace a full hose-down and scrub. Outdoor cans deal with heat, rain, insects, and heavier waste. They need more serious cleaning muscle, especially in summer.
What You Need
- Foaming shaving cream, preferably a basic white variety
- Rubber gloves
- Microfiber cloths or paper towels
- Soft scrub brush or old dish brush
- Warm water
- Mild dish soap
- Baking soda, optional
- EPA-registered disinfectant or diluted bleach solution, optional for deeper cleaning
- Trash bags that fit your bin properly
Choose foaming shaving cream, not shaving gel. Gel can work in a pinch, but foam spreads faster, clings better, and wipes away more easily. Avoid menthol-heavy formulas if you are sensitive to strong scents. Also, do not use shaving cream on porous, unfinished, or delicate decorative bins without testing a small hidden area first.
Step-by-Step: How to Freshen a Trash Bin With Shaving Cream
Step 1: Empty the Bin Completely
Remove the trash bag and check the bottom of the bin for loose debris. This is the moment when you may discover a popcorn kernel, a receipt from 2023, or a sticky object that looks like it has been through emotional trauma. Toss anything loose before adding moisture. If there is visible liquid, wipe it up first with paper towels while wearing gloves.
Step 2: Rinse or Wipe Out the Bin
For a kitchen trash can or larger indoor bin, rinse it with warm water if possible. A bathtub, utility sink, or outdoor hose works well. For smaller bathroom or office bins, wiping with a damp cloth is usually enough. The goal is to remove loose dirt before the shaving cream goes on. Cleaning foam works better when it is not battling an entire casserole crime scene.
Step 3: Add a Thin Layer of Shaving Cream
Spray shaving cream along the inside bottom, inner walls, rim, and underside of the lid. You do not need to fill the can like a birthday cake. A thin, even layer is enough. Spread it with a gloved hand, sponge, cloth, or soft brush. Pay extra attention to corners and grooves, because that is where old spills like to retire.
Step 4: Let It Sit for 10 to 15 Minutes
Let the shaving cream rest on the surface. This gives the foam time to soften residue and help neutralize mild odors. Do not let it dry into a crust. If the room is hot or the bin is near sunlight, check it after 5 to 8 minutes. The goal is moist foam, not archaeological plaster.
Step 5: Scrub Lightly
Use a soft scrub brush or microfiber cloth to work the shaving cream into the surface. Scrub the bottom, corners, rim, lid, and any textured areas. If the bin has a foot pedal, wipe around the pedal and hinge area too. These spots collect grime because hands and shoes touch them often.
Step 6: Rinse and Dry Thoroughly
Rinse the bin well with warm water or wipe it clean with a damp cloth. Then dry it completely. This step matters more than people think. Moisture encourages odor, mildew, and bacterial growth. A clean trash can that stays wet is just a future stink factory wearing a clean shirt.
Step 7: Add Odor Control Before Re-Bagging
Once the bin is dry, sprinkle a small amount of baking soda in the bottom, place a charcoal odor absorber nearby, or use a fitted liner. Then add a fresh trash bag. Make sure the bag fits snugly. A too-small bag slides down and lets food residue touch the bin. A too-large bag bunches up and traps leaks. Trash bags are like jeans: fit matters.
When Shaving Cream Is Not Enough
Shaving cream is a helpful freshening trick, but some trash bin situations call for a stronger plan. If the bin has raw chicken juice, spoiled dairy, fish packaging, pet waste, mold, insects, or a lingering sour smell after cleaning, wash it with dish soap and warm water first. After that, use a disinfectant according to the product label. Always allow the disinfectant to remain wet on the surface for the recommended contact time.
Never mix shaving cream with bleach, ammonia, vinegar, toilet cleaner, or other cleaning chemicals. More products do not mean more power. Sometimes they mean dangerous fumes, ruined surfaces, and a very bad afternoon. Clean first, rinse if needed, then disinfect separately if the situation requires it.
How Often Should You Clean a Trash Bin?
For indoor kitchen trash cans, a light wipe-down once a week and a deeper clean once a month is a practical schedule. If you cook often, throw away meat packaging, or have children who believe trash cans are basketball hoops, clean more often. Bathroom and office bins may only need a monthly freshening unless they handle wet waste or hygiene products.
Outdoor garbage bins usually need a deep clean at least a few times a year, with extra attention during hot weather. Heat makes odors bloom faster. If your outdoor can smells like it is auditioning for a swamp documentary, clean it after pickup day when it is empty. Use a hose, dish soap, a long-handled brush, and plenty of drying time in the sun.
Why Drying Is the Secret Step Everyone Skips
Most people clean a bin, rinse it, admire their work for half a second, then drop in a new bag while the inside is still damp. That is like washing your hair and putting on a winter hat immediately. Moisture gets trapped. Odor returns. The bin starts smelling stale, even though you technically cleaned it.
After rinsing, turn the bin upside down to drain. Then wipe it with a dry cloth or leave it open in a well-ventilated area. Sunlight can help outdoor bins dry faster, but avoid leaving plastic bins in extreme heat for too long if they are prone to warping. Indoors, a fan can speed up drying.
Extra Deodorizing Tricks That Pair Well With Shaving Cream
Baking Soda
Baking soda is one of the easiest odor absorbers for trash cans. Sprinkle a tablespoon or two in the bottom of a dry indoor bin before adding the bag. For larger bins, use more. Replace it whenever it becomes damp or dirty.
Activated Charcoal
Activated charcoal odor bags are useful near trash cans, diaper pails, and pet waste bins. They absorb odors without adding fragrance. That is helpful if you prefer “nothing smell” over “lavender trying to defeat tuna.”
Newspaper or Paper Towels
A folded layer of newspaper or paper towel at the bottom of the bin can catch small leaks. Replace it often. This is especially useful for kitchen cans, where even a tiny drip can turn dramatic by morning.
Better Trash Habits
Odor prevention starts before cleaning. Drain wet food packaging before tossing it. Tie up meat scraps or seafood waste in a smaller bag. Take out kitchen trash before it becomes heavy with liquids. Rinse recyclable containers when possible. The less residue that reaches the bin, the less cleaning you have to do later.
Common Mistakes to Avoid
The first mistake is using too much shaving cream. A mountain of foam looks satisfying, but it makes rinsing harder and can leave residue. Use a thin layer. The second mistake is using shaving cream as a disinfectant. It freshens and cleans lightly; it does not replace a disinfecting product when germs are a concern.
The third mistake is forgetting the lid. Trash can lids are sneaky. They catch splatter, food steam, fingerprints, and odors. Wipe both sides of the lid every time you clean the bin. The fourth mistake is ignoring the outside. If your hand touches the rim daily, that rim needs cleaning too.
The final mistake is putting a bag into a damp can. This traps moisture and brings back odor quickly. Dry first, bag second. Your nose will notice the difference.
Best Trash Bins for Easier Cleaning
If you are buying a new trash can, choose one with smooth interior walls, a removable liner, and a lid that can be wiped easily. Stainless steel cans look sleek and resist some stains, but they still need cleaning around seams and lids. Plastic cans are lighter and easier to rinse, but they can hold odors if scratched or neglected.
A foot pedal is convenient, but check the hinge and pedal area during cleaning. Slim bins save space, but narrow corners can be harder to scrub. A removable inner bucket is one of the best features because you can wash the dirty part without wrestling the entire can into the bathtub like a slippery robot.
Experience Section: What Actually Happens When You Use Shaving Cream on a Trash Bin
The first time you try shaving cream as a trash bin cleaner, the process feels a little ridiculous. You are standing there with a can of shaving cream, aiming it into a garbage can, wondering whether your life has become a home-cleaning infomercial. Then the foam expands, clings to the sides, and suddenly the whole idea makes sense. Unlike watery cleaners that run straight to the bottom, shaving cream stays where you put it. That makes it useful for lids, rims, corners, and vertical walls where odors often hide.
In a small bathroom bin, the difference is noticeable quickly. Bathroom trash cans often collect tissues, cotton rounds, product packaging, floss picks, and other dry waste, so the smell is usually stale rather than rotten. A thin layer of shaving cream, a short wait, and a good wipe can make the bin smell cleaner without needing a harsh chemical cloud. It is especially helpful when the bin has absorbed fragrance from old products or has that dusty, closed-up odor that appears when a lid stays shut for days.
In a kitchen trash can, the results depend on how dirty the bin is. If the problem is a faint smell after taking out the trash, shaving cream works nicely as a freshening step. It removes light film and makes the can feel less grimy. But if there is sticky liquid at the bottom, the shaving cream should not be step one. First, remove the mess, wash with dish soap, rinse, and then use shaving cream as a finishing deodorizer. That order gives better results and avoids smearing old residue around like frosting on a terrible cake.
One practical tip from experience: use less foam than you think. A few lines around the inside are enough. Too much creates a rinsing marathon, and nobody wants to spend Saturday afternoon negotiating with a foamy trash can. Another tip is to use a dry cloth for the final buff on the exterior, especially if the bin is stainless steel or glossy plastic. This helps prevent streaks and leaves the surface looking polished.
The smell after cleaning is usually fresh, mild, and less “perfume explosion” than many commercial sprays. That said, some shaving creams have strong scents. If your household is sensitive to fragrance, choose a simple sensitive-skin formula or skip the scented method and use dish soap plus baking soda instead.
The biggest lesson is that shaving cream is not magic, but it is useful. It turns a dreaded chore into something quick, cheap, and oddly satisfying. It is perfect for maintenance cleaning, not disaster recovery. Use it between deeper washes, keep the bin dry, change bags before they leak, and your trash can will stop announcing itself every time you walk into the room.
Final Thoughts
A clean trash bin is one of those small household upgrades that makes the whole room feel fresher. You may not notice a clean bin immediately, but you definitely notice a dirty one. Shaving cream offers a simple, budget-friendly way to freshen trash cans, loosen light grime, and reduce everyday odors. It is easy to apply, easy to scrub, and surprisingly effective for maintenance cleaning.
Use it wisely: clean visible mess first, never mix it with strong chemicals, disinfect separately when needed, and always dry the bin before adding a new bag. With a few better habits and the occasional foam treatment, your trash can can go back to being what it should be: quiet, clean, and not the main character in your kitchen.