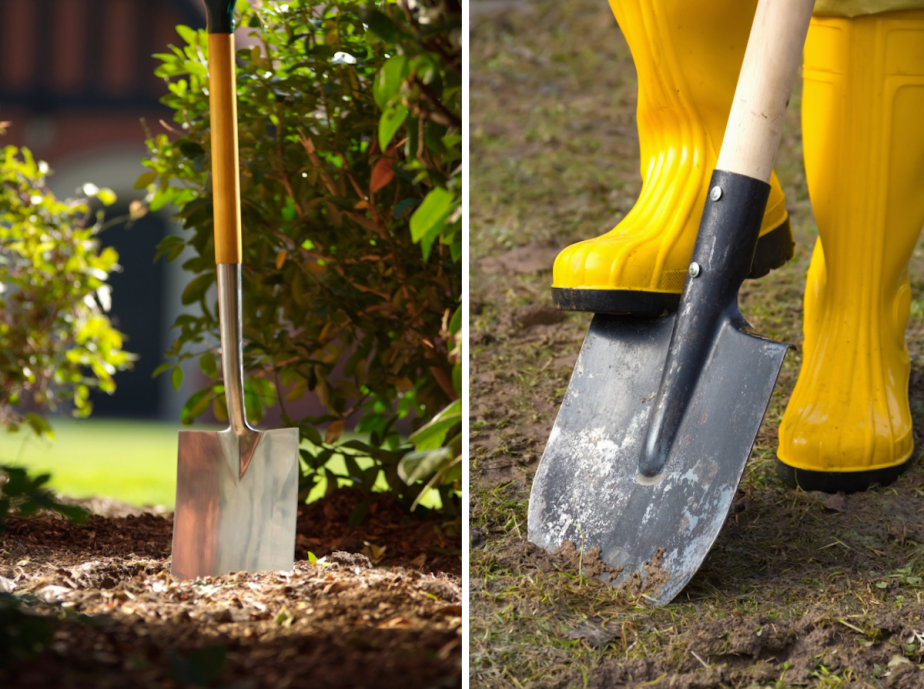
Walk into a garden center and ask for a shovel, and someone may hand you a spade. Ask for a spade, and you may receive something labeled a digging shovel. Tool terminology can get muddier than a backyard after three days of rain, but the practical differences matter.
Choosing the correct digging tool can help you cut cleaner garden edges, move mulch faster, plant shrubs more efficiently, and finish the weekend without feeling as though your lower back has filed a formal complaint. This guide explains the spade-versus-shovel debate, the jobs each tool handles best, and the features DIY landscapers should examine before buying.
What Is the Difference Between a Spade and a Shovel?
The simplest distinction involves blade shape and purpose. A typical shovel has a broad, curved or dished blade designed to dig, scoop, lift, and move material. A traditional garden spade has a flatter blade with relatively straight sides and a straight cutting edge. It excels at slicing soil, cutting sod, dividing plants, creating borders, and shaping holes precisely.
Shovels commonly have longer handles that provide reach and leverage. Spades often use shorter shafts with D-shaped or T-shaped grips, giving the user more control in tight spaces. These descriptions match the way major U.S. retailers, manufacturers, and university extension programs generally classify the tools, although product names are not perfectly standardized.
The One-Glance Test
Place the two tools side by side. If the blade resembles a shallow bowl and curves forward from the shaft, it is probably a shovel. If the blade is flatter, narrower, and shaped more like an oversized playing card, it is probably a spade.
There are exceptions. A trenching shovel may be long and narrow, while a transplanting spade may have a pointed tip. Manufacturers also use names such as “spade shovel,” “digging spade,” and “garden shovel.” Instead of trusting the label alone, inspect the blade, handle, foot step, and intended use.
What a Shovel Does Best
A shovel is the pickup truck of the landscaping shed. It may not deliver surgical precision, but it can move a serious amount of material before lunch.
Digging Planting Holes
A round-point digging shovel is usually the best general-purpose choice for planting shrubs, small trees, and large perennials. Its pointed or rounded tip concentrates force into a smaller area, helping the blade enter ordinary soil. The curved blade also holds loose dirt as you lift it from the hole.
When digging a planting hole, use the shovel to break and remove soil rather than carving a perfectly smooth cylinder. Roughening the sides of a hole can make it easier for roots to move into surrounding soil, especially when the ground contains clay.
Moving Loose Landscaping Material
For mulch, compost, gravel, sand, and loose topsoil, a shovel’s concave blade is more efficient than a flat spade. The curved surface carries material instead of allowing it to slide off every time you turn toward the wheelbarrow.
A square-point or transfer shovel is especially useful when material is already loose. Its flat front edge can scrape a driveway, garage floor, or truck bed, while its raised sides help contain the load.
Mixing Soil and Amendments
A shovel works well for combining topsoil, compost, and other amendments in a wheelbarrow or on a tarp. Its dished blade can lift and turn the mixture repeatedly. For breaking severely compacted ground, however, a garden fork or mattock may loosen the area more effectively before the shovel takes over.
What a Spade Does Best
A spade is the landscaping equivalent of a chef’s knife. It is made for controlled cuts, defined lines, and jobs where “close enough” will remain visible from the patio.
Creating Crisp Landscape Edges
The straight cutting edge of a garden spade can slice a clean boundary between turf and a flower bed. Mark the desired curve with a garden hose or landscape paint, position the blade vertically, and press it into the soil using your foot. Slightly overlap each cut to produce a continuous edge.
A shovel can perform this task, but its rounded blade tends to leave a scalloped or uneven border. That may be charming in a cottage garden. It is less charming when you were aiming for a professionally defined lawn.
Cutting and Removing Sod
A sharp spade can divide turf into manageable strips or squares. After outlining a section, slide the blade beneath the grass roots and lift the sod away. Taking shallow passes usually requires less effort than trying to pry up a thick, heavy slab in one heroic movement.
Dividing Perennials
Hostas, ornamental grasses, daylilies, and other established perennials sometimes need division. A sturdy spade can cut through the root mass, allowing sections to be replanted elsewhere. For delicate plants, dig around the entire clump and lift it before dividing it carefully with a spade, knife, or pruning saw.
Shaping Beds and Flat-Bottomed Holes
The flat blade makes a spade useful for squaring the sides of a planting hole, shaving high spots, cleaning a shallow trench, and creating a level base for pavers. It removes thin slices of earth more predictably than a curved shovel.
Spade vs. Shovel: Quick Comparison
| Feature | Shovel | Spade |
|---|---|---|
| Typical blade | Curved, rounded, pointed, or scoop-shaped | Flat with straight sides and a straight or slightly curved edge |
| Primary purpose | Digging, lifting, scooping, and moving material | Slicing, edging, cutting sod, and precise digging |
| Common handle | Long straight handle or shorter D-grip | Shorter shaft with D-grip or T-grip |
| Best for loose material | Excellent | Fair |
| Best for clean edges | Fair | Excellent |
| Best beginner purchase | Round-point digging shovel | Flat garden spade as a second tool |
Common Types of Shovels
Round-Point Digging Shovel
This is the familiar all-purpose shovel found in most sheds. Its pointed or rounded nose penetrates soil, while the curved blade holds dirt. It is suitable for planting, turning soil, digging holes, and general yard work.
Square-Point or Transfer Shovel
A transfer shovel has a broad blade with a flat leading edge. Use it to move mulch, compost, grain, gravel, or loose soil from a flat surface. It is not the best choice for breaking untouched ground because the wide edge requires more force to push into compacted soil.
Trenching Shovel
This tool has a narrow blade designed to create slim channels for irrigation tubing, drainage components, low-voltage landscape wire, or edging. Its straight sides help shape trench walls while limiting unnecessary soil disturbance.
Drain Spade
A drain spade has a narrow, elongated blade, often with rounded shoulders and a curved tip. It is useful for cleaning or deepening narrow holes and trenches after the initial ground has been opened. Specialized trenching tools are commonly selected according to trench width, soil condition, and the precision the project requires.
Scoop Shovel
With a large, lightweight blade, a scoop shovel moves bulky material such as leaves, snow, animal bedding, or lightweight mulch. It carries volume rather than penetrating hard soil.
Common Types of Spades
Garden Spade
The standard garden spade has a flat blade and straight cutting edge. It is the best option for edging beds, slicing sod, trimming soil walls, and making controlled cuts in the garden.
Transplanting Spade
A transplanting spade has a long, narrow blade that can reach below bulbs, taproots, and perennial root systems. It creates a deep hole without removing an unnecessarily large amount of surrounding soil.
Border Spade
A border spade is a smaller, lighter version of a garden spade. It is convenient for raised beds, crowded borders, and gardeners who find a full-size steel tool cumbersome.
Edging Spade
Some edging spades have a half-moon-shaped blade and a wide foot platform. They are designed primarily to make vertical cuts rather than scoop soil. For redefining bed lines, they can produce a cleaner result than nearly any multipurpose tool.
How to Choose the Right Blade and Handle
Blade Material
Carbon steel is strong, affordable, and suitable for demanding digging, although it can rust if stored wet. Stainless steel resists corrosion and releases sticky soil relatively easily, but it often costs more. Aluminum is lightweight and useful for scooping loose material, yet it is not the first choice for prying in hard or rocky ground.
Handle Material
Wood handles have a traditional feel, absorb some vibration, and can often be replaced. They should be inspected for cracks, splinters, and looseness. Fiberglass handles resist weather and require little maintenance, although severe impacts can damage them. Steel shafts are exceptionally durable but may add weight and transmit more shock to the hands.
Handle Length
A long handle offers leverage and may reduce bending during repetitive digging. A short D-handle provides control when lifting soil, cutting sod, or working between established plants. The correct length depends on the user’s height, the task, and the angle at which the blade naturally meets the ground.
Before purchasing, hold the tool in a normal working stance. You should be able to guide the blade without hunching excessively or raising your shoulders awkwardly. Choosing an appropriately sized, reasonably light tool can reduce fatigue and make landscaping more comfortable.
Foot Steps and Grips
Rolled steps or wide foot platforms give your boot a stable place to apply downward pressure. This feature is particularly helpful in dense soil. A D-grip improves control during lifting and twisting motions, while a cushioned straight grip may feel better during long digging sessions.
Which Tool Should You Use for Specific Landscaping Jobs?
- Planting a shrub: Start with a round-point shovel and finish the hole with a spade if cleaner sides are needed.
- Moving mulch: Use a transfer shovel or scoop shovel.
- Edging a flower bed: Choose a garden spade or half-moon edging spade.
- Removing lawn for a new bed: Cut sections with a spade, then lift and move them with a shovel.
- Digging a narrow irrigation trench: Use a trenching shovel, drain spade, or narrow transplanting spade.
- Dividing a large perennial: Use a sharp garden spade.
- Loading gravel into a wheelbarrow: Select a square-point transfer shovel.
- Breaking rocky or root-filled soil: Begin with a mattock, digging bar, or garden fork before using a shovel.
- Leveling soil beneath pavers: Use a flat spade for controlled shaving and a square shovel for removing loosened material.
Digging Technique That Saves Energy
Even the perfect tool performs badly when used like a medieval battering ram. Position the blade where you want the cut, place one foot firmly on the step, and use your body weight to press downward. Avoid jumping on the blade, especially in rocky soil.
Take smaller bites when the ground is wet, heavy, or compacted. Bend at the knees and hips, keep the load near your body, and avoid twisting your spine while holding a full shovel. Turn by moving your feet. Alternate sides periodically so one arm and shoulder do not perform every repetition.
Dry clay can become nearly bricklike, while saturated clay may cling to a blade as though it has abandonment issues. When practical, water extremely dry soil lightly in advance and allow excess moisture to drain before digging.
Safety Comes Before the First Scoop
Before installing trees, fences, mailboxes, drainage lines, or other features, contact 811 or the appropriate state 811 center. Buried utilities may be closer to the surface than expected, and even a hand shovel can damage a gas, electrical, water, or communication line. Wait for the required responses and markings, then follow the safe-digging instructions provided for your location.
Wear sturdy footwear with slip-resistant soles. Gloves can improve grip and protect against splinters, while eye protection is wise when soil contains rocks or when sharpening a blade. Do not use a tool with a cracked shaft, loose head, severely bent blade, or damaged grip.
How to Maintain a Spade or Shovel
Remove clinging dirt after each project and dry the tool before storage. Moist soil left on steel encourages corrosion, while dried clay adds weight and makes the next job unnecessarily unpleasant.
Inspect wooden handles for rough areas and sand them when necessary. A suitable protective oil can help preserve unfinished wood. Check rivets, sockets, welds, and grips for movement or damage.
A dull edge requires more pressure to enter the ground. Secure the clean blade before sharpening, wear gloves and eye protection, and use a flat file to restore the existing bevel. Avoid turning a soil tool into a razor; an excessively thin edge is more likely to roll, chip, or dull quickly. Finish with a light protective coating and store the tool in a dry, ventilated area.
Do DIY Landscapers Need Both?
For occasional gardening, one sturdy round-point shovel can handle many basic jobs. It can dig planting holes, turn soil, move compost, and perform rough edging when necessary.
Once landscaping projects become more ambitious, owning both tools makes sense. The shovel handles excavation and material movement, while the spade cleans edges, cuts sod, shapes beds, and manages precision work. They are complementary rather than competing tools.
A sensible starter collection includes a long-handled round-point shovel and a short D-handle garden spade. Add a transfer shovel, trenching shovel, or transplanting spade only when your projects regularly demand one.
Conclusion: Let the Job Choose the Tool
The spade-versus-shovel question is not about crowning one champion of the shed. A shovel is usually better for penetrating ordinary ground, scooping loose material, and moving soil. A spade is better for controlled cutting, straight edges, sod removal, plant division, and precise shaping.
Study the blade rather than relying entirely on the product label. Match the handle length to your body and working conditions, choose materials appropriate for the soil, and keep the cutting edge clean and serviceable. The right tool will not make every landscaping project effortless, but it can prevent a two-hour task from becoming an all-weekend archaeological excavation.
Experience Notes: Lessons DIY Landscapers Learn in the Yard
Experience 1: A Shovel Can Dig an Edge, but the Result Shows
Many first-time landscapers create a new flower bed using the only digging tool they own: a round-point shovel. The bed gets built, the plants survive, and nothing technically goes wrong. However, the border often looks wavy because the curved blade creates a series of rounded cuts. Switching to a flat spade for the final pass produces a more continuous line. The practical lesson is simple: rough excavation and finish work are different stages. Use the shovel to remove bulk soil, then let the spade tidy the outline.
Experience 2: Bigger Scoops Are Not Always Faster
A large shovel blade looks efficient until it is packed with wet clay. Suddenly, every load weighs roughly the same as a sleeping Labrador. Smaller scoops often allow a steadier rhythm and reduce fatigue. This becomes especially noticeable when loading a wheelbarrow or digging below waist level. Experienced DIY landscapers stop trying to fill the entire blade on every pass. They loosen compacted soil first, lift manageable quantities, and keep the wheelbarrow close enough to avoid carrying each load across the yard.
Experience 3: Roots Change the Tool Plan
A pointed shovel can cut small feeder roots, but a mature woody root may stop it instantly. Repeatedly slamming the blade into the same root wastes energy and may damage the tool. A sharp spade can slice moderate roots more cleanly, while a mattock, lopper, or pruning saw may be necessary for thicker growth. Before cutting major roots near an established tree, consider how the work could affect stability and plant health. Sometimes the smartest landscaping technique is moving the planned hole six inches to the left.
Experience 4: Handle Length Matters More After the First Hour
A short D-handle feels controlled and powerful when making a few cuts. During a long excavation, however, constant bending can become tiring. A long-handled shovel may feel less precise, but it provides reach and leverage for repeated digging. Landscapers often benefit from switching tools during a project instead of forcing one design to handle every phase. The long shovel opens and empties the hole; the short spade shapes the edges, slices roots, and handles detail work near plants or hardscape.
Experience 5: Cleaning the Tool Now Beats Fighting It Later
At the end of a tiring project, leaving a mud-covered shovel beside the garage feels harmless. By the next weekend, the soil has hardened, the blade has begun to rust, and the handle may have absorbed moisture. A quick rinse, thorough drying, and inspection take only a few minutes. Periodic filing also makes a surprisingly large difference in compacted soil. A maintained tool enters the ground with less effort, while a neglected one encourages the user to push harder, twist more, and invent colorful new landscaping vocabulary.
The Practical Takeaway
The most successful DIY landscapers do not necessarily own the largest tool collection. They recognize when to change tools, take smaller loads, prepare difficult soil, protect their bodies, and stop before frustration turns a shovel into a throwing object. Start with a reliable digging shovel and garden spade, learn what each one does naturally, and add specialty tools only when repeated projects justify the expense.