If your workbench looks like it swallowed a pile of clamps, tape measures, drill bits, pencils, sanding discs, mystery screws, and at least one tool you swore you put “somewhere safe,” congratulations: you are officially ready for drawers.
Adding drawers to a workbench is one of the simplest ways to make a shop feel bigger, cleaner, and more efficient. Good drawers keep your most-used tools close at hand, protect supplies from dust, and save you from that daily scavenger hunt where a tape measure somehow vanishes into another dimension. Better yet, you do not need museum-grade joinery or a woodworking degree from the University of Sawdust to build them.
The smartest approach is usually the simplest one: build sturdy plywood drawer boxes, size them correctly for your chosen slides, install them square, and organize the interiors so they work for how you actually build. That is the secret. Not magic. Not expensive hardware. Not chanting at the table saw.
In this guide, we will walk through simple ways to build drawers for a workbench, including materials, slide options, sizing, assembly, installation, common mistakes, and practical upgrades that make your shop storage work harder. If you want clean, durable, beginner-friendly results, you are in the right place.
Why Workbench Drawers Are Worth the Effort
Open shelves under a workbench seem like a good idea until they become a dusty parking lot for random gear. Drawers solve that problem beautifully. They let you sort tools by task, keep fasteners visible, and use the full depth of the cabinet without crawling around on the floor like a raccoon looking for a socket wrench.
Drawers also improve workflow. Imagine one shallow drawer for measuring tools, one for layout supplies, one for chisels and hand planes, and a deeper drawer below for sanders or boxed hardware. Suddenly your bench is not just a surface. It is a command center.
And from a build standpoint, drawers are friendlier than many people think. A basic drawer is just a box that slides in and out of an opening. Once you understand the size rules and install everything square, the rest becomes a repeatable process.
Start with the Simplest Drawer Strategy
Choose Plywood Drawer Boxes
If your goal is simple, durable, and shop-ready, plywood is your best friend. It is stable, strong, widely available, and less fussy than solid wood. For most workbench drawers, 1/2-inch or 3/4-inch plywood works well for the box sides, front, and back. A 1/4-inch plywood bottom is common for lighter drawers, while heavier tool drawers may benefit from thicker bottoms or extra support.
Why plywood? Because the shop is not a ballroom. It is a working environment. Drawer boxes need to be dependable more than fancy. Plywood resists seasonal movement better than solid lumber, takes screws well when sized properly, and keeps the build process straightforward.
Pick Easy Joinery
You do not need hand-cut dovetails to build reliable workbench drawers. They are gorgeous, yes. They are also unnecessary if the drawer is destined to hold router bits and Allen wrenches rather than heirloom silverware.
Simple options include:
- Glue and brad nails: Fast and beginner-friendly for light-duty drawers.
- Pocket-hole screws: Great for quick assembly and strong enough for many shop applications.
- Rabbets or dadoes: A nice middle ground if you want extra strength without getting fancy.
- Box joints: Strong, attractive, and a solid choice if you already have the jig setup.
For a workbench, simple joinery often wins because it is faster to repeat. If you are building several drawers, consistency matters more than showing off.
Drawer Slides: The Make-or-Break Decision
Before you cut a single piece of plywood, decide what type of drawer slide you want to use. This step matters because the slide type determines the drawer box dimensions. Skip this decision and you may build a beautiful drawer that fits absolutely nowhere.
Side-Mount Slides
These are the practical, no-nonsense option for many workbench drawers. They are visible when the drawer is open, easy to install, and available in heavy-duty versions. If you expect drawers to hold tools, hardware, batteries, or metal accessories, side-mount ball-bearing slides are a strong choice.
They are especially beginner-friendly because the sizing rules are straightforward and the installation process is forgiving enough to allow small adjustments.
Undermount Slides
Undermount slides are hidden beneath the drawer, which gives a cleaner look and often a smoother feel. They are excellent if you want a polished cabinet-style appearance. The tradeoff is that they require more precise drawer construction, more exact clearances, and closer attention to manufacturer specs.
For a fine furniture project, undermount slides are terrific. For a rugged workbench, they are still an option, but they demand more accuracy.
Wooden Slides
If you want the simplest low-cost solution and do not need silky-smooth full extension, wooden runners can work. They are old-school, surprisingly effective, and perfect for lighter drawers or traditional shop furniture. That said, metal slides usually offer better access and better performance under weight.
In most modern workbench builds, side-mount slides are the easiest sweet spot between cost, durability, and ease of installation.
How to Size Drawers Correctly
This is the part that saves headaches.
First, measure the inside width, height, and depth of the opening where the drawer will go. Then check the requirements for your chosen slides. Do not guess. Do not eyeball it. Do not consult your “close enough” inner voice. That voice is the reason many drawers live sad, crooked lives.
As a general approach:
- Measure the cabinet opening carefully in more than one place.
- Use the slide manufacturer’s required clearance to determine drawer box width.
- Choose a drawer height that leaves room for smooth operation and any false front gaps.
- Match drawer depth to the slide length, while keeping enough rear clearance inside the cabinet.
If you are using multiple drawers in one workbench bay, think about function before you lock in heights. A stack of all-deep drawers sounds useful until small tools disappear into the abyss. A better setup is often a mix: shallow at the top, medium in the middle, deep at the bottom.
Best Materials for Workbench Drawers
Drawer Box Material
For most DIY builders, Baltic birch or cabinet-grade plywood is a great option. It machines cleanly, stays flat, and holds up well in a shop environment. If your budget is tighter, standard plywood can still work just fine for utility drawers.
Drawer Bottom Material
A 1/4-inch plywood bottom is often enough for light tools and shop supplies, especially when captured in grooves. But if you plan to store heavy items like impact drivers, routers, boxes of screws, or metal hardware, do not be shy about upgrading. A thicker bottom, a bottom supported underneath, or a shorter/wider drawer design can all improve long-term durability.
Drawer Fronts
You can keep things simple by making the drawer front part of the box, or you can attach separate false fronts later for a cleaner look. Separate fronts make alignment easier and help you achieve even gaps across the face of the workbench. They also let you use nicer-looking wood on the outside without complicating the internal box.
A Simple Step-by-Step Build Process
1. Build the Cabinet or Bench Base First
Your drawer openings need to be square and consistent. If the workbench base is twisted, bowed, or built like it lost a fight with gravity, the drawers will tell on you immediately. Take time to square the bench base and add solid mounting points for the slides.
2. Cut All Drawer Parts Together
Batch cutting improves consistency. Cut the sides, fronts, backs, and bottoms for multiple drawers at once when possible. Label everything. Trust me, every plywood rectangle starts looking like every other plywood rectangle after about 11 minutes.
3. Cut Grooves for the Bottom
If you are using a captured bottom, cut grooves in the drawer sides and front. A common approach is to leave the back slightly short so the bottom can slide in during assembly. This method is neat, strong, and efficient.
4. Assemble the Boxes
Dry-fit everything first. Then glue and fasten using your chosen joinery. Check for square by measuring diagonals. If the two diagonal measurements match, you are in good shape. If not, adjust before the glue sets. A drawer box that starts out racked will never become charming later.
5. Install the Slides Carefully
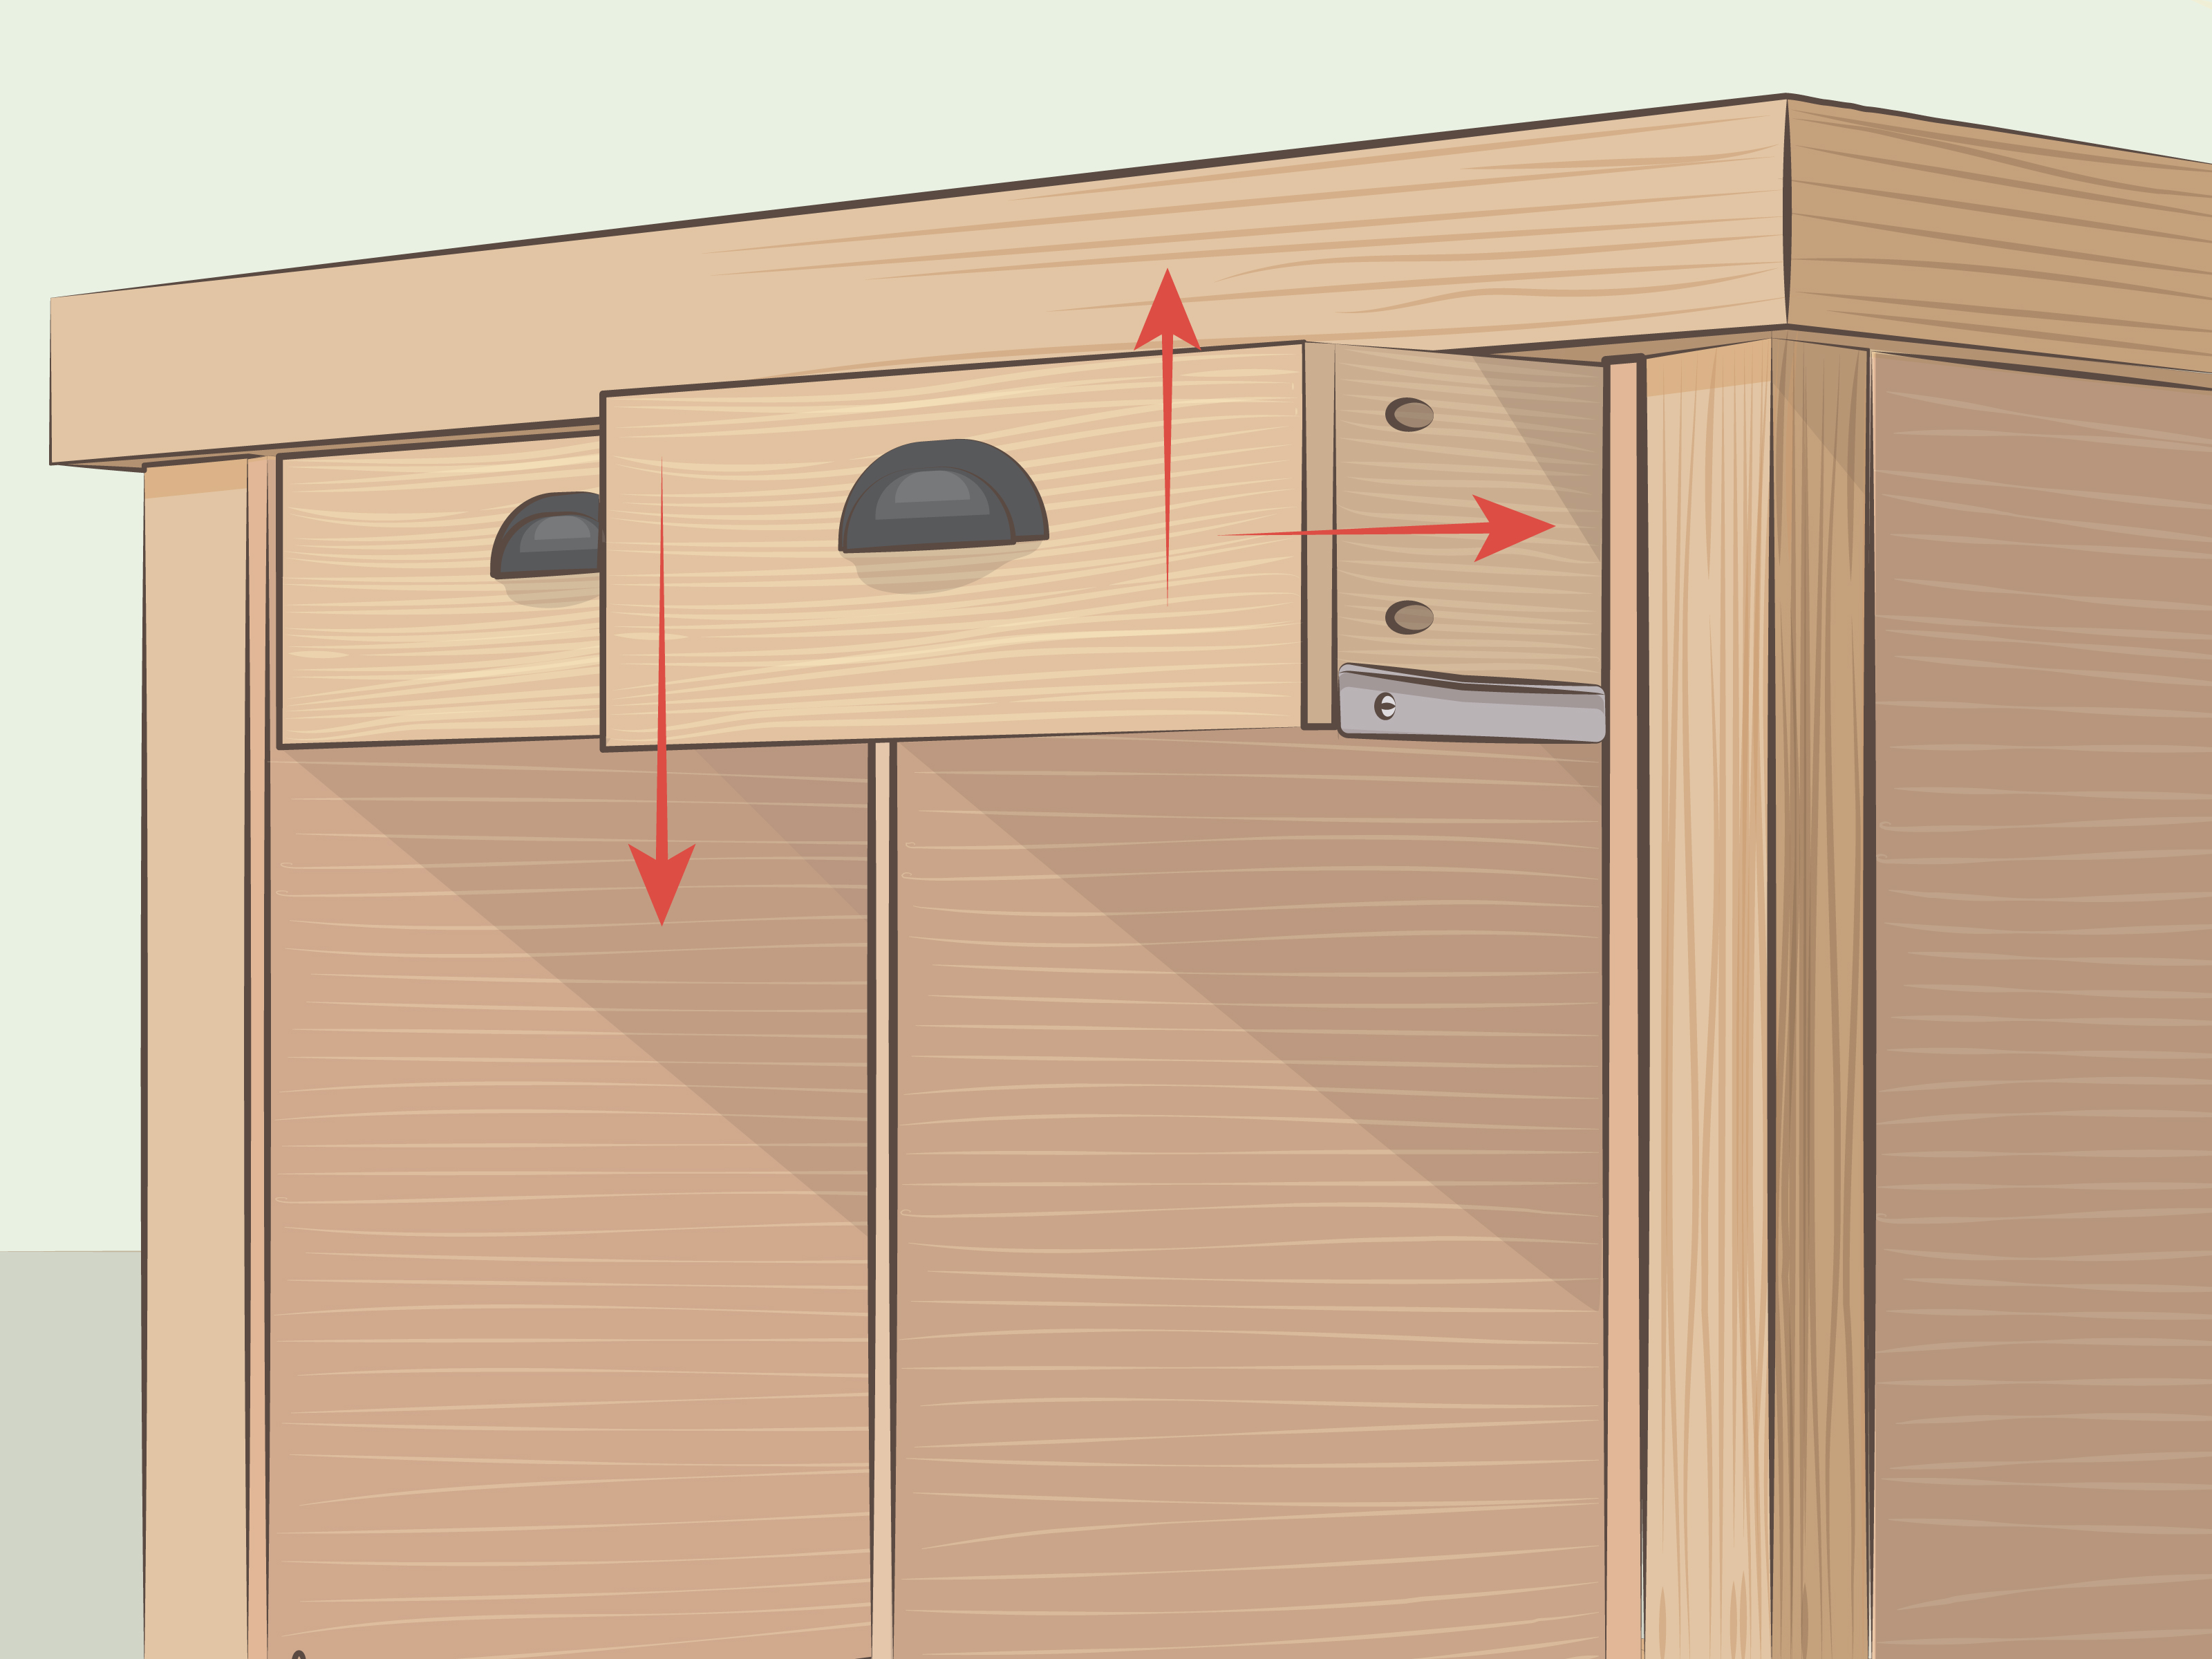
Mount the cabinet members of the slides level and parallel. Then mount the drawer members in matching positions on the boxes. Use spacers, story sticks, or scrap blocks to keep installation consistent from one drawer to the next. This is where patience pays rent.
6. Test Before Adding Fronts
Slide the boxes in and out. Check for rubbing, sagging, or side-to-side play. Make adjustments now, while everything is easy to reach. Once the drawer fronts go on, your tolerance for surprises will drop dramatically.
7. Attach Drawer Fronts and Pulls
If you are using applied fronts, use spacers to create even reveals around each drawer. Double-sided tape can help hold fronts in place temporarily while you fasten them from inside the drawer box. Then add pulls, knobs, finger grooves, or whatever suits your shop style.
Simple Design Ideas That Make Drawers Better
Use Shallow Top Drawers
These are perfect for pencils, layout tools, utility knives, marking gauges, drill bits, and other small items that usually vanish when you need them most.
Make Lower Drawers Deeper
Save deep drawers for heavier or bulkier items such as sanders, boxes of fasteners, chargers, or safety gear. This keeps weight lower in the bench and improves stability.
Add Dividers
The best drawer is not the deepest one. It is the one where you can actually find things. Add simple dividers, trays, or removable inserts so your workbench drawers do not become wooden junk mail.
Think About Access
Full-extension slides are especially useful in a workshop because they let you reach tools at the very back without performing wrist yoga. If your budget allows, they are often worth it.
Common Mistakes to Avoid
Ignoring slide specs: This is the classic blunder. The slide type controls the drawer size. Always build to the hardware, not to hope.
Using weak bottoms for heavy loads: A drawer filled with metal hardware gets heavy fast. Build for the real load, not the imaginary one where every tool is made of marshmallow.
Installing slides out of parallel: Even tiny errors can make a drawer bind, rack, or feel rough. Use guides and take your time.
Making every drawer the same depth: Uniformity looks tidy on paper, but mixed depths usually work better in real shops.
Skipping organization: Drawers without dividers are just fancy caves.
How to Make Workbench Drawers Last Longer
Workbench drawers live a harder life than bedroom furniture. They get slammed, overloaded, dusty, and occasionally asked to hold items that probably belong on a forklift. To improve lifespan, use decent plywood, install slides square, avoid overloading shallow bottoms, and add stops or locking hardware if your bench moves around the shop.
A simple coat of finish on the drawer fronts can also help them resist grime. For the inside, many builders leave the plywood bare, which is perfectly practical. You can also line certain drawers with cork, rubber matting, or thin hardboard if you want less tool clatter.
When the Simplest Method Is the Best Method
It is easy to overcomplicate drawer building. You start out wanting a few practical workbench drawers, and suddenly you are researching hand-cut joinery, imported slides, figured maple fronts, and whether your shop cabinet should “tell a story.” Friend, the story should be that it opens smoothly and holds your tools.
The simplest method for most people is this: plywood drawer boxes, practical slide hardware, careful measuring, square assembly, and thoughtful organization. That formula works. It works for beginners, it works for busy DIYers, and it works for woodworkers who would rather build projects than spend three weekends debating drawer philosophy.
Build the first drawer carefully. The second one goes faster. By the third, you will feel suspiciously confident. By the fourth, you will start looking around the shop for other places that “definitely need drawers now.” This is normal behavior.
Real-World Experiences Building Workbench Drawers
The first time I added drawers to a workbench, I made the classic rookie mistake: I built the boxes first and bought the slides later. On paper, everything looked perfect. In reality, the drawers were just a little too wide, which is woodworking’s version of being “a little too pregnant.” The slides did not care about my optimism. I ended up trimming parts, muttering at the bench, and learning the unforgettable lesson that hardware decisions come before drawer dimensions.
Another lesson came from loading drawers the way people actually use them instead of the way plans imagine them. A drawer that seems sturdy when it is holding a tape measure and a few pencils may feel very different once it is stuffed with drill batteries, router bits, pliers, and a random chunk of brass you are apparently saving for history. That experience taught me to respect drawer bottoms. Thin bottoms are fine for light-duty storage, but the moment you start storing dense tools and hardware, stronger bottoms and better support become cheap insurance.
I also learned that shallow drawers are wildly underrated. At first, deep drawers seemed more useful because they could hold “more stuff.” That part was true. What was also true was that the more stuff they held, the harder it became to find anything. Shallow drawers for marking tools, measuring gear, knives, and sanding accessories changed the whole workflow of the bench. Instead of digging through piles, I could open a drawer and see everything at once. It felt less like storage and more like having an assistant who never lost the combination square.
Then there was the issue of alignment. Drawer installation looks simple until one side sits a hair high, the other side sits a hair low, and suddenly the drawer slides with the enthusiasm of a rusty shopping cart. That is when spacers, story sticks, and setup blocks became heroes. Once I started using repeatable guides for slide placement, installation became dramatically easier and more accurate. It was one of those irritating discoveries that makes you wonder why you ever tried to wing it in the first place.
Perhaps the most useful experience was realizing that workbench drawers are not furniture drawers. They do not need to be precious. They need to be dependable. A small ding on a drawer front in the shop is not a tragedy. A drawer that sticks every morning is. That mindset changes how you build. You start prioritizing smooth action, solid construction, and practical layout over decorative details that add time without adding value.
Over time, the best drawer upgrades turned out to be simple ones: full-extension slides so nothing got lost in the back, dividers so small tools stopped breeding in dark corners, and labeled sections so I knew exactly where to toss things during a project. Once the drawers matched the way I actually worked, the bench felt bigger, cleaner, and easier to use.
That is probably the biggest truth about building workbench drawers: the project is not really about drawers. It is about reducing friction in your work. When tools are easy to reach and easy to put away, projects move faster. The shop feels calmer. You waste less time searching and more time building. And that is a pretty satisfying payoff for a few boxes on slides.