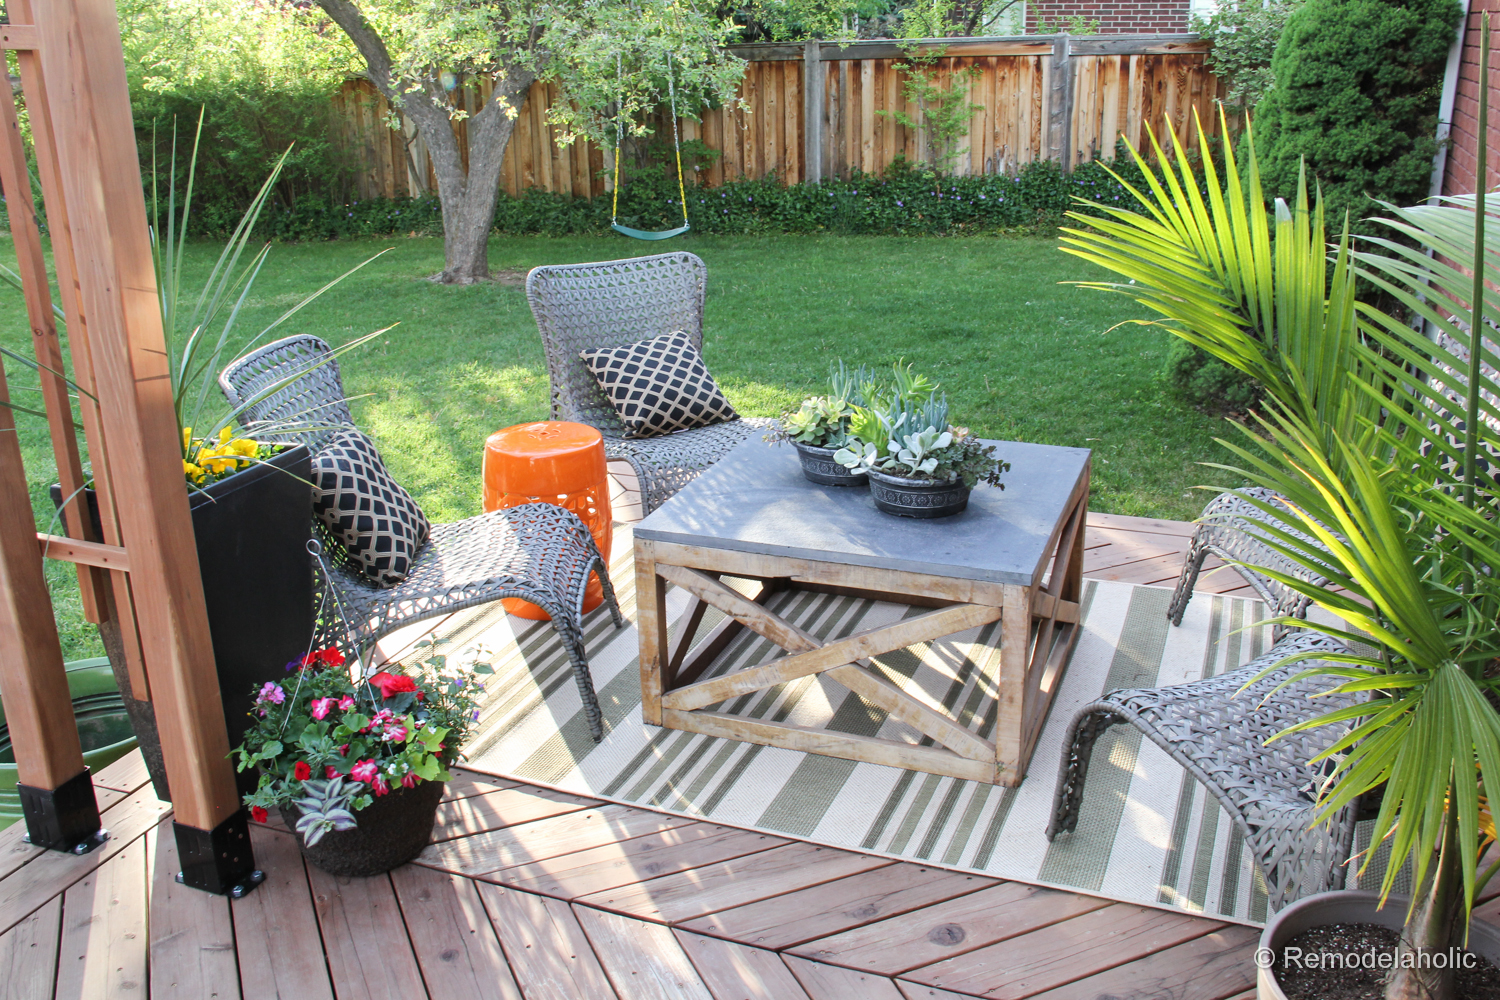
Every backyard deck has a dramatic arc. One minute it is the charming outdoor living space where lemonade tastes better, burgers smell heroic, and everyone suddenly believes they are “patio people.” The next minute, it is covered in pollen, mystery stains, leaf confetti, muddy footprints, and one chair cushion that looks like it survived a small weather event. That is when it is time for a proper deck clean up.
Our deck clean up was not glamorous at first. There was sweeping. There was scrubbing. There was a moment when someone said, “Is that dirt or is the wood just like that now?” But by the end, the deck looked brighter, safer, and far more inviting. Better yet, the process reminded us that deck cleaning is not just about appearances. A clean deck can help prevent mildew, reduce slippery spots, protect wood or composite boards, and make the whole backyard feel like an actual extension of the home instead of a storage zone for forgotten planters.
This guide walks through a practical, homeowner-friendly approach to cleaning a deck, including what to remove first, how to choose the right cleaner, when to scrub instead of blast, how to protect nearby plants, and what to do after the boards dry. Whether you have a wood deck, composite decking, painted railings, or a patio setup that has slowly turned into an outdoor junk drawer, this deck clean up plan will help you bring it back to life without turning the job into a weekend-long wrestling match.
Why a Deck Clean Up Matters More Than You Think
A deck is exposed to sun, rain, wind, dirt, leaves, food spills, pet traffic, furniture scratches, and the occasional dropped hot dog. Over time, that everyday mess can create more than an ugly surface. Wet leaves and trapped debris can encourage mildew and algae. Grease can soak into porous wood. Dirt can settle between boards. Outdoor rugs can hide moisture. Loose screws, splintering boards, and soft spots can stay unnoticed until someone steps in the wrong place.
That is why a deck clean up should be part beauty treatment, part safety inspection, and part seasonal reset. Think of it as giving your outdoor space a checkup. You are not only washing away grime; you are also looking for problems while they are still small. A raised nail is easier to fix than a twisted ankle. A small mildew patch is easier to scrub than a slippery green skating rink. A faded board is easier to stain than a rotten one.
Step One: Clear the Deck Like You Mean It
Before water, soap, or cleaner enters the scene, remove everything from the deck. That means patio furniture, rugs, planters, grills, storage boxes, toys, string lights within reach, and decorative items that somehow multiplied over the season. This is the step people want to skip, but it is also the step that makes the entire project easier.
Once the deck is empty, you can see what you are working with. You may find circles under planters, dark marks under furniture feet, pollen in corners, or debris wedged between boards. You may also discover that one missing garden glove from last fall. Congratulations. Archaeology!
Check Before You Clean
Walk slowly across the deck and look for loose boards, popped fasteners, soft areas, wobbling rails, splinters, or cracked boards. Pay special attention to shaded areas, places near stairs, and spots where water tends to collect. If a board feels spongy or a railing shifts when you lean on it, pause the cleaning project and handle repairs first. A clean deck is lovely; a safe deck is non-negotiable.
Step Two: Sweep, Scrape, and Remove Debris
Start with a good broom. Sweep with the direction of the boards and push debris off the surface, out of corners, and away from the house. Use a putty knife, plastic scraper, or old paint tool to gently clear leaves, seeds, and compacted dirt from gaps between boards. Avoid gouging the wood or scratching composite decking.
This dry-cleaning stage matters because water turns loose dirt into mud. If you spray first and sweep later, you create a delightful paste that travels everywhere, including onto your shoes, the siding, and possibly the dog. Dry debris is easier to remove, and your cleaning solution works better when it can reach the actual deck surface.
Step Three: Protect Plants, Siding, and Nearby Surfaces
Before applying any deck cleaner, rinse nearby grass, shrubs, and plants with plain water. Damp leaves and soil are less likely to absorb cleaning runoff quickly. If your plants are delicate, cover them loosely with plastic sheeting while you clean, then remove the cover as soon as you are done so they do not overheat.
Also move cushions, outdoor fabrics, and metal decor away from the cleaning zone. Some cleaners can discolor fabrics or react with metals. If your deck connects directly to the house, give siding and doors a quick rinse before and after cleaning. The goal is simple: clean the deck, not accidentally redecorate the side of the house with streaks.
Step Four: Choose the Right Deck Cleaner
The best deck cleaner depends on the deck material and the type of mess. For general dirt on many surfaces, mild dish soap and warm water can be enough. For deeper grime, mildew stains, and weathered wood, a deck cleaner designed for your surface is usually more effective. Oxygen bleach cleaners are commonly recommended for wood because they help lift organic stains without the harshness of chlorine bleach.
Composite decking is a different creature. It often needs a soft-bristle brush, warm soapy water, or a cleaner approved by the decking manufacturer. Always check the care instructions for your brand before using strong chemicals, stiff brushes, or pressure washing. Composite boards can scratch or develop surface damage if treated like concrete.
Cleaning Products You Should Not Mix
Never mix bleach with ammonia, vinegar, acids, or other household cleaners. Chemical cocktails belong in science labs, not next to your patio chairs. Use one product at a time, follow the label, wear gloves and eye protection when recommended, and rinse thoroughly. If a cleaner smells intense, do not “power through.” Step back, ventilate the area, and respect the label instructions.
Step Five: Apply Cleaner in Small Sections
Work in small, manageable areas so the cleaner does not dry before you can scrub and rinse it. A pump sprayer, garden sprayer, bucket, or deck brush can all work depending on the product. Apply the cleaner evenly and let it sit for the recommended time, often around 10 to 15 minutes. Keep the surface damp while the cleaner works.
Letting the cleaner dwell is important. It gives the formula time to loosen grime, pollen, mildew, and embedded dirt. Scrubbing immediately after application is like asking someone to clean a lasagna pan before it soaks. Possible? Yes. Enjoyable? Not even slightly.
Step Six: Scrub With the Grain
Use a stiff-bristle brush for wood decks unless the manufacturer recommends otherwise. For composite decking, use a soft-bristle brush to reduce the risk of scratches. Scrub with the direction of the boards, not across them. This helps lift dirt from the grain and gives the surface a more even finish.
Pay extra attention to stairs, railings, corners, and traffic paths. These spots collect hand oils, shoe grime, grill splatter, and moisture. If a stain does not come up on the first pass, apply more cleaner, let it sit again, and scrub once more. Patience usually beats brute force.
Step Seven: Rinse Thoroughly
Rinsing is where many deck clean up projects go wrong. If dirty cleaner dries on the boards, it can leave a film or streaky residue. Use a garden hose with steady water pressure and rinse each section until runoff looks clear. Start near the house and work outward so you are not washing grime back over areas you already cleaned.
Rinse railings, steps, balusters, and nearby siding as well. Soap can hide in corners and under ledges. If your deck has lots of grooves or textured surfaces, take your time. A thorough rinse is the difference between “fresh and clean” and “why does the deck feel weirdly sticky?”
Should You Pressure Wash a Deck?
Pressure washing can be useful on some wood decks, but it can also cause damage if done carelessly. Too much pressure can raise wood fibers, gouge soft boards, strip finishes unevenly, or force water into places where it should not go. If you use a pressure washer on wood, choose a low setting, use a wide fan tip, keep the nozzle moving, and test an inconspicuous area first.
For composite decking, be especially careful. Some manufacturers allow pressure washing only under specific limits, while others discourage it because it may damage the surface or affect warranty coverage. When in doubt, scrub with an approved cleaner and rinse with a hose. Your deck does not need to be blasted into next Tuesday to look clean.
How to Handle Common Deck Stains
Green Algae or Mildew
Green growth often appears in shaded, damp areas. Use a deck cleaner appropriate for your surface and scrub thoroughly. Keep nearby vegetation protected and rinse well. For wood, oxygen bleach solutions are often a good choice for organic staining. Avoid letting wet leaves sit on the deck because they can restart the problem quickly.
Grease From the Grill
Grease stains need quick attention. Blot fresh grease with absorbent material, then clean with warm water and a mild detergent or a product recommended for grease removal on your deck surface. Avoid spreading the stain with aggressive scrubbing at first. Work from the outside of the stain toward the center.
Rust, Tannin, and Planter Marks
Rust from metal furniture and tannin stains from leaves or wood extractives may require a specialized cleaner. Always test a small hidden area before applying any stain remover broadly. To prevent future marks, use plant stands with airflow, move pots occasionally, and avoid leaving metal items directly on wet decking.
Let the Deck Dry Completely
After rinsing, give the deck time to dry. Wood decks often need at least 24 to 48 hours of dry weather before staining, sealing, or putting heavy furniture back. Drying time depends on temperature, humidity, sunlight, shade, and airflow. Composite decking may dry faster on the surface, but water can still sit in gaps and corners.
Do not rush this stage. Trapping moisture under outdoor rugs or furniture can encourage mildew and discoloration. If you plan to stain or seal, read the product label carefully. Most stains need clean, dry wood and a mild weather window to cure properly.
Deck Clean Up Aftercare: Make the Results Last
Once the deck is clean and dry, take a few simple steps to keep it looking good longer. Place furniture pads under chair and table legs. Use breathable outdoor rugs and lift them occasionally to check for trapped moisture. Put saucers under planters, but do not let water sit in them for days. Sweep weekly during pollen season or when leaves are falling.
For wood decks, consider whether it is time to stain or seal. A simple water-drop test can help. Sprinkle a little water on the boards. If it beads up, the finish may still be doing its job. If it soaks in quickly, the wood may be ready for a protective coating. Staining and sealing help reduce moisture absorption, improve appearance, and extend the life of the deck.
Small Details That Make a Big Difference
A deck clean up is not only about boards. Clean the railings, stairs, lattice, furniture, cushions, umbrella base, and outdoor lighting. Wipe down the grill exterior. Shake out rugs. Wash cushion covers according to their care labels. Remove cobwebs from corners. Trim shrubs that touch the deck so air can circulate.
These finishing touches make the deck feel intentionally refreshed rather than merely less dirty. They also help prevent the mess from returning quickly. A clean deck surrounded by dusty furniture is like wearing a tuxedo with muddy sneakers. Technically dressed up, but the vibe is confused.
Our Deck Clean Up Experience: What We Learned the Messy Way
At the end of our deck clean up, the biggest lesson was that the job looked more intimidating than it actually was. Before we started, the deck seemed like one giant problem: dull boards, dusty railings, leaf piles in the corners, planter rings, and a general feeling of “we should have done this three weekends ago.” Once we broke it into steps, it became manageable. Clear the furniture. Sweep. Inspect. Wash. Scrub. Rinse. Dry. Put everything back with a little more thought than before.
The first surprise was how much better the deck looked after sweeping alone. Removing dry leaves, pollen, dirt, and random outdoor clutter instantly made the space feel less neglected. It also helped us see which areas actually needed cleaning and which areas were just buried under seasonal debris. The corners were the worst offenders. Leaves had packed themselves into little damp nests, and those spots needed extra brushing before any cleaner touched the boards.
The second lesson was that scrubbing matters. A hose can rinse away loose dirt, but it does not magically remove grime that has settled into the grain. We used a deck brush with a long handle, which saved our backs and made it easier to scrub in steady lines with the boards. It was not exactly a spa day, but it was satisfying in the way only visible progress can be. Every pass of the brush made the deck look a little more like the place we remembered.
We also learned not to let cleaner dry on the surface. On one small section, we got distracted moving furniture and waited too long before rinsing. That area needed a second rinse and another light scrub to remove residue. After that, we worked in smaller sections and kept the boards damp until rinse time. It made the whole process smoother and gave a more even result.
Another practical discovery: outdoor rugs and planters need more attention than they usually get. Under one planter, there was a dark ring that had clearly been forming for a while. Under the rug, the boards were cleaner in some places and darker in others because moisture and dirt had been trapped unevenly. Going forward, we plan to move planters every couple of weeks, lift the rug after rainy stretches, and sweep underneath instead of pretending that “out of sight, out of mind” is a maintenance strategy.
The final reward came when everything dried and we put the furniture back. We rearranged the chairs, wiped the table, cleaned the cushions, and added one small plant that had not yet been given the opportunity to stain anything. The deck suddenly felt like a room again. Not a storage platform. Not a muddy transition zone. A real outdoor living space.
Our advice? Do not wait until the deck looks terrible. A light seasonal deck clean up is much easier than a rescue mission. Sweep often, clean spills quickly, keep leaves from piling up, and inspect the boards while you work. The project may still involve sweat, stubborn stains, and at least one dramatic sigh, but the payoff is worth it. A clean deck invites people outside. It makes morning coffee better. It makes dinner feel more relaxed. And yes, it makes you briefly believe you are the kind of person who has their entire home under control. Enjoy that feeling. You earned it.
Conclusion: A Clean Deck Is a Happier Deck
A successful deck clean up does not require perfection, expensive tools, or a professional-level vocabulary of cleaning chemicals. It requires a smart plan, the right cleaner for your surface, patient scrubbing, careful rinsing, and enough drying time before everything goes back into place. Whether your deck is wood or composite, large or small, brand-new or proudly weathered, regular cleaning helps protect its beauty, safety, and comfort.
The best part is how quickly the space changes. Once the grime is gone, the deck becomes useful again. It is ready for coffee, cookouts, quiet evenings, family dinners, and the kind of casual backyard moments that make home feel bigger. So grab the broom, respect the scrub brush, and give your deck the reset it deserves. Your future barefoot self will thank you.
Note: This article is written as original web-ready content and is based on widely accepted deck-cleaning, maintenance, and safety practices from reputable U.S. home improvement and consumer guidance sources.