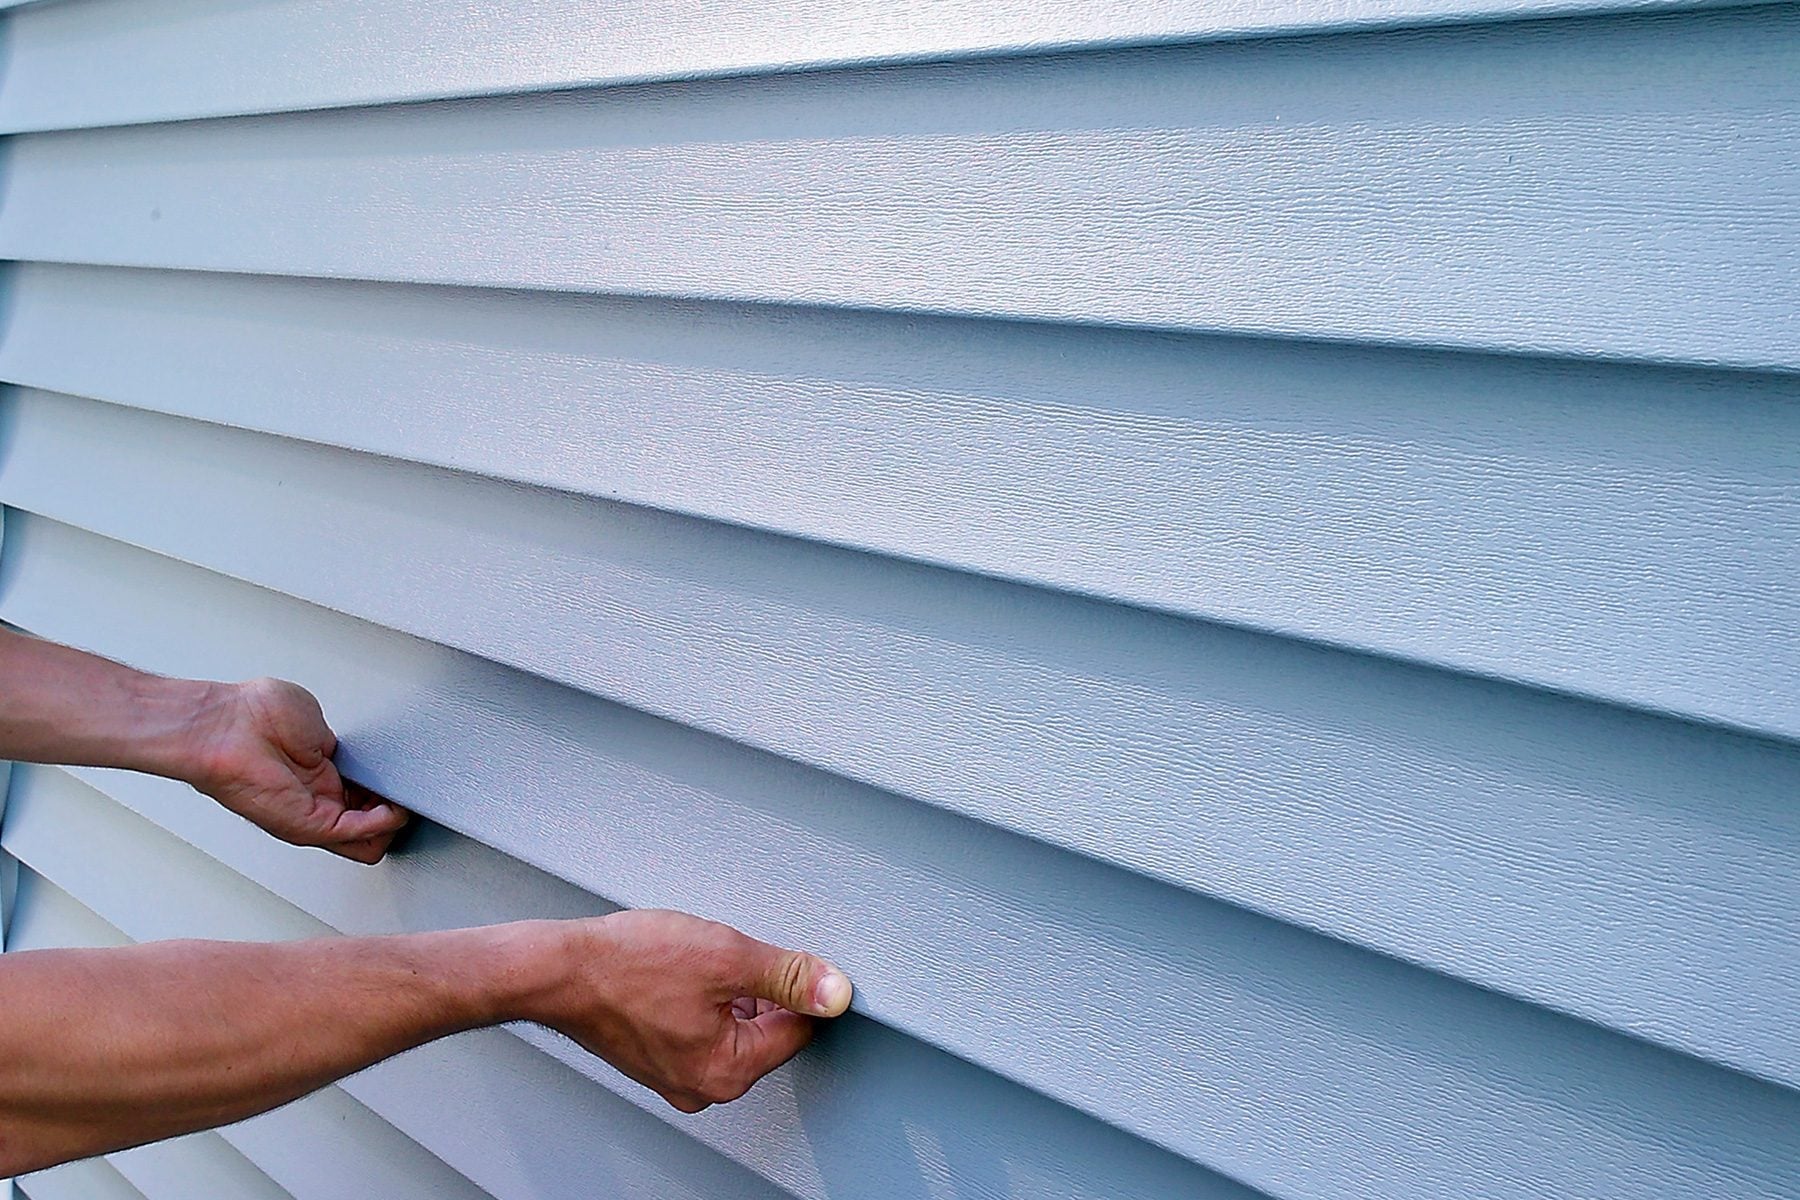
Vinyl siding is attached with nails, but “attached” is not quite the same as “nailed down.” That distinction is the secret behind an exterior that stays smooth through summer heat, winter cold, and years of weather changes.
Drive the nails too tightly and the siding may buckle, ripple, or crack. Place them carelessly at the ends of the slots and the panels cannot expand normally. Use the wrong fasteners and rust stains may eventually decorate the wall in a style nobody requested.
Learning how to nail vinyl siding correctly is therefore less about hammering harder and more about controlling nail position, depth, spacing, and alignment. This guide explains the complete process, including fastener selection, wall preparation, common mistakes, nail-gun use, and practical lessons that can make a do-it-yourself installation look far more professional.
Why Proper Vinyl Siding Nailing Matters
Vinyl expands when temperatures rise and contracts when temperatures fall. A long panel can move noticeably as outdoor conditions change. The elongated nailing slots along the upper edge of each panel are designed to accommodate that movement.
That is why vinyl siding should hang from its fasteners rather than being clamped firmly against the wall. The nail holds the panel close to the structure while the slot allows it to slide sideways.
Imagine installing a 12-foot panel on a cool morning and driving every nail head tightly against the nailing hem. When afternoon sunlight warms the wall, the panel attempts to expand. Because it cannot move along the slots, the material may push outward and form waves. The problem is not poor-quality siding. The problem is that the siding has been treated like a rigid board instead of a flexible exterior cladding.
Correct fastening helps prevent:
- Buckled or wavy siding panels
- Cracking around nail slots
- Loose courses during windy weather
- Uneven horizontal lines
- Rust stains caused by unsuitable fasteners
- Panels that separate from their locking edges
- Premature installation failure
Choose the Right Nails for Vinyl Siding
Use corrosion-resistant siding nails made from galvanized steel, aluminum, stainless steel, or another material approved by the siding manufacturer. The best choice depends on the product, local climate, substrate, trim material, and applicable building requirements.
In coastal environments or other areas where corrosion is especially aggressive, stainless steel may be required or strongly preferred. Aluminum trim commonly requires aluminum or stainless steel fasteners to avoid corrosion problems between dissimilar metals.
Recommended nail characteristics
Standard industry guidance commonly calls for nails with heads at least 5/16 inch in diameter and shanks approximately 1/8 inch in diameter. The broad head supports the nailing hem without slipping through the slot, while the relatively narrow shank leaves room for movement.
Nails must also be long enough to penetrate the approved nailable material adequately. A common minimum is 1 1/4 inches of penetration into framing, furring, or another suitable nailable substrate. This is penetration depth, not necessarily the total nail length.
For example, a wall with foam sheathing, existing siding, or thick underlayment will require a longer fastener than a wall with thin sheathing. Do not automatically grab a box of 1 1/2-inch nails and assume the mathematics will politely solve itself.
Avoid these fasteners
- Interior finish nails
- Uncoated steel nails that may rust
- Nails with heads too small for the siding slots
- Fasteners too short to reach a secure substrate
- Roofing nails unless approved for the particular siding system
- Fasteners incompatible with aluminum trim or coastal exposure
Tools and Materials You Will Need
- Corrosion-resistant vinyl siding nails
- Hammer or properly adjusted siding nailer
- Tape measure
- Level
- Chalk line
- Utility knife or vinyl scoring tool
- Aviation snips
- Fine-tooth saw blade approved for cutting vinyl
- Nail-hole slot punch
- Snap-lock punch
- Vinyl siding unlocking tool
- Safety glasses and appropriate work gloves
- Stable ladders, platforms, or scaffolding
A nail-hole slot punch is especially useful when an existing slot does not line up with a stud or other nailable area. Instead of driving a nail through the solid vinyl face, the tool creates or lengthens a slot while preserving room for expansion.
Prepare the Wall Before Nailing Siding
Proper nailing cannot rescue a badly prepared wall. Vinyl siding should be installed over a smooth, flat, stable surface with an approved water-resistive barrier and correctly integrated flashing.
Vinyl siding is designed to shed most rain, but it is not the wall’s only waterproofing layer. Some water can get behind exterior cladding. The water-resistive barrier, flashing, drainage details, and properly prepared openings protect the building beneath it.
Inspect the substrate
Repair rotten wood, loose sheathing, mold-related damage, protruding nails, and uneven areas before installation. Do not install standard vinyl siding directly over open studs unless the specific system and local code expressly permit that assembly.
If the wall includes rigid foam or continuous insulation, follow the siding manufacturer’s fastening schedule. Fasteners may need to pass through the foam and penetrate framing, or approved furring may be required.
Establish a level starting point
The starter strip determines the alignment of every horizontal course above it. Mark a level reference line around the building and install the starter strip without stretching or bending it.
A starter strip that rises by half an inch across a wall will not become less noticeable after eight more courses. It will become a much larger and more expensive reminder to use a level.
How to Nail Vinyl Siding Correctly: Step by Step
1. Lock the panel into the course below
Position the panel and engage its bottom lock with the panel or starter strip below. Apply gentle upward pressure until the connection is secure along the entire length.
Do not pull the panel upward forcefully or stretch it while fastening. Excessive tension can distort the profile, create uneven laps, and prevent the course from hanging naturally.
2. Start nailing near the center
For horizontal vinyl siding, place the first fastener near the center of the panel and continue toward each end. Working from the middle outward helps distribute the panel evenly and reduces the chance of trapping expansion stress.
3. Place every nail in the center of its slot
Drive the nail through the middle of the elongated nailing slot, not at either end. Centering the fastener gives the panel room to move in both directions as temperatures change.
When a slot does not align with a secure fastening point, use a nail-hole slot punch to extend or create a proper slot. Do not solve the problem by driving a nail through the solid face of the siding.
4. Drive nails straight and level
The nail shank should enter the wall straight rather than at an upward or downward angle. An angled nail head can pinch one side of the slot and restrict movement even when the head appears loose.
Keep the fastener level with the nailing hem. Bent nails, tilted heads, and dramatic “one more hammer swing” decisions are common causes of localized distortion.
5. Do not drive nail heads tight
Leave the manufacturer-specified clearance between the nail head and the vinyl nailing hem. Many installation manuals describe approximately 1/32 inch of space, roughly the thickness of a dime, while some products specify a larger gap.
The practical test is simple: after fastening, the panel should slide freely from side to side. The nail head should hold it against the wall without clamping it.
Do not deliberately leave nails so loose that panels rattle or lift away from the substrate. The objective is controlled movement, not a siding percussion section.
6. Follow the correct nail spacing
For many horizontal vinyl siding products, fasteners are installed no more than 16 inches on center. Vertical siding is commonly fastened at intervals of up to 12 inches, while accessories may require nails every 8 to 12 inches.
These are general guidelines, not universal substitutions for product instructions. High-wind-rated siding, insulated siding, specialty profiles, shakes, scallops, and code-approved assemblies may have different fastening patterns.
7. Keep nails away from panel ends when required
Panel ends need room to move inside corner posts, J-channels, and other receiving pockets. Follow the product’s specified expansion clearances, which may vary with panel length and installation temperature.
Near an overlapping joint, keep the final fastener far enough from the panel end to avoid interfering with the lap. Certain installation systems recommend placing the last nail several inches from the end.
8. Confirm that the course remains level
Check the course with a level every few panels and compare it with window heads, soffits, and other long visual lines. A tiny error repeated across several courses can turn into a noticeable slope.
Do not use the roofline as your only reference. Older buildings are often charming precisely because almost nothing is perfectly straight.
9. Test movement before installing the next course
Slide the completed panel gently in both directions. It should move without catching on nail heads. Check that the bottom lock is fully engaged and that no part of the nailing hem has been crushed.
Nailing Corner Posts and Vertical Accessories
Vertical accessories are handled differently from horizontal siding panels. Corner posts and similar pieces are generally hung from the top.
Place the first fastener at the top of the uppermost nailing slot so the accessory hangs from that nail. Center the remaining fasteners in their slots so the material can expand downward and move as designed.
Long accessories may require fastening through the upper portions of more than one top slot, depending on the manufacturer’s instructions. Keep the post plumb while working downward and avoid twisting it against the wall.
Can You Use a Nail Gun for Vinyl Siding?
A pneumatic nailer can speed up a large siding project, but it can also overdrive hundreds of nails with impressive efficiency. A nail gun should be used only when it can consistently leave the required clearance beneath the fastener head.
Set up the nailer carefully
- Use approved corrosion-resistant siding nails.
- Reduce air pressure and adjust the depth control.
- Practice on scrap siding attached to a representative wall sample.
- Check that each nail lands in the center of the slot.
- Confirm that the scrap panel slides freely after fastening.
- Recheck settings whenever hose pressure, temperature, material, or substrate changes.
Keep the nailer perpendicular to the wall. If consistent placement is difficult, use a hammer. A slower tool that produces correct results is faster than removing several walls of buckled siding later.
Common Vinyl Siding Nailing Mistakes
Driving nails too tightly
This is the most common fastening error. Tight nails prevent thermal movement and often produce waves or buckles during warm weather.
Nailing at the end of the slot
A fastener placed at one end of a slot allows movement in only one direction. Center each nail unless a specific accessory instruction requires a different location.
Face-nailing the siding
Driving a nail through the visible face usually restricts movement and creates a potential crack or leak location. Use the designed nailing slots and proper finishing accessories. Face-nailing should occur only where a manufacturer specifically instructs it for an unusual detail.
Stretching panels during installation
Pulling upward on a panel while nailing may distort its profile and make the next course difficult to lock. Engage the lock securely, then let the panel hang naturally.
Using nails that are too short
A nail that barely reaches through foam or sheathing may not resist wind loads. Calculate the complete wall thickness and required substrate penetration before purchasing fasteners.
Ignoring the product manual
Generic advice is useful, but the instructions packaged with the siding control the actual installation. Specialty products can have unique nail patterns, clearance requirements, starter systems, and wind-zone provisions.
Special Conditions That Require Extra Attention
Cold-weather installation
Vinyl becomes less flexible in cold temperatures. Handle panels carefully, make cuts slowly, and preserve the larger expansion clearances specified for cold-weather work. Do not force brittle panels into tight channels.
Hot, sunny walls
Panels heated by direct sunlight may already be expanded during installation. Avoid stretching them, and follow the temperature-based clearance recommendations in the product instructions.
High-wind areas
High-wind applications may require specific siding profiles, closer fastener spacing, structural sheathing, particular nail types, or attachment directly to framing. Use the tested assembly required by the manufacturer and local building authority.
Coastal environments
Salt air accelerates corrosion. Verify whether stainless steel or another upgraded fastener is required. The least expensive nail in the store is not a bargain when it begins creating rust streaks across a new exterior.
Existing siding or foam sheathing
When installing over existing cladding or rigid insulation, create a flat, secure base and use fasteners long enough to reach the approved substrate. Furring, specialized installation systems, or engineering guidance may be necessary.
Quick Vinyl Siding Nailing Checklist
- Use manufacturer-approved, corrosion-resistant fasteners.
- Verify sufficient penetration into framing or a nailable substrate.
- Lock each panel fully without stretching it.
- Start fastening at the center and work toward the ends.
- Place nails in the center of the nailing slots.
- Drive every nail straight and level.
- Leave the required clearance beneath each nail head.
- Follow the specified on-center spacing.
- Allow expansion space inside trim channels.
- Check that each panel slides freely before continuing.
- Keep courses level and accessories plumb.
- Follow local codes and the exact product manual.
Conclusion
The key to nailing vinyl siding correctly is remembering that the panels must remain free to move. Select corrosion-resistant fasteners, provide adequate substrate penetration, center nails in the slots, drive them straight, and leave the specified space beneath each head.
Once a panel is fastened, test it. If it slides gently from side to side while remaining securely supported against the wall, the installation is probably on the right track. If it cannot move at all, stop and correct the fasteners before adding another course.
Careful fastening may take a few additional seconds per nail, but it prevents years of buckling, cracking, and repairs. In vinyl siding work, the best hammer swing is not the hardest one. It is the one that knows when to stop.
Field Experience: Practical Lessons From Nailing Vinyl Siding
One of the first lessons experienced installers learn is that vinyl siding problems often appear long after the person holding the hammer has left. A panel can look perfectly flat on a cool installation morning and begin waving after several hours of direct summer sunlight. That delay makes tight nailing especially deceptive.
A reliable habit is to test every panel immediately after fastening it. Place one hand near the center and slide the panel gently left and right. The movement does not need to be dramatic. It simply needs to confirm that the nails are not pinching the slots. This quick check is easier than inspecting individual nail-head gaps while balancing on a ladder.
Another practical lesson concerns rhythm. Beginners often drive several nails before checking whether the panel is level, fully locked, or properly positioned inside the corner channels. By then, correcting the panel means pulling multiple nails. A better routine is to lock the panel, center it, install one middle nail, check the alignment, and then continue toward the ends.
Hand nailing also provides useful feedback. The hammer reveals whether the nail is entering solid wood, thin sheathing, a void, or unexpectedly hard material. If a nail repeatedly misses a secure substrate, do not angle it sideways and hope for a miracle. Locate framing or create an approved slot where the panel can be secured correctly.
When using a pneumatic nailer, test shots should be treated as part of the installation rather than as wasted time. Air pressure that worked on one wall may overdrive nails on another wall with softer sheathing. A hose connected to a different compressor can also change performance. Professionals pause and recalibrate because repairing an entire elevation is considerably slower than adjusting a depth setting.
Small visual details matter as well. Fasteners may be hidden after the next course is installed, but their placement controls the final appearance. Crooked nails can twist the hem. Uneven pressure can pull one portion of a panel higher than another. An out-of-level starter strip can make every later course look wrong even when each panel is technically nailed correctly.
It is also wise to separate fastening problems from wall-preparation problems. When siding refuses to lie flat, the instinct may be to add more nails or drive existing ones tighter. That can make the condition worse. The actual cause may be bowed sheathing, a protruding fastener, thick flashing, uneven foam, or an accessory installed too tightly. Step back, inspect the wall plane, and correct the obstruction instead of forcing flexible vinyl to disguise it.
Finally, keep several spare panels from the original project. Although this is not directly a nailing technique, it makes future repairs far easier. Colors can fade, profiles can be discontinued, and a replacement panel purchased years later may not match. Store the extras flat, protected from sunlight and excessive heat, and label them with the manufacturer, profile, color, and installation date.
The overall experience can be summarized in one rule: never rush the movement check. Correct vinyl siding installation is a balance between secure attachment and deliberate freedom. The nails resist wind and support the panel; the slots manage temperature changes. When both parts are allowed to do their jobs, the wall stays flatter, quieter, and far less likely to demand an awkward repair conversation later.