There is something deeply satisfying about turning a humble lump of clay into a stylish home accent. It feels a little like magic, except instead of a wand, you use a rolling pin, a cup of water, and maybe the corner of your kitchen table that is currently pretending to be an art studio. DIY clay home decor projects are popular for a good reason: they are affordable, customizable, beginner-friendly, and surprisingly forgiving. If your tray comes out slightly uneven, congratulationsyou have created “organic modern design.”
Clay decor also fits beautifully into today’s biggest interior trends: handmade textures, warm minimalism, earthy colors, sculptural shapes, and personalized accents. Whether you want a handmade jewelry dish, a wavy mirror frame, a candle holder, wall charms, plant markers, napkin rings, or a tiny vase that looks like it belongs in a boutique, clay gives you the freedom to make it yourself without needing a pottery wheel or a kiln.
This guide will walk you through the best types of clay for home decor, essential tools, step-by-step methods, beginner project ideas, finishing techniques, troubleshooting tips, and real-world experience from making clay decor at home. By the end, you may look at every empty corner of your house and think, “That needs a clay object.” This is normal. Welcome to the club.
Why DIY Clay Home Decor Projects Are Worth Trying
DIY clay home decor projects are ideal because they combine creativity with practicality. You can make beautiful items that actually serve a purpose: a tray for keys, a holder for incense, a dish for rings, tags for herbs, ornaments for shelves, or small sculptural pieces for coffee tables. Unlike many crafts that require expensive machines or complicated supplies, clay projects can start with one block of clay and a few household tools.
Another reason clay is so appealing is that it creates texture. Modern home decor often benefits from contrast: smooth glass beside handmade clay, polished metal next to matte ceramics, soft linen beside sculptural shapes. A clay piece adds warmth because it looks touched by human hands. Even small imperfections can make the finished decor feel more personal and high-end.
Clay is also wonderfully adaptable. You can paint it in neutral tones for a minimalist look, use bold colors for playful decor, press leaves into it for botanical texture, carve geometric lines for a modern style, or seal it with a glossy finish for a ceramic-inspired effect. In other words, clay does not demand one aesthetic. It politely asks, “What mood are we in today?”
Choosing the Right Clay for Home Decor
Before you start shaping your masterpiece, choose the right clay. The three most common types for DIY home decor are air-dry clay, polymer clay, and traditional ceramic clay. Each has strengths, limits, and a slightly different personality.
Air-Dry Clay
Air-dry clay is the easiest choice for beginners. It hardens at room temperature and does not require baking or firing. This makes it perfect for decorative bowls, wall hangings, ornaments, plant markers, small trays, sculptural objects, and seasonal decor. It is soft, easy to shape, and usually dries within one to three days depending on thickness, humidity, and brand.
The main thing to remember is that air-dry clay is porous. It should be sealed after drying if you want better durability. However, sealing does not automatically make it fully waterproof, so air-dry clay is best for indoor decorative use rather than outdoor planters or pieces that will sit in water.
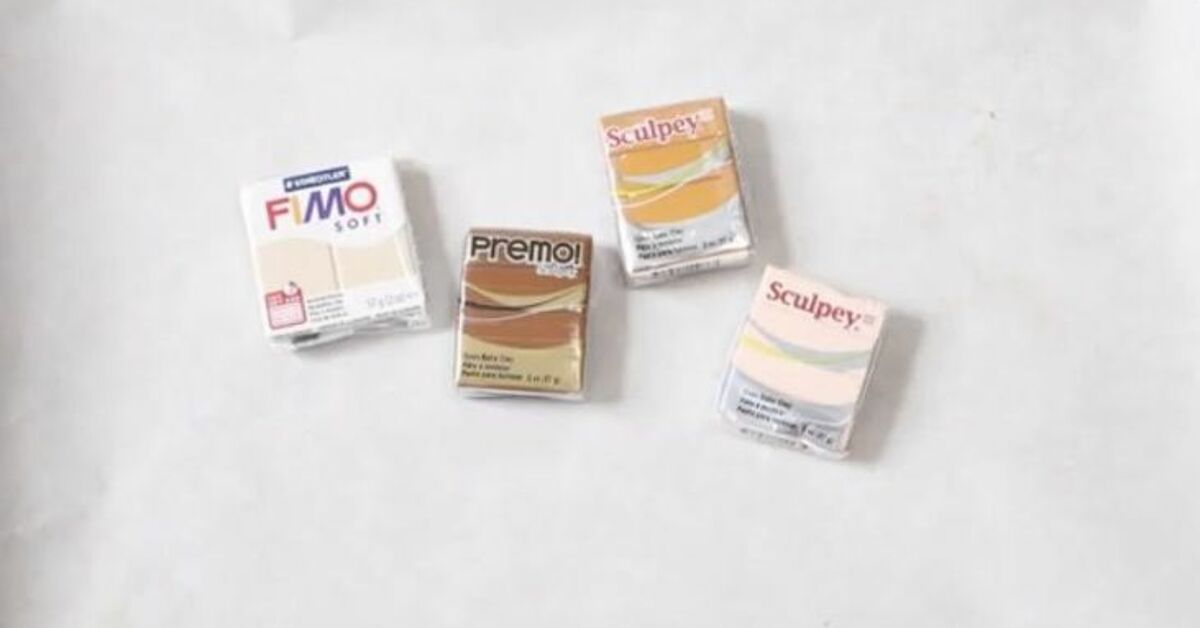
Polymer Clay
Polymer clay is an oven-bake clay that becomes firm after curing. It is excellent for small, detailed projects such as knobs, mini sculptures, jewelry dishes, decorative magnets, incense holders, drawer pulls, and patterned accents. It comes in many colors, so you can create marbled effects without painting.
Always follow the package instructions for baking temperature and time. Many polymer clays cure at low oven temperatures, but exact instructions vary by brand and clay line. An oven thermometer is helpful because home ovens can be dramatic little creatures that claim to be 275°F while secretly planning otherwise.
Traditional Ceramic Clay
Traditional ceramic clay is wonderful, but it usually needs a kiln to become durable and functional. If you have access to a community studio, school pottery room, or local ceramic workshop, this clay opens the door to true pottery: mugs, vases, bowls, tiles, and fired wall art. For most home DIY projects, however, air-dry clay and polymer clay are more convenient.
Basic Supplies You Need
You do not need a professional studio to make clay decor. A beginner setup can be simple and affordable. Start with clay, parchment paper, a rolling pin or smooth bottle, a craft knife, a small bowl of water, sandpaper, acrylic paint, paintbrushes, and a clear acrylic sealer or varnish. Optional tools include cookie cutters, rubber stamps, silicone molds, texture mats, carving tools, gold leaf, painter’s tape, and small dowels.
Many household objects can become clay tools. A drinking glass can cut circles. A fork can create texture. A lace scrap can press in a pattern. A bowl can shape a curved dish. A toothpick can make holes for hanging ornaments. Your kitchen drawer is basically a craft store wearing pajamas.
How to Make DIY Clay Home Decor Projects: Step-by-Step
Step 1: Prepare Your Workspace
Cover your work surface with parchment paper, wax paper, a silicone mat, or a smooth plastic board. Clay can leave residue, and air-dry clay especially can get dusty once it starts drying. Keep a small bowl of water nearby for smoothing, but do not overdo it. Too much water can weaken air-dry clay and make it sticky.
Step 2: Condition the Clay
Knead the clay until it becomes soft and workable. For air-dry clay, this helps reduce cracks and makes shaping easier. For polymer clay, conditioning is essential because it warms the material and makes it flexible. If clay feels too dry, add only a tiny amount of water to air-dry clay and knead gently. Polymer clay should not be softened with water; use proper clay softener if needed.
Step 3: Roll to an Even Thickness
Roll the clay evenly, usually about 1/4 inch thick for trays, ornaments, and wall pieces. If the clay is too thin, it may warp or break. If it is too thick, it may dry slowly and crack. For consistent thickness, place two pencils, chopsticks, or thin wooden strips on either side of the clay and roll over them like guide rails.
Step 4: Shape the Design
Cut or form your design. For a trinket dish, cut a circle or organic blob shape and gently place it inside a shallow bowl to curve upward. For wall charms, cut arches, moons, stars, or abstract shapes. For napkin rings, wrap strips of clay around a cardboard tube covered in parchment paper. For a vase sleeve, build around a clean glass jar rather than trying to make a waterproof clay vessel from air-dry clay.
Step 5: Add Texture and Details
This is where clay decor becomes personal. Press leaves, flowers, lace, shells, stamps, or fabric into the clay. Carve lines with a toothpick or clay tool. Add small clay coils, dots, handles, or raised borders. Keep attachments slightly damp and score both surfaces before joining them. Scoring means scratching tiny lines into the clay so the pieces grip better.
Step 6: Dry or Cure Properly
For air-dry clay, place the piece on a flat surface and let it dry slowly. Flip it gently after several hours so both sides dry evenly. Avoid direct heat, strong sun, or hair dryers, which can cause cracks. For polymer clay, bake according to package instructions and allow it to cool completely before handling. Cooling matters because pieces can still be flexible when warm.
Step 7: Sand, Paint, and Seal
Once dry, sand rough edges with fine-grit sandpaper. Wipe away dust before painting. Acrylic paint works well for most decorative air-dry clay pieces. You can also use paint pens for details, metallic wax for highlights, or a thin wash of color for a stone-like finish. After painting, seal the piece with acrylic varnish, matte sealer, gloss spray, or another craft-safe topcoat suitable for your clay type.
Easy DIY Clay Home Decor Project Ideas
1. Handmade Clay Trinket Dish
A trinket dish is the perfect beginner clay project. Roll out air-dry clay, cut a circle or freeform shape, and place it inside a shallow bowl to curve the edges. Let it dry, sand the rim, paint it, and seal it. Use it for rings, keys, paper clips, or the mysterious little objects that gather on every nightstand.
2. Clay Wall Hanging
Cut clay into arches, half-moons, circles, or abstract shapes. Punch holes before drying, then connect the pieces with cotton cord, leather lace, or twine. Paint in earthy tones like terracotta, cream, olive, taupe, or charcoal. The result is lightweight wall decor with a handmade, gallery-style look.
3. Textured Clay Vase Sleeve
Air-dry clay is not ideal for holding water, but it can beautifully cover a glass jar or bottle. Roll out clay, wrap it around a jar, blend the seam, and add texture with fabric or carving tools. Once dry, paint and seal it. The hidden glass container holds the water while the clay provides the style. Teamwork makes the decor dream work.
4. Clay Candle Holder
Create a simple candle holder by forming a thick clay base and pressing a tealight or taper candle into the center to mark the opening. Remove the candle before drying or baking. Make sure the holder is stable, level, and wide enough to prevent tipping. Use battery-operated candles for the safest decorative option, especially if the piece is painted or sealed.
5. Botanical Imprint Tray
Roll out air-dry clay and press leaves, herbs, or small flowers into the surface. Remove the plant material to reveal the imprint, then shape the clay into a shallow tray. After drying, use watered-down acrylic paint to highlight the texture. This project looks elegant in a bathroom, entryway, or bedroom.
6. Clay Napkin Rings
Cut clay into strips and wrap each strip around a cardboard tube covered in parchment paper. Blend the seam, add texture, and let dry. Paint them in colors that match your table setting. Handmade napkin rings are a small detail, but they make dinner feel intentionaleven if the main course came from a delivery bag.
7. Wavy Clay Mirror Frame
For a sculptural mirror, build a lightweight frame around a small mirror using aluminum foil as the base, then cover it with air-dry clay. Smooth the surface, let it dry fully, sand, paint, and seal. This creates the popular blob-style mirror look without the designer price tag. Keep the clay away from the reflective surface as much as possible, and protect the mirror with tape while painting.
Design Tips for a High-End Look
To make DIY clay decor look more expensive, keep the color palette intentional. Neutrals, muted earth tones, and monochrome finishes often look polished. Try matte white for a ceramic feel, soft beige for a natural look, black for modern contrast, or terracotta for warmth. Metallic accents can work beautifully, but use them sparingly so the piece does not look like it got into a fight with a craft glitter aisle.
Shape also matters. Organic edges, soft curves, arches, fluted ridges, and simple geometric forms tend to look modern. If you are unsure where to start, choose one strong design feature: texture, color, shape, or pattern. Let that feature shine instead of adding every idea at once.
Finally, think about where the piece will live. A clay tray near the front door should be sturdy and sealed. A wall hanging should be lightweight. A vase sleeve should fit tightly around its glass insert. Decor becomes better when beauty and function agree to sit at the same table.
Common Mistakes and How to Avoid Them
Using Clay Too Thickly
Thick clay dries unevenly and may crack. Keep most air-dry clay pieces around 1/4 inch thick unless the project requires more structure. For sculptural pieces, build around a lightweight base such as foil to reduce weight and drying time.
Drying Too Fast
Fast drying can cause cracking or warping. Let air-dry clay dry at room temperature, away from heaters and direct sunlight. Flip flat pieces occasionally and allow airflow on both sides.
Skipping Sanding
Sanding is the difference between “handmade chic” and “I wrestled this out of a craft drawer.” Use fine-grit sandpaper once the piece is dry, especially around edges and seams.
Forgetting to Seal
Unsealed air-dry clay can absorb moisture and dust. A clear sealer protects the surface and gives the finish a more complete look. Choose matte for a natural ceramic effect or gloss for a shiny glazed appearance.
Making Functional Food Items
Most DIY air-dry clay projects are decorative, not food-safe. Avoid using handmade air-dry clay dishes for serving food unless every material, paint, and sealer is clearly labeled food-safe. When in doubt, use clay decor for keys, jewelry, candles, plants, or displaynot snacks.
Best Finishes for Clay Home Decor
The finish changes the mood of a clay piece. Matte sealer creates a soft, modern look. Gloss varnish mimics glazed ceramic. Satin sealer sits between the two and is a great everyday choice. White paint gives a clean gallery style, while beige and stone colors create a calm organic feel. For a rustic finish, dry-brush a darker color into carved lines or textured areas, then wipe the surface lightly.
You can also create faux stone by mixing tiny amounts of black, gray, or brown paint into white clay-colored paint and dabbing with a sponge. For a speckled ceramic look, flick diluted paint onto the piece with a stiff brush. Do this inside a box unless you want your wall to join the project.
of Real Experience: What Making Clay Decor Actually Teaches You
After making several DIY clay home decor projects, you quickly learn that clay has opinions. It may look calm in the package, but the moment you roll it too thin, rush the drying, or forget to smooth an edge, it reminds you that crafting is a partnership, not a dictatorship. The good news is that most mistakes are fixable, and many of them make the final piece more charming.
The first big lesson is patience. Air-dry clay does not care that you want to paint the tray tonight. If it is not fully dry, the paint may trap moisture, the surface may feel soft, or the piece may warp later. Waiting an extra day often leads to a cleaner, stronger result. It is not glamorous, but neither is explaining why your handmade dish now resembles a potato chip.
The second lesson is that simple shapes usually look best. Beginners often want to carve, stamp, paint, marble, attach handles, add dots, and sprinkle metallic accents all on one tiny dish. The result can feel busy. A clean oval tray with one pressed leaf or one painted rim often looks more elegant than a project carrying seven design ideas and a small identity crisis.
Texture is the easiest way to make clay decor look professional. Pressing linen, lace, leaves, or even a rough sponge into clay adds depth without requiring advanced sculpting skills. A textured surface also hides minor unevenness. This is helpful because handmade clay rarely comes out perfectly smooth, and honestly, perfect smoothness is overrated unless you are manufacturing bathroom tiles.
Another practical discovery is that sanding matters more than expected. A project can look average before sanding and surprisingly polished afterward. Edges become softer, small bumps disappear, and paint applies more evenly. Use a gentle hand and wear a dust mask or sand outdoors if possible, because dried clay dust is not something you want floating around your workspace.
Sealing is also worth the effort. Even a basic matte varnish can make a clay object feel finished. It deepens the paint color slightly, protects the surface from fingerprints, and gives the piece a more durable feel. For items that will be touched often, such as key trays or napkin rings, sealing is not just decorativeit is practical.
Finally, clay decor teaches you to look at your home differently. A plain jar becomes a vase base. A scrap of fabric becomes a texture stamp. A small corner shelf becomes a place for a handmade sculpture. DIY clay projects encourage you to create decor that fits your space instead of buying something almost right. And when someone asks where you got that cute little dish, you get the unbeatable joy of saying, “I made it,” while pretending you are very casual about your obvious creative genius.
Conclusion
DIY clay home decor projects are one of the easiest ways to bring personality, texture, and handmade warmth into your space. With air-dry clay or polymer clay, a few basic tools, and a little patience, you can create trays, wall hangings, candle holders, vase sleeves, ornaments, napkin rings, and sculptural accents that look stylish without costing a fortune.
The key is to choose the right clay, keep shapes simple, dry or cure pieces properly, sand rough areas, and finish with paint and sealer. Start small, enjoy the process, and let imperfections become part of the charm. After all, the best handmade decor does not look like it came from a factory. It looks like it has a storyand possibly a fingerprint or two.