If Halloween decorating had a hall of fame, the “witch legs sticking out of something” gag would absolutely have its own glittery plaque. It is funny, instantly recognizable, and just the right amount of dramatic. Now add a cauldron full of candy, and suddenly your décor becomes a snack station with a personality disorderin the best possible way.
This whimsical witch legs cauldron candy stand is part centerpiece, part conversation starter, and part candy command center. It works for a front porch display, a Halloween party buffet, a classroom event, or a cozy little entry table that says, “Welcome, please take a treat and ignore the suspicious footwear.” Better still, it is a flexible DIY project. You can make it cute, spooky, glam, vintage, kid-friendly, or full-on enchanted apothecary chic.
In this guide, you will learn how to build a sturdy witch legs cauldron candy stand, what materials work best, how to style it so it looks intentional instead of accidental, and how to avoid the common mistakes that make a fun craft turn into a leaning tower of Halloween. The result is a practical and playful display that looks more expensive than it really iswhich, frankly, is witchcraft of the highest order.
Why This Halloween Candy Stand Works So Well
A good holiday craft does two things: it looks charming, and it earns its keep. This one does both. The cauldron gives you a deep bowl for wrapped candy, mini treat bags, glow sticks, or party favors. The witch legs create movement and humor. Together, they tell a tiny visual story: one overconfident witch got a little too enthusiastic around her own potion and paid the fashion-forward price.
This design is also easy to personalize. Use striped tights and glitter shoes for a playful look. Go with black-and-purple boots for a classic Halloween palette. Add tulle, ribbon, moss, faux bubbles, battery lights, or a painted sign if you want the display to lean more theatrical. Keep it simple if you prefer a cleaner seasonal accent.
Another reason this project performs so well for SEO-worthy holiday content and real-life decorating alike is that it answers several needs at once. People looking for a Halloween candy stand, witch legs décor, DIY cauldron centerpiece, or easy Halloween crafts are all essentially trying to find a project that is festive, useful, and not wildly complicated. This one checks every box without requiring a garage full of power tools or a theater degree.
Materials You Will Need
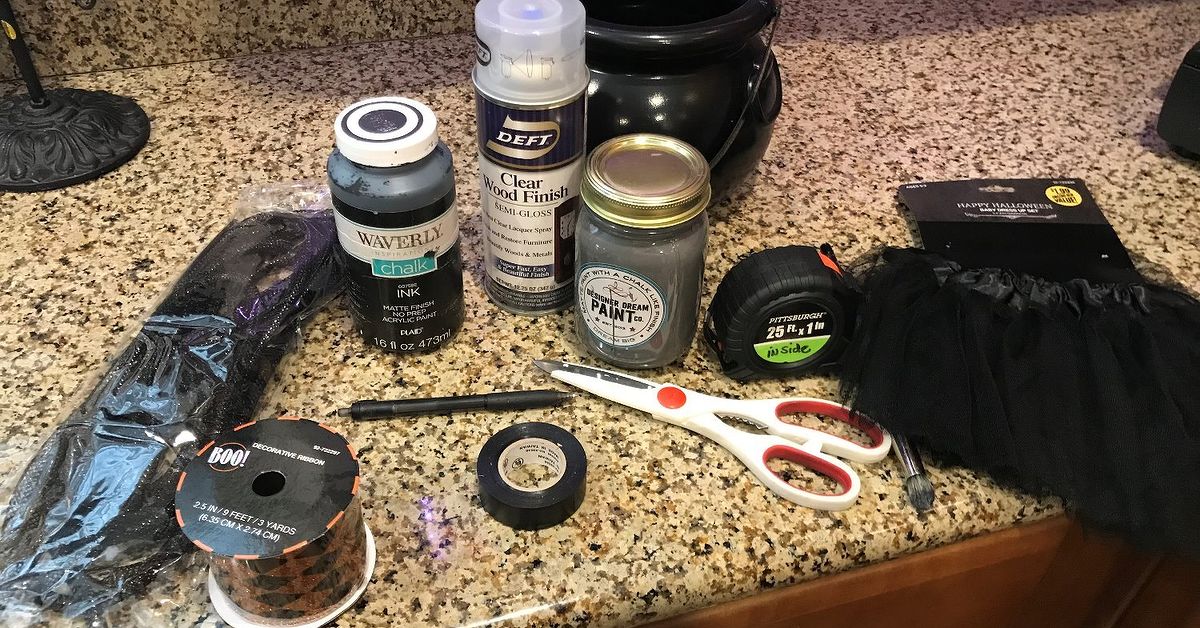
You can keep this project budget-friendly with craft-store basics and a few thrifted finds. Here is a reliable supply list:
- 1 medium or large plastic cauldron
- 1 sturdy base, such as a wood round, tray, plant stand, or thick foam board
- 1 pair of witch legs, doll legs, mannequin-style bendable legs, or DIY legs made from pool noodles, foam, or stuffed tights
- Striped tights, patterned socks, or Halloween fabric
- Mini boots, doll shoes, costume shoes, or painted faux shoes made from foam
- Hot glue gun and glue sticks
- Strong craft adhesive or epoxy for extra hold
- Black spray paint or acrylic paint, if you want to refresh the cauldron or base
- Ribbon, tulle, faux spiders, ribbon roses, glitter stars, or faux moss for embellishment
- Wrapped candy, treat bags, or party favors
- Optional: battery-operated fairy lights, foam balls for “bubbles,” wooden dowels, and clear sealer
Best Material Choices for a Durable Finish
If your stand will live outdoors for part of the season, choose a plastic or resin cauldron rather than thin cardboard. A wood base is more stable than lightweight foam alone, especially if trick-or-treaters, pets, or a strong fall breeze are part of your neighborhood ecosystem. When painting plastic, light prep and thin coats matter. When sealing decorative elements, go for several light protective layers rather than one thick gloopy one. Halloween is campy, but your finish should not look like it melted in a cursed sauna.
How to Make the Witch Legs Cauldron Candy Stand
Step 1: Plan the Size and Shape
Before gluing anything, decide where the stand will go. A tabletop version may only need a 10- to 14-inch cauldron and shorter legs. A porch display can go bigger. Think about scale. If the cauldron is too small for the legs, it looks awkward. If the legs are too tiny, the joke gets lost. You want the proportions to suggest that a delightfully clumsy witch really did tumble into the pot mid-spell.
Place the cauldron on the base and test a few leg angles. Straight up can look funny and cartoonish. A slight bend or crossed-leg pose feels more whimsical and dynamic. This is the stage where you discover whether your vision is “storybook charm” or “fashionably defeated sorceress.” Both are valid.
Step 2: Build or Prep the Legs
If you bought ready-made witch legs, great. You are already winning. If not, you can make your own by stuffing striped tights with polyester fill, plastic bags, pool noodle pieces, or foam tubing. For a cleaner silhouette, insert a lightweight dowel or bendable wire core inside each leg before stuffing. That helps them hold a pose rather than flopping around like overcooked spaghetti.
Attach or create the shoes next. Mini boots are perfect, but you can also craft shoe shapes from foam, papier-mâché, or lightweight plastic forms. Paint them black, purple, emerald, or ruby red if you want a cheeky fairy-tale wink. Add tiny buckles with metallic paper or ribbon for extra charm.
Step 3: Create a Secure Leg Insert
The most important part of the whole project is making the legs look like they are actually emerging from the cauldron. There are two easy ways to do this.
Method one: attach the legs to a foam block or support piece that sits inside the cauldron. This works well if your cauldron is deep enough. Glue the legs to the support, then place the support inside the cauldron and secure it so the legs stand upright.
Method two: cut small slits or openings near the cauldron rim or top insert and fit the legs through. This can create a cleaner, more integrated look. If you use this method, make sure the plastic is sturdy enough and the cuts are neat.
Whichever method you choose, test stability before decorating. If the legs wobble every time someone grabs candy, reinforce the inside with extra foam, wood scraps, or stronger adhesive. A whimsical display should look playful, not medically concerning.
Step 4: Anchor the Cauldron to the Base
Once the legs are secure, attach the cauldron to the base. This gives the entire candy stand a finished look and makes it far less likely to tip. A painted wood round works beautifully because it creates a polished platform. You can leave it plain black, stencil stars or moons on it, or add a ring of moss, leaves, or faux potion drips around the base of the cauldron.
If you want extra height, place the cauldron on a low pedestal, upside-down planter, or decorative stand before attaching it to the base. Height makes the display feel more intentional and turns a basic candy bowl into a true Halloween centerpiece.
Step 5: Paint and Embellish
This is the magical part. If your cauldron looks too shiny, too cheap, or too plain, give it a quick paint refresh. Matte black is classic. A brushed charcoal finish with silver dry-brushing makes it look more antique. Add subtle green around the rim if you want a “bubbling potion” effect.
Decorate the legs and cauldron in a way that supports your chosen style:
- Whimsical: striped tights, glitter shoes, pastel stars, and ribbon bows
- Classic witchy: black-and-orange palette, faux spiders, broom accents, and moons
- Vintage Halloween: muted orange, cream, black, and aged metallic touches
- Kid-friendly: bright colors, smiling ghosts, pom-poms, and candy corn details
You can also glue faux bubbles made from foam balls around the opening or tuck in battery-operated fairy lights to create a glowing “brew.” It is amazing what a few tiny lights can do. Suddenly the whole stand looks like it has a side hustle in stage design.
Step 6: Add the Candy and Final Styling
Line the inside of the cauldron with tissue paper, shredded paper filler, or a removable bowl insert if you want easier cleanup. Then fill it with wrapped candy, lollipops, mini chocolates, or spooky snack bags. Wrapped treats are the cleanest choice, especially for outdoor displays or parties with lots of little hands.
Finish the scene with nearby décor that supports the story. A mini broom, stack of spell books, crooked sign, faux ravens, black roses, or tiny pumpkins can frame the stand beautifully. Keep the styling balanced. The witch legs should be the star, not buried under fourteen competing accessories and one emotionally intense plastic spider.
Creative Variations to Try
Tabletop Party Version
Use a smaller cauldron, glittery shoes, and a pretty ribbon around the base. This version works well on dessert tables, classroom parties, or office snack stations. It feels festive without taking over the entire zip code.
Front Porch Trick-or-Treat Version
Go bigger with longer legs, a weighted base, weather-friendly materials, and a generous bowl of candy. Add string lights or a lantern for visibility. This version doubles as porch décor and candy distribution headquarters.
Glam Witch Version
Think black, gold, plum, and a scandalous amount of glitter. Use velvet ribbon, metallic stars, and elegant boots. This is the version for people who like their Halloween with a side of fabulous drama.
Farmhouse Halloween Version
Swap bright glitter for softer textures like burlap ribbon, muted stripes, moss, distressed black paint, and cream pumpkins. The witch still crashed into the cauldron; she just did it in a more curated seasonal palette.
Common Mistakes to Avoid
Making it top-heavy: If the legs are too heavy for the cauldron and base, the stand may tip. Add weight to the bottom or widen the base.
Using unsealed materials outdoors: If you plan to display it outside, protect paint and decorative paper from moisture.
Overfilling the cauldron: Candy is heavier than it looks. Leave enough room so the bowl still feels balanced and the legs remain the visual focal point.
Skipping a test fit: Dry fitting before glue saves time, nerves, and the deeply humbling experience of peeling off crooked witch knees.
How to Style the Finished Candy Stand for Maximum Charm
The easiest way to make this DIY look polished is to treat it like a vignette, not just a bowl of candy with legs. Place it on a tray, runner, crate, or riser. Add one or two supporting pieces with varied height. Use textures such as moss, mesh, tulle, or leaves. Repeat your accent color in at least two places so the whole setup feels connected.
For example, if the witch shoes are glittery purple, repeat purple in a ribbon or faux floral pick nearby. If the base includes stars, echo that shape on a tag or sign. These tiny styling choices make the project feel more finished and more photographable, which matters if the candy stand is destined for a party table, social post, or holiday blog feature.
Conclusion
A whimsical witch legs cauldron candy stand is one of those rare Halloween crafts that is genuinely fun to make, useful once it is done, and cute enough to reuse year after year. It turns a simple candy bowl into a scene. It gives your décor humor, motion, and character. And best of all, it can be as easy or as elaborate as you want it to be.
Whether you go with striped stockings and glitter shoes or a moodier spell-caster look, the secret is balancing charm with structure. Use a sturdy base, secure the legs properly, keep the scale proportionate, and add only the decorations that support your theme. Do that, and your finished piece will look less like a last-minute craft scramble and more like a mischievous little Halloween masterpiece.
In other words, your candy stand will not just hold treats. It will steal the show while doing it.
Experiences and Lessons From Making a Witch Legs Cauldron Candy Stand
One of the most interesting things about making a witch legs cauldron candy stand is how quickly the project teaches you the difference between “cute in my head” and “actually works in real life.” On paper, it sounds simple: put legs in a cauldron, add candy, done. But once you begin, you realize that the charm comes from all the little decisions. The angle of the legs changes the whole personality of the piece. Straight legs look funny and bold. Bent legs feel more animated, like the witch is still trying to negotiate with gravity. Even the shoes matter more than expected. A pointy black shoe creates a classic storybook look, while a glitter heel makes the whole thing feel like Halloween crashed into a costume closet and decided to stay.
Another memorable part of the experience is how forgiving the project can be. This is not one of those crafts where one crooked line ruins everything. In fact, a bit of imperfection often makes it better. A slightly uneven bow, a deliberately weathered paint finish, or a crooked little sign can make the display feel more whimsical and alive. That is part of the fun. You are not building museum furniture. You are building a playful scene. The freedom to be a little messy, a little dramatic, and a little weird is honestly refreshing.
People also tend to underestimate how much this project changes once candy is added. Before the treats go in, it looks like décor. After the treats go in, it becomes interactive. Kids immediately understand what it is. Adults usually laugh first and then ask where you bought it. That reaction is one of the most satisfying parts of the experience, because it feels handmade in the best way. It has personality. It invites people to come closer. It does what good holiday décor is supposed to do: it makes the space feel festive, memorable, and just a little magical.
There is also a practical lesson hidden in the process: sturdy always beats speedy. The first instinct is often to glue everything fast and hope the Halloween spirits handle the rest. Sadly, the spirits are unreliable contractors. Taking the extra time to reinforce the legs, test the balance, and anchor the cauldron properly makes a huge difference. That is especially true if the stand will sit on a porch, near a doorway, or anywhere people will keep reaching for candy. A stable display looks better and lasts longer, and that means you can bring it back each year with just a few fresh touches.
Perhaps the best experience of all is how easy it is to adapt the project to your own style. Some crafters lean full sparkle, with tulle, lights, and shoes that look ready for a broomstick runway. Others prefer a more classic black-and-orange setup with ravens, moss, and old-book vibes. Both approaches work. That flexibility makes the project feel personal rather than generic. By the time it is finished, the candy stand does not just look like a Halloween decoration. It looks like your Halloween decorationyour humor, your color palette, your level of spooky commitment.
And that is really the magic of this craft. It starts as a silly idea and ends as a surprisingly effective piece of seasonal décor. It is useful, photogenic, fun to customize, and memorable enough that people talk about it long after the candy disappears. Which, for a cauldron project involving a fictional witch’s legs, is a pretty impressive résumé.