Note: This article is written for web publishing in standard American English and synthesizes practical DIY guidance from real home, garden, hardware, and decorating references.
If you have an old tomato cage sitting in the garage looking like it retired from garden duty in 2019, congratulations: you may already own the base of your next patio side table. A tomato cage side table DIY is one of those wonderfully sneaky projects that feels almost too simple to count as furniture making. You take a wire tomato cage, trim it to the right height, give it a fresh finish, add a tabletop, and suddenly your sad little plant-support cone becomes a stylish spot for iced tea, a book, a citronella candle, or the snack bowl everyone pretends not to hover around.
This project is affordable, beginner-friendly, and highly customizable. It works for patios, balconies, porches, garden corners, sunrooms, and even indoor spaces if you want a lightweight accent table or plant stand. Better yet, it gives new life to a common garden item that often gets bent, forgotten, or shoved behind the lawn tools like a wire skeleton from last summer’s tomato dreams.
In this guide, you’ll learn how to make a tomato cage side table DIY from start to finish, including what materials to use, how to choose the right cage, how to attach the tabletop securely, and how to make the finished piece look intentional instead of “I found this in the shed and hoped for the best.”
Why a Tomato Cage Makes a Great Side Table Base
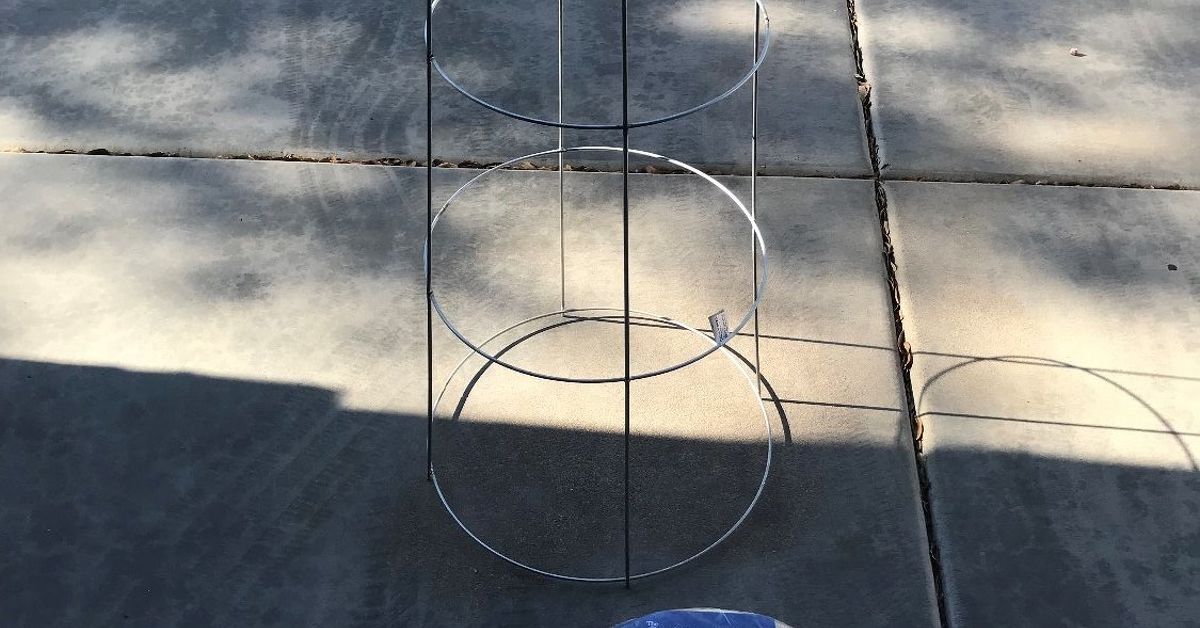
A tomato cage is already shaped like a furniture base. Most round wire cages have circular rings connected by vertical supports, which means they naturally create a tapered pedestal form. Flip it, trim it, paint it, and it can look surprisingly modern. The open wire design also keeps the table visually light, which is perfect for small patios or balconies where bulky furniture can make everything feel cramped.
Another benefit is cost. A new tomato cage is usually inexpensive, and if you already have one, the base is essentially free. The tabletop can be made from a wood round, a small cutting board, a salvaged tray, a concrete paver, or even a thick serving platter, depending on the look you want. That flexibility is what makes this DIY tomato cage table so appealing: farmhouse, boho, modern, coastal, cottagecore, desert-chic-with-a-lemonadepick your personality and paint accordingly.
There is one important reality check, though: this is a lightweight side table, not a dining table, footstool, or place to display your bowling ball collection. Use it for drinks, plants, lanterns, small decor, and everyday patio items. For heavier use, choose a thick-gauge tomato cage, a sturdy tabletop, and add weight or reinforcement at the base.
Materials You’ll Need
You can make this project with basic tools and a weekend afternoon. The exact supplies depend on your design, but the following list covers the most reliable version.
Basic supplies
- One round wire tomato cage, preferably heavy-gauge metal
- One wood round, serving tray, or tabletop piece, about 14 to 20 inches wide
- Wire cutters, bolt cutters, or a hacksaw
- Work gloves and safety glasses
- Sandpaper or sanding block
- Metal primer or bonding primer
- Spray paint suitable for metal and outdoor use
- Exterior wood stain, paint, or clear sealer for the tabletop
- Small screws, conduit straps, metal brackets, fence staples, or pipe straps
- Drill or screwdriver
- Measuring tape
- Drop cloth or cardboard for painting
Optional upgrades
- Felt pads or rubber feet for indoor use
- Clear spray sealer for extra paint protection
- Construction adhesive for added tabletop grip
- Decorative rope, jute, or macrame cord
- Small sandbag, paver, or planter to weigh down the base
- Outdoor-rated screws if the table will live outside
Step 1: Choose the Right Tomato Cage
Not all tomato cages are created equal. Some are sturdy enough to wrangle a monster tomato plant through August. Others bend if you look at them with mild disappointment. For a side table, choose a cage made from thicker wire. A heavy-gauge cage gives the table better balance and helps prevent wobbling.
Round cages are the easiest to turn into a side table because the rings provide a natural support structure for a round tabletop. Square cages can work too, but they usually look more industrial and may need a square or rectangular top to feel balanced. If you plan to use the table outdoors on grass or soil, you can keep the pointed legs and push them into the ground. If you want the table for a patio, deck, balcony, or indoor space, cut off the pointed legs so the bottom sits flat.
Step 2: Decide the Table Height
Before cutting anything, decide where the table will live. A side table next to a patio chair usually works well at about 18 to 24 inches tall. A plant stand can be taller. A low garden drink table can be shorter. The key is to match the table height to the furniture around it.
Place the tomato cage upside down and test different heights. Many tomato cages have several circular rings, so you can cut the cage just above or below a ring to create a stable base. A table that uses two rings often feels sturdier than one that keeps the entire tall cage. Shorter usually means more stable, especially if the tabletop is wide.
Mark your cut points with painter’s tape or a marker. Try to cut each vertical wire at the same height so the finished base does not wobble. This is one of those steps where measuring twice saves you from muttering creative things in the driveway later.
Step 3: Cut the Tomato Cage
Put on gloves and safety glasses before cutting the wire. Tomato cage wire can be sharp after cutting, and nobody wants their cute patio project to come with a tiny metal revenge plot.
Use heavy-duty wire cutters, bolt cutters, or a hacksaw to trim the cage to your chosen height. If the wire is thick, you may need to score it, bend it back and forth, and then snap it cleanly. After cutting, check for sharp ends. File or sand any rough metal edges, especially if the table will be used around kids, pets, or bare summer legs.
If you want a flat-bottom table, cut off the pointed stakes completely. If the table will sit in a garden bed, you can leave the stakes in place and push them into the soil for extra stability. For a patio or indoor table, the bottom ring should act as the foot of the table.
Step 4: Clean and Prep the Metal
Spray paint sticks best to a clean, slightly scuffed surface. Wipe the tomato cage with a damp cloth to remove dirt, dust, and garden residue. If the cage has rust, use sandpaper or a wire brush to remove loose rust and flaky spots. Let the cage dry completely before painting.
If the wire is very shiny or slick, lightly sand it so the primer has something to grip. You do not need to attack it like you are training for a sanding Olympics. A gentle scuff is enough. The goal is better paint adhesion, not a full metal makeover documentary.
Step 5: Prime and Paint the Cage
Place the cage on cardboard or a drop cloth in a well-ventilated area. Use a primer made for metal, especially if the table will stay outdoors. Primer helps paint stick and can reduce the chance of rust. Let the primer dry according to the product directions.
Next, apply spray paint in light, even coats. Hold the can about 10 to 12 inches from the cage and move in smooth passes, slightly overlapping each stroke. Several thin coats look better and last longer than one heavy coat that drips like a sad birthday candle. Rotate the cage as you work so you reach the underside of the rings and vertical wires.
Color choice is where this project gets fun. Matte black gives a modern look. White feels fresh and coastal. Sage green blends into a garden. Bright yellow, coral, cobalt, or tomato redyes, tomato red is allowedcan turn the table into a cheerful accent piece. For a more elegant indoor version, try brushed gold, bronze, or soft champagne metallic paint.
Step 6: Prepare the Tabletop
A round wood tabletop is the most common choice for a DIY tomato cage side table. You can buy a precut wood round at many craft or home improvement stores, or cut your own from plywood. A 14-inch top works for a petite drink table, while an 18- to 20-inch top provides more usable surface area. Just remember: the wider and heavier the top, the more stability the base needs.
Sand the tabletop until smooth, especially around the edges. If you want a natural wood look, apply exterior stain and a clear outdoor sealer. If you prefer color, use paint followed by a protective topcoat. For outdoor use, seal all sides of the wood, including the underside. Moisture does not politely attack only the pretty side.
You can also use alternative tops. A metal tray makes the table removable and easy to clean. A concrete paver creates a modern garden look and adds weight, though it needs a strong cage. A thick bamboo tray can feel spa-like. A painted wood circle with a stenciled pattern adds personality without requiring advanced carpentry skills.
Step 7: Attach the Tabletop
Flip the tabletop upside down on a soft surface. Center the tomato cage on the underside of the top. Take a moment to check the alignment from several angles. A centered base makes the finished side table look professional and helps prevent tipping.
There are several ways to attach the cage:
- Metal conduit straps: These curved straps fit over wire and screw into the tabletop. They are secure and easy to adjust.
- Small metal brackets: Brackets can hold the ring in place if positioned evenly around the top.
- Fence staples: These can work for thicker wood tops, but they are less adjustable than straps.
- Construction adhesive plus straps: Adhesive can reduce shifting, but mechanical fasteners are still recommended for strength.
Use at least three or four attachment points around the ring. Pre-drill small pilot holes so the wood does not split. Make sure the screws are short enough that they do not poke through the tabletop. Nothing ruins a DIY victory lap faster than discovering your screws have created tiny metal volcanoes on the serving surface.
Step 8: Test for Stability
Turn the table upright and place it on a flat surface. Gently press on different edges of the tabletop to check for wobble. If it rocks, inspect the bottom ring and trimmed wire ends. You may need to bend the base slightly, add rubber feet, or adjust the attachment points.
For outdoor use, consider adding weight at the bottom. A small round paver, decorative stone, or low planter placed inside the base can help anchor the table. If the table will sit in soil, leaving the cage legs longer and pushing them into the ground creates a more secure garden version.
Design Ideas for Your Tomato Cage Side Table
Modern black and natural wood
Paint the cage matte black and seal the tabletop with a warm wood stain. This is the easiest way to make the project look store-bought. Pair it with neutral patio cushions, terracotta pots, and a lantern for a clean outdoor lounge look.
Boho rope-wrapped table
Wrap jute rope around one or two rings of the tomato cage after painting. Secure the ends with hot glue or silicone adhesive. Add a light wood top and a potted fern nearby. Suddenly your $10 garden cage has main-character energy.
Color-pop balcony table
Choose a bold paint color like teal, coral, lemon yellow, or sky blue. Keep the tabletop simple with white paint or clear-sealed wood. This version works beautifully on small balconies where one bright piece can wake up the whole space.
Garden plant stand table
Use a slightly smaller tabletop and place a trailing plant on top. Let the plant spill through the wire base for a soft, garden-inspired effect. This option is ideal for porches and sunrooms.
Common Mistakes to Avoid
The first mistake is using a flimsy tomato cage. Thin wire may be fine for small plants, but it can wobble under a tabletop. Choose the strongest cage you can find, especially for outdoor use.
The second mistake is skipping primer. Paint may look good at first, but without proper prep it can chip quickly, especially if the table sits outside. Clean, scuff, prime, paint, and seal. It sounds like a lot, but most of the time is drying time, which is basically DIY’s way of telling you to have a snack.
The third mistake is choosing a tabletop that is too large. A huge top on a narrow wire base can tip easily. Keep proportions sensible. If you want a wider top, use a shorter cage and add weight to the base.
The fourth mistake is not sealing the wood. Outdoor moisture can warp, stain, or damage unprotected wood. Seal the top, bottom, and edges so the tabletop survives more than one season.
How to Care for Your DIY Tomato Cage Table
Keep your tomato cage side table clean by wiping it with a soft cloth and mild soap when needed. Avoid leaving standing water on a wood top. If the table sits outdoors year-round, refresh the clear sealer as needed and touch up paint chips before rust gets comfortable.
During storms or high winds, move the table to a sheltered spot. It is lightweight by design, which is convenient when you want to rearrange the patio but less convenient when the weather decides to redecorate your yard. If you live in a windy area, keep the base weighted or use the table in a protected corner.
Budget Breakdown
This tomato cage side table DIY can be very inexpensive. If you already own a tomato cage and scrap wood, you may only need paint and screws. A typical budget might look like this:
- Tomato cage: $5 to $15
- Wood round: $8 to $25
- Spray primer and paint: $10 to $20
- Fasteners or brackets: $3 to $8
- Wood sealer or stain: $8 to $20
That means many people can make one table for around $30 to $60, depending on what they already have. Compared with buying a new outdoor side table, this project is budget-friendly and gives you the satisfaction of saying, “Thanks, I made it,” which is the DIY equivalent of a mic drop.
of Real-World Experience: What Actually Matters When Making This DIY
After making or studying projects like this, the biggest lesson is that stability matters more than decoration. It is tempting to focus on the paint color first because that is the fun part. A bright tomato cage side table looks adorable in photos, especially with a cute drink, a plant, and maybe a book placed just casually enough to suggest you live a calm and beautifully hydrated life. But the real success of the project comes from choosing a strong cage, cutting it evenly, and attaching the tabletop securely.
A thicker tomato cage makes the entire table feel better. Lightweight cages can work, but they are better for tiny plant stands or decorative indoor corners. For an outdoor side table that will hold drinks, candles, and the occasional plate of snacks, a heavier cage is worth it. The table does not need to weigh as much as a cast-iron bench, but it should not wobble every time someone sets down a glass of lemonade.
Another practical lesson is to test the tabletop size before committing. Place the top on the cage temporarily and step back. If it looks like a giant hat on a tiny wire body, go smaller or shorten the cage. Proportion makes the difference between “modern accent table” and “craft project that escaped supervision.” In most cases, a round top between 14 and 18 inches looks balanced. If you go larger, use a shorter cage and add bottom weight.
Paint also deserves patience. Rushing spray paint is the easiest way to create drips, sticky spots, and uneven color. Light coats are your friend. Let each coat dry properly. If you are painting outside, avoid windy days unless you enjoy wearing half the paint yourself. A cardboard box can work as a simple spray shelter for smaller cage sections, and it helps control overspray.
For the tabletop, sealing the underside is a small detail that makes a big difference. Many beginners seal only the top because that is the part people see. But outdoor moisture creeps in from every direction. Seal the top, underside, and edges, especially if you use plywood or pine. If you want the table to last, treat the hidden parts with the same respect as the pretty parts.
Finally, think about where the table will actually live. On grass, leaving short stakes can help anchor it. On a deck or tile patio, rubber feet can prevent scratching and reduce wobble. Indoors, felt pads are useful. Near a pool, choose rust-resistant paint and expect to do touch-ups. On a windy balcony, weight the base or tuck it beside a chair. A tomato cage table is charming, affordable, and surprisingly stylish, but it is still lightweight furniture. Treat it like a flexible accent piece, not a family heirloom carved by forest elves, and it will serve you well.
Conclusion
Making a tomato cage side table DIY is one of the easiest ways to turn a humble garden supply into a useful piece of decor. With a sturdy wire cage, a sealed tabletop, a few fasteners, and a fresh coat of paint, you can create a stylish table for your patio, porch, balcony, garden, or indoor plant corner. The project is affordable, customizable, and friendly to beginners, but it still rewards careful prep. Choose a strong cage, cut evenly, prime the metal, seal the wood, and test the finished table before loading it with decor.
The best part is that this DIY does not need to look homemade in the “please be kind, I tried” sense. With thoughtful color choices and clean finishing, your tomato cage table can look modern, playful, rustic, or elegant. It is proof that good design sometimes starts in the garden aisle, quietly disguised as tomato support.