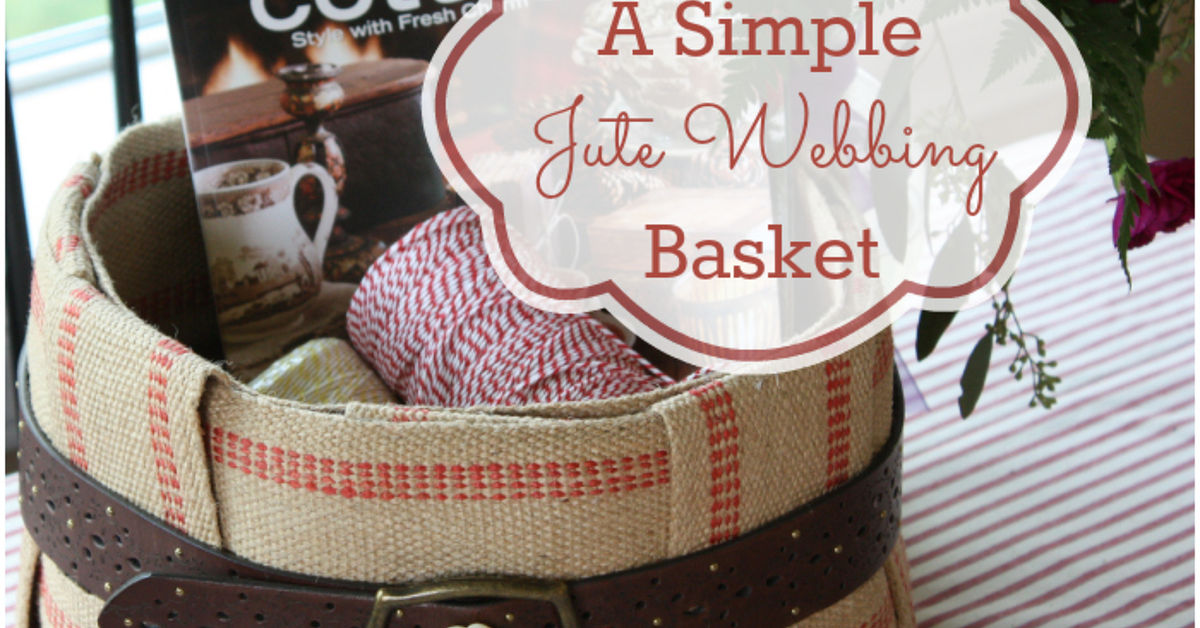
A good basket can hide clutter, hold towels, organize craft supplies, and make a shelf look suspiciously well behaved. The trouble is that attractive woven baskets often cost more than the things placed inside them. Fortunately, you can make a simple jute webbing basket with basic tools, a temporary box mold, and an easy over-under weave.
Jute upholstery webbing is ideal for this project because it is wide, flexible, textured, and visually finished before you begin. Instead of weaving dozens of narrow reeds, you work with broad bands that quickly form a bold checkerboard pattern. The completed basket suits farmhouse, cottage, coastal, bohemian, and relaxed modern rooms.
This tutorial covers sizing, cutting, fray control, weaving, shaping, handles, lining, common mistakes, and practical lessons learned while making the basket.
Why Use Jute Upholstery Webbing?
Jute is a natural plant fiber commonly used in burlap, twine, rugs, sacks, and upholstery materials. Jute webbing is woven into a strong, broad strip, often around 3 to 4 inches wide. Upholsterers traditionally interlace it in an over-under pattern to support chairs and ottomans; the same basic structure gives a decorative basket stability and texture.
This remains a soft-sided storage basket, not a substitute for a wooden crate. It works best for rolled washcloths, yarn, mail, toys, remote controls, faux greenery, or packaged gifts. Use a stronger container for heavy books, wet laundry, loose soil, or a cat who interprets every new object as real estate.
Materials and Tools
- Jute upholstery webbing, preferably 3 to 4 inches wide
- Sharp fabric or heavy-duty scissors
- Measuring tape, ruler, and fabric marker
- Hot glue gun and compatible glue sticks
- Binder clips, clothespins, or small craft clamps
- A rectangular box or bin to use as a mold
- Optional cardboard, cork, plastic canvas, or thin plywood for the base
- Optional jute twine, cotton rope, leather, fabric, and heavy thread
For a medium basket about 12 inches long, 9 inches wide, and 7 inches high, begin with roughly 8 to 10 yards of webbing. Buy a little extra for overlaps, handles, and the inevitable strip that becomes two inches too short through what can only be described as craft-room sorcery.
Plan the Basket Size
Choose a box or plastic bin close to the desired finished size. It will serve as a temporary mold, keeping the walls upright while you weave and secure them.
Each lengthwise strip must run up one side, across the bottom, and up the opposite side. Crosswise strips travel in the other direction. Add 2 to 3 inches for folding over the rim:
- Long strips: basket length + twice the height + 2 to 3 inches
- Cross strips: basket width + twice the height + 2 to 3 inches
A 12-by-9-by-7-inch basket therefore needs long strips around 29 inches and cross strips around 26 inches. Test one strip in each direction around the mold before cutting the entire batch.
How to Make a Jute Webbing Basket Step by Step
1. Cut and Stabilize the Webbing
Mark straight cut lines and use sharp scissors in one firm motion. Jute frays easily, so seal each raw edge with a narrow line of clear fabric glue or fray-control liquid. A thin bead of hot glue also works, although too much creates a stiff lump. Do not use a flame to seal natural jute.
2. Arrange the Bottom Strips
Place the lengthwise strips side by side on a protected work surface. Keep the preferred face and any colored center stripe oriented consistently. Position the strips closely without overlapping them.
Four 3-inch strips form a base approximately 12 inches wide before small adjustments. When the size does not divide evenly by the strip width, distribute the remaining space equally along both edges rather than leaving one obvious gap.
3. Weave the Cross Strips
Pass the first cross strip over the first long strip, under the second, over the third, and so on. Reverse the sequence for the next row: under, over, under, over. Continue until the center forms a flat checkerboard.
Slide each row snugly against the previous row and check the base with a ruler. The weave should be firm but flat. Add tiny dots of hot glue beneath a few intersections near the perimeter so the grid does not shift during shaping. Traditional upholstery also relies on interlaced webbing to distribute support across a frame.
4. Add a Firm Base if Desired
Cut cardboard, cork, plastic canvas, or thin plywood slightly smaller than the woven bottom. Cover it with canvas or felt for a neater finish. You can glue it in place or leave it removable for easier replacement.
A rigid insert helps the basket sit flat, prevents small objects from dipping into the weave, and protects furniture from scratchy fibers.
5. Raise the Walls Around the Mold
Center the woven base beneath the box. Fold the loose strips upward against opposite sides and clip them near the top. Keep every strip vertical and preserve the spacing established in the bottom.
At the corners, allow strips from adjoining sides to meet or overlap slightly. Flatten the layers with your fingers and distribute the bulk evenly. Aim for a tailored fold, not a sleeping bag being forced back into its storage sack.
6. Weave Horizontal Side Bands
Cut webbing long enough to circle the basket with at least a 1-inch overlap. Near the bottom, weave the first band over and under the upright strips. Reverse the pattern on the next row and keep each band level.
Broad upholstery webbing can be less cooperative around sharp corners than narrow reed. If one continuous band becomes bulky, use two pieces and hide the joints at opposite corners. Glue or stitch the overlaps, then push every row down against the row below it.
Continue until the sides reach the desired height. Leave at least 1 inch of upright webbing above the final horizontal band for finishing the rim.
7. Reinforce Seams and Corners
Remove one clip at a time and glue concealed overlaps. Press with scrap cardboard or a wooden craft stick instead of a finger; hot glue is remarkably good at securing fibers and teaching immediate respect for temperature.
For a basket that will be handled regularly, reinforce the corners and band joints with heavy upholstery thread. A small box stitch, X stitch, or bar tack prevents repeated movement from loosening the adhesive.
8. Finish the Upper Rim
Fold the exposed upright ends inward over the final horizontal row. Trim them evenly, seal the cut edges, and glue them inside the basket.
Wrap another strip of webbing, cotton rope, or jute braid around the top for a cleaner outline. Hide the joint at the back. This rim band covers raw ends and helps prevent the sides from flaring outward.
9. Add Handles
Cut two equal lengths of webbing, rope, or leather. A finished loop measuring 6 to 8 inches works well on a medium basket. Fold the raw ends under and position the handles symmetrically.
Place an extra webbing patch behind each handle end, then glue and stitch through all layers in a square with an X through the center. The patch spreads the pulling force across the wall. Treat these as decorative, light-duty handles and test them before carrying the basket near anything fragile or expensive.
10. Remove the Mold and Refine the Shape
Slide out the box carefully. Press the corners from the inside, straighten uneven rows, insert the base panel, and trim fuzzy fibers with small scissors. Do not pull loose fibers because that may disturb the weave.
Allow adhesives to cure according to their labels before filling the basket. If the walls bow outward, return the mold to the basket and loosely wrap a belt or ribbon around it until the seams have set.
Add an Optional Fabric Liner
A cotton or canvas liner gives the basket a soft interior and stops small items from poking through openings. Sew a simple box-shaped liner, fold its top edge over the rim, and attach it with hidden stitches, snaps, or hook-and-loop tape.
A removable liner is useful for children’s supplies or crumb-producing items. Keep natural jute away from standing water. When using the basket as a planter cover, place the plant in a waterproof pot with a saucer or plastic barrier because prolonged moisture can damage woven natural materials.
Common Problems and Fixes
The Weave Shifts
Clip the perimeter and glue a few base intersections before lifting the walls. A nonslip mat also keeps the entire grid from skating across the table.
The Sides Flare Outward
Keep the mold inside until the adhesive cures, maintain even tension in the horizontal bands, and reinforce the top rim.
The Corners Are Bulky
Stagger seams instead of stacking every overlap in one location. Trim only hidden excess, then clamp the corner flat while it sets.
The Basket Is Too Soft
Add a rigid bottom, reinforce the corners with stitches, double the rim band, or place fabric-covered cardboard panels against the interior walls.
Customization Ideas
Paint a black or cream stripe, stencil a number, attach a leather label, add wooden beads, or thread cotton cord through selected openings. A low basket works as a tabletop organizer, while a tall version can hold hand towels. Small baskets make attractive containers for candles, snacks, gardening gifts, or spa products.
Keep decoration proportional to the basket’s job. Tassels look delightful on a shelf display but can become tiny dust mops on a bin pulled from a closet every day.
Safety, Cleaning, and Care
Use the glue gun on a heat-resistant surface, keep the nozzle away from skin, and unplug it after use. Ventilate the workspace when applying adhesives, paints, or sealants, and follow every product label. Hot-melt equipment can cause burns, while some adhesives produce fumes or present skin-contact hazards.
Clean the basket with a soft brush, lint roller, or low-suction vacuum attachment. Blot small marks with a barely damp cloth and dry promptly. Avoid soaking or machine washing the basket.
Experience-Based Lessons From Making a Jute Webbing Basket
The first time I tried this project, I skipped the mold because the flat base looked perfectly square. I assumed the walls would rise politely at 90-degree angles. They did not. One leaned outward, another curled inward, and the finished piece resembled a rustic nacho bowl. It still held yarn, but it had strong opinions about geometry.
A cardboard shipping box transformed the second attempt. It held the corners in alignment, provided a solid surface for clips, and made it obvious when a horizontal row started climbing uphill. Drawing a level guideline around the box before weaving the walls made the final rim much neater.
I also learned not to cut every strip from the original calculations alone. Webbing thickness, corner folds, and the chosen rim style change the required length. Now I cut one long strip and one cross strip, fit them around the mold, confirm the overhang, and only then cut the remaining pieces. That small test prevents several yards of webbing from becoming oversized rustic bookmarks.
My early approach to adhesive was equally enthusiastic and equally wrong. I applied thick rivers of hot glue, which held well but created hard bumps and visible squeeze-out. Smaller beads produced cleaner seams. I began using glue for immediate positioning and hand stitches for lasting reinforcement, especially at corners and handles.
Clips turned out to be essential. Binder clips controlled thick corner folds, while clothespins held the upper bands without crushing the texture. Leaving them in place until the glue cooled completely saved me from repeated repairs and from delivering the traditional crafter’s speech, “Why is this attached to my sleeve?”
The basket looked far more professional when I paid attention to the face of the webbing. Some upholstery webbing includes a colored stripe or slightly different textures on each side. Keeping the stripe centered and the preferred face outward made the entire pattern feel intentional.
A fabric-covered bottom insert was another worthwhile improvement. Without one, pencils and small containers tilted into the woven gaps, and the base flexed when lifted. Corrugated cardboard wrapped in canvas worked for a decorative basket. For frequent use, plastic canvas or thin plywood would provide greater durability.
The most important lesson was to accept modest irregularities. Jute is coarse, its edges are not laser-cut, and handmade weaving naturally varies. A tiny shift or fuzzy fiber adds character. The project succeeds when the weave is reasonably square, the seams are secure, and the rim is tidynot when it looks as though a machine produced it under fluorescent supervision.
For a first attempt, I recommend a medium rectangular basket with a base around 12 by 9 inches. Tiny baskets require fussy folds, while oversized baskets demand more reinforcement. A medium version is forgiving, useful, and large enough to make the weaving sequence easy to understand. After completing it, adapting the same method to trays, square bins, and gift baskets becomes much simpler.
Conclusion
Making a simple jute webbing basket comes down to careful measuring, an even over-under weave, controlled shaping around a mold, reinforced seams, and a clean rim. Add a liner, handles, or decorative details to match your room, but allow the natural texture to remain the main attraction.
The finished basket may not support encyclopedias or an ambitious cat, but it can organize everyday clutter with more charm than a plastic bin. It also provides the satisfying answer to a future compliment: “ThanksI made it.”
Note: This original tutorial was developed by synthesizing practical guidance from established U.S. upholstery, woodworking, craft, home-improvement, and workplace-safety resources, then adapting those principles for a lightweight decorative basket.