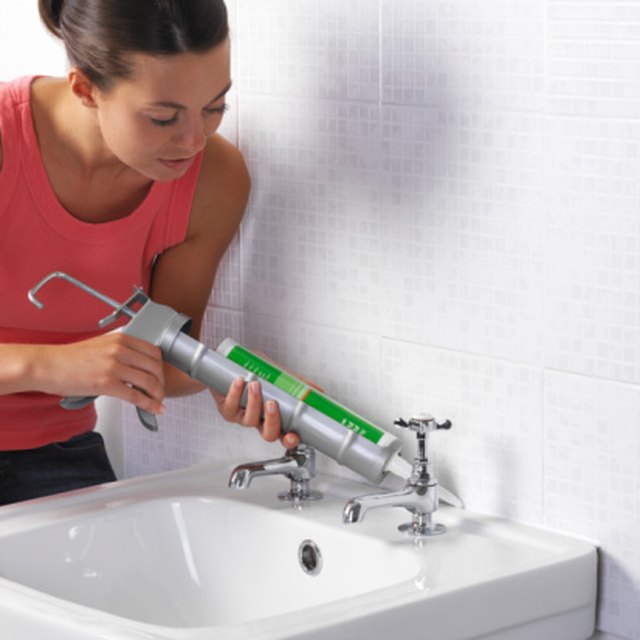
Sealant has a sneaky way of turning a “quick little project” into a waiting game. You apply a neat bead around the bathtub, window, sink, gutter, or trim, admire your craftsmanship for six proud seconds, and then reality taps you on the shoulder: “Now don’t touch it for 24 hours.” Delightful.
The good news is that you can help sealant dry faster without ruining the job. The bad news is that you cannot magically force every sealant to cure in ten minutes unless the product was designed for that. Sealant is chemistry, not instant noodles. Still, with the right product, surface prep, airflow, temperature, humidity control, and bead size, you can reduce delays and avoid the sad, sticky mess that happens when someone uses the shower too soon.
This guide explains how to dry sealant fast, what actually speeds up curing, what slows it down, and which “clever hacks” should be politely escorted out of your toolbox.
Drying vs. Curing: The Difference That Saves Your Project
Before talking about how to speed things up, let’s clear up the most common confusion: drying and curing are not the same thing.
Drying usually means the surface of the sealant is no longer wet, tacky, or easy to smear. It may feel dry to the touch, but that does not mean the bead is ready for water, pressure, scrubbing, or paint.
Curing means the sealant has fully changed into its final durable, flexible, waterproof form. This is the stage that matters most for performance. A sealant can feel dry on top while remaining soft underneath, like a brownie pulled from the oven too early. Tempting? Yes. Structurally wise? Not so much.
Many silicone, acrylic latex, and hybrid sealants become tack-free within 30 minutes to a few hours, but full cure commonly takes 24 hours or longer. Some specialty products cure in 24 to 72 hours, while certain synthetic rubber or polyurethane sealants may need several days. Always check the tube or technical data sheet because the label is the boss, even if your impatience has excellent arguments.
What Makes Sealant Dry Faster?
Sealant drying speed depends on four main factors: the formula, the temperature, the humidity, and the size of the bead. Airflow and surface preparation also play a major role. If one of these is wrong, drying time can stretch from “later today” to “why is this still sticky?”
1. Choose a Fast-Drying or Fast-Cure Sealant
The fastest way to dry sealant fast is to buy a product made to dry fast. That sounds obvious, but many people grab the first tube that says “waterproof” and later discover it needs 48 hours of peace, quiet, and emotional support.
For bathrooms, kitchens, windows, and doors, look for terms such as:
- Fast dry
- Fast cure
- Water-ready in 30 minutes
- Paintable in 30 minutes
- Shower-ready
- Rain-ready
Some 100% silicone sealants are water-ready in as little as 30 minutes under ideal conditions, usually based on a small bead at around 70°F and moderate humidity. That does not always mean the product is fully cured in 30 minutes. It means it may tolerate water exposure sooner than standard formulas. Read that again before you throw a pool party in your freshly sealed shower.
2. Apply a Smaller, Cleaner Bead
Sealant dries faster when it is applied in the correct amount. A thick, oversized bead takes longer to cure because the inside of the bead needs time to react, release moisture, or evaporate solvents depending on the formula.
For most household joints, cut the nozzle at a 45-degree angle and make the opening only as large as the gap requires. A bead that is too large is not “extra protection.” It is usually just extra waiting, extra mess, and extra opportunity for your finger to create modern art on the tile.
If the joint is deep, use backer rod before applying sealant. Backer rod fills space behind the sealant, controls bead depth, and helps the sealant cure more evenly. It also prevents wasting half a tube in one heroic squeeze.
3. Keep the Room Warm, Not Hot
Sealant generally dries and cures faster in moderate warmth. A comfortable room temperature, often around 70°F to 80°F, is ideal for many products. Cold temperatures slow curing because chemical reactions and evaporation happen more slowly.
If you are sealing in a chilly bathroom, garage, basement, or exterior area, warm the space before applying. Use normal room heating, not extreme heat. A gentle, stable temperature helps the sealant set properly.
Avoid blasting sealant with a heat gun, hair dryer, or space heater placed too close. Too much heat can skin the surface too fast, trap uncured material underneath, cause cracking, or weaken adhesion. In other words, do not try to intimidate the sealant into drying. It has chemistry on its side.
4. Use Airflow Wisely
Fresh airflow helps many sealants dry faster, especially water-based acrylic latex caulks that rely partly on evaporation. Open a window, run an exhaust fan, or place a small fan nearby to move air through the room.
The fan should circulate air gently across the area, not blast directly into the bead like a tiny hurricane. Strong airflow can push dust into wet sealant or dry the surface unevenly. Your goal is fresh air, not a wind tunnel experiment.
5. Control Humidity Based on Sealant Type
Humidity is where things get interesting. Silicone sealants often need moisture in the air to cure, so extremely dry air can slow them down. Acrylic latex sealants, on the other hand, dry as water evaporates, so high humidity can slow them down.
For silicone sealant, moderate humidity is usually helpful. If the air is bone-dry, curing may slow. For acrylic latex caulk, drier air and good ventilation can speed drying. For polyurethane and hybrid sealants, moisture may play a role, but each formula is different.
The practical rule: read the label, then adjust the room. If you are using acrylic latex in a damp bathroom, run the fan or a dehumidifier. If you are using silicone in extremely dry air, do not panic if it takes longer than expected.
Step-by-Step: How to Dry Sealant Fast Without Ruining It
Step 1: Remove Old Sealant Completely
New sealant does not bond well to dirty, loose, moldy, or damaged old sealant. Scrape away the old bead with a utility knife, caulk removal tool, or plastic scraper. For stubborn silicone residue, use a silicone remover if appropriate for the surface.
This step is not glamorous, but it is critical. Applying fresh sealant over old sealant is like putting a clean shirt over a muddy one. Technically there is a clean layer, but nobody should feel proud.
Step 2: Clean the Surface
Clean the joint with a suitable cleaner to remove soap scum, dust, grease, mildew, and old residue. In bathrooms and kitchens, grease and soap film are common bonding enemies. Around windows and doors, dust and paint flakes are the usual troublemakers.
After cleaning, rinse if needed and allow the surface to dry thoroughly. Sealant applied to a damp or contaminated surface may not bond correctly, and poor adhesion can lead to peeling, gaps, leaks, and your future self saying unprintable things.
Step 3: Dry the Joint Before Application
Even if the room looks dry, moisture can hide behind tile edges, sink rims, window trim, and old caulk lines. Use towels, a fan, or extra waiting time to dry the area before sealing. For a bathtub or shower that has been leaking, running a fan for several hours or overnight may improve adhesion.
This is especially important in bathrooms. Sealant may be waterproof after curing, but it does not appreciate being asked to bond to a swamp.
Step 4: Tape for a Clean, Thin Bead
Painter’s tape helps create a neat line and controls bead width. Apply tape on both sides of the joint, leaving only the gap exposed. This makes it easier to apply the right amount of sealant and remove excess before it skins over.
Remove the tape while the sealant is still wet. Waiting too long can tear the edge or pull up part of the bead. Sealant has a short memory for forgiveness.
Step 5: Apply Steady Pressure
Hold the caulk gun at a consistent angle and apply a smooth, continuous bead. Move steadily, not too fast and not too slow. Gaps in the bead create weak spots, while blobs add unnecessary curing time.
For best results, push or pull the nozzle according to the manufacturer’s instructions and your comfort level. The important part is full contact with both sides of the joint.
Step 6: Tool the Bead Immediately
Tooling means smoothing the sealant so it bonds properly and looks clean. Use a caulk finishing tool, gloved finger, or approved smoothing method. Many sealants skin over quickly, sometimes within minutes, so do not apply the whole bathroom and then wander off for coffee.
A properly tooled bead is not just prettier; it also helps the sealant make better contact with the surfaces. Better contact means better curing and a longer-lasting seal.
Step 7: Improve Ventilation and Temperature
Once the sealant is applied, keep the area warm and ventilated. Use an exhaust fan in a bathroom, open a nearby window if weather allows, or run a small fan in the room. Keep the temperature stable and avoid sudden cold drafts.
For acrylic latex sealant, airflow helps moisture leave the bead. For silicone, airflow helps remove odor and supports even curing, but remember that some humidity may still be beneficial.
Step 8: Protect the Sealant While It Cures
Fast drying does not help if someone touches, scrubs, paints, or soaks the bead too early. Keep people, pets, water, cleaning products, and curious fingers away from the area until the product reaches the stage listed on the label.
If you are sealing a shower, do not use it until the sealant is water-ready or fully cured, depending on the product instructions. If you are sealing trim before painting, wait until the caulk is paint-ready. If you are sealing exterior windows, check the rain-ready time and the weather forecast before you start.
Best Conditions for Drying Sealant Fast
| Factor | Best Practice | Why It Matters |
|---|---|---|
| Temperature | Use moderate warmth, often around 70°F to 80°F | Cold slows curing; extreme heat can damage the bead |
| Humidity | Use moderate humidity for silicone; lower humidity for acrylic latex | Different formulas dry and cure in different ways |
| Airflow | Use gentle ventilation | Helps moisture and solvents move away without disturbing the bead |
| Bead Size | Apply only what the joint needs | Thicker beads take longer to cure |
| Surface Prep | Clean and dry thoroughly | Improves adhesion and prevents curing problems |
How Long Does Sealant Usually Take to Dry?
Drying times vary by product, but here are common household expectations:
- 100% silicone sealant: Often tack-free or water-ready in 30 minutes to a few hours, with full cure commonly around 24 hours or longer.
- Acrylic latex caulk: Often dry to the touch in about 30 minutes and paintable within 30 minutes to 2 hours, depending on the formula and conditions.
- Siliconized acrylic latex: Similar to acrylic latex but with improved flexibility and adhesion.
- Polyurethane sealant: Strong and flexible, but cure time may range from 24 hours to several days.
- Synthetic rubber sealant: May be instantly waterproof in some cases, but full cure can take several days to a week.
These are general ranges, not permission slips. The tube always wins. If the label says wait 24 hours, wait 24 hours. Your sealant is not impressed by optimism.
Common Mistakes That Slow Sealant Drying
Applying Too Much Sealant
A thick bead may look strong, but it often cures slowly and can wrinkle, slump, or stay soft inside. Use backer rod for deep gaps and apply the recommended bead size.
Sealing Over Wet Surfaces
Moisture under the sealant can interfere with adhesion. This is especially common around tubs, showers, sinks, and exterior trim after rain.
Painting Too Soon
Paintable caulk still needs time before painting. If you paint too early, the paint may crack, smear, discolor, or trap moisture. Also, standard 100% silicone is usually not paintable, so do not try to negotiate with it.
Using Expired Sealant
Old sealant may not cure properly. If a tube has been sitting in the garage since the era of flip phones, check the expiration date and consistency. Lumpy, separated, or strange-smelling product belongs in the trash, not around your bathtub.
Using the Wrong Product
A bathroom needs mold-resistant, waterproof sealant. Exterior windows need weatherproof flexibility. Concrete joints may need polyurethane or masonry sealant. Choosing the wrong product can cause slow drying, poor bonding, or early failure.
Can You Use a Hair Dryer to Dry Sealant Fast?
Usually, no. A hair dryer may seem like a clever shortcut, but direct heat can dry the surface too quickly while leaving the inside uncured. It can also cause cracking, bubbling, shrinking, or poor adhesion. The same warning applies to heat guns.
If you need warmth, warm the room gently instead of blasting the bead. Think cozy room, not dragon breath.
Can You Put a Fan on Sealant?
Yes, a fan can help, especially for acrylic latex sealants. Use gentle airflow across the room, not a direct blast inches from the bead. Good ventilation helps drying, reduces odor, and keeps the environment stable.
In bathrooms, an exhaust fan is especially useful. For exterior work, choose a dry, mild day and avoid sealing right before rain, extreme heat, or freezing temperatures.
Can You Make Silicone Sealant Cure Faster?
You can encourage silicone sealant to cure faster by using the correct bead size, keeping the area warm, maintaining moderate humidity, and allowing air circulation. However, you cannot safely force silicone to fully cure instantly unless the product is specifically formulated for rapid cure.
Silicone cures by reacting with moisture in the air. Very dry conditions can slow it down. A normal indoor humidity level is usually fine. Do not spray water directly onto fresh silicone unless the manufacturer says to do so. Too much surface moisture can interfere with the finish or adhesion.
Can You Make Acrylic Latex Caulk Dry Faster?
Yes. Acrylic latex caulk dries as water evaporates, so airflow and lower humidity help. Use a fan, open a window, run a dehumidifier in damp rooms, and keep the temperature comfortably warm.
For painting projects, choose a fast-dry paintable caulk. Many trim caulks are designed to be paintable quickly, but cool or humid conditions can extend the wait time. If the bead still feels soft or tacky, give it more time.
Fast-Dry Sealant Tips by Project
Bathroom and Shower
Use a kitchen and bath silicone sealant with mold resistance and a water-ready time that fits your schedule. Remove all old caulk, dry the joint thoroughly, apply a thin bead, tool it immediately, and run the exhaust fan. Even with fast formulas, avoid touching or cleaning the bead until fully cured.
Kitchen Sink
Use waterproof silicone around sinks and backsplashes. Clean away grease before applying. Kitchen surfaces often look clean while hiding a tiny film of oil, which is basically a “do not stick here” sign for sealant.
Windows and Doors
Use an exterior-rated weatherproof sealant. Apply in mild weather and avoid rain during the initial cure period. Keep bead size controlled and make sure the surface is dry, especially on wood trim.
Baseboards and Interior Trim
Use paintable acrylic latex or siliconized acrylic caulk. To speed drying, keep the room warm, use airflow, and apply a small bead. Wait until the caulk is paint-ready before coating it.
Concrete and Masonry Cracks
Use a sealant designed for masonry or concrete movement. These products may take longer to cure because they are built for durability and flexibility. Do not rush heavy-duty sealants; they are doing big-boy chemistry.
How to Tell If Sealant Is Dry Enough
Check the label first. If enough time has passed, lightly touch a small hidden area with a clean gloved finger. The surface should not transfer, smear, or feel wet. Do not press hard. A gentle touch is a test; poking it like bread dough is sabotage.
For full cure, look for firm, rubbery consistency throughout the bead. If it feels soft, gummy, or moves easily, give it more time. If it remains uncured long after the expected cure window, the product may be expired, the surface may be contaminated, the bead may be too thick, or the environment may be too cold or dry.
Experience-Based Tips: What Actually Works in Real Projects
After enough bathroom, kitchen, window, and trim sealing projects, one lesson becomes obvious: drying sealant fast starts before the tube is even opened. The fastest jobs are the ones where everything is ready first. The slowest jobs usually begin with “I’ll just squeeze a little caulk in there” and end with a sticky bead, wet tile, and regret wearing a black shirt.
One practical experience is that surface drying matters more than people think. Around a shower, the tile may look dry after a quick towel wipe, but the old joint can still hold moisture. If the previous caulk failed because water was sneaking behind it, the area may need serious drying time. Running a small fan toward the tub area for several hours before applying new silicone can make a major difference. It is not dramatic, but neither is flossing, and dentists still keep winning that argument.
Another real-world trick is to cut the nozzle smaller than you think you need. Many beginners cut the tip too large, apply a giant bead, then spend ten minutes trying to smooth it into submission. A smaller opening gives more control, uses less sealant, and shortens curing time. You can always enlarge the nozzle; you cannot un-cut it. This is the caulk tube version of “measure twice, cut once.”
Painter’s tape is also worth the extra minute. It keeps the bead narrow and neat, which helps it cure faster and look professional. The key is removing the tape while the sealant is still wet. If you wait until the surface skins over, the tape can pull up the edge and create a ragged line. That is the moment when a five-minute project becomes a tiny courtroom drama between you and the wall.
For acrylic latex caulk on trim, airflow is your friend. A small fan in the room and comfortable warmth can help it become paint-ready faster. However, painting too early is one of the most common mistakes. If the caulk still feels cool, soft, or tacky, wait. Paint can trap moisture, which slows curing and may lead to cracks or uneven finish. Fast-dry caulk is helpful, but it is not a time machine.
For silicone in bathrooms, the best experience-based advice is to choose the right product from the start. A 30-minute water-ready silicone can save a lot of inconvenience, especially in a one-bathroom home. Still, “water-ready” does not mean “scrub-ready.” Avoid cleaning products, pressure, and aggressive wiping until the sealant has fully cured. A shower can often return to service sooner with the right product, but the bead still deserves a little respect.
Exterior sealant projects teach another lesson: weather is part of the tool kit. A mild, dry day beats a heroic attempt during cold drizzle. If rain is coming soon, use a rain-ready exterior silicone or wait for better conditions. Wind can help airflow, but it can also blow dust, pollen, and leaf bits into fresh sealant. Nothing says “custom finish” like a permanently embedded maple seed.
Finally, never underestimate product age. A fresh tube cures more predictably than one that has been half-open in the garage for a year. If the sealant comes out lumpy, separated, unusually thick, or refuses to skin over, stop using it. Saving a few dollars on old caulk can cost hours of cleanup. The fastest way to dry sealant fast is often to throw away the questionable tube and start with fresh material.
Conclusion
Learning how to dry sealant fast is really about working with the product instead of fighting it. Choose a fast-dry or fast-cure formula, apply it in the right conditions, keep the bead thin and even, clean and dry the surface, use gentle airflow, and respect the difference between dry-to-touch and fully cured.
Silicone, acrylic latex, polyurethane, and hybrid sealants all cure differently. Some love moderate humidity; others prefer drier air. Some are water-ready in 30 minutes; others need 24 hours or more before they can handle normal use. The label is not decoration. It is the instruction manual for avoiding leaks, cracks, peeling, and the emotional damage of redoing the same job twice.
Note: Drying time and curing time vary by sealant type, bead size, temperature, humidity, airflow, surface material, and product age. Always follow the manufacturer’s instructions on the tube or technical data sheet before exposing sealant to water, paint, cleaning products, or pressure.