If your once-mighty hot shower now turns lukewarm halfway through shampooing, your water heater may not be lazy, dramatic, or personally offended. It may simply have a bad dip tube. This small plastic tube inside a tank-style water heater has one very important job: it sends incoming cold water to the bottom of the tank so it can be heated properly. When the dip tube cracks, breaks, or disintegrates, cold water can mix near the top of the tank and rush straight out through your hot water line. The result? A shower that starts cozy and ends like a polar-bear challenge.
The good news is that learning how to change a dip tube is a realistic DIY project for many homeowners with basic plumbing confidence. You do not need to rebuild the water heater, perform wizardry, or negotiate with a mysterious basement appliance. However, you do need to work carefully, shut off power or gas correctly, relieve pressure, and use the right replacement part.
This step-by-step DIY guide explains what a water heater dip tube does, how to diagnose dip tube failure, what tools you need, how to replace the dip tube safely, and when it is smarter to call a licensed plumber. Let’s give your hot water supply its dignity back.
What Is a Water Heater Dip Tube?
A dip tube is a long tube connected to the cold water inlet at the top of a tank-style water heater. It extends downward inside the tank, usually close to the bottom. When cold water enters the heater, the dip tube directs that water downward so it can be heated by the gas burner or electric heating elements.
This design helps preserve temperature layering inside the tank. Hot water naturally rises to the top, where it exits through the hot water outlet. Cold water belongs near the bottom until it warms up. A working dip tube keeps this system orderly. A failed dip tube turns the tank into a chaotic soup of cold and hot water, and nobody wants plumbing soup.
Common Signs of a Bad Dip Tube
A failing dip tube is sneaky because your water heater may still turn on, heat water, and look completely normal from the outside. The problem happens inside the tank. Here are the most common symptoms.
1. Hot Water Runs Out Too Fast
This is the classic warning sign. If your 40- or 50-gallon tank suddenly behaves like it has the stamina of a coffee mug, the dip tube may be broken. Cold water may be entering near the top of the tank and mixing directly with the hot water that should be headed to your faucet.
2. Lukewarm Water Instead of Hot Water
If you keep turning the shower handle hotter and hotter but the water never gets properly hot, the dip tube may not be delivering cold water to the bottom of the tank. Before blaming the thermostat, heating element, gas control valve, or your family’s suspiciously long showers, check for dip tube symptoms.
3. White Plastic Pieces in Faucet Aerators
Older or deteriorating dip tubes can break apart. Small white plastic flakes may travel through the hot water piping and clog faucet aerators, showerheads, washing machine screens, or dishwasher inlet screens. If you clean a faucet screen and find plastic confetti, your water heater is throwing a party you did not approve.
4. Reduced Hot Water Pressure
Broken dip tube fragments can collect in fixtures and strainers. This may reduce hot water flow at sinks, tubs, or appliances. If cold water pressure seems normal but hot water pressure has dropped, inspect aerators and consider the dip tube as a possible suspect.
Before You Start: Is This a Good DIY Job?
Changing a dip tube is usually easier than replacing a water heater, but it is not always simple. The difficulty depends on how your cold water line is connected. If your heater has a flexible connector, the repair may be straightforward. If the cold line is rigid copper pipe soldered directly into place, you may need to cut and reconnect pipe, which raises the skill level.
This job is more DIY-friendly if:
- You have a tank-style gas or electric water heater.
- You can safely shut off water, power, or gas.
- The cold water inlet is accessible.
- The piping uses flexible connectors or threaded fittings.
- You are comfortable using pipe wrenches and thread sealant.
Call a licensed plumber if you see heavy corrosion, leaking at the tank, damaged gas piping, electrical hazards, soldered connections you cannot handle, or a very old water heater that may be near the end of its service life. A 20-year-old tank with rust, leaks, and a bad dip tube may be asking for retirement, not a tiny plastic pep talk.
Tools and Materials You Will Need
Gather everything before shutting down the water heater. This prevents the classic DIY situation where the tank is half-drained, the floor is wet, and you suddenly realize your adjustable wrench is vacationing in another toolbox.
- Replacement dip tube made for your water heater model
- Adjustable wrench or pipe wrench
- Channel-lock pliers
- Garden hose
- Bucket and towels
- Flathead screwdriver for some drain valves
- Pipe thread sealant or plumber’s tape rated for potable water
- Tubing cutter, if rigid copper must be cut
- Flexible water heater connector, if replacement is needed
- Work gloves and safety glasses
- Flashlight
How to Choose the Right Replacement Dip Tube
Do not grab a random dip tube and hope for the best. Water heaters vary by brand, model, tank height, inlet design, and nipple configuration. Some replacement dip tubes come attached to a cold water nipple, while others are separate inserts. Many are made from durable plastic such as PEX or polypropylene, but sizing and fit matter.
Check the model number and serial number on the rating plate of your water heater. Use that information to look up the correct part through the manufacturer, a plumbing supply store, or a reliable water heater parts retailer. If the original tube is still mostly intact, compare its length and diameter to the replacement. The new dip tube should reach near the bottom of the tank without jamming against it.
Safety First: Shut Everything Down Properly
Water heaters combine hot water, pressure, electricity, gas, and sometimes old plumbing that has not been touched since flip phones were fashionable. Respect the appliance before you start.
For an Electric Water Heater
Turn off power at the circuit breaker. Many electric water heaters use a 240-volt circuit, so make sure the correct breaker is off. Never restore power to an electric water heater until the tank is completely full again. Energizing dry heating elements can burn them out quickly.
For a Gas Water Heater
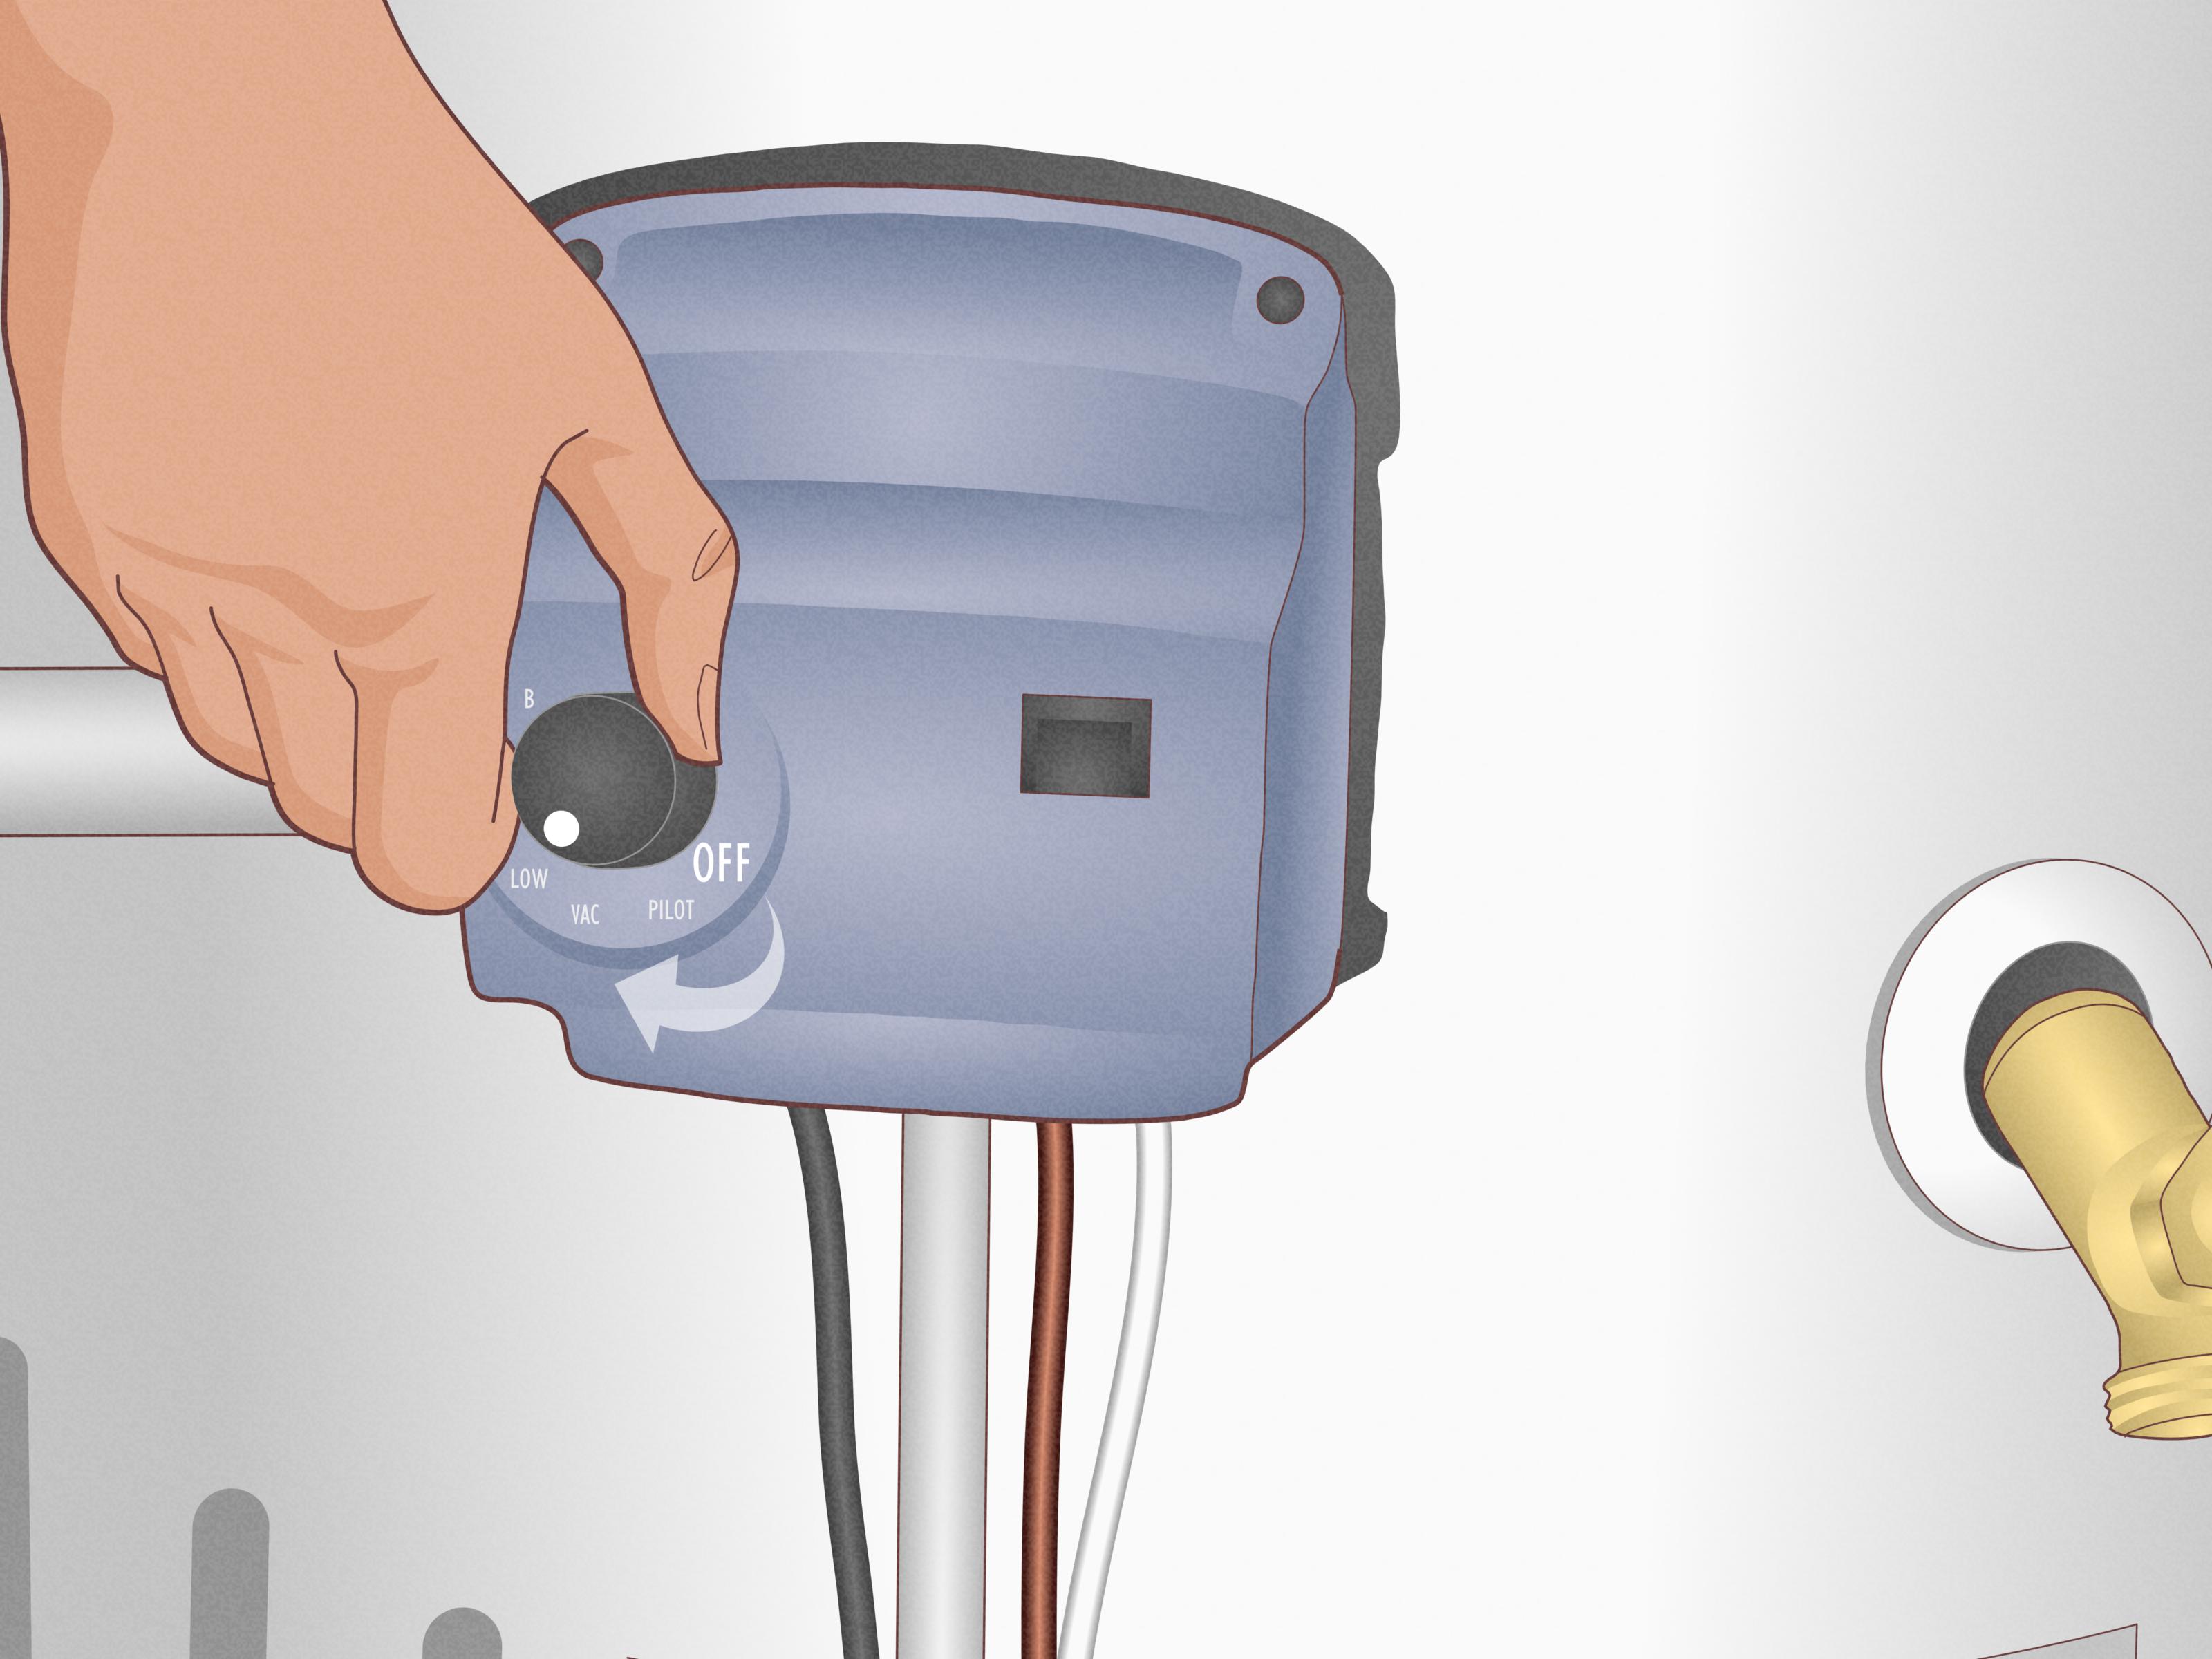
Turn the gas control valve to the “off” or “pilot” position according to your unit’s instructions. If the job requires moving or disturbing gas piping, stop and call a professional. Replacing a dip tube usually involves the water connections at the top of the tank, not the gas line.
Cool the Water
If possible, let the water cool before draining. Hot water can scald skin quickly. Running hot water at a nearby faucet for several minutes can help reduce tank temperature, but use caution. Gloves and eye protection are not glamorous, but neither is explaining a preventable burn.
How to Change a Dip Tube: Step-by-Step Instructions
Step 1: Turn Off the Cold Water Supply
Locate the cold water shutoff valve above the water heater. Turn it clockwise or move the lever perpendicular to the pipe to shut off incoming water. If the valve is stuck, leaking, or missing, you may need to shut off the main water supply to the house.
Step 2: Open a Hot Water Faucet
Open a nearby hot water faucet. This helps relieve pressure in the system and allows air into the plumbing as water drains from the tank. Leave the faucet open during the draining process.
Step 3: Drain Several Gallons from the Tank
Attach a garden hose to the drain valve near the bottom of the water heater. Run the hose to a floor drain, utility sink, bucket, or safe outdoor area. Open the drain valve and drain several gallons of water. You usually do not need to drain the entire tank to replace a dip tube, but lowering the water level below the top inlet reduces spills when the cold water connection is removed.
If the drain valve clogs with sediment, open and close it gently. Do not force a fragile plastic drain valve. If the valve leaks after draining, it may need service or replacement.
Step 4: Disconnect the Cold Water Inlet Pipe
Find the cold water inlet on top of the water heater. It is often marked “cold,” “C,” or has a blue indicator. Disconnect the water supply line from the cold inlet. If you have a flexible connector, loosen the nut with an adjustable wrench. If the pipe is rigid copper, you may need to cut the line and later reconnect it with approved fittings.
Work slowly and support the pipe as you loosen it. Old fittings can be stubborn. A little patience here saves you from inventing new words in front of the water heater.
Step 5: Remove the Cold Water Nipple or Old Dip Tube
Depending on the water heater design, the dip tube may be attached to the cold water nipple or inserted below it. Use a pipe wrench to loosen the nipple from the top of the tank. Turn counterclockwise. If the fitting is corroded, apply steady pressure rather than jerky force.
Once the nipple is removed, pull out the old dip tube. It may come out in one piece, or it may be cracked, shortened, brittle, or completely missing. If it breaks during removal, use needle-nose pliers carefully to retrieve remaining pieces from the inlet opening. Do not push fragments deeper into the tank if you can avoid it.
Step 6: Inspect the Old Dip Tube
Compare the old part to the replacement. If the old tube is short, melted, cracked, or crumbly, you have likely found the cause of your hot water problem. If the old dip tube looks perfect, the issue may be elsewhere, such as sediment buildup, a failed heating element, thermostat trouble, burner issues, or a broken mixing valve.
Step 7: Install the New Dip Tube
Insert the new dip tube into the cold water inlet. Make sure it slides straight down into the tank. If the replacement tube must be trimmed, cut it according to the manufacturer’s instructions. It should extend close to the bottom of the tank but not press hard against the tank floor.
Apply potable-water-rated thread sealant or plumber’s tape to the male threads of the nipple, if required. Avoid overusing tape, because excess material can shred and enter the plumbing. Thread the nipple back into the tank by hand first to avoid cross-threading, then tighten it with a wrench. Snug is good. Hulk mode is not.
Step 8: Reconnect the Cold Water Line
Reconnect the cold water supply line to the inlet nipple. Replace worn flexible connectors if they look kinked, corroded, or damaged. If you cut copper pipe, reconnect it with code-approved fittings suitable for water heater use. Make sure all connections are aligned properly and not under stress.
Step 9: Refill the Tank Completely
Close the drain valve. Keep a hot water faucet open. Turn the cold water supply back on. The tank will begin to fill, and air will escape through the open faucet. At first, the faucet may sputter. Once a steady stream of water flows for several minutes, the tank is full and most air has been purged.
This step is especially important for electric water heaters. Do not turn power back on until the tank is full. Dry-fired heating elements can fail fast, and then your simple dip tube repair becomes a bonus repair you did not order.
Step 10: Check for Leaks
Inspect the cold water inlet connection, the nipple threads, the flexible connector, and the drain valve. Use a dry paper towel around fittings to detect small leaks. If you see water, shut off the supply and tighten or reseal the connection as needed.
Step 11: Restore Power or Gas
For an electric water heater, turn the breaker back on only after the tank is full. For a gas water heater, relight the pilot or restart the unit according to the manufacturer’s instructions. Set the thermostat to a safe household temperature, commonly around 120 degrees Fahrenheit for many homes.
Step 12: Flush Faucet Aerators and Showerheads
If the old dip tube disintegrated, clean faucet aerators, showerheads, and appliance inlet screens. Plastic pieces may remain in the plumbing. Unscrew aerators, rinse the screens, and run hot water briefly to clear loose debris. This final cleanup can restore flow and prevent future annoyance.
Troubleshooting After Replacing the Dip Tube
The Water Is Still Lukewarm
If the dip tube was replaced but hot water is still weak, check the thermostat setting, heating elements, gas burner operation, sediment buildup, and mixing valves. A failed dip tube is common, but it is not the only reason hot water disappears faster than snacks at a football party.
The New Connection Leaks
Turn the water off and relieve pressure. Remove and reseal the threaded connection. Make sure threads are clean and not damaged. Do not overtighten, especially on older tanks, because top fittings can be fragile.
Hot Water Pressure Is Still Low
Clean all hot-side faucet aerators and showerheads. If plastic debris traveled through the system, it may take more than one cleaning. Also check washing machine screens and dishwasher inlet filters if those appliances show reduced hot water flow.
The Tank Is Rusty or Leaking
If the tank itself leaks, replacing the dip tube will not solve the problem. A leaking tank usually means the water heater needs replacement. Do not ignore tank leaks; water damage can become far more expensive than the appliance.
How Long Does a Dip Tube Replacement Take?
For an accessible water heater with flexible connectors, the job may take about one to two hours. If pipes must be cut, fittings are corroded, the drain valve clogs, or the old dip tube breaks apart, the project can take longer. First-time DIYers should move slowly and avoid rushing. Plumbing rewards calm hands and punishes impatience with puddles.
How Much Does It Cost to Replace a Dip Tube?
The replacement dip tube itself is usually inexpensive compared with major water heater repairs. The total DIY cost depends on whether you also need new connectors, fittings, thread sealant, a hose, or tools. Hiring a plumber costs more, but it may be worth it when access is difficult, piping is soldered, or the heater is older and questionable.
Before spending money, consider the age and condition of the water heater. If the tank is near the end of its expected life, rusty, noisy, inefficient, or leaking, replacing the full unit may make more sense than repairing one internal part.
Maintenance Tips to Help Prevent Future Hot Water Problems
A dip tube does not require regular maintenance the way a filter does, but overall water heater care can help the system last longer and perform better.
- Flush the tank periodically to reduce sediment buildup.
- Check the anode rod according to the manufacturer’s maintenance schedule.
- Keep the thermostat at a safe, efficient setting.
- Inspect fittings and valves for leaks.
- Clean faucet aerators if hot water flow drops.
- Do not ignore popping noises, rusty water, or sudden performance changes.
Think of your water heater as the quiet employee of the house. It works hard every day, rarely complains, and only gets attention when something goes wrong. A little maintenance is its version of a performance bonus.
When to Call a Professional Plumber
DIY repairs are satisfying, but there is no trophy for turning a manageable repair into an indoor fountain. Call a licensed plumber if:
- The water heater is leaking from the tank.
- You smell gas or suspect a gas line problem.
- The cold water inlet is badly corroded.
- The pipe connections are soldered and you are not comfortable cutting or joining pipe.
- The heater is very old and showing multiple failure signs.
- You cannot identify the correct replacement dip tube.
- Local code requires professional service for this type of work.
A professional can also tell whether the problem is truly the dip tube or another component. That matters because replacing the wrong part is like changing your shoelaces because your car will not start.
Real-World Experience: What Changing a Dip Tube Teaches You
Replacing a dip tube is one of those DIY jobs that looks almost too simple on paper. Shut things off, unscrew a fitting, pull out a tube, install a new one, refill the tank, and enjoy hot water. In real life, the project often teaches you a few practical lessons that no tool package label bothers to mention.
First, the diagnosis matters. Many homeowners assume a lukewarm shower means the water heater is dying. Sometimes it is. But when the tank still heats, the burner or elements still work, and the water simply runs out too quickly, the dip tube deserves attention. One useful clue is timing. If the first few minutes of water are hot but the temperature falls sharply, cold water may be short-circuiting inside the tank. Another clue is debris. White plastic bits in aerators strongly point toward a deteriorated dip tube, especially in older heaters.
Second, access can make or break the mood. A water heater in an open garage with flexible water lines is a much friendlier patient than a tank wedged in a closet with rigid copper piping, drywall scars, and exactly four inches of working space. Before starting, look at the top of the tank and ask yourself how the cold water line will actually come apart. This small inspection can save a long mid-project stare into the distance.
Third, old fittings do not always cooperate. Mineral buildup, corrosion, and years of heat can make the cold water nipple stubborn. The trick is steady pressure, good wrench placement, and enough room to work. Avoid twisting connected pipes or using so much force that you damage the tank opening. If the fitting feels like it might snap, that is not the water heater being dramatic; that is your cue to slow down or call help.
Fourth, refilling the tank is not a throwaway step. Many DIY mistakes happen after the “real repair” is done. The tank must be completely full before power is restored to an electric heater. Leave a hot faucet open while refilling and wait until water flows steadily. Air sputtering is normal. Silence followed by a burned-out heating element is less charming.
Fifth, cleanup matters. If the old dip tube crumbled, replacing it is only half the job. Plastic fragments may already be hiding in faucet aerators, showerheads, and appliance screens. Cleaning those parts can noticeably improve hot water flow. In some homes, the “repair” does not feel complete until the last clogged bathroom faucet stops dribbling like it is trying to conserve its emotional energy.
Finally, changing a dip tube gives you a better understanding of how your water heater works. You learn where the shutoff valve is, how to drain pressure safely, how the tank refills, and why regular maintenance matters. Even if you decide to call a plumber next time, that knowledge helps you describe the problem clearly and avoid unnecessary guesswork. And when the hot shower returns? That is the kind of victory that deserves a quiet nod, a dry floor, and maybe not telling everyone in the house that you are now the Supreme Commander of Hot Water.
Conclusion
Changing a dip tube is a practical DIY repair that can restore hot water performance when a tank-style water heater starts running cold too quickly. The dip tube may be small, but it plays a big role in keeping cold water at the bottom of the tank and hot water ready at the top. When it breaks, cracks, or disintegrates, your water heater may seem weak even though the heating system itself still works.
The key steps are simple but important: shut off power or gas, close the cold water supply, relieve pressure, drain several gallons, remove the cold inlet connection, replace the dip tube, refill the tank completely, check for leaks, and restore the heater safely. Take your time, use the correct replacement part, and know when a professional plumber is the better choice.
Note: Always follow the instruction manual for your specific water heater model and comply with local plumbing codes. If you smell gas, see electrical damage, find severe corrosion, or discover a leaking tank, stop the DIY repair and contact a qualified professional.