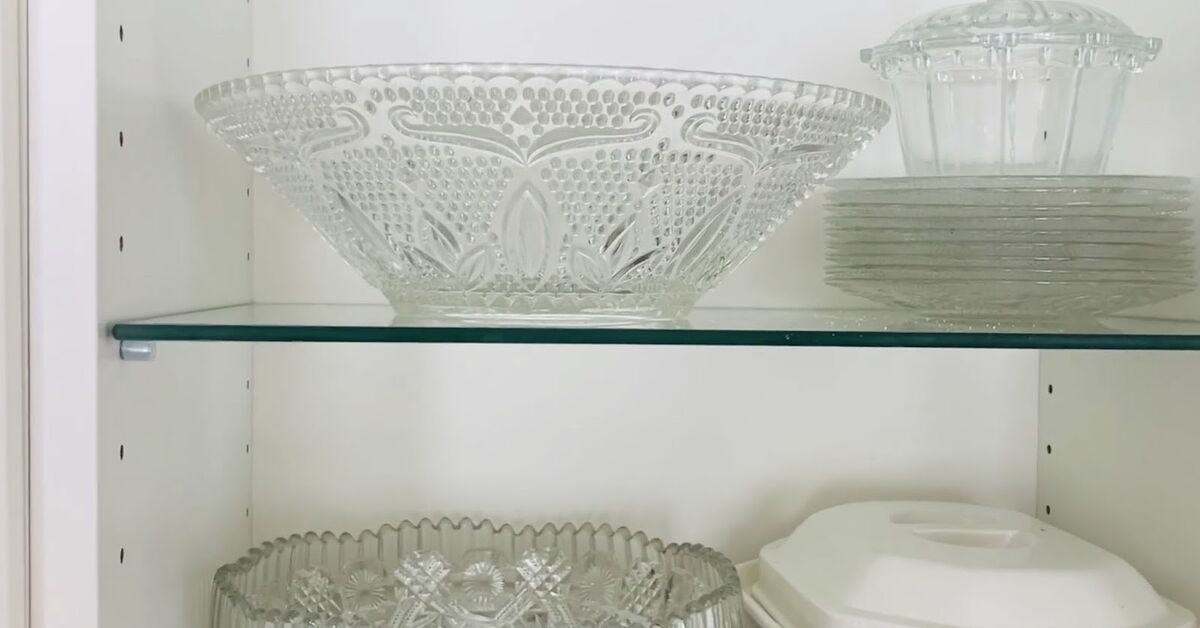
Clear glass bowls are the quiet introverts of the home decor world. They sit in cabinets, hold keys, collect dust, and occasionally pretend to be fancy when guests come over. But with reverse decoupage, that plain bowl can become a custom decorative showpiece that looks like it wandered out of a boutique gift shop and somehow forgot to bring its boutique price tag.
Reverse decoupage glass bowls are made by applying decorative paper, napkins, fabric, or tissue to the outside or underside of clear glass so the design shows through from the front. Instead of gluing artwork on top where it can be touched, scratched, or soaked, the image is protected behind the glass. The result is glossy, dimensional, and surprisingly elegant. It is also wonderfully forgiving, which is excellent news for those of us whose crafting confidence disappears the moment glue enters the room.
This guide walks you through the full process: choosing the right bowl, preparing the glass, selecting paper, applying decoupage medium, sealing the design, fixing bubbles, styling the finished piece, and avoiding common rookie mistakes. Whether you want a floral centerpiece, a coastal catchall, a holiday candy bowl, or a dramatic art bowl for a shelf, this DIY glass bowl craft is simple enough for beginners and satisfying enough for experienced makers.
Note: Reverse decoupage bowls are best treated as decorative pieces unless you use a product specifically labeled washable and follow its curing instructions exactly. Keep glue, paint, and sealer away from direct food-contact surfaces. When in doubt, use the bowl for wrapped treats, ornaments, potpourri, faux fruit, jewelry, or pure visual glory.
What Is Reverse Decoupage?
Decoupage is the art of decorating a surface with paper cutouts, then sealing them with glue, varnish, or a special decoupage medium. Reverse decoupage flips the usual method around. Instead of putting the design on the visible front surface, you attach it to the back or outside of a transparent object. When you turn the bowl over or look through the glass, the design appears beneath a shiny glass layer.
That “reverse” part matters because the order of your layers changes. The image side faces the glass first, then the backing layers go behind it. Think of it like dressing a sandwich backward: the pretty lettuce goes against the window, and the bread hides in the back. Odd, yes. Effective, absolutely.
For glass bowls, this technique works especially well on the exterior base, the outside curve, or the underside of shallow bowls. Clear bowls with smooth surfaces are easiest. Heavily textured, frosted, or deeply ridged glass can still work, but it may distort the design or create stubborn air pockets.
Why Glass Bowls Are Perfect for Reverse Decoupage
Glass gives reverse decoupage its magic. The glossy surface acts almost like a built-in resin finish, making paper designs look brighter and deeper. A simple napkin pattern can suddenly resemble hand-painted porcelain. A botanical print can look like vintage transferware. A bold geometric design can turn a dollar-store bowl into something that says, “I have excellent taste and possibly a label maker.”
Glass bowls are also easy to find. You can use thrift-store bowls, clear salad bowls, dessert bowls, candle bowls, trifle bowls, shallow serving bowls, or inexpensive glass pieces from discount stores. The key is to choose a bowl with enough smooth area for your design to adhere evenly.
Best bowl shapes for beginners
Start with a shallow, wide bowl or a small glass dish with a gently curved surface. Flat-bottomed bowls are easier than steep-sided bowls because paper does not love dramatic curves. Paper napkins and tissue paper are more flexible than thick scrapbook paper, so they work better for rounded glass.
Bowls to avoid on your first try
Avoid bowls with sharp corners, heavy embossing, deep fluting, or lots of tiny grooves. They look gorgeous before crafting but can become glue-and-wrinkle obstacle courses. Save them for later, after you and your decoupage brush have developed a working relationship.
Supplies You’ll Need
You do not need a studio, a kiln, or a mysterious craft machine that costs more than your dishwasher. Most reverse decoupage glass bowl projects require simple supplies:
- Clear glass bowl
- Decorative paper napkins, tissue paper, rice paper, thin fabric, or printed paper
- Decoupage medium such as Mod Podge or a glass-compatible sealer
- Soft bristle brush or foam brush
- Small scissors or craft knife
- Rubbing alcohol or white vinegar for cleaning
- Paper towels or lint-free cloth
- Plastic wrap or a silicone mat to protect your workspace
- White acrylic paint, chalk paint, or multi-surface paint for backing
- Clear acrylic sealer or additional decoupage medium for finishing
- Optional: gold leaf, metallic paint, glitter, painter’s tape, sponge pouncer, or felt pads
Paper napkins are a favorite for this craft because they are thin, flexible, and available in almost every design imaginable. Florals, lemons, chinoiserie, toile, birds, butterflies, blue-and-white patterns, vintage labels, holiday prints, and abstract designs all work beautifully. The only catch is that napkins are usually two- or three-ply. You must separate the layers and use only the printed top layer. If you skip this step, the bowl may look bulky, cloudy, and slightly like it lost a wrestling match with a paper towel.
Step-by-Step: How to Reverse Decoupage a Glass Bowl
Step 1: Clean the glass like you mean it
Wash the bowl with warm, soapy water, rinse it well, and dry it completely. Then wipe the outside surface with rubbing alcohol or white vinegar to remove invisible oils. This step is boring, which is how you know it is important. Glue does not bond well to grease, fingerprints, sticker residue, or whatever mysterious film thrift-store glass sometimes brings home with it.
After cleaning, try to handle the bowl by the rim or inside surface. Fingerprints on the working area can interfere with adhesion and may show through the final design.
Step 2: Plan the design before opening the glue
Turn the bowl upside down and decide where your image will go. If the bowl is shallow, you may cover the entire exterior. If it is deeper, you might only decorate the bottom third or create a border around the lower outside. Cut or tear your paper pieces before applying medium.
For a seamless look, tear napkin edges instead of cutting them. Torn edges feather into the background more naturally. Cut edges are useful when you want crisp shapes, such as stars, lemons, flowers, or birds. A mix of both can create a layered collage effect.
Step 3: Separate napkin layers
If using paper napkins, peel away the plain backing layers until only the printed top layer remains. This layer will feel delicate, almost like tissue. Handle it gently. It is not trying to ruin your day; it is simply thin and dramatic.
A helpful trick is to put a small piece of tape on the back corner of the napkin and pull gently. The layers often separate more easily. You can also rub a corner lightly between your fingers until the plies begin to split.
Step 4: Apply decoupage medium to the outside of the bowl
Place the bowl upside down on a protected surface. Brush a thin, even coat of decoupage medium onto the outside area where the image will go. Do not use a thick puddle. More glue does not mean more success. It means more wrinkles, more sliding, and more muttering under your breath.
Work in sections if the bowl is large or curved. Thin paper becomes fragile when wet, so smaller sections give you more control.
Step 5: Place the design face down
This is the most important reverse decoupage detail: the printed side of the paper must face the glass. When the bowl is turned right side up, you will see the design through the glass. If you place the paper face outward, the back of the paper will show through the bowl, which is not the charming boutique effect we are chasing.
Lay the paper onto the wet medium, printed side against the glass. Smooth it gently from the center outward using your fingers, a soft brush, or a piece of plastic wrap. Plastic wrap helps reduce tearing because it lets you press without dragging directly on the wet paper.
Step 6: Smooth bubbles, but don’t bully the paper
Small wrinkles are normal, especially on curved glass. In fact, tiny wrinkles can add a handmade texture that looks intentional. Large air bubbles, however, should be coaxed out while the medium is wet. Press lightly and tap rather than scrub. If the paper tears, patch it with another small piece of matching pattern. Decoupage is basically collage wearing a fancy hat, so patches are allowed.
Step 7: Add a sealing coat
Once the paper is positioned, brush a thin coat of decoupage medium over the back of the paper. This seals it and helps it bond to the glass. Let it dry according to the product instructions. Most projects need at least one to two hours between coats, but drying time depends on humidity, product type, and how generously you applied the medium.
Apply two or three thin coats rather than one heavy coat. Thin coats dry clearer, smoother, and harder. Thick coats may remain tacky or cloudy.
Step 8: Add a white or light backing layer
Many napkins and tissue papers look dull unless backed with white or light-colored paint. After the decoupage layer is dry, brush or sponge white acrylic paint over the back of the paper. This makes the design pop through the glass. Without backing paint, the pattern may disappear when placed against a dark table or shelf.
If you want an antique effect, use cream, parchment, pale gold, or soft gray instead of bright white. For drama, try black behind metallic or high-contrast designs. Just test first, because dark backing can swallow delicate floral details faster than a junk drawer swallows batteries.
Step 9: Finish and protect the back
After the paint dries, seal the exterior with a clear acrylic sealer or additional decoupage medium. This helps protect the paper and paint from light handling. Add felt pads to the bottom rim if the decorated area touches furniture. Felt pads prevent scratches and keep the bowl from sticking to surfaces in humid weather.
If you use dishwasher-safe decoupage medium, follow the label’s full curing instructions. Some formulas require several weeks of curing before washing. Even then, remember that dishwasher-safe does not automatically mean food-safe, microwave-safe, or soak-proof.
Design Ideas for Decorative Glass Bowls
Vintage botanical bowl
Use floral napkins, fern prints, seed packet graphics, or botanical tissue paper. Back the design with warm white paint and finish the rim with a tiny line of gold metallic paint. Place it on a stack of coffee table books with faux pears or wrapped candies inside.
Coastal blue-and-white bowl
Choose napkins with shells, coral, waves, or chinoiserie patterns. Blue-and-white designs look crisp through glass and pair well with summer tablescapes. Fill the bowl with shells, sea glass, or linen napkins for a beach-house look that does not require you to own a beach house.
Holiday centerpiece bowl
Use Christmas plaid, autumn leaves, pumpkins, snowflakes, or Easter florals. Reverse decoupage is ideal for seasonal decor because you can create a custom piece for very little money. A shallow glass bowl with holiday napkins and metallic edging can hold ornaments, pinecones, wrapped chocolates, or battery-operated fairy lights.
Modern abstract bowl
Cut tissue paper into irregular shapes and layer them on the outside of the bowl. Use translucent colors for a stained-glass effect or bold black-and-white paper for a gallery-style piece. This is a great option if you do not want florals, birds, or anything that looks like it might have opinions about tea parties.
Common Mistakes and How to Fix Them
The paper wrinkled badly
Wrinkles usually happen when there is too much medium, the paper is too thick, or the bowl curve is too steep. Use thinner paper, apply less medium, and work in smaller pieces. If the wrinkle is already dry, disguise it with another layer of torn paper or add metallic accents around it. Congratulations, it is now “texture.”
The design looks faded
Add a white or light backing paint behind the image. Thin papers become translucent when glued, so backing paint is often the difference between “beautiful handmade bowl” and “why is there a ghost flower in my glass?”
The edges are lifting
Apply a small amount of decoupage medium under the lifted edge, press gently, and seal over it once dry. For future projects, make sure the glass is cleaned thoroughly and the paper is fully saturated but not drenched.
The finish feels tacky
Tackiness can come from heavy coats, insufficient drying time, or using the wrong product for glass. Let the bowl cure longer in a dry, dust-free area. If needed, apply a compatible clear acrylic sealer once everything is fully dry.
How to Style Your Finished Bowl
A reverse decoupage glass bowl is more than a craft project; it is a styling opportunity. Use it on an entry table for keys, on a dresser for jewelry, on a bookshelf as an art object, or on a dining table as a centerpiece. For holidays, fill it with ornaments, wrapped sweets, pinecones, faux snow, painted eggs, or mini pumpkins. For everyday decor, keep it simple with moss balls, decorative beads, dried citrus, or nothing at all.
The best showpiece bowls have breathing room around them. If the design is busy, place the bowl on a plain surface. If the design is subtle, layer it with books, candles, or a tray. A handmade bowl should look collected, not stranded.
Care Tips for Reverse Decoupage Glass Bowls
Handle your finished bowl gently, especially during the first few days. Avoid soaking it in water. Do not scrub the decorated exterior. Wipe it with a soft, slightly damp cloth when needed. Keep it out of the microwave, and do not place hot food directly against decorated surfaces. If the bowl is purely decorative, it will last longer and cause you far fewer emotional negotiations.
If you want a bowl that can be washed, use a dishwasher-safe decoupage product and follow the full curing period listed by the manufacturer. Even then, hand washing is often kinder to handmade decor. The dishwasher may be convenient, but it is not known for its gentle personality.
Personal Experience: What This Project Teaches You After the First Bowl
The first time you reverse decoupage a glass bowl, you may feel a tiny rush of panic when the napkin touches the glue. That is normal. Wet napkin paper behaves like it has never heard of cooperation. It stretches, folds, wrinkles, and sometimes clings to your finger instead of the glass. But after a few minutes, the process becomes calmer. You start to understand that the trick is not force; it is patience. A light touch wins.
One of the most useful lessons is that perfect placement matters less than overall effect. When a bowl is finished and turned right side up, small overlaps and tiny wrinkles often vanish behind the shine of the glass. What looked messy up close can look rich and layered from normal viewing distance. This is excellent news for anyone who has ever stared at a craft project from three inches away and declared it a disaster. Step back. The bowl probably looks better than your inner critic is willing to admit.
Another practical experience is learning how much backing color changes the finished design. A floral napkin may look pale and unimpressive until you add white paint behind it. Suddenly the flowers sharpen, the leaves brighten, and the whole bowl wakes up. Metallic backing creates a more glamorous effect, while cream paint gives a vintage look. Testing small scraps on the underside or on a spare jar can save you from surprises.
Curved bowls also teach you to respect paper size. Large sheets look efficient, but they can fight the shape of the bowl. Smaller torn pieces usually blend better and create fewer wrinkles. If you are using a repeating pattern, overlapping fragments can look intentional, almost like handmade ceramic glaze. If you are using one large central image, place that first, then fill around it with background pieces.
The most enjoyable part is how personal the finished bowl feels. You can match it to a room, a holiday, a favorite color, or even a memory. A lemon-print bowl can brighten a kitchen counter. A rose-covered bowl can become a Mother’s Day gift. A map-print bowl can hold travel keepsakes. A bowl decorated with sheet music can sit on a piano and quietly show off. Unlike mass-produced decor, reverse decoupage lets you make something specific, affordable, and full of character.
There is also a charming low-risk freedom in this project. If you find glass bowls at a thrift shop or dollar store, each attempt costs very little. That makes experimentation easier. Try bold colors. Try layered tissue. Try gold edges. Try a pattern you would never buy as wallpaper but might love in a small decorative accent. The bowl becomes a tiny creative laboratory, minus the safety goggles and suspicious bubbling liquid.
After a few projects, you may start seeing every clear glass object as a candidate: plates, trays, jars, candleholders, vases, and ornaments. This is the classic decoupage side effect. One minute you are making a bowl; the next minute you are holding a napkin up to a glass lamp base and whispering, “What if?” Do not be alarmed. This is how DIY home decor hobbies reproduce.
Ultimately, reverse decoupage glass bowls are satisfying because they combine easy materials with impressive results. The process is slow enough to feel relaxing but quick enough to finish in a weekend. The finished piece looks polished, but the technique welcomes beginners. And best of all, it turns ordinary glass into something with personality. Plain bowls had a good run. Now it is their decorative showpiece era.
Conclusion
Reverse decoupage glass bowls are one of the easiest ways to create custom decorative showpieces without expensive supplies or advanced craft skills. By cleaning the glass, placing the design face down, sealing carefully, backing the image with paint, and protecting the finished surface, you can transform a simple clear bowl into a centerpiece, gift, catchall, or seasonal accent.
The secret is to work in thin layers, use flexible paper, smooth gently, and let each coat dry. Once you understand the reverse layering process, the creative possibilities are wide open. Florals, coastal prints, vintage graphics, holiday patterns, metallic details, and abstract tissue designs can all become beautiful glass decor. Best of all, every bowl can be different, which is handy if you enjoy crafting but dislike making the same thing twice like a tiny decor factory.
So grab a glass bowl, choose a napkin that makes you smile, and give reverse decoupage a try. Your cabinet may be hiding its next showpiece right now.