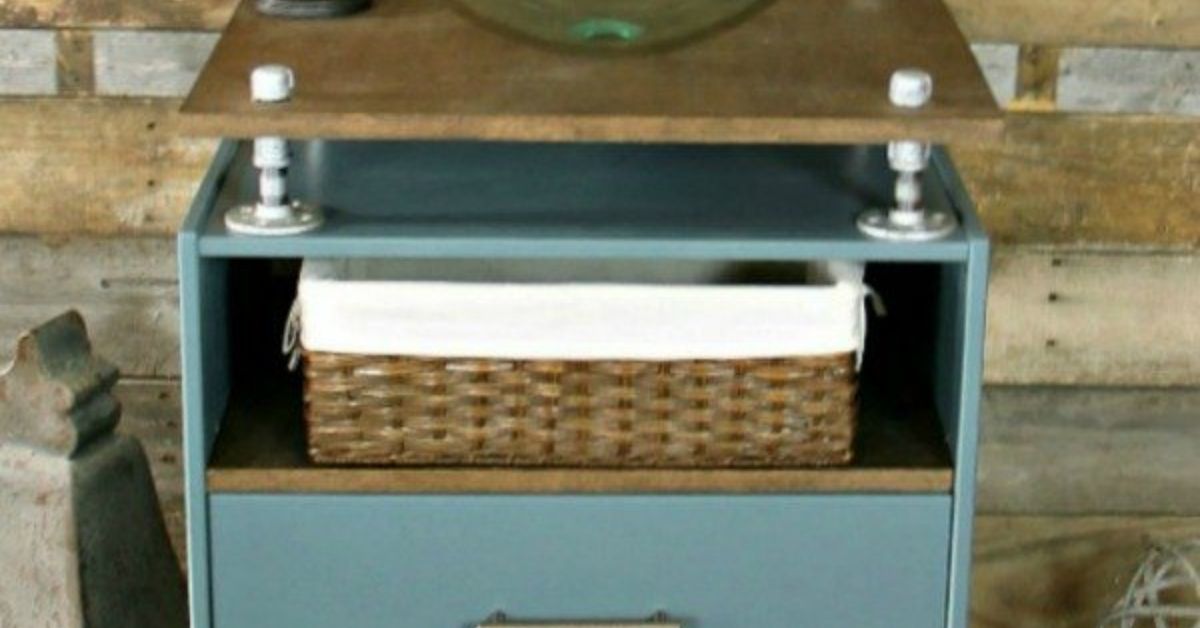
A bathroom vanity has a surprisingly important job. It holds your sink, hides plumbing, stores the toothpaste collection you swear you are going to organize, and sets the visual tone for the entire room. Unfortunately, furniture-style vanities can also carry price tags that make a humble bathroom remodel feel like an sy furniture vanity in a day by transforming a simple dresser, chest, storage cabinet, or sturdy furniture frame into a custom bathroom centerpiece. Repurposed dressers, desks, tables, and cabinets are widely used as the starting point for furniture-style DIY bathroom vanities because they combine character with practical storage. is not advanced cabinetmaking. It is good planning. Measure carefully, choose a sink that cooperates with your furniture, make room for plumbing, protect the wood from moisture, and secure the finished vanity properly. Do those things and you can create a custom-looking vanity before bedtimepossibly with enough energy left to admire it every 12 minutes.
Why Build a Furniture Vanity Instead of Buying One?
Walk through the bathroom section of a home-improvement store and you will find plenty of perfectly respectable vanities. Many are attractive. Many are convenient. Many also look remarkably similar to their neighbors.
A DIY furniture vanity offers something different. It can look like an intentional piece of furniture instead of a cabinet that happens to have a sink sitting on it. Decorative legs, interesting hardware, wood grain, vintage drawer fronts, and custom paint colors can immediately add personality.
Repurposing furniture can also be a practical strategy for small bathrooms and powder rooms. A carefully selected table or chest may fit an awkward wall more naturally than a standard cabinet. Furniture-style bathroom designs are available in many sizes and storage configurations, and even major fixture manufacturers now emphasize vanity size, finish, and organization as key design considerations. , this project allows you to control the details. Want deep green paint and brass pulls? Go for it. Prefer warm natural wood with a white vessel sink? Excellent. Feel emotionally committed to a dresser you rescued from a curb in 2017? Its moment may finally have arrived.
Choose the Right Furniture for Your DIY Vanity
Start With a Strong, Stable Piece
Your future vanity needs to support a sink, faucet, countertop items, and regular daily use. Avoid furniture that rocks dramatically when touched or has extensive structural damage. Minor cosmetic problems are fine. Scratches, outdated stain, and ugly knobs are makeover opportunities. Rotten wood and joints held together by optimism are not.
Solid wood and quality plywood are particularly friendly to modification. Some engineered furniture can also work, but cutting particleboard or fiberboard requires extra care because exposed edges are vulnerable to moisture and may not hold fasteners as confidently as solid material.
Check the legs, frame, drawer runners, and back structure. Tighten loose joints before proceeding. Add wood glue, corner blocks, or reinforcing screws where appropriate. The finished furniture vanity should feel solid before you even introduce plumbing to the conversation.
Measure the Bathroom Before Falling in Love
Measure the available width, depth, and height of the vanity area. Note door swings, baseboards, floor vents, outlets, toilet clearance, and the position of existing supply and drain pipes.
Vanity measurement and installation guidance from major U.S. home-improvement retailers consistently stresses checking the space first and setting the cabinet level before securing it to the wall. Proper wall attachment typically involves fastening into studs or using anchors appropriate for the wall material when studs are unavailable. me the old vanity’s dimensions are automatically ideal. Your new piece may have decorative feet, a deeper top, or drawers that collide with the plumbing. Put the furniture in the bathroom temporarily and stand in front of it. Pretend to wash your hands. Open nearby doors. Move around.
Yes, this looks slightly ridiculous. It is still easier than discovering after installation that the bathroom door now attacks the vanity every morning.
Tools and Materials You Will Need
The exact shopping list depends on your sink and furniture, but a simple furniture vanity conversion typically requires the following:
- Tape measure and pencil
- Level and stud finder
- Drill and drill bits
- Jigsaw or hole saw
- Screwdriver
- Adjustable wrench and pliers
- Clamps
- Sandpaper or an orbital sander
- Primer, cabinet paint, stain, or protective clear finish
- Sink and compatible drain assembly
- Faucet and flexible supply lines
- Silicone or the sealant specified by the sink and countertop manufacturer
- Mounting screws and suitable wall anchors if required
- New knobs or pulls, if desired
- Bucket, rags, and safety glasses
Gather everything before starting. A “one-day vanity project” becomes a “mysterious three-week bathroom situation” remarkably fast when the correct drain fitting is discovered to be missing at 8:47 p.m.
How to Build This Easy Furniture Vanity in a Day
Step 1: Remove Drawers and Hardware
Begin by emptying the furniture and removing all drawers, doors, knobs, and pulls. Label parts if the piece has several similar drawers. Put screws and hardware in a container instead of setting them somewhere “safe.” Every DIYer knows that “safe place” is another term for “parallel dimension.”
With the furniture empty, inspect the interior. Identify where the wall drain and water supply lines will enter. Also estimate where the sink drain will pass through the top.
Step 2: Position the Sink and Faucet
Set the sink on the vanity top without attaching it. Center it visually, then check the location from several angles. A vessel sink is especially useful for many furniture conversions because the basin sits above the surface and may require a comparatively limited top modification.
However, always follow the actual sink template and manufacturer instructions. Sink shapes, drain assemblies, mounting rings, and faucet clearances vary. Lowe’s installation guidance, for example, notes that some vessel sinks require a mounting ring and specifies applying sealant according to the sink configuration. et mounts through the furniture top, place it behind or beside the sink and check handle movement. Make sure the spout reaches the bowl properly. This is not the place for interpretive plumbing.
Step 3: Mark Every Cut Before Using the Saw
Trace or mark the sink drain opening according to the template. Mark faucet holes if necessary. Then measure the locations of the wall plumbing and transfer those measurements to the back of the furniture.
Check everything twice.
Actually, check it three times. The jigsaw has no undo button.
Furniture vanity plans and dresser conversions commonly require openings around drain and supply lines, and drawer boxes may need to be shortened or notched to clear the plumbing. Kreg project guidance specifically recommends checking drawer interference because every plumbing arrangement is different, while This Old House describes measuring and cutting cabinet openings to fit existing lines. t the Top and Back
Drill a starter hole inside a marked opening when using a jigsaw. Insert the blade and cut slowly along the line. Support loose sections so they do not tear the surrounding material as the cut finishes.
Cut the rear plumbing access opening only as large as necessary. A neat opening preserves more of the furniture’s structure and produces a cleaner installation.
Sand rough cut edges. Any exposed wood or engineered material near plumbing should later receive an appropriate protective finish. Water is excellent for washing hands and surprisingly committed to ruining unprotected cabinetry.
Step 5: Modify the Drawers
This is the step that turns a dresser conversion from “cute idea” into an actual working vanity.
Slide the drawers back into the cabinet and determine which boxes interfere with the sink drain or P-trap. Depending on the layout, you may be able to sacrifice the upper center drawer and keep its front as a fixed false drawer. Another option is to notch the rear portion of a drawer and build a smaller U-shaped box around the plumbing.
HGTV dresser vanity projects illustrate this approach by cutting drawer interiors to create plumbing recesses and then reassembling the modified drawer boxes. vatively. Remove only the drawer space the plumbing needs. A toothbrush does not care whether its drawer is full depth, but you will care if every drawer becomes decorative fiction.
Step 6: Sand, Prime, and Finish the Furniture
If you are painting the vanity, clean the furniture thoroughly and remove residue, grease, and loose finish. Sand as required for your chosen coating system. Fill major dents or unwanted hardware holes, then remove sanding dust.
Apply a suitable primer. Sherwin-Williams recommends testing primer adhesion in an inconspicuous area and using a bonding or stain-blocking primer for bathroom vanity cabinet projects. Bathroom-specific cabinet coatings and protective finishes are also promoted by U.S. paint and wood-finish manufacturers for durability and moisture exposure. wood, use a stain if desired and protect the surface with a clear finish appropriate for the wood and bathroom environment. Pay particular attention to the top, cut edges, sink opening, and areas near the faucet.
Here is one important reality about the phrase “build in a day”: coating cure times vary. You may be able to complete the construction and installation sequence quickly when using a prefinished piece or a fast-drying compatible finishing system, but never rush a product beyond its labeled recoat or cure instructions merely to win an imaginary race against Saturday.
Step 7: Install the Faucet Before Access Gets Difficult
In many layouts, installing the faucet while the vanity is still away from the wall is much easier. Attach the faucet, mounting hardware, and flexible supply lines according to the manufacturer’s directions.
The same logic applies to the sink drain assembly when the design allows preassembly. Working from above a cabinet is pleasant. Working upside down inside a small drawer cavity while a wrench falls on your forehead is a character-building exercise nobody requested.
Step 8: Move the Vanity Into Position and Level It
Carefully place the furniture vanity against the wall. Feed the supply and drain connections through the prepared openings.
Set a level across the top from side to side and front to back. Use appropriate shims when necessary. An old house may contain floors that appear to have been leveled by a pirate at sea, so trust the level rather than your eyes.
Locate the wall studs and fasten the vanity securely through a strong rear frame member. Do not rely on small furniture backing panels for structural attachment. Installation guidance from Lowe’s and DIY cabinet plans from Kreg both emphasize securing vanities to framing or appropriate wall anchors after leveling. unt the Sink and Connect the Plumbing
Attach the sink using the method and sealant specified for your exact sink and top. Do not assume every basin uses the same adhesive or sealing procedure.
Connect the drain and P-trap. Attach the hot and cold supply lines to the correct shutoff valves. Tighten fittings appropriately without attacking them as though they have personally offended you.
If existing plumbing must be relocated, if shutoff valves are damaged, or if local code requires licensed plumbing work, bring in a qualified professional. Converting furniture around existing connections is one thing. Redesigning the home’s plumbing system before lunch is another project entirely.
Step 10: Test for Leaks
Place a dry towel or paper towels beneath the plumbing. Slowly open the water shutoff valves. Run both hot and cold water and inspect every connection.
Fill the sink partially, then release the water so the drain and P-trap handle a larger flow. Look and feel for moisture around the faucet lines, drain body, trap joints, and wall connection.
Fix leaks before reinstalling drawers. Repeat the test.
This step is not glamorous enough for social media, but neither is explaining why the bathroom floor has developed its own indoor reflecting pool.
Easy Design Ideas That Make the Vanity Look Custom
Replace the Hardware
New knobs and pulls provide one of the fastest visual upgrades. Matte black hardware creates strong contrast. Brass warms painted finishes. Simple wood knobs can soften a modern vanity.
Measure existing hole spacing before buying pulls. Reusing the old holes can save filling, sanding, and redrilling time.
Add Furniture Feet
Decorative feet or legs can emphasize the furniture look, but they must be structurally appropriate. Adding legs may also change the final vanity height, so calculate the combined height of the cabinet, top, and sink before modification.
Use a Bold Paint Color
A small powder room can handle more personality than many homeowners expect. Deep blue, olive, charcoal, clay, and saturated green can turn an ordinary chest into the main design feature.
Pair a strong cabinet color with a restrained countertop and sink if you want the vanity to lead the room without starting a visual argument with the wallpaper.
Keep Some Original Character
A furniture vanity does not need to look brand new. Original drawer fronts, wood grain, decorative trim, and aged details are part of its appeal. Better Homes & Gardens and HGTV both showcase repurposed furniture as a way to give bathrooms distinctive character rather than relying solely on standard cabinetry. ine damage, but think carefully before sanding away every sign of age. Sometimes a slightly imperfect piece looks more expensive because it does not appear to have arrived in a flat box with 76 identical screws.
Common Furniture Vanity Mistakes to Avoid
Ignoring the Plumbing Until the End
The drain and P-trap take up real space. Measure them before cutting the top or permanently modifying drawers. A beautiful sink centered precisely over a drawer divider can turn your easy DIY bathroom vanity into a woodworking puzzle.
Leaving Raw Wood Around Sink Openings
Seal exposed areas created by cutting. This is particularly important around the sink, drain opening, faucet penetrations, and furniture top. Moisture protection is a recurring recommendation in wood finishing and bathroom cabinet guidance. Secure the Vanity
A dresser was designed to hold clothing. A vanity supports plumbing fixtures and receives repeated pressure from people leaning on it. Attach the cabinet securely to the wall using suitable structural points and fasteners.
Rushing the Finish
Paint that feels dry on the surface may not be ready for aggressive handling. Follow the coating manufacturer’s drying, recoating, and curing instructions. Humidity and temperature can affect finishing conditions and drying behavior.
Making Every Drawer a False Front
Plumbing needs room, but thoughtful modifications can often preserve useful drawer space. Before permanently fixing a drawer front closed, see whether a shallow box or U-shaped drawer can work around the pipes.
A Realistic One-Day Furniture Vanity Experience
The most useful lesson from a furniture vanity project is that the first hour rarely looks impressive. You begin with a dresser in the garage, a sink in a cardboard box, and several tools spread across a workbench. There is no dramatic reveal. There is mostly measuring. Then measuring again. Then staring at the drainpipe as though it might reveal its intentions under questioning.
A typical successful build starts with a dry fit. You carry the furniture into the bathroom and discover that the baseboard prevents it from sitting completely against the wall. This is exactly why test fitting matters. Instead of discovering the problem after the sink is mounted, you can decide whether to notch the furniture, adjust trim, or accept a planned spacing solution. Ten minutes of awkward furniture shuffling can prevent an hour of irritated sawing.
The first major confidence boost comes after marking the sink. A vessel sink is placed on the top, moved half an inch to the left, moved back, and finally centered. You step into the doorway to check the view. Suddenly, the old chest begins to look like bathroom furniture. At this stage, it is tempting to rush forward. Resist. Check the drain center against the cabinet interior before cutting.
Then comes the jigsaw moment. The drill makes a starter hole, the blade enters the furniture top, and there is a brief mental conversation involving the phrase, “Well, there is definitely no returning this dresser now.” Slow cuts are usually cleaner cuts. Once the disk of wood drops free and the drain fits through the opening, the project feels completely different. The intimidating part has become a hole, and the hole is exactly where it belongs.
Drawer modification often requires the most improvisation. Imagine the P-trap occupying the rear center of the top drawer. Instead of abandoning the drawer, you mark a generous plumbing clearance and shorten the box around that area. The drawer now loses some capacity, but it still holds combs, toothpaste, or grooming supplies. This is one of those satisfying DIY compromises: the plumbing gets its space, and you do not surrender every square inch of storage.
Finishing is where patience receives a surprise examination. You may want to install the vanity immediately after the final brushstroke, especially when the color looks fantastic. A deep green cabinet with brass hardware can create an absurd amount of excitement for an object that stores hand soap. Still, the product label wins. Let each coating dry and cure as directed. For a true one-day project, beginning with prefinished furniture or completing refinishing before installation day makes the schedule far more realistic.
Once the cabinet is level and secured, connecting the faucet can become the day’s least photogenic chapter. There is a bucket on the floor. A flashlight is balanced in a questionable position. You tighten a supply connection, turn on the valve, and watch it with the suspicion normally reserved for a raccoon near an open trash can.
The first leak test provides the biggest relief. Water runs. The drain empties. The paper towels beneath the trap stay dry. You test everything again because confidence is lovely but water damage is expensive.
Finally, the drawers go back in and the hardware is attached. This is the five-minute transformation that makes the previous hours worth it. The same furniture piece that looked ordinary in the morning now appears intentional, custom, and far more expensive. Add a mirror, hand towel, and soap dispenser, and the bathroom suddenly has a focal point.
The biggest practical takeaway from this kind of build is simple: speed comes from planning, not rushing. A one-day furniture vanity is achievable when the furniture fits, the sink configuration is straightforward, existing plumbing remains in place, and finish cure times have been respected. Measuring carefully may feel slow at 8 a.m., but it is considerably faster than rebuilding a drawer at 4 p.m. because a P-trap has claimed the same territory.
There is also a less technical benefit. Repurposing furniture makes the room feel personal. You remember the original chest, the nervous first cut, and the moment the water finally ran without dripping. A factory vanity can be beautiful, but it rarely comes with a story involving a jigsaw, three cups of coffee, and a heroic amount of measuring tape.
Conclusion: A Custom Vanity Without a Custom-Cabinet Timeline
You do not need a professional cabinet shop to create a furniture-style bathroom centerpiece. With a sturdy dresser, chest, console, or cabinet, you can build an easy furniture vanity in a day while preserving the details that make the piece unique.
The winning formula is straightforward: measure the bathroom, plan around existing plumbing, choose a compatible sink, cut carefully, preserve usable storage, protect the furniture from moisture, level the cabinet, and fasten it securely. Take leak testing seriously and follow the sink, faucet, sealant, and finishing product instructions for the exact materials you use.
The finished result can deliver the warmth of real furniture, practical bathroom storage, and the smugbut fully deservedsatisfaction of saying, “Oh, the vanity? I made that.”
Note: This project is best suited to installations that reuse accessible existing plumbing. Major drain, supply, electrical, or structural changes should comply with local requirements and may call for a qualified professional.