Some people deal with boredom by scrolling. Others reorganize a junk drawer and call it personal growth. But if you want a project that is equal parts useful, fun, and oddly satisfying, building a cornhole game set is a fantastic way to spend a day. You get to cut wood, make something with your hands, customize it however you want, and end the project with a backyard game everyone actually wants to play. That is a pretty strong return on investment for a few boards, some screws, and a little sawdust in your shoes.
Better yet, a DIY cornhole set is approachable. You do not need a full workshop that looks like a television set. You need a solid plan, a few standard tools, and enough patience to measure twice instead of embracing chaos on the first cut. When you are done, you will have a custom game set that works for cookouts, tailgates, family nights, birthdays, and those random Saturdays when nobody can agree on what to do.
This guide walks you through how to build a regulation-style cornhole set, choose the right materials, finish the boards properly, and avoid the classic mistakes that turn a simple project into a dramatic monologue in the driveway.
Why Build Your Own Cornhole Boards?
Store-bought cornhole sets can be convenient, but homemade boards have a few big advantages. First, you control the quality. Second, you control the look. Third, you get the deeply rewarding experience of pointing at a finished board and saying, “Yeah, I made that,” which is the universal language of DIY pride.
A homemade cornhole game set also lets you choose whether you want a simple backyard version or something closer to a regulation setup. You can paint team colors, add a family name, stain the wood for a cleaner look, or keep the design minimal and classic. Either way, the final product feels more personal than a generic set pulled out of a box.
Start With Regulation Cornhole Dimensions
If you want your build to feel right during actual play, begin with regulation dimensions. This is the part where precision matters. Cornhole is relaxed. Your measurements should not be.
Standard Board Size
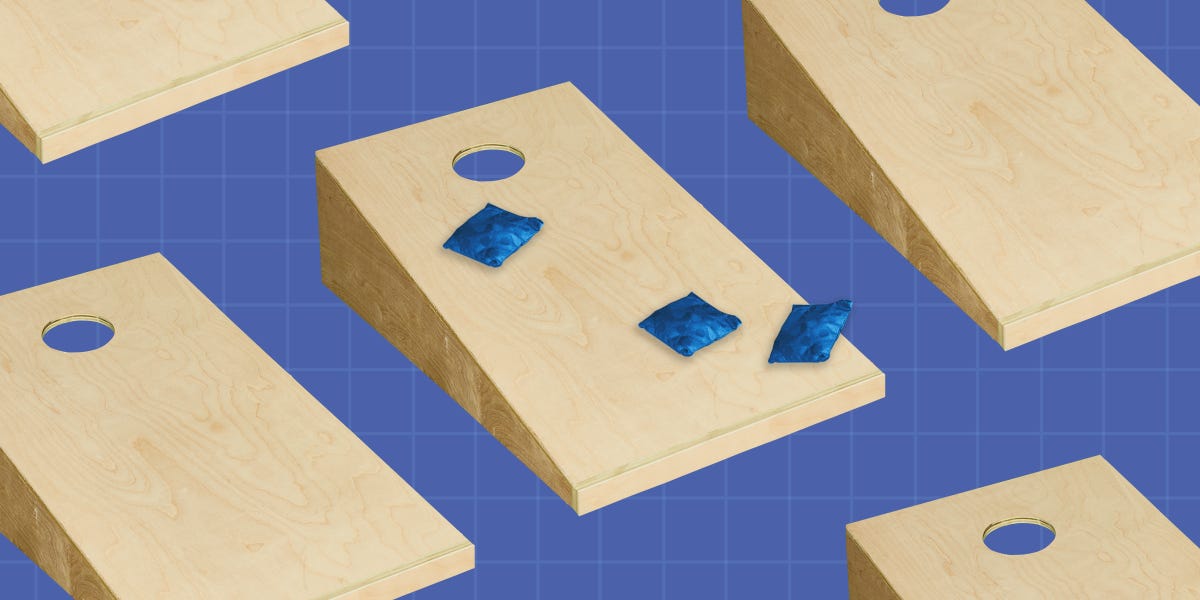
A regulation cornhole board is 2 feet wide and 4 feet long. The playing surface should be smooth and sturdy, typically made from plywood. The hole is 6 inches in diameter and centered 9 inches down from the top edge of the board, with the center of the hole lined up in the middle from side to side.
Board Height and Angle
The back of the board should sit 12 inches off the ground, while the front sits about 3 to 4 inches high. That tilt creates the familiar slope that helps bags slide, stick, or drop through the hole depending on how they land. Too flat and the game feels wrong. Too steep and every throw turns into a physics experiment nobody asked for.
Bag and Court Basics
A full set includes eight bags total, with four bags in one color and four in another. Standard bags are typically 6 by 6 inches and around 1 pound each. Official play usually places the front edges of the boards 27 feet apart, though many casual players shorten the distance for kids, beginners, or smaller yards. That is perfectly fine. Backyard fun does not require a referee with a tape measure and a whistle.
Materials You’ll Need
You can build a solid cornhole game set with common materials from a home center. Most DIY builders use plywood for the tops and 2x4s or similar lumber for the frame and legs.
- Two plywood tops cut to 24 x 48 inches
- Boards for the frame and legs
- Deck screws or wood screws
- Wood glue
- Carriage bolts, washers, and nuts for folding legs
- Sandpaper in medium and fine grits
- Primer and paint or stain
- Clear protective finish, such as polyurethane or polycrylic
If you want a sturdier, more premium feel, you can use thicker plywood. If you want a lighter set for easy carrying, stick closer to the minimum thickness. There is always a balance between portability and that nice, satisfying “thunk” when a bag lands.
Tools That Make the Job Easier
You do not need a giant workshop, but a few tools make the build cleaner and faster.
- Tape measure
- Pencil
- Circular saw, miter saw, or table saw
- Drill and drill bits
- Jigsaw for cutting the hole
- Clamps
- Sander or sanding block
- Paintbrushes or foam rollers
If you are missing something, this is still a very manageable project. Many DIY guides treat cornhole boards as a one-day build because the construction is straightforward. The finishing work is what usually takes longer, especially if you want the boards to look sharp rather than merely functional.
How to Build a Cornhole Game Set
1. Cut the Board Tops
Start by cutting two plywood rectangles to 24 by 48 inches. These will become your playing surfaces. Accuracy matters here because uneven tops can make the whole set look slightly off, and once you see it, you will never unsee it.
2. Mark and Cut the Holes
Measure 9 inches down from the top edge of each board and find the center point across the width. Draw a 6-inch circle and cut it out with a jigsaw. Take your time. A clean hole makes the boards look professionally made, while a jagged hole makes the project look like it lost a fight.
3. Build the Frames
Under each top, assemble a rectangular frame using lumber cut to support the 2-by-4-foot shape. Attach the short pieces between the long pieces so the final frame fits neatly under the plywood top. Use wood glue and screws for a tight build.
4. Attach the Tops
Set the plywood tops on the frames, square everything carefully, and fasten them down with screws. If the frame is twisted or the top is not flush, the finished board can wobble. Cornhole should involve competition between players, not between the board and the lawn.
5. Make the Legs
Cut four legs and shape the ends so they can pivot smoothly when attached. Many DIY builders round one end and drill a centered hole for the carriage bolt. The leg length and angle matter because they determine the final height of the board. Once installed, the rear should sit around 12 inches high.
6. Install Folding Hardware
Attach the legs using carriage bolts, washers, and nuts so they can fold inward under the board. Folding legs are worth the extra effort because they make storage and transport much easier. A cornhole board that cannot fit in the garage without causing a household debate is less fun than advertised.
7. Sand Everything Smooth
Sand the playing surface, edges, and corners thoroughly. The goal is a smooth surface that lets bags slide without snagging. This is one of the most important steps in the build. Beautiful paint cannot hide a rough board forever. The first bean bag will tell on you.
How to Finish Cornhole Boards the Right Way
A proper finish does two jobs. It protects the wood and creates the right playing feel. A cornhole board should be slick enough for bags to move, but not so slick that every toss slides off like it is escaping responsibility.
Paint, Stain, or Decals?
This is where the project becomes personal. You can paint the entire surface in bold colors, stain the wood for a natural look, add stripes, apply vinyl decals, or create custom artwork. Some people build boards for a favorite football team. Others go for clean, modern designs. And some go full patriotic fireworks mode. It is your set. Choose your flavor.
Use a Protective Topcoat
Once your design is dry, seal it with a clear finish. Water-based polyurethane is a popular choice because it adds protection without turning your boards into yellow-tinted relics. Polycrylic is another option many builders like for a clean finish over painted surfaces. Apply multiple thin coats instead of one thick coat. Thick coats tend to drip, pool, and inspire regret.
Let the Finish Cure
Do not rush this part. Dry and cured are not the same thing. If you start playing too early, the bags can stick, the finish can scuff, and your brand-new boards can look tired before their first real cookout. Let the finish fully cure so the playing surface performs the way it should.
Should You Make the Bean Bags Too?
You can. Many DIY plans include homemade bags, and they are not especially complicated if you can sew a straight enough line to keep the filling from escaping like popcorn at a movie theater.
Durable fabric such as duck cloth works well. Cut equal squares, sew three sides, fill each bag, and close the fourth side securely. Traditional filling uses corn kernels, while many modern bags use resin pellets or plastic fill for better durability and weather resistance. If you want the boards to feel homemade but the bags to feel ultra-consistent, there is no shame in buying the bags separately.
Common Cornhole Board Building Mistakes
Using Warped Lumber
If the lumber is bowed, twisted, or badly warped, your boards may never sit flat. Pick the straightest pieces you can find. It saves time, frustration, and several dramatic sighs in the parking lot.
Skipping Pilot Holes
Fasteners placed too close to the ends of boards can split the wood. Pilot holes are boring, yes, but they prevent problems and make you look like you know what you are doing.
Ignoring the Surface Finish
A rough board ruins gameplay. So does a finish that is too slick. The ideal surface feels smooth, durable, and balanced.
Rushing the Decorative Work
Paint bleeds, crooked stripes, wrinkled decals, and smudged clear coats all happen when people decide “close enough” is a design strategy. It is not. Slow down and let each layer dry properly.
How Much Does It Cost to Build a DIY Cornhole Set?
The final cost depends on the materials you choose and whether you already own the tools. A simple set can be budget-friendly if you stick with basic plywood, standard lumber, and paint you already have. If you choose premium plywood, custom graphics, nicer hardware, and extra finishing supplies, the total goes up.
Still, building your own cornhole game set usually delivers better value than buying a flimsy set that looks great in the product photo and suspiciously lightweight in person. DIY lets you spend money where it matters: sturdier tops, better hardware, and a finish that holds up through repeated use.
How to Make Your Cornhole Set More Fun
Add Personal Graphics
Monograms, team logos, cabin names, school colors, or simple geometric designs all work well. A custom set feels like part game, part backyard décor.
Build a Scoreboard
If your family gets competitive, a simple scoreboard is a smart add-on. Otherwise, the phrase “I thought we had 17” will become the soundtrack of your weekend.
Use Lights for Night Play
Glow paint, LED strips, or clip-on outdoor lights can turn a basic setup into a crowd favorite after sunset. This is especially fun for parties and summer gatherings.
What the Experience of Building a Cornhole Set Is Really Like
There is something wonderfully old-school about building a cornhole game set. You begin with boredom, a pile of wood, and a vague sense that you should probably be doing something productive. A few hours later, you are standing in the yard tossing bags at something you built yourself, and suddenly the day has a plot. That experience is a huge part of this project’s appeal.
The early phase feels practical. You measure, mark, cut, and try not to second-guess the plan every four minutes. Then the project shifts. Once the hole is cut and the frame comes together, the boards stop looking like random lumber and start looking like a real game. That moment is surprisingly motivating. It is the DIY equivalent of smelling cookies in the oven. You know the good part is coming.
There is also a satisfying rhythm to the work. Measure. Cut. Clamp. Screw. Sand. Repeat. It is active enough to be engaging, but simple enough that it does not feel overwhelming. Even people who are not serious woodworkers tend to enjoy the process because the project is clear and the result is immediately understandable. You are not building a mysterious cabinet with nineteen hidden joints. You are building fun.
The customization stage is where personalities show up. One person paints clean stripes and adds a crisp monogram. Another creates a full team-themed masterpiece. Someone else says they are going for “rustic” when what they really mean is “I spilled stain in two places and chose confidence.” That is part of the charm. Cornhole boards do not need to be museum pieces. They need to be sturdy, playable, and fun enough that people want another round.
And then comes the best part: the first game. The boards hit the grass. The bags come out. Somebody throws too hard. Somebody celebrates far too early. Somebody immediately suggests a tournament. The project that started as a cure for boredom turns into an excuse for gathering. That is why this build works so well. It does not just fill time. It creates future good times too.
Over time, the set gets better. A few scuffs show up. The bags soften. The finish loses that brand-new look and gains character. Suddenly your boards are not just a backyard game set. They are the thing dragged out for cookouts, holiday weekends, birthday parties, and those random evenings when the weather is too nice to waste indoors. A good DIY project gives you something useful. A great one gives you memories attached to it. Cornhole somehow manages both without being fussy, expensive, or overly complicated.
Final Thoughts
If you are bored and itching to build something, a cornhole game set is one of the best DIY projects you can pick. It is practical, beginner-friendly, customizable, and fun long after the last screw goes in. You do not need advanced skills to make a set that looks sharp and plays well. You just need a plan, decent materials, and enough patience to finish it properly.
Build it once, build it well, and you will have a game set that earns its keep for years. Not bad for a project that started with, “So… what should we do today?”