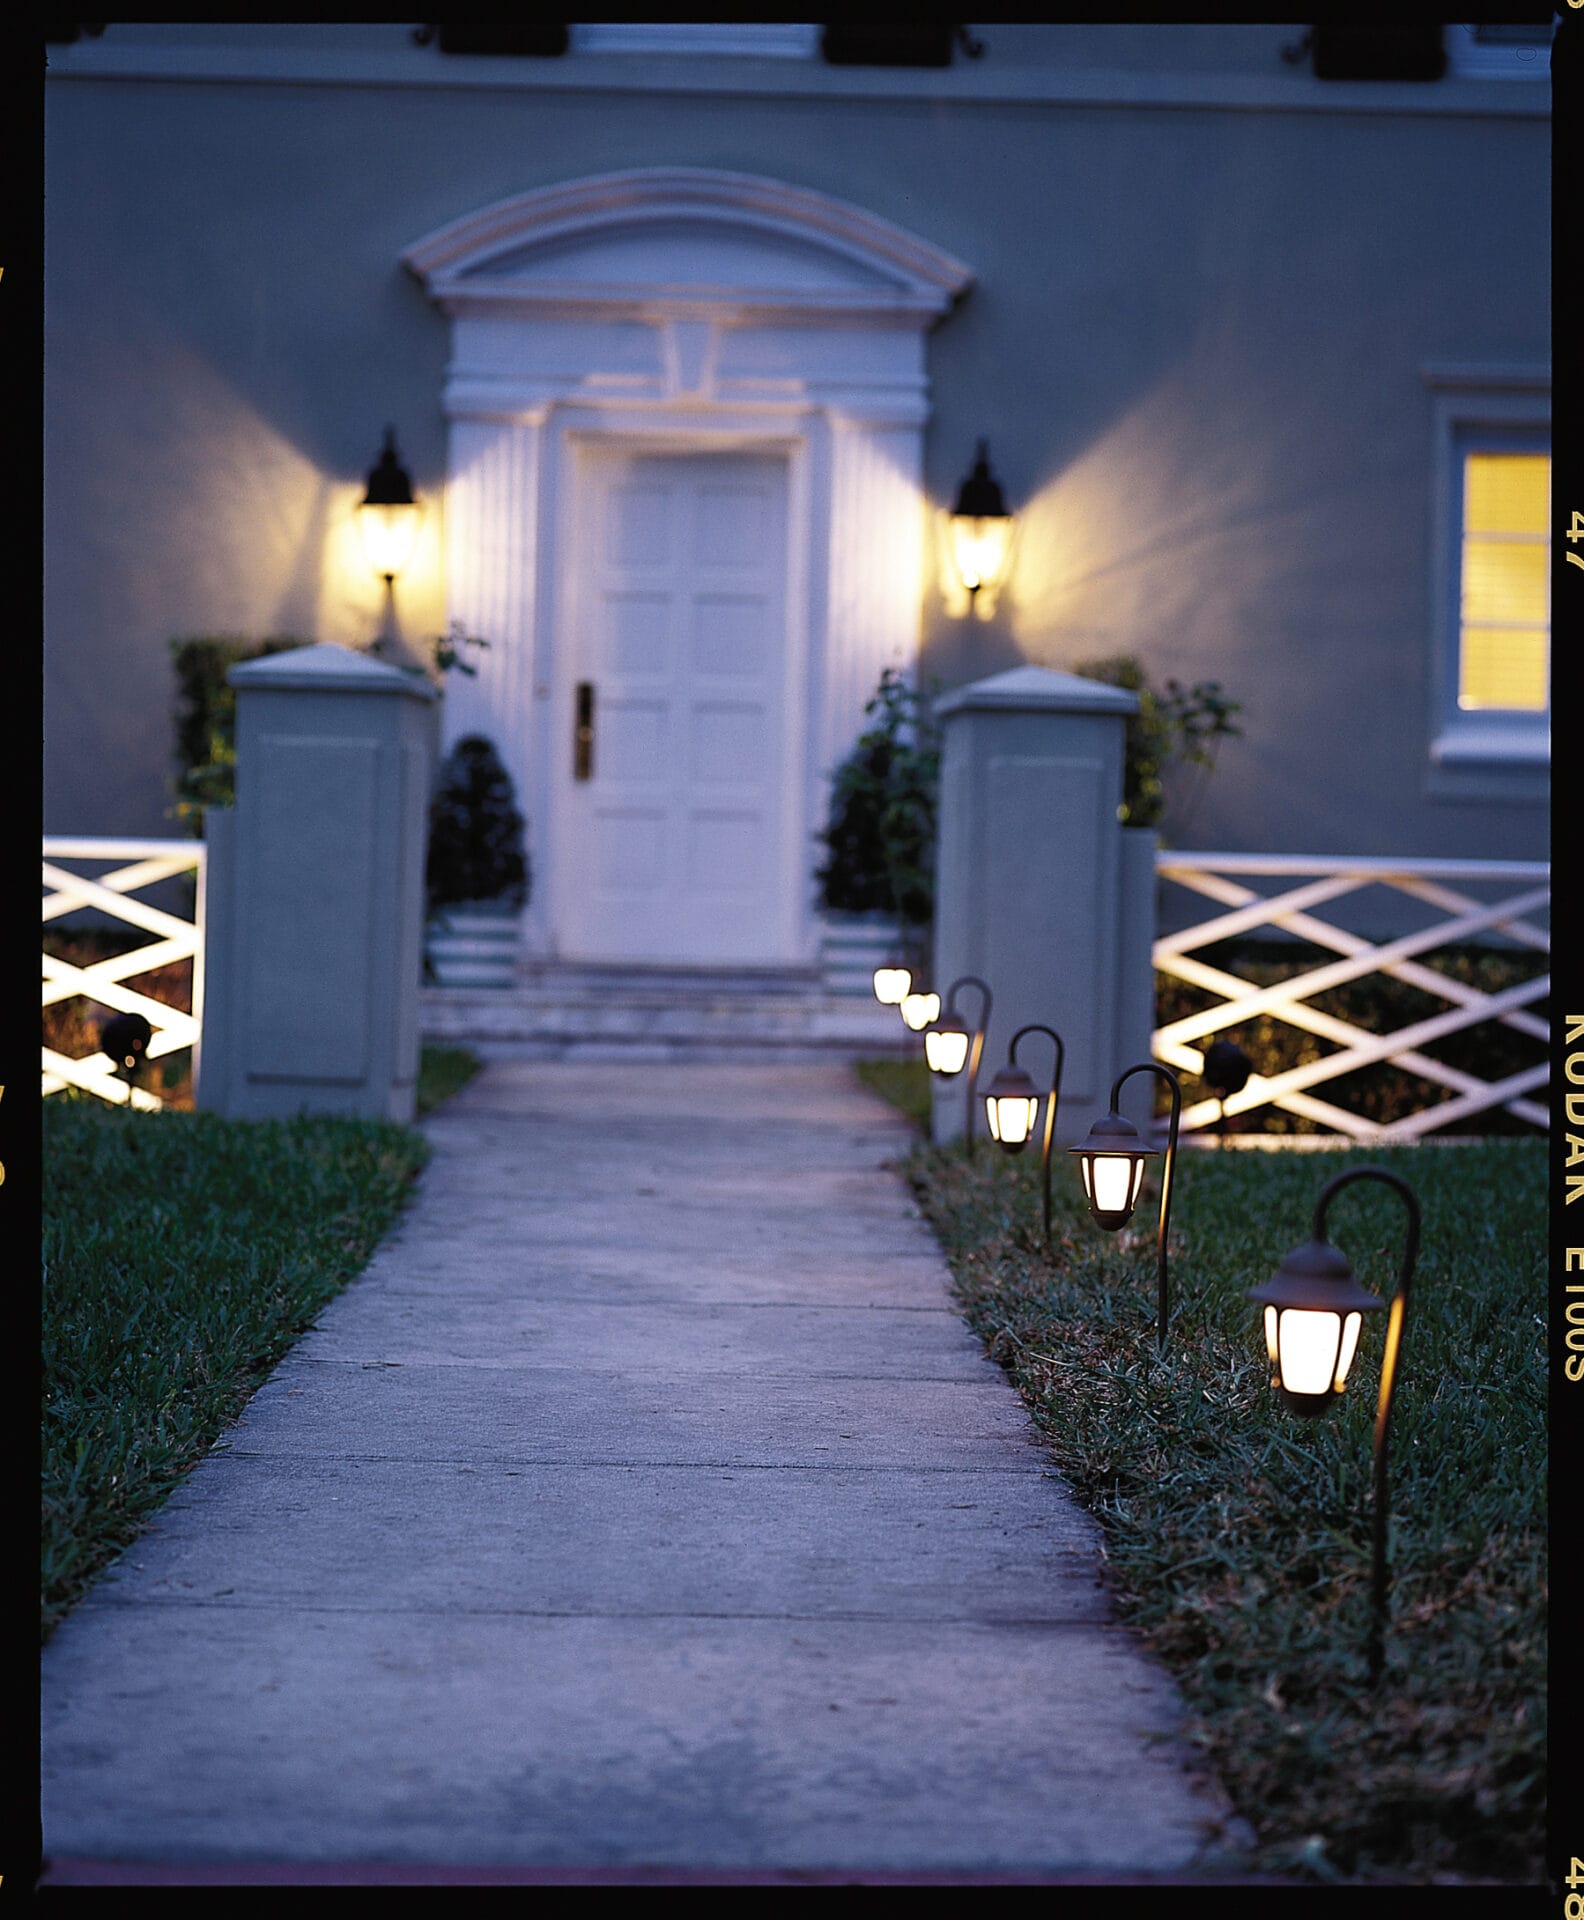
Landscape lighting is one of those home upgrades that quietly becomes a show-off. During the day, nobody notices the cable tucked under mulch or the transformer mounted beside the ht hired a publicist, and suddenly your yard has main-character energy.
The good news: learning how to put in landscape lighting is very doable for many homeowners, especially when using a low voltage landscape lighting system. The even better news: you do not need to turn your yard into an airport runway. A smart installation uses just enough light to guide footsteps, highlight architectural features, and make outdoor spaces feel warm, safe, and inviting.
This guide walks through planning, choosing fixtures, wiring, installing, troubleshooting, and maintaining a landscape lighting system that looks polished without making the neighbors wonder if you are signaling aircraft.
What Landscape Lighting Actually Does
Before buying the first shiny path light that winks at you from the store shelf, decide what you want your outdoor lighting to accomplish. Great landscape lighting usually does three things: improves safety, adds curb appeal, and extends the use of outdoor spaces after dark.
For safety, lights belong near walkways, steps, driveways, patios, decks, gates, and any place where ankles might file a complaint. For beauty, lights can highlight trees, stone walls, garden beds, columns, water features, and interesting textures on your home. For atmosphere, softer lights near seating areas can make a patio feel like an outdoor room instead of a dark slab with furniture.
Choose the Right Type of Landscape Lighting
Solar Landscape Lights
Solar lights are the easiest to install because they do not need wiring. You push them into the ground, let the sun charge them, and enjoy the glow. They work best in sunny areas that receive several hours of direct light each day. The tradeoff is consistency. Cloudy weather, shade, old batteries, and winter days can reduce brightness.
Low Voltage Landscape Lighting
Low voltage lighting is the most popular DIY-friendly option for permanent-looking results. A transformer plugs into an outdoor GFCI-protected outlet and steps household current down to 12 volts. From there, direct-burial cable carries power to path lights, spotlights, well lights, deck lights, and other fixtures.
For most homeowners, this is the sweet spot: safer than line-voltage work, more reliable than solar, and flexible enough to upgrade later. If your goal is to install landscape lights that look professional and perform consistently, low voltage is usually the best starting point.
Line Voltage Lighting
Line voltage systems operate at 120 volts, the same power level as standard household circuits. They can be powerful, but they usually require deeper burial, conduit, permits, junction boxes, and a licensed electrician. For most DIY landscape lighting installation projects, line voltage is where the toolbox closes and the professional phone call begins.
Plan the Layout Before You Dig
The best time to design landscape lighting is not after you have already shoved ten fixtures into the ground like birthday candles. Start with a simple sketch of your yard. Mark your house, walkways, driveway, trees, garden beds, steps, patio, deck, fence, and outdoor outlet location.
Then walk the property at night with a flashlight. Shine light from different directions and heights. Uplight a tree from the base. Aim a beam across a stone wall. Hold a flashlight low beside the walkway. This little test shows what deserves attention and what should remain peacefully in the dark.
Good Fixture Placement Examples
- Path lights: Place them slightly off the walkway edge, usually staggered rather than lined up like soldiers.
- Spotlights: Aim them at trees, columns, textured walls, or architectural details.
- Well lights: Use them for discreet uplighting where a visible fixture would look bulky.
- Step lights: Install them near stairs, retaining walls, or deck transitions for safer movement.
- Flood lights: Use sparingly for broad coverage, not as a substitute for thoughtful design.
A common spacing range for path lights is about 8 to 10 feet apart, but the real goal is overlapping pools of light, not a glowing runway. If your path curves, place fixtures where they help guide the eye around the bend.
Gather Tools and Materials
A basic low voltage landscape lighting installation does not require a truck full of mysterious professional gadgets. You can usually complete the project with common tools and the right lighting components.
Materials You May Need
- Low voltage transformer
- Outdoor-rated low voltage fixtures
- Direct-burial landscape lighting cable
- Waterproof wire connectors
- Ground stakes or mounting hardware
- Timer, photocell, or smart outdoor control if not built into the transformer
- Mulch or soil for restoring trenches
Helpful Tools
- Tape measure
- Flat shovel or edging tool
- Wire stripper
- Screwdriver
- Work gloves
- Voltage tester or multimeter
- Rubber mallet
- Notebook or phone for recording fixture wattage and layout
Calculate Transformer Size
The transformer is the heart of a low voltage system. Choose one too small, and your lights may dim, flicker, or fail to perform well. Choose one with enough capacity, and the system has room to breathe.
Start by adding the wattage of every fixture. For example, if you plan to install ten LED path lights rated at 4 watts each and four spotlights rated at 6 watts each, your total load is 64 watts. A transformer rated above that total gives you a safer operating margin and room for future expansion.
A practical rule is to leave about 20 to 25 percent extra capacity. For a 64-watt system, a 100-watt transformer would be more comfortable than a 60-watt transformer. Avoid overloading the transformer; outdoor lighting is supposed to make your yard glow, not make your equipment sweat.
Pick the Right Cable Gauge
Landscape lighting cable comes in different gauges. The lower the gauge number, the thicker the wire. Longer runs and higher wattage loads usually need thicker cable to reduce voltage drop. Voltage drop happens when lights far from the transformer receive less power, making them dimmer than the lights near the house.
For short runs with modest LED loads, 14-gauge or 16-gauge cable may work. For longer runs, larger systems, or multiple fixture groups, 12-gauge or even thicker cable may be better. Always follow the fixture and transformer manufacturer instructions, and when in doubt, choose the more robust cable. Future-you, the one adding three more lights around the new hydrangeas, will be grateful.
Call 811 Before Digging
Even low voltage lighting cable sits in shallow trenches, but you should still contact 811 before digging. Buried gas, electric, communication, water, and irrigation lines are not always where common sense thinks they should be. Common sense has never owned a shovel.
Contact your local 811 center a few business days before the project. Utility locators will mark public utility lines with paint or flags. Respect those marks, dig carefully around them, and remember that private lines, such as irrigation pipes or wiring to a shed, may require separate locating.
Step-by-Step: How To Put in Landscape Lighting
Step 1: Assemble and Test the Fixtures
Open the boxes, assemble the fixtures, and confirm that all stakes, lenses, screws, connectors, and lamps are included. It is much better to discover a missing part at noon on the driveway than at 8:45 p.m. while crouched in mulch and bargaining with mosquitoes.
Step 2: Place Fixtures Temporarily
Set every fixture in its planned location without burying cable or driving stakes fully into the ground. View the layout from the street, porch, driveway, and patio. Adjust spacing until the design looks balanced.
Step 3: Mount the Transformer
Install the transformer near an outdoor-rated GFCI outlet. Mount it vertically according to the manufacturer instructions, usually above ground level and away from sprinkler spray, puddles, and direct soil contact. Do not use an indoor transformer outside.
Step 4: Lay Out the Cable
Run the low voltage cable from the transformer along your planned route. Leave extra slack at each fixture location so you can adjust placement later. Avoid placing cable where it will be damaged by edging tools, aerators, heavy foot traffic, or future planting projects.
Step 5: Connect Fixtures
Connect each light to the main cable using waterproof connectors approved for outdoor or direct-burial use. Many budget kits include quick clamp connectors, but silicone-filled waterproof connectors are usually more durable. Moisture is the sneaky villain in outdoor lighting; give it fewer places to cause trouble.
Step 6: Connect Cable to the Transformer
With the transformer unplugged, strip the cable ends as directed and attach them to the transformer terminals. Many systems use common and 12-volt terminals. Some professional-style transformers include multiple voltage taps to help compensate for voltage drop on longer runs.
Step 7: Test Before Burying
Plug in the transformer and turn on the system. Check every fixture. Adjust beam angles, rotate path lights, and confirm that spotlights are aimed at features rather than windows, drivers, or your neighbor’s breakfast nook.
Step 8: Bury the Cable
Once everything works, bury the cable in a shallow trench according to local requirements and manufacturer instructions. Many low voltage systems use shallow burial, often around 3 to 6 inches. Keep connections accessible when possible, especially near fixtures, so repairs do not require an archaeological expedition.
Step 9: Set the Timer or Photocell
Use a timer, photocell, smart plug, or built-in transformer control so the lights operate only when needed. Dusk-to-dawn sensors are convenient, while timers can reduce energy use by turning lights off late at night.
Design Tips for a Professional Look
Professional-looking outdoor lighting is usually more restrained than beginners expect. Instead of lighting everything, highlight the best things. Darkness is not the enemy; it is the contrast that makes the lighting dramatic.
Use Warm Light
Warm white light, often around 2700K to 3000K, creates a comfortable residential glow. Cooler blue-white light can feel harsh in a garden and may increase glare. Warm light makes brick, wood, stone, foliage, and skin tones look more natural.
Aim Down and Across, Not Into Eyes
Good landscape lighting illuminates surfaces, not eyeballs. Shield fixtures where possible, tilt spotlights carefully, and check glare from normal viewing angles. If you can see the bare light source from the street or seating area, adjust it.
Layer the Lighting
Use several types of light for depth. Path lights guide movement. Uplights create drama. Downlights from trees can mimic moonlight. Step lights improve safety. A layered plan feels intentional, while one fixture type repeated everywhere can feel flat.
Do Not Overlight
Your yard should not be brighter than your living room. Use the lowest effective brightness, control the hours of operation, and keep light on your property. Responsible landscape lighting saves energy, reduces glare, and is kinder to neighbors, wildlife, and your own sleep cycle.
Common Landscape Lighting Mistakes
- Buying fixtures before planning: This leads to random placement and unused lights.
- Using too small a transformer: Leave room for the actual load and future additions.
- Spacing path lights too close: This creates the dreaded runway effect.
- Aiming lights into windows: Beautiful outside, annoying inside.
- Skipping waterproof connectors: Moisture will eventually find weak connections.
- Not testing before burial: Never hide cable until every light works.
- Forgetting maintenance: Plants grow, mulch shifts, lenses get dirty, and fixtures move.
Troubleshooting After Installation
Some Lights Are Dim
Dim lights at the end of a run often point to voltage drop. Try reducing the number of fixtures on that run, using thicker cable, creating separate zones, or using the appropriate transformer voltage tap if available.
One Fixture Does Not Work
Check the bulb or LED module, then inspect the connector. Most single-fixture failures come from loose, corroded, or poorly sealed connections.
The Whole System Is Off
Confirm the outlet has power, reset the GFCI, check the transformer settings, and inspect the timer or photocell. Also check whether the transformer breaker or overload protection has tripped.
Lights Flicker
Flickering can come from loose connections, moisture, overloaded transformers, incompatible lamps, or damaged cable. Unplug the system before inspecting wiring.
Maintenance for Long-Lasting Landscape Lights
A good landscape lighting system needs occasional attention, but maintenance is simple. Clean lenses a few times per year so dirt, hard water spots, and pollen do not dull the beam. Trim plants away from fixtures. Re-aim spotlights after storms, yard work, or enthusiastic pets. Check exposed cable near fixtures and rebury any sections that rise above the soil.
In fall, clear leaves away from well lights and path fixtures. In winter climates, mark fixture locations before snow arrives so shovels and plows do not turn your lighting investment into modern art. Once or twice a year, walk the system at night and adjust as the landscape changes.
Real-World Experience: What Installing Landscape Lighting Feels Like
The first lesson from putting in landscape lighting is that the yard looks completely different once you start thinking in shadows. During the day, a walkway is just a walkway. At night, it becomes a route guests must follow without tripping over a brick edge, a sprinkler head, or that one root that has been plotting against everyone since 2017. This is why the flashlight test is so helpful. You quickly learn that one carefully placed light can do more than three random fixtures.
The second lesson is that less light usually looks more expensive. Many first-time installers want to brighten every shrub, tree, wall, and garden gnome. After testing, they realize the best effect comes from restraint. A single uplight on a sculptural tree can create more drama than a dozen scattered lights. A soft glow across a stone wall gives texture. A few staggered path lights create rhythm. Darkness between these features gives the eye a place to rest. Without that contrast, the yard becomes visually noisy.
The third lesson is that cable management matters more than expected. Laying cable is easy when it is stretched across the lawn like a garden hose. Making it neat, protected, and future-friendly takes patience. Leave slack near fixtures. Avoid sharp bends. Keep cable away from edging lines. Take a photo of the layout before burying anything. That photo may save you later when you decide to plant a new rose bush and wonder, “Is there a wire under here?” Spoiler: there probably is.
The fourth lesson is that the first night of testing is where the real design happens. Fixtures that looked perfectly placed in daylight may glare into a window at night. A spotlight may hit the lower trunk of a tree beautifully but miss the canopy. A path light may be too close to the edge and create a bright hot spot. Expect to move things. In fact, plan to move things. Temporary placement is not laziness; it is wisdom wearing work gloves.
The fifth lesson is that outdoor lighting makes a home feel cared for. It is not only about looks. A lit walkway feels welcoming. A softly illuminated entry feels safer. A patio with warm lighting invites people to stay outside longer. Good landscape lighting changes how people move through and enjoy a property. It turns dark corners into usable spaces and ordinary plants into nighttime features. The project may start with wire, fixtures, and a transformer, but the payoff is emotional: the house feels warmer, calmer, and more complete after sunset.
Conclusion
Knowing how to put in landscape lighting starts with a plan, not a shovel. Choose the right lighting type, sketch your layout, calculate transformer capacity, use proper outdoor-rated materials, call 811 before digging, test the system before burying cable, and aim every fixture with purpose. The best landscape lighting installation is not the brightest one. It is the one that guides movement, flatters the home, protects the night, and makes the yard feel inviting without shouting for attention.
Low voltage landscape lighting is a practical DIY project when done carefully. Start small, use warm light, avoid glare, and leave room for future expansion. Your yard does not need to glow like a stadium. It only needs the right light in the right place at the right time.
Note: This article is written in original standard American English and synthesized from practical U.S. landscape lighting installation, electrical safety, safe-digging, and outdoor lighting design guidance.