A pantry can go from peaceful food library to snack-based disaster zone with remarkable speed. One grocery trip introduces three half-used bags of rice, a cereal box too tall for the shelf, and enough canned tomatoes to survive a very specific apocalypse. Before long, finding the peanut butter requires an archaeological permit.
The good news is that effective pantry organization does not require a walk-in room, custom cabinetry, or a matching container for every lentil. A clutter-proof pantry is built around visibility, accessibility, realistic shopping habits, and easy routines. The goal is not to create a showroom that nobody is allowed to touch. It is to create a practical storage system that continues working after breakfast, grocery day, and the mysterious arrival of six extra bags of chips.
These genius pantry organization ideas will help you clear crowded shelves, use awkward spaces, reduce duplicate purchases, and make everyday cooking noticeably easier.
Why Pantry Clutter Keeps Coming Back
Pantry clutter is rarely caused by laziness. More often, the storage system does not match the way the household actually eats, cooks, and shops. A beautiful basket labeled “Artisanal Grains” is not especially useful when everyone keeps tossing granola bars into it.
Common problems include shelves that are too deep, categories that are too broad, invisible items at the back, excessive bulk shopping, and containers that do not fit the available space. Another major culprit is overfilling. When every shelf is packed edge to edge, removing one item causes a minor avalanche and returning it becomes a game of edible Tetris.
The best pantry organization system solves those problems with simple boundaries and obvious homes for commonly used foods.
1. Empty the Pantry Before Buying Organizers
Buying storage bins before evaluating the pantry is like buying shoes before checking your size. The bins may be lovely, but there is a strong chance they will not fit.
Begin by removing everything from the shelves. Place items on a counter or table and sort them into useful groups such as breakfast foods, baking ingredients, canned goods, snacks, pasta, sauces, beverages, and back stock.
As you sort, identify duplicate products, empty packages, stale foods, and ingredients nobody enjoys. Check cans for leaking, swelling, heavy rust, or severe dents. Products with damaged packaging should be handled cautiously rather than returned to storage.
Wipe down the empty shelves before replacing anything. This reset reveals your true inventory and lets you organize the space around what you own instead of hiding clutter inside attractive plastic.
2. Measure Every Shelf
Measure shelf width, depth, and height, including the distance between fixed shelves. Note hinges, door frames, pipes, electrical outlets, and other obstacles that affect usable space.
Deep shelves often need pull-out bins, while shallow shelves may work better with narrow containers or tiered risers. Tall shelves can accommodate stackable bins, but only when there is enough clearance to lift the upper container comfortably.
Record the measurements on your phone before shopping. A bin that is one inch too deep is not “almost perfect.” It is a plastic reminder that optimism is not a measuring system.
3. Create Pantry Zones Based on Real Life
Grouping similar items together is one of the most dependable pantry clutter solutions. However, categories should reflect how your household uses food.
Useful pantry zones may include:
- Breakfast foods
- Weeknight meal ingredients
- Baking supplies
- Canned vegetables and beans
- Pasta, rice, and grains
- Snacks and lunchbox foods
- Sauces, oils, and condiments
- Tea, coffee, and drink mixes
- Pet food
- Bulk refills and back stock
A “taco night” bin containing shells, seasoning, canned beans, and salsa may work better for your family than separating every ingredient by package type. Similarly, a breakfast station can hold oatmeal, cereal, nut butter, and pancake mix in one convenient area.
Do not create so many zones that returning groceries requires a map. Broad, understandable categories are easier for everyone to maintain.
4. Give Prime Shelf Space to Everyday Items
Frequently used foods should live between waist and eye level. This is the pantry equivalent of first-class seating: fast access, no climbing, and minimal inconvenience.
Place cereal, coffee, lunch supplies, cooking oils, and regular dinner ingredients within easy reach. Reserve high shelves for seasonal bakeware, party supplies, specialty appliances, and unopened back stock. Heavy containers belong on lower shelves where they are easier and safer to lift.
When organizing for children, place approved snacks on a lower shelf. This supports independence and reduces the familiar sound of someone shouting, “Where are the crackers?” while standing directly in front of the crackers.
5. Use Clear Bins to Control Loose Packages
Clear bins are especially useful for snack bags, seasoning packets, baking decorations, drink mixes, and other small packages that refuse to stand politely on a shelf.
Choose bins with straight sides and comfortable handles. A bin should slide out easily so you can see everything inside without unloading the shelf. Narrow bins can divide a deep pantry into lanes, preventing smaller foods from disappearing behind larger boxes.
Clear storage also makes shortages visible. When the snack bin looks empty, you know what to buy. When an opaque basket looks empty, it may simply be concealing seventeen granola bars beneath a bag of pretzels.
6. Decant Selectively, Not Obsessively
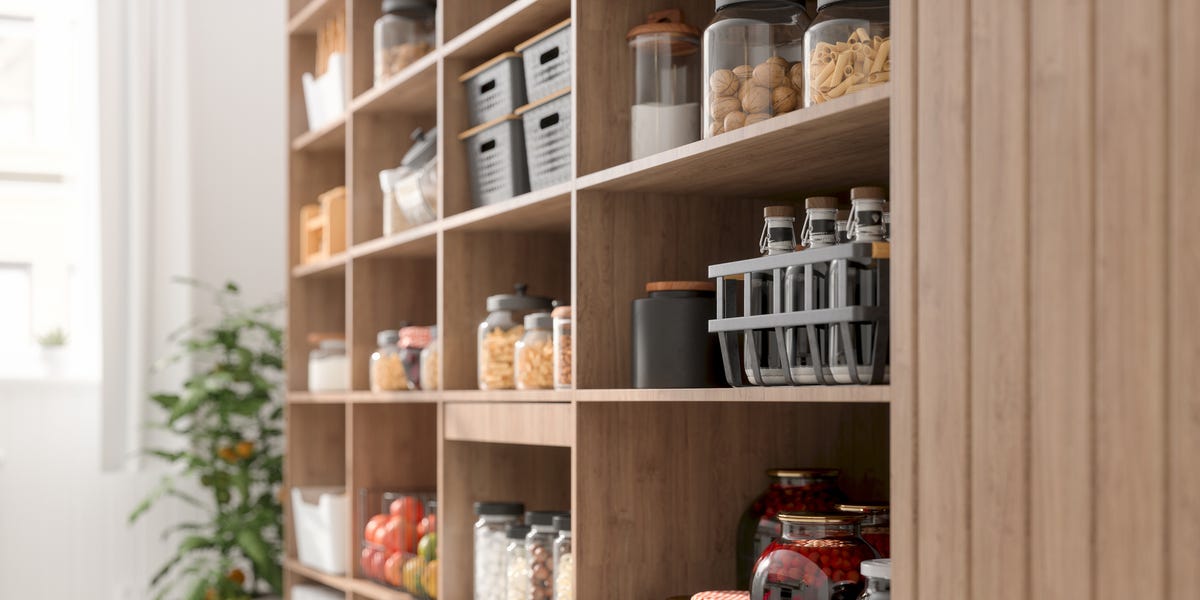
Airtight containers can protect flour, sugar, cereal, pasta, grains, nuts, and other dry foods after their original packages are opened. Square and rectangular containers generally use shelf space more efficiently than round ones.
However, not every product needs to be transferred. Decanting works best for ingredients that are used regularly, arrive in flimsy packaging, or benefit from a secure seal. A small box of pasta that will be used in one meal does not necessarily need its own luxury apartment.
Select containers that are easy to wash, fill, pour, and scoop from. Before transferring food, confirm that the entire package will fit. Otherwise, you may create the dreaded “container plus leftover bag” situation, which doubles the clutter instead of reducing it.
Preserve important package information
Label decanted foods with the product name and relevant date. Keep cooking instructions, allergen information, or lot details when needed. These can be clipped from the package and placed in a small envelope, attached to the container, or recorded digitally.
7. Add Labels That Explain the System
Labels are not merely decorative. They communicate where things belong, especially in a shared kitchen.
Label shelves, baskets, bins, and canisters using simple terms such as “Snacks,” “Baking,” “Pasta,” or “Breakfast.” Avoid clever descriptions that require interpretation. “Tiny Moments of Joy” may sound delightful, but nobody knows whether it contains chocolate, tea, or batteries.
Use removable labels if your inventory changes often. Chalk markers, dry-erase labels, basket clips, and reusable adhesive labels allow categories to evolve without leaving a sticky historical record on every container.
8. Make Deep Shelves Work Like Drawers
Deep pantry shelves can store plenty of food, but they often create an invisible second row where cans and jars quietly retire.
Place related products in long, handled bins that can be pulled forward like drawers. Use one bin for pasta, another for baking ingredients, and another for sauces. This allows you to reach the back without removing five unrelated items.
For canned goods, use tiered risers so labels remain visible. Shelf steps are particularly helpful when several cans have similar shapes but radically different personalities, such as tomato soup and sliced peaches.
9. Put Turntables in Awkward Corners
Turntables, often called Lazy Susans, are useful for oils, vinegars, sauces, spreads, and jars. A quick rotation brings items from the back forward without requiring a search-and-rescue operation.
Choose a turntable with a raised edge to prevent bottles from sliding off. Divided models can separate categories, while two-tier versions make use of vertical space. Avoid overcrowding the surface; a turntable cannot turn effectively when packed like a rush-hour subway car.
Use turntables in corners, on deep shelves, or wherever bottles tend to form an unruly crowd.
10. Use Vertical Space With Risers and Stackable Storage
Large gaps above short cans and boxes represent valuable unused space. Shelf risers create an additional level for dishes, canned goods, jars, or small bins.
Stackable containers can also help, but stability matters. Place heavier items below lighter ones and avoid tall towers that must be dismantled whenever you need the bottom container.
Adjustable shelving offers even greater flexibility. If every shelf is the same height, short cans may waste space while tall appliances struggle to fit. Repositioning a shelf by a few inches can create an entire new storage level without expanding the pantry itself.
11. Turn the Pantry Door Into Storage
The back of a pantry door can hold shallow shelves, hanging baskets, hooks, or pocket organizers. It is an excellent location for spices, wraps, seasoning packets, lightweight snacks, and other compact products.
Measure door clearance carefully. A deep organizer may collide with interior shelves and prevent the door from closing, turning your clever storage project into an architectural disagreement.
Keep heavy glass containers off lightweight hanging systems unless the organizer is designed and securely installed for that load.
12. Establish a First-In, First-Out Routine
Restaurants commonly rotate inventory so older products are used before newer ones. The same first-in, first-out principle works well at home.
When unloading groceries, place newer packages behind older ones. Keep products that should be used soon at the front or in a designated “Use First” bin. This is helpful for snacks, baking ingredients, canned goods, and duplicate condiments.
Many dates on shelf-stable foods describe peak quality rather than an automatic safety deadline. Nevertheless, food should always be evaluated for damaged packaging, spoilage, pests, unusual odor, or other warning signs. Follow product-specific storage instructions and use extra care with foods intended for infants or people with special health needs.
13. Limit Back Stock to a Defined Area
Bulk buying can save money only when the food is used and there is enough room to store it properly. A sale is not a bargain if half the purchase expires behind a bread machine.
Create one specific shelf or bin for backup products. When that area is full, stop buying more until the supply decreases. This physical boundary prevents “just in case” shopping from spreading across the pantry.
Track frequently purchased staples on a small inventory list. A note on the pantry door or a shared phone list can help household members record items as they run low.
14. Leave Breathing Room
A functional pantry should not be completely full. Open space makes products easier to see, remove, and return. It also provides room for normal changes after grocery shopping.
Aim to keep each shelf comfortably below maximum capacity. You do not need to calculate a precise percentage, but you should be able to remove one item without causing neighboring products to lean, fall, or file a complaint.
If the pantry remains overfilled after decluttering, reduce the amount of duplicate stock or relocate rarely used appliances and serving pieces to another storage area.
15. Create a Five-Minute Weekly Reset
Pantry organization is maintained through small corrections, not heroic annual cleanouts.
Once a week, spend five minutes returning stray items to their zones, folding or sealing open bags, wiping crumbs, and moving older foods forward. Before grocery shopping, scan the shelves and check the “Use First” area.
Schedule a deeper review every few months. Remove everything from one shelf at a time, clean the surface, inspect packages, and reconsider any category that repeatedly becomes messy. A failing zone usually indicates that the system needs adjustment, not that everyone in the household has suddenly rejected civilization.
Low-Cost Pantry Organization Ideas
You can improve pantry storage without purchasing an entire collection of premium organizers. Repurpose clean shoeboxes, sturdy produce boxes, glass jars, magazine holders, and small baskets you already own.
Cardboard boxes can temporarily test a layout before you invest in permanent bins. Cut the tops lower for easier access, cover them with paper if desired, and label the front. A basic tension rod may help separate trays or lightweight packages, while adhesive hooks can hold measuring spoons or reusable shopping bags.
The most important features are fit, visibility, and ease of use. An inexpensive bin that matches the shelf is more valuable than a designer basket that blocks the door.
Pantry Organization Ideas for Small Spaces
If you do not have a traditional pantry, create one using a freestanding cabinet, narrow rolling cart, bookcase, utility shelf, or unused wall. A slim cart can fit between appliances and hold canned goods or dry ingredients. Wall-mounted rails and shallow shelves provide storage without consuming floor space.
In a small kitchen, distribute pantry zones across several locations. Store baking supplies together in one cabinet, breakfast foods near the coffee maker, and dinner staples near the cooking area. The pantry does not have to be one room; it simply needs to function as one coordinated system.
Experiences and Lessons From Real-World Pantry Resets
The most revealing part of a pantry makeover often occurs several weeks after the labels are applied. That is when homeowners discover which ideas genuinely simplify daily life and which ones looked better in photographs than they worked during a rushed Tuesday morning.
Consider a busy family whose pantry originally organized products by package type. Boxes went on one shelf, cans on another, and bags on a third. The arrangement looked orderly, but preparing meals required searching in three locations. Reorganizing by routine created a better result. Breakfast foods moved together, lunchbox snacks received a low pull-out bin, and common dinner ingredients occupied the central shelves. The total amount of storage did not change, yet meal preparation became faster because related products were kept together.
A different challenge appears in small apartment kitchens. One renter may have a single narrow cabinet with deep shelves and no pantry door. Stacking products in rows seems efficient until everything behind the first row becomes invisible. Long bins can transform that cabinet by functioning as removable drawers. Instead of reaching blindly behind cereal boxes, the renter pulls out the breakfast bin and sees the entire category. The improvement is not glamorous, but neither is buying a fourth jar of peanut butter because the first three were hiding.
Home bakers often learn that decanting is most useful when done selectively. Flour and sugar may benefit from large airtight canisters, while tiny specialty ingredients are easier to manage in one labeled baking bin. Transferring every sprinkle, chocolate chip, and packet of yeast into separate containers may create more washing, labeling, and date tracking than the baker wants. A sustainable system respects how much maintenance a person will realistically perform.
Bulk shoppers frequently face another lesson: storage capacity must control purchasing decisions. A large package may have an excellent unit price, but the pantry still has physical limits. Assigning one shelf to backup products creates a visible boundary. When the shelf is full, new purchases wait. This reduces waste and protects the everyday shelves from becoming a warehouse loading dock.
Families also discover that labels are most effective when everyone understands them. A basket marked “Mom’s Healthy Snacks” is overly specific and unlikely to survive. A basket marked “Grab-and-Go Snacks” gives children and adults a clear instruction. The easier a category is to understand, the more likely household members are to put products back correctly.
Perhaps the most important experience is realizing that pantry organization is not permanent. Eating habits change, children grow, dietary needs shift, and a once-useful appliance may become an expensive shelf ornament. Successful pantry systems adapt. A zone that stays messy should be resized, relocated, or renamed rather than repeatedly forced into the same unsuccessful arrangement.
The best pantry makeover is therefore not the one with the prettiest containers. It is the one that reduces forgotten food, duplicate shopping, stressful meal preparation, and arguments about where the crackers belong. When an organized pantry quietly supports daily routines, it has done its job.
Conclusion
Clutter-proofing a pantry begins with removing what you do not need and creating obvious homes for everything that remains. Clear zones, properly sized bins, labels, risers, turntables, door storage, and thoughtful product rotation can transform even a narrow cabinet into efficient food storage.
Start with one shelf rather than waiting for the perfect free weekend. Group similar products, move frequently used foods forward, and test the arrangement before buying more organizers. The goal is not flawless shelves. It is a flexible system that makes cooking, shopping, and putting groceries away easier.
And when one snack bag inevitably escapes its bin, remain calm. Organization is a system, not a hostage situation.