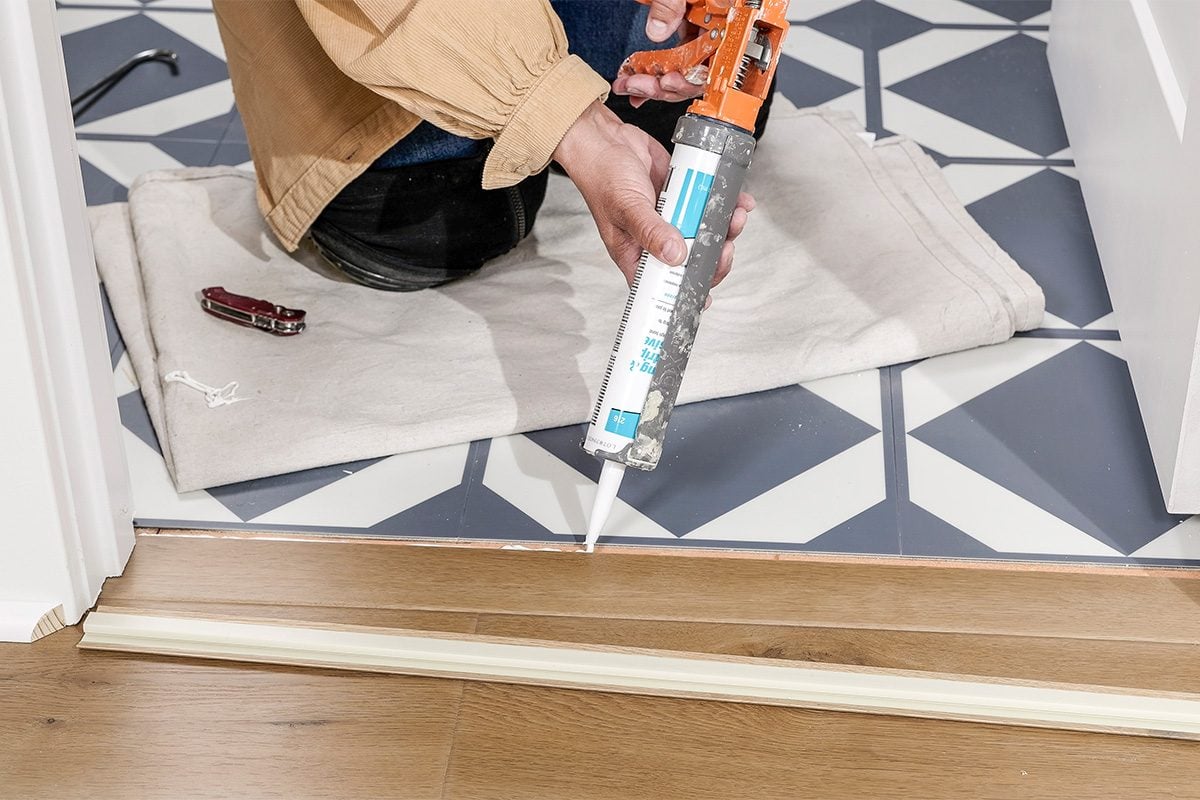
If floors had social skills, transition strips would be the polite friend who introduces everyone at the party and keeps things from getting awkward. Tile meets vinyl. Hardwood meets carpet. One room sits slightly higher than the next because your house was apparently built by talented people who also enjoyed surprises. That is exactly where a floor transition strip earns its keep.
A properly installed floor transition strip does three big jobs at once: it creates a cleaner finished look, helps protect exposed floor edges, and makes the change between flooring surfaces safer underfoot. It can also help cover expansion space at doorways and fixed edges, which is a big deal for floating floors that need room to move with seasonal changes. In other words, this small piece of trim is doing more work than its size suggests.
The good news is that installing one is usually a beginner-friendly DIY project. The trick is choosing the right type, cutting it accurately, and fastening it in the right place without boxing in the floor. Below, you will learn how to install a floor transition strip in five easy steps, plus how to avoid the mistakes that turn a five-minute victory lap into an afternoon of muttering.
Before You Start: Pick the Right Transition Strip
Not every transition strip is the same, and grabbing the first one that vaguely matches your floor color is how DIY confidence turns into a return trip to the store. Here are the most common types:
- T-molding: Best when two hard-surface floors are close to the same height, such as vinyl plank to laminate or hardwood to tile.
- Reducer strip: Used when one hard floor is lower than the other. It creates a gentle slope instead of a stub-your-toe moment.
- Threshold or end molding: Good for finishing against carpet, sliding doors, fireplaces, hearths, or other fixed vertical edges.
- Carpet transition: Designed to finish the edge where hard flooring meets carpet, often with a track, tap-down trim, or tucked carpet edge.
- 4-in-1 transition systems: The Swiss Army knife of floor moldings. One kit can often be configured as a T-molding, reducer, carpet transition, or end cap.
Also check how your specific strip installs. Some styles snap into a metal or plastic track. Others glue down. Some can be nailed or screwed. If you are working over concrete, you may need anchors. If you are working with a floating floor, the transition should generally attach to the subfloor or track system, not to the floating planks themselves.
Tools and Materials
You will not need a contractor trailer full of gear, but having the right tools makes the job cleaner and faster:
- Transition strip or molding kit
- Tape measure
- Pencil
- Miter saw, hacksaw, or fine-tooth saw
- Tin snips if you need to trim a metal track
- Drill or driver
- Screws or anchors if required
- Construction adhesive if required
- Rubber mallet
- Painter’s tape
- Safety glasses
- Vacuum or broom
One more thing: always read the molding manufacturer’s instructions before you start. Yes, really. I know. Nobody enjoys reading installation inserts written in the romantic language of “track shim” and “fastener spacing,” but that little paper matters because exact clearances, gap sizes, and attachment methods vary by profile.
Step 1: Prep the Doorway or Transition Area
The prettiest transition strip in the world will still look crooked if you install it over dust, old adhesive blobs, loose underlayment, or a crusty strip that should have retired three remodels ago. Start by clearing the area completely.
What to do first
- Remove any old transition strip, screws, nails, or broken track pieces.
- Vacuum the gap and surrounding flooring thoroughly.
- Check that the subfloor is dry, flat, and solid.
- Remove padding or underlayment under the track if your product instructions call for direct fastening to the subfloor.
- Undercut door casing if needed so the transition sits neatly and the flooring can move freely.
This is also the moment to confirm your flooring heights. If both surfaces are roughly even, a T-molding is usually the right call. If one floor is lower, use a reducer. If the strip ends at carpet or a sliding door, you may need an end molding or threshold instead.
For floating floors, make sure the required expansion space is still there. Do not shove flooring tight against the neighboring surface just because you want the transition to “hide it better.” Floors move. They shrink. They expand. They have moods. Your transition strip should work with that movement, not pin it down like a museum display.
Step 2: Measure Carefully and Cut the Transition Strip
This step sounds easy because it is easy in the same way pancakes are easy: straightforward, but only if you stop pretending “close enough” is a measurement system.
Measure the full width of the doorway or transition area. If the strip sits in a doorway, it usually looks best when centered under the closed door so each room gets a clean visual break. Mark the cut line clearly with pencil.
Best practices for cutting
- Measure twice before cutting once.
- Dry-fit the strip before fastening anything permanently.
- Use a fine-tooth saw or carbide-tipped blade for a cleaner finished edge.
- Use painter’s tape over the cut line on finished moldings to help reduce splintering.
- Pre-drill if you will be nailing near the ends of wood moldings.
If your system includes a separate track, cut the track to the same length as the visible molding unless the manufacturer says otherwise. Metal tracks often cut best with tin snips or a metal-cutting blade. Wood or composite caps usually cut best on a miter saw.
Before moving on, place the strip where it will go and make sure it covers the joint properly without crowding the floor. A good transition should look intentional, not like it wandered in from another remodel and decided to stay.
Step 3: Install the Track or Base
Many modern transition strips use a track system. This is the hidden part that fastens to the subfloor and holds the visible molding in place. Think of it as the stage crew: nobody applauds it, but the show falls apart without it.
How to install the track
- Position the track according to the molding instructions.
- Check that it is straight and centered or offset correctly for your profile.
- Fasten it to the subfloor with screws, nails, or adhesive as specified.
- If installing over concrete, drill the required holes and use anchors if your system calls for them.
This is one area where guessing causes problems. Some tracks sit centered in a gap between two floors. Others are offset from one flooring edge by a specific amount. Carpet transitions may need the trim aligned with the carpet edge or tack strip. Thresholds at doors may need a certain overlap while still preserving expansion space. So yes, the instructions matter here too.
If you are gluing rather than screwing, use a quality construction adhesive and apply it only where the molding system is supposed to bond. Do not smear adhesive where it can lock a floating floor in place. That is a great way to create squeaks, buckling, or future regret.
Step 4: Snap, Tap, or Press the Molding into Place
Once the track is secure, it is time for the part that feels most satisfying: installing the visible strip. Most snap-in systems work best when you start at one end, guide the molding into the track with your hand, and tap it gradually into place with a rubber mallet.
Tips for a clean fit
- Start at one end and work steadily across.
- Use your hand to guide the molding as it enters the track.
- Tap gently with a rubber mallet rather than hitting it like you are settling a score.
- Stop if the strip rocks or wiggles instead of seating properly.
If the molding is not engaged correctly, more force will not fix it. It will just damage the strip faster. Recheck alignment and make sure the cap is sitting inside the track before you continue. Some manufacturers even warn that a loose, wiggling cap can break if hammered down while misaligned. That is not a suggestion. That is a tiny plastic prophecy.
For glue-down moldings, set the piece firmly into place, apply even pressure across the length, and wipe away any squeeze-out right away. Painter’s tape stretched across the molding and onto both floors can help hold it steady while adhesive cures.
Step 5: Finish the Edges and Test the Transition
Once the strip is installed, do a final check before calling the job done and dramatically admiring your craftsmanship from the hallway.
Final checklist
- Make sure the strip feels secure and level.
- Walk across it several times to test for rocking or movement.
- Confirm that doors open and close freely over the transition.
- Clean off dust, fingerprints, and adhesive residue.
- Fill exposed nail holes with a matching putty or filler if needed.
If you installed a threshold or reducer with nails, countersink them neatly and fill the holes. If you used adhesive, give it the full cure time before heavy foot traffic. If the transition is between hard flooring and carpet, make sure the carpet edge looks tidy and fully supported instead of stuffed in there like a rushed shirt hem.
Common Mistakes to Avoid
Installing a floor transition strip is simple, but a few classic errors show up again and again:
- Using the wrong profile: A T-molding will not magically become a reducer because you really hoped it would.
- Forgetting expansion space: Especially dangerous with floating laminate, engineered wood, and vinyl plank floors.
- Fastening into the floating floor: The strip should usually attach to the subfloor or approved track system instead.
- Skipping the dry fit: One crooked cut later, you are back at the store buying a replacement.
- Hammering a misaligned snap-in strip: If it wiggles, stop and reset it before it cracks.
- Ignoring door swing: A perfect-looking strip is not so perfect if the door rubs over it every day.
Pro Tips for a Better-Looking Result
- Choose a transition color that coordinates with at least one of the floors, not necessarily both.
- Center doorway transitions under the closed door for a cleaner room-to-room look.
- Use a sharp blade and tape the cut line on prefinished trims to minimize chipping.
- Vacuum before fastening so the track sits flat and true.
- For wood moldings, pre-drill near ends to reduce the chance of splitting.
- In high-traffic areas, use the more secure fastening method recommended for your product.
The goal is not just to bridge two floors. The goal is to make the transition look like it always belonged there. When it is done right, nobody notices it. Which, in the glamorous world of finishing carpentry, is basically a standing ovation.
Real-World Experiences and Lessons from DIY Installations
One of the most common experiences people have with a floor transition strip is realizing the hard part is not the install itself. The hard part is choosing the right transition before the install even starts. A homeowner might buy a T-molding because it looks like the “normal” option, only to discover one room sits slightly lower than the next. Suddenly the strip rocks, leaves a lip, or looks awkward. The lesson is simple: measure the floor heights first and let the profile follow the floors, not your guess.
Another frequent experience happens in doorways between luxury vinyl plank and tile. Everything seems easy until the door closes and reveals that the transition is off-center. It still works, but it never quite looks finished. People often say the installation started to feel professional only after they closed the door, marked the centerline, and rechecked where the strip would actually sit when the room was in use. That tiny adjustment makes a surprisingly big visual difference.
There is also the classic “I thought more force would help” moment. Many DIYers report snapping or denting a transition strip because the cap was not fully aligned with the track. Instead of pausing, they grabbed a hammer and committed to optimism. It did not go well. The better experience comes from going slowly: start at one end, guide the strip by hand, tap with a rubber mallet, and check constantly that it is engaging properly. Gentle, patient taps win this game every time.
People installing transitions over concrete often learn a different lesson: the subfloor decides how much fun you are allowed to have. A wood subfloor usually feels straightforward because screws bite quickly and adjustments are easy. Concrete can turn a ten-minute job into a longer one if anchors, drilling dust, and exact hole placement enter the chat. Still, once the correct bit and anchors are on hand, the job becomes much more manageable. Preparation matters more than bravado.
Floating floors create another memorable learning curve. Many homeowners discover, sometimes the annoying way, that a beautiful transition can still cause trouble if it locks the floor from moving. A strip nailed too aggressively into the wrong place can lead to noise, pressure, or seasonal movement issues later on. Experienced DIYers often say the best thing they learned was to respect expansion space, even when it feels invisible and abstract during installation. The floor may look still, but it is not actually still year-round.
There are also good surprises. A lot of people expect transition strips to look clunky, especially between different materials. But when the right reducer or threshold is cut neatly and matched well, it can make two totally different floors look intentional together. That is often the moment when a DIY job stops looking like “we did our best” and starts looking like a real finish detail.
In short, real-world experience tends to teach the same handful of truths: dry-fit first, follow the profile instructions, do not rush the track, and never underestimate how much a small trim piece can change the whole room. It is a humble little strip, but it has strong opinions about being installed correctly.
Final Thoughts
Installing a floor transition strip is one of those home-improvement tasks that seems minor until you skip it. Then every doorway looks unfinished, every floor edge feels vulnerable, and every slight height difference becomes a tiny trip hazard with main-character energy.
The good news is that once you know how to install a floor transition strip in five easy steps, the project becomes refreshingly manageable. Choose the right molding, prep the area, measure and cut carefully, install the track properly, and finish with patience. That is the whole recipe. No drama, no mystery, and ideally no emergency second trip to buy the same strip again because the first cut was “close enough.”
If you take your time and follow the specific instructions for your product, you can get a clean, durable, professional-looking transition that ties the space together beautifully.