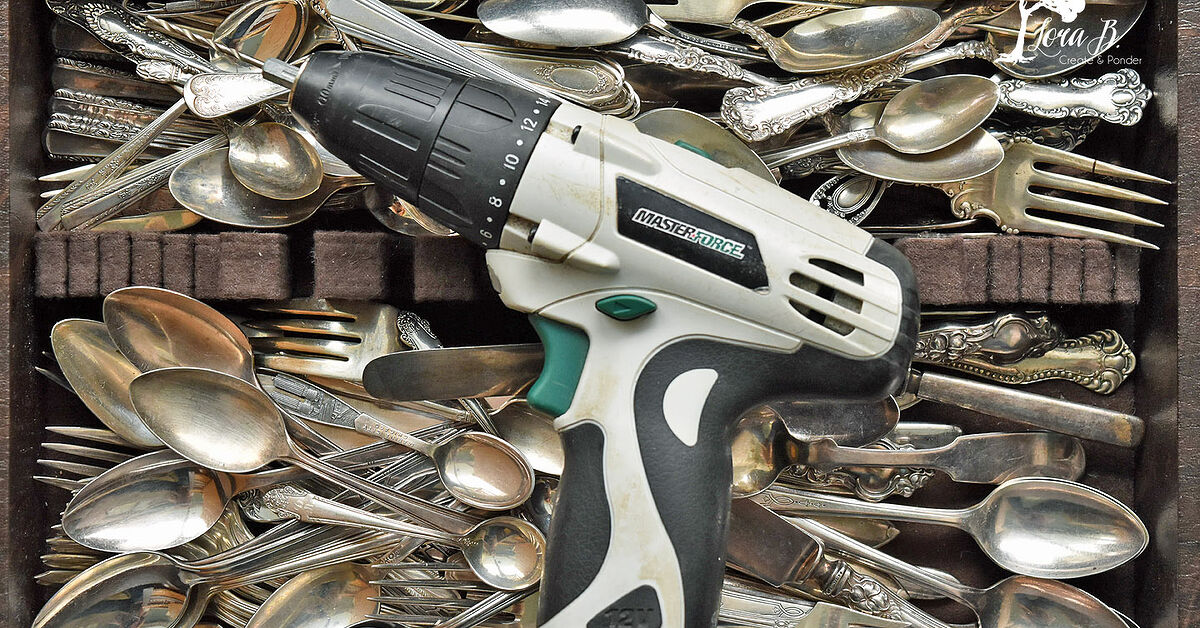
Somewhere in a drawer, a lonely fork is waiting for its second act. It has survived spaghetti night, dishwasher arguments, holiday dinners, and possibly one mysterious trip to the backyard. Instead of letting old kitchen utensils rattle around like tiny metal ghosts, you can turn them into charming vintage silverware art that looks intentional, creative, and far more expensive than it actually is.
Vintage silverware art is the sweet spot between upcycling, farmhouse decor, wall art, and “I swear I meant to keep that bent spoon.” With a little cleaning, arranging, bending, drilling, and imagination, old spoons, forks, knives, ladles, and serving pieces can become kitchen wall art, garden flowers, wind chimes, framed displays, candle sconces, hooks, signs, and even quirky sculptures.
This guide walks you through how to make vintage silverware art out of old kitchen utensils safely and beautifully. You do not need to be a professional metalworker. You do need patience, basic tools, a good eye for composition, and the emotional strength to admit that not every fork wants to become a butterfly.
Why Vintage Silverware Makes Such Great Art
Old silverware has built-in character. Patterned handles, worn edges, soft tarnish, monograms, floral engravings, and mismatched finishes all add texture that new craft supplies try very hard to fake. A spoon that has lost its shine may still have a beautiful silhouette. A fork with slightly bent tines can suddenly become a feather, flower petal, sunburst, or fish tail.
The beauty of upcycled silverware art is that it honors the past without turning your home into a museum where everyone whispers. It is nostalgic, practical, sustainable, and budget-friendly. Thrift stores, estate sales, flea markets, garage sales, and family junk drawers often have orphaned flatware pieces that are no longer useful as a set but perfect for DIY silverware crafts.
Vintage silverware also works with many decorating styles. For a farmhouse kitchen, mount spoons and forks on reclaimed wood. For cottagecore decor, make spoon flowers or a whimsical utensil wreath. For industrial interiors, leave stainless steel pieces raw and attach them to dark-stained boards. For holiday decor, transform small spoons into ornaments, gift tags, or mini framed pieces.
Before You Start: Check What Your Silverware Is Made Of
Before bending, drilling, cutting, or gluing anything, take a moment to inspect your utensils. Some old pieces may be sterling silver, silver-plated, stainless steel, nickel silver, or a mixed metal alloy. Sterling silver and older collectible flatware can be valuable, especially if the set is complete, marked, or made by a desirable manufacturer.
Look for stamps on the back of the handle. Common marks include “sterling,” “925,” “silverplate,” “EPNS,” “stainless,” or brand names. If a piece seems valuable, research it before turning it into a dragonfly. Nothing ruins craft night faster than realizing you flattened Grandma’s rare spoon into a garden marker that says “basil.”
For most DIY silverware art projects, stainless steel, damaged silverplate, incomplete sets, and inexpensive thrifted pieces are ideal. They are affordable, durable, and easy to find. Save sentimental or potentially valuable pieces for non-destructive framed displays, shadow boxes, or removable arrangements.
Supplies and Tools You May Need
You do not need every tool on this list for every project. A simple framed silverware art piece may require only a frame, backing board, adhesive, and utensils. A wind chime or spoon flower will need more shaping and drilling.
Basic Materials
- Old spoons, forks, knives, ladles, serving spoons, or butter knives
- Wood board, canvas, shadow box, picture frame, or metal ring
- Strong adhesive suitable for metal and wood
- Picture-hanging hardware
- Fine-grit sandpaper or sanding sponge
- Soft cloths or microfiber towels
- Mild dish soap and warm water
- Baking soda, aluminum foil, and salt for tarnish removal if desired
- Paint, stain, wax, or clear sealer
- Wire, jump rings, beads, twine, or fishing line for hanging projects
Helpful Tools
- Needle-nose pliers
- Locking pliers or a bench vise
- Rubber mallet or hammer
- Drill with metal drill bits
- Center punch
- Clamps
- Metal file
- Tin snips or metal-cutting tool for advanced projects
- Safety glasses and work gloves
Note: Safety glasses are not optional when drilling or hammering metal. Your eyes are more important than a spoon flower, even if the spoon flower has tremendous personality.
Step 1: Choose a Project Style
The first step in making vintage silverware art is deciding what kind of art you want. Old kitchen utensils are surprisingly flexible as design materials, but your project will look better if you choose a clear direction before glue enters the chat.
Popular Vintage Silverware Art Ideas
- Framed kitchen wall art: Arrange forks, knives, and spoons inside a frame or shadow box.
- Utensil word art: Bend pieces into letters or use them to spell “EAT,” “GATHER,” “COFFEE,” or “HOME.”
- Spoon flowers: Flatten and layer spoons into petals for wall decor or garden stakes.
- Fork hooks: Bend fork handles into hooks for keys, mugs, aprons, or lightweight towels.
- Silverware wind chimes: Drill holes in handles and hang utensils from a teapot, colander, ring, or wood branch.
- Dragonflies and butterflies: Use spoon bowls as wings and fork handles as bodies.
- Utensil wreaths: Arrange mismatched pieces in a circular pattern for a kitchen door or dining room wall.
If you are new to silverware crafts, begin with framed wall art. It is forgiving, attractive, and does not require major metal bending. If you are more confident, try spoon flowers, hooks, or wind chimes.
Step 2: Clean the Old Kitchen Utensils
Wash every utensil with warm water and mild dish soap. Use a soft sponge or cloth to remove grease, dust, drawer crumbs, and whatever mysterious substance has been clinging to that serving spoon since 1998. Dry each piece immediately to avoid water spots.
If you want a polished look, remove tarnish with a gentle silver-cleaning method. For light tarnish, a soft cloth and mild dish soap may be enough. For heavier tarnish on silver-plated or sterling pieces, many DIYers use a foil-lined pan with hot water, baking soda, and salt. This creates a reaction that helps lift tarnish. Rinse thoroughly and dry well afterward.
However, do not over-polish if you love the vintage look. Patina adds depth. A little darkness in the grooves can make floral handle patterns stand out beautifully. The goal is “charmingly aged,” not “freshly launched satellite.”
Step 3: Plan the Layout Before Attaching Anything
Lay your utensils on a table and play with the arrangement. Move them around until the composition feels balanced. For wall art, consider symmetry. Place a large serving spoon in the center and smaller forks or teaspoons around it. For a rustic sign, align utensils vertically on a stained board. For a wreath, overlap handles around a circular base.
Take a photo of the layout before you start attaching pieces. This tiny step can save you from the classic DIY tragedy of forgetting your perfect arrangement the moment you lift one spoon.
Design Tips for Better Silverware Art
- Mix shiny and tarnished pieces for contrast.
- Use odd numbers, such as 3, 5, 7, or 9 utensils, for a natural-looking arrangement.
- Repeat similar shapes to create rhythm.
- Use a dark background to make silver pieces pop.
- Pair delicate engraved handles with soft colors like cream, sage, dusty blue, or warm white.
- Use reclaimed wood for farmhouse style and clean painted canvas for modern style.
Step 4: Make Easy Framed Vintage Silverware Wall Art
This is the best beginner project because it requires minimal bending and no drilling. It also looks polished enough to hang in a kitchen, breakfast nook, pantry, coffee bar, or dining room.
Instructions
- Choose a frame or shadow box deep enough to hold the utensils.
- Remove the glass if the utensils are too thick.
- Cover the backing board with fabric, scrapbook paper, burlap, painted canvas, or thin wood veneer.
- Arrange the utensils in your chosen pattern.
- Mark the placement lightly with a pencil.
- Attach each piece with strong adhesive, small metal brackets, wire loops, or tiny screws if the design allows.
- Let the adhesive cure fully according to the product instructions.
- Add hanging hardware and display your finished art.
For a clean design, mount one fork, one knife, and one spoon in a row. For a more dramatic piece, create a fan shape using several spoons. For a sentimental version, frame utensils from a family set and add a small handwritten recipe card behind them.
Step 5: Create Spoon Flower Art
Spoon flowers are among the most popular old silverware art projects because the bowl of a spoon naturally resembles a petal. You can make a flat flower for wall decor or attach the flower to a metal rod or wood dowel for garden art.
Instructions
- Choose five to eight spoons for petals and one smaller spoon or decorative button for the center.
- Flatten the spoon bowls gently with a rubber mallet or hammer. Place a towel underneath to reduce marks.
- Arrange the spoon bowls in a circle with handles pointing inward or outward, depending on your design.
- Attach them to a round metal washer, wood disk, or sturdy backing plate.
- Add a center piece to cover the joining area.
- Mount the flower on a board, frame, garden stake, or wreath base.
If you want a rustic garden look, leave the metal imperfect. If you want a more refined look, polish the spoon bowls and paint the backing board a deep charcoal, navy, or forest green. The contrast makes the flower shine without screaming, “I used to stir soup.”
Step 6: Make Fork Hooks for Functional Wall Art
Fork hooks are practical, charming, and slightly hilarious in the best way. They work well for keys, lightweight mugs, aprons, jewelry, herbs, or small kitchen towels.
Instructions
- Choose sturdy forks with attractive handles.
- Clamp the fork handle in a vise, protecting it with scrap cloth to prevent scratches.
- Slowly bend the handle upward into a hook shape using pliers.
- Curl or spread the fork tines for decoration.
- Drill a hole through the handle or use metal straps to attach the fork to a wood board.
- Sand any sharp spots with a metal file.
- Mount the board securely to the wall.
Do not overload fork hooks. They are decorative helpers, not weightlifting champions. Use them for light items and enjoy the fact that your keys now hang from a utensil with more style than most key racks.
Step 7: Build a Vintage Silverware Wind Chime
A silverware wind chime is perfect for a porch, patio, garden, or kitchen window. Spoons and forks make a soft, tinkling sound when they touch, and mismatched pieces give the project a relaxed vintage look.
Instructions
- Choose a top piece, such as a small colander, teacup, old strainer, metal ring, driftwood branch, or vintage ladle.
- Mark where each utensil will hang.
- Use a center punch to create a small indentation before drilling.
- Drill holes slowly using a metal drill bit. Add a little cutting oil if needed to reduce heat and help the bit work smoothly.
- File rough edges around the holes.
- Attach jump rings, wire, fishing line, or small chains.
- Hang utensils at slightly different lengths for movement and sound.
- Add beads, crystals, old keys, or small metal charms if desired.
Keep the design balanced. Too many heavy utensils on one side can make the wind chime hang crooked, like it just heard bad news. Test it by holding it up before making final knots or wire loops.
How to Drill Old Silverware Safely
Drilling metal is not difficult, but it requires care. Secure the utensil with clamps or a vise. Never hold it in your hand while drilling. Mark the hole location, create a small starter dent with a center punch, and use a drill bit made for metal. Start slowly so the bit does not wander across the handle.
Use light, steady pressure. Let the drill do the work. If the metal gets hot, pause and allow it to cool. After drilling, smooth the hole with a metal file so it will not cut wire, string, or fingers. Always wear eye protection because tiny metal shavings have absolutely no respect for your weekend plans.
How to Bend Spoons and Forks Without Ruining Them
Some utensils bend easily, while others act like they have been training for a resistance competition. Silver-plated utensils are often easier to bend than thick stainless steel. Start with inexpensive test pieces before shaping your favorites.
Use a vise, locking pliers, or two pairs of pliers for control. Wrap the metal with cloth to reduce scratches. Bend slowly and gradually instead of forcing a sharp angle all at once. For curled fork tines, needle-nose pliers work well. For spoon bowls, a rubber mallet can flatten or curve the surface with fewer marks than a regular hammer.
If a piece cracks, splits, or feels brittle, stop using it for bent art. You can still glue it flat to a frame or use it in a shadow box. In upcycling, there is almost always a Plan B. It may not be the original plan, but it often has better jokes.
Finishing Touches That Make Silverware Art Look Professional
The difference between “cute craft” and “I bought this at an artisan market” is usually in the finishing details. Sand rough wood edges. Paint or stain your backing board evenly. Use matching hardware. Hide glue blobs. Clean fingerprints from polished pieces before hanging. Add felt pads behind wall art to protect the wall.
Consider labeling the piece if it has a family story. A small tag that says “Grandma’s Sunday spoons” or “Made from flea market finds, 2026” gives the art meaning. For gifts, include a small card explaining how the piece was made. People love handmade items even more when they know the story behind them.
Creative Variations for Different Home Styles
Farmhouse Kitchen
Use reclaimed wood, white paint, burlap, and slightly tarnished utensils. Arrange a fork, spoon, and knife vertically with simple lettering such as “EAT” or “GATHER.” Add small black hooks underneath for keys or aprons.
Vintage Cottage
Choose floral-handled silverware, pastel backgrounds, lace trim, and shadow boxes. Spoon flowers and utensil wreaths look especially charming in cottage-style spaces.
Industrial Decor
Use stainless steel pieces, dark wood, exposed screws, black metal brackets, and clean lines. A row of bent fork hooks on a black-stained board can look surprisingly sleek.
Garden Art
Turn spoons into flowers, forks into dragonfly wings, and butter knives into plant markers. Seal wood parts for outdoor use and expect metal to weather naturally over time.
Common Mistakes to Avoid
One common mistake is using too much glue. Strong adhesive is helpful, but visible blobs can make a beautiful project look rushed. Apply carefully and wipe excess before it dries.
Another mistake is ignoring weight. Silverware can be heavier than it looks, especially serving pieces. Use sturdy backing, secure hardware, and wall anchors when needed.
Do not skip cleaning. Dust, oil, and tarnish can prevent adhesive from bonding properly. Also, avoid using valuable antique pieces unless you are certain you want to alter them permanently.
Finally, do not overcomplicate the design. A simple arrangement of five beautiful spoons can look more elegant than a crowded board with every utensil you found, including the suspicious grapefruit spoon nobody understands.
Personal Experience: What I Learned Making Vintage Silverware Art
The first thing you learn when making vintage silverware art is that old utensils have opinions. Some spoons flatten politely. Others bounce under the hammer like they have lawyered up. Some forks bend into graceful curls. Others twist sideways and suddenly look like they are pointing accusingly at your life choices. That is part of the fun. Unlike store-bought craft blanks, vintage silverware brings surprises, and those surprises often become the best part of the finished piece.
One of the most satisfying projects is a simple framed kitchen display. I like starting with a dark backing board because silver utensils stand out beautifully against it. A single ornate serving spoon in the center, flanked by two smaller forks and two teaspoons, can look elegant with almost no extra decoration. The trick is spacing. If the pieces are too close, the frame feels crowded. If they are too far apart, it looks like the utensils had an argument and stopped speaking. Taking a quick photo of the layout before gluing helps more than you would think.
Cleaning is another lesson. At first, it is tempting to polish every piece until it shines like a trophy. But after making a few projects, you realize that a little tarnish gives the art depth. Darkened grooves in patterned handles make the details easier to see. A softly aged spoon often looks warmer and more interesting than a perfectly polished one. I usually clean off grime and sticky residue, then polish selectively. The goal is not to erase age; it is to let the piece look cared for.
Drilling silverware teaches patience very quickly. The best results come from clamping the piece securely, marking the hole carefully, and starting slowly. If you rush, the bit may slide across the handle and leave a dramatic scratch that nobody requested. A center punch makes a big difference. So does using the right bit for metal. Once the hole is drilled, filing the edges is essential. Even a tiny burr can cut hanging wire or scratch skin.
Bending utensils is where creativity really shows up. Fork tines can become curls, claws, leaves, feathers, or little rays of sunshine. Spoon bowls can become petals, wings, fish scales, or tiny reflective moons. The most important advice is to practice on pieces you do not love first. Every batch of old silverware behaves differently. Thin silver-plated pieces are usually easier to shape, while thick stainless steel may require more strength and better tools.
The biggest lesson is that imperfections make the art feel handmade in the best possible way. A slightly uneven spoon flower still has charm. A wind chime with mismatched utensils sounds and looks more interesting than a perfectly matched set. A fork hook with a few scratches can feel like it has already lived a good life. Vintage silverware art is not about making old kitchen utensils look new. It is about giving them a second story, preferably one that hangs proudly on the wall and makes guests say, “Wait, is that made from spoons?” That is when you know the project worked.
Conclusion
Learning how to make vintage silverware art out of old kitchen utensils is a creative way to rescue forgotten flatware and turn it into something personal, decorative, and useful. Whether you make framed wall art, spoon flowers, fork hooks, wind chimes, or a full utensil wreath, the process combines sustainability with personality. You are not just crafting; you are giving old objects a new role in the home.
Start simple, work safely, and let the materials guide you. Clean the utensils, check for value, plan your layout, and choose techniques that match your skill level. With a few basic tools and a sense of humor, even a bent fork can become art. And honestly, that is the kind of comeback story every junk drawer deserves.