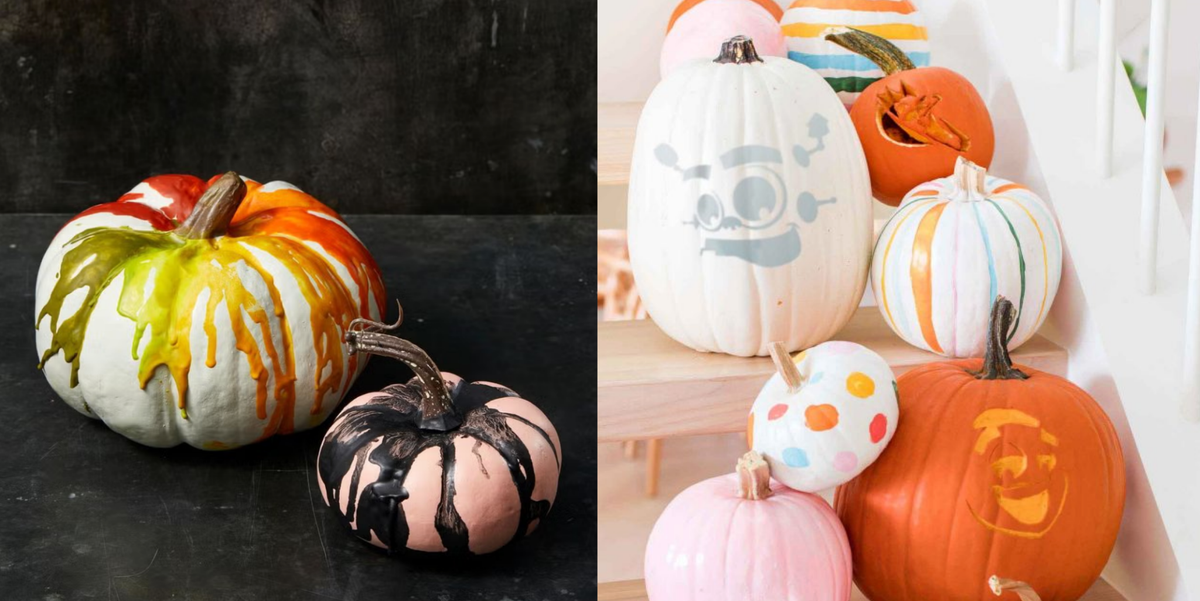
Pumpkin carving is iconic… but it’s also messy, pokey, and somehow always ends with someone asking, “Who left pumpkin guts in the sink?” Pumpkin painting is the chill, glow-up alternative: no knives, less slime, and way more stylesfrom cute to creepy to “I accidentally made modern art and now I’m proud.”
In 2025, painted pumpkins are still the MVP of fall decorating because they’re safer for kids, friendlier for small spaces, and they can match literally any vibeminimalist porch, maximalist Halloween party, pastel “cozy but make it aesthetic,” or full-on haunted-house energy.
Before You Start: Make Your Painted Pumpkin Look Better (and Last Longer)
Pick the right pumpkin
- Real pumpkins: Choose firm ones with no soft spots, cracks, or bruises. A flat bottom helps it sit nicely.
- Faux pumpkins: If you want your masterpiece to survive past Thanksgiving, foam pumpkins are basically “cheat mode.”
- White pumpkins: They’re fantastic for bright colors, pastels, and crisp black designs.
Prep like a pro (takes 3 minutes, saves 3 headaches)
- Wipe dirt off with a damp cloth, then dry completely (paint hates moisture).
- If the pumpkin feels slick, lightly scuff with a fine sanding sponge (optional, but helpful).
- For bold colors: apply a thin base coat (white acrylic or spray primer) and let it dry.
What paint should you use?
- Acrylic craft paint: The all-purpose favoritefast-drying, vibrant, and easy to layer.
- Spray paint: Best for smooth base coats and quick coverage (use outdoors, light coats).
- Paint pens: Great for outlines, lettering, and tiny details without needing a “micro-brush PhD.”
- Washable tempera (for kids): Easier cleanup and less stress. Put the pumpkin in a bin to catch the chaos.
Seal it (especially if it’s going outside)
A clear topcoat helps protect paint from scuffs and light rain. Use a spray clear coat or a brush-on sealer. Thin coats beat one gloopy coat every time. Let it cure fully before moving it.
Set Up a Pumpkin Painting Station That Doesn’t Ruin Your Weekend
- Cover the table with a trash bag + kraft paper (double protection, double confidence).
- Use paper plates as palettes and small cups for rinse water.
- Keep baby wipes nearbybecause life.
- For kids: put pumpkins in a large plastic bin or on a baking tray to contain splatters.
- Have “add-ons” ready: googly eyes, stickers, felt shapes, glitter glue, ribbon, faux flowers, and washi tape.
67 Pumpkin Painting Ideas (No Carving Required)
Each idea below includes a quick “how to” so you can go from “blank gourd” to “front-porch legend” without overthinking it.
Fast Wins (Cute, Easy, and Low-Stress)
- Classic polka dots: Use a sponge dauber or the end of a paintbrush for clean, round dots.
- Half-dipped pumpkin: Paint the bottom half one color and leave the top natural for a modern look.
- Color-block stripes: Tape off thick bands, paint, peel, and admire your crisp lines.
- Ombre fade: Blend two or three shades from dark at the bottom to light at the top with a dry brush.
- Chalkboard pumpkin: Paint with chalkboard paint and write messages all season (bonus: easy re-do).
- Monogram letter: Paint the whole pumpkin, then add a big initial with a stencil or paint pen.
- Confetti speckle: Flick watered-down paint with a stiff brush for fun splatter dots (protect your area!).
- Minimalist stem-to-bottom line art: Draw a simple face or abstract lines with a black paint pen on a white pumpkin.
- Two-tone “drip edge”: Paint a wavy line near the top and fill above it like frosting.
- Candy-corn stripes: Yellow bottom, orange middle, white topsimple and instantly festive.
- Pastel matte pumpkin: Soft pink, mint, or lavender with a matte sealer for cozy 2025 vibes.
- Neon pop: Bright neon shapes on a black pumpkin look like Halloween meets arcade night.
- Galaxy wash: Sponge navy and purple, then dot stars with white paint.
- Checkerboard: Tape a grid, paint alternating squaresbold and graphic.
- Gold-tipped pumpkin: Paint the pumpkin one solid color, then dry-brush metallic gold on the ridges.
Cute Critters & Characters (Kid-Friendly and Party-Perfect)
- Emoji faces: Yellow base + paint pen details. Make a whole “emoji family” set.
- Sleepy ghost: White base, closed eyes, rosy cheekscute, not scary.
- Black cat pumpkin: Paint black, add triangle ears from felt, and finish with whiskers.
- Owl pumpkin: Big circle eyes, felt wings, and a simple beakadorable on mini pumpkins.
- Spider buddy: Paint black, add big eyes, and glue pipe-cleaner legs around the sides.
- Monster mash: Bright base color, one giant eye, and jagged teeth. Go full cartoon.
- “Beak-a-boo” birds: Paint small pumpkins like birds and add feathers for a playful texture.
- Ladybug: Red base, black dots, and a black “head” section near the stem.
- Bumblebee: Yellow base with black stripes and tiny wings made from paper or felt.
- Unicorn pumpkin: Pastel paint, a gold horn, and a flower crownwhimsical without trying too hard.
- Frog pumpkin: Green base, big round eyes on top (foam balls work), and a sweet smile.
- Panda: White pumpkin + black circles for eyes and ears. Cute is undefeated.
- Dino pumpkin: Green base with painted scales; add felt “spikes” down the back.
- Smiley face set: Paint 3–5 mini pumpkins with different moods and line them up like a sitcom cast.
Spooky but Still Paint-Only (Halloween Energy Without the Knife)
- Tape-resist spiderweb: Make a web with tape, spray paint over it, peel, then add a plastic spider.
- Classic haunted house silhouette: Paint the pumpkin pale, then add a black haunted skyline around the middle.
- Mummy wrap look: Paint off-white bands and add eyes peeking through.
- Skeleton grin: Black base; paint white teeth across the front for an instant spooky smile.
- “Stitched” pumpkin: Draw stitch marks and seams with a black paint pen over an orange or gray base.
- Bloody drip (fake, obviously): White base with red drips from the stem downward.
- Witchy symbols: Paint black and add moons, stars, and sigils in metallic gold.
- Glow-style eyes (painted): Neon green eyes on a black pumpkin look eerie even in daylight.
- Bat swarm: Paint a night sky and add flying bats with a stencil or paint pen.
- Creepy clown: Bright colors, exaggerated smile, and a little crackle detail (use a crackle medium if you have it).
- Poison apple pumpkin: Deep red base with a black “drip” and a shiny topcoat.
- Jack-o’-lantern face (painted): Keep it classictriangles and a grinwithout any cutting.
- “Eyeball” pumpkin: White base, one large iris, veiny red linesgross in the best way.
- Vintage horror poster colors: Limited palette (black, orange, cream) with bold lettering and shapes.
Pattern Play (For the “I Like Crafting, But Also Design” Crowd)
- Scandi folk art: Start with a white base, add colorful geometric flowers and dots.
- Modern terrazzo: Neutral base with chunky paint “chips” in assorted colors.
- Retro squiggles: Curvy lines in mustard, rust, cream, and sage for a trendy throwback.
- Plaid pumpkin: Paint horizontal and vertical stripes in layered tones (washi tape helps guide lines).
- Herringbone: Small angled strokes in repeating rowstime-consuming, but wildly satisfying.
- Geometric triangles: Tape triangles, paint alternating colors, peel for sharp shapes.
- Mandala dots: Use dotting tools or the end of a brush handle to build concentric dot patterns.
- Constellation map: Dark base, paint tiny stars, then connect them with thin lines and label a few.
- Topographic lines: Wavy contour lines around the pumpkincool, unexpected, and very “2025 art kid.”
- Brushstroke abstract: Bold, painterly strokesintentionally imperfect = the point.
- Negative-space pattern: Paint around shapes (like leaves or circles) and leave the pumpkin color showing through.
- Stamped pattern pumpkin: Use stamps (or carved sponge shapes) for quick repeating motifs.
Glam & Grown-Up (Because Your Pumpkin Can Dress Up Too)
- Disco ball pumpkin: Use adhesive mirror tiles on a faux pumpkin for full sparkle mode.
- Metallic ombre: Blend metallic gold into copper, or silver into gunmetal, for a luxe gradient.
- Gold leaf accents: Paint a solid base, then add torn gold leaf pieces for high-end texture.
- Pressed flower pumpkin: Attach pressed petals and seal carefullyromantic and surprisingly modern.
- Dried floral clusters: Paint neutral, then glue small floral bunches near the stem like a mini arrangement.
- Porcelain “ginger jar” style: White base with blue painted motifsclassic and elegant.
- Toile-inspired scenes: Paint a light base and draw tiny pastoral designs with a fine paint pen.
- Marble effect: Swirl gray, white, and a touch of gold; seal glossy for a stone-like finish.
- Velvet-look pumpkin (painted illusion): Matte black base with subtle highlights painted on ridges for depth.
- Matte black + brass stem: Paint the pumpkin matte black and the stem metallic brass for a clean statement piece.
- Rose-gold drip: Paint a pale base and add a rose-gold “liquid metal” drip around the top.
- Neutral “pumpkin gallery” set: Paint several pumpkins in cream, taupe, and gray with different patterns so they look curated together.
Pro Tips for Cleaner Lines, Better Photos, and Less Regret
Make stencils work for you
Tape the stencil firmly. Use a sponge (not a dripping brush) and dab lightly. Peel while paint is still slightly damp for the cleanest edge.
When to use paint pens
Paint pens are perfect for outlines, faces, lettering, and tiny details that make a pumpkin look “intentional.” They also reduce the need for tiny brushes that disappear the moment you need them.
Keep it from smearing
- Work in thin coats and let each layer dry.
- Rotate the pumpkin instead of dragging your hand around it.
- Paint one “side” at a time and let it dry before flipping or moving it.
FAQ: Pumpkin Painting Questions People Actually Ask
How long do painted pumpkins last?
It depends on the pumpkin’s condition and where you display it. A firm pumpkin indoors can look good for several weeks, while outside heat and moisture can shorten its life. Painting doesn’t magically stop decay, but using a dry, clean pumpkin and sealing the paint can help your design stay intact.
Can I paint a pumpkin and still eat it?
If you plan to cook with it, it’s best to avoid painting the shell with craft paints, which aren’t food-safe. For cooking pumpkins, keep decorations to non-toxic, food-contact-safe methodsor decorate a separate pumpkin for display and save the edible one for the kitchen.
What’s the best option for little kids?
Washable, non-toxic, water-based paints (like tempera) plus big brushes and a contained painting bin. Add stickers and googly eyes for instant success and minimal frustration.
Extra: of Real-Life Pumpkin Painting Experience (What You Learn After the 3rd Pumpkin)
The first time I hosted a pumpkin painting night, I thought I was being incredibly responsible. I bought table coverings, set out a “paint station,” and even arranged brushes like a fancy art class. Thirty minutes later, the table looked like a crime scene for glitter glue, someone had painted a pumpkin entirely “because orange is boring,” and a fully grown adult asked if we could “just paint it like a donut” and then proceeded to create something so cute it deserved its own Instagram account.
Here’s what I learned: pumpkin painting is less about perfection and more about momentum. If people stall at the beginningstaring at a blank pumpkin like it’s judging themgive them a base coat and a simple prompt. “Pick a theme: spooky, cute, or fancy.” Or hand them a stencil. Or point at a paint pen and say, “Write a tiny dramatic phrase on it.” Once the first mark is made, creativity kicks in like it’s been waiting in the wings the whole time.
Also, the unsung hero of every pumpkin painting setup is the humble plastic bin. Put pumpkins inside it, especially for kids, and suddenly you’re not chasing paint splatters across your kitchen like you’re in an action movie nobody asked for. Use small cups of paint instead of open bottles. Keep paper towels and wipes within arm’s reach. And if you’re doing spray paint, commit to the outdoorsspray paint does not “stay neatly on the newspaper” the way we all pretend it will.
My favorite part is the moment the pumpkins start looking like a collection. One pumpkin alone is cute. Five pumpkins togetherdifferent sizes, coordinated colors, a mix of patterns and characterslooks like you planned it for weeks (even if you absolutely did not). That’s the secret sauce: do a couple in the same color family, vary the patterns, and suddenly your porch is giving “fall magazine spread.”
The biggest surprise? Adults get just as into it as kidssometimes more. Kids tend to be fearless: bold colors, giant faces, maximum googly eyes. Adults start cautious and then spiral into full commitment, adding metallic accents, shading, and a glossy topcoat like they’re submitting to a gourd-based art competition. By the end of the night, everyone’s taking photos, naming their pumpkins, and negotiating who gets to keep the best one. Which is how you know the craft worked: it made people laugh, create, and leave with something they’re weirdly proud of. That’s a winno carving knife required.
Conclusion
Whether you want a quick kid-friendly project, a spooky Halloween set, or a glam centerpiece that looks like it belongs in a design magazine, pumpkin painting gives you the fun without the mess. Pick a style, grab a brush (or a paint pen), and let your pumpkin become the fall decor personality it was meant to be.