The Cheshire Cat is one of those magical Halloween costume ideas that can be cute, creepy, funny, sparkly, dramatic, or all of the above before dinner. With the famous wide grin, purple-and-pink stripes, cat ears, fluffy tail, and mischievous Wonderland attitude, this costume gives you plenty of room to play. Best of all, you do not need to be a professional seamstress, makeup artist, or person who owns seventeen types of fabric scissors. You can make a Cheshire Cat costume with closet basics, craft supplies, face paint, or a little sewing if you are feeling brave.
This guide breaks the project into three practical approaches: a no-sew Cheshire Cat costume, a hoodie or bodysuit version, and a makeup-focused costume for last-minute parties. Each method includes materials, step-by-step instructions, styling tips, safety reminders, and budget-friendly shortcuts. Whether you are making a Cheshire Cat Halloween costume for an adult, a child, a school event, a cosplay meetup, or an Alice in Wonderland group costume, these ideas will help you build a look that says, “We are all mad here,” but in the best possible way.
Before You Start: What Makes a Cheshire Cat Costume Work?
A good Cheshire Cat costume is not just “cat ears plus purple shirt.” That may technically get you into the feline family, but the Cheshire Cat has a very specific personality. Think bold stripes, a huge grin, bright eyes, a curved tail, and a mysterious expression that suggests you know where the snacks are hidden.
Key Costume Elements
To make the character instantly recognizable, focus on these details:
- Pink and purple stripes: These are the classic visual shortcut for the animated Cheshire Cat look.
- Cat ears: Felt, faux fur, foam, or fabric ears on a headband work well.
- A fluffy or curved tail: A tail adds movement and makes the costume feel complete.
- The Cheshire grin: This can be done with makeup, a paper prop, felt teeth, or a removable mask-style smile.
- Playful accessories: Striped tights, gloves, leg warmers, tutu skirts, oversized bows, and purple wigs all fit the Wonderland mood.
Once you have those pieces, you can make the costume simple or elaborate. The trick is to choose the method that matches your time, budget, comfort level, and tolerance for hot glue strings attaching themselves to your soul.
Way 1: Make a No-Sew Cheshire Cat Costume
This is the easiest version and the best choice if you need a quick DIY Cheshire Cat costume without sewing. It works for adults, teens, and kids, and it can be made mostly from clothes you already own. The final look is comfortable, flexible, and party-friendly.
What You Need
- Pink or purple long-sleeve shirt, hoodie, dress, or sweatshirt
- Matching leggings, pants, or tights
- Purple duct tape, fabric tape, felt strips, or iron-on fabric strips
- Plain headband
- Pink and purple felt or craft foam
- Hot glue gun or fabric glue
- Feather boa, faux fur trim, or stuffed fabric tube for the tail
- Safety pins, elastic, or ribbon for attaching the tail
- Black eyeliner, white face paint, and pink or purple makeup for the grin
Step 1: Build the Striped Outfit
Start with a pink or purple base outfit. A long-sleeve shirt and leggings are the easiest combination because they are comfortable and easy to decorate. A hoodie also works beautifully because it gives the costume a cozy, cartoonish shape.
Cut strips from purple felt, pink felt, or fabric tape. Place them horizontally across the shirt and leggings to create the classic Cheshire Cat stripes. For a fast version, use purple duct tape on a pink shirt or pink tape on a purple shirt. If the costume is for a child, avoid wrapping tape too tightly around sleeves or legs. Clothes need to stretch, move, and survive the sacred Halloween activities of running, sitting, jumping, and dramatically demanding candy.
For a cleaner look, vary the stripe widths. Some can be wide, some narrow, and some slightly angled. The Cheshire Cat is not a ruler-based animal. A little wonkiness adds charm.
Step 2: Make Simple Cat Ears
Fold a piece of felt in half and cut two diamond shapes. Each diamond will fold over the headband to create one ear. Cut smaller triangles from a contrasting color for the inner ears. Glue the inner triangles onto the larger felt pieces, then fold each diamond around the headband and glue the edges together.
If you want ears that stand taller, insert a small piece of craft foam or thin cardboard inside each ear before gluing. For a fluffier costume, cover the outside with faux fur trim. The ears do not need to be perfect. In fact, slightly oversized ears make the costume cuter and more animated.
Step 3: Add a Tail
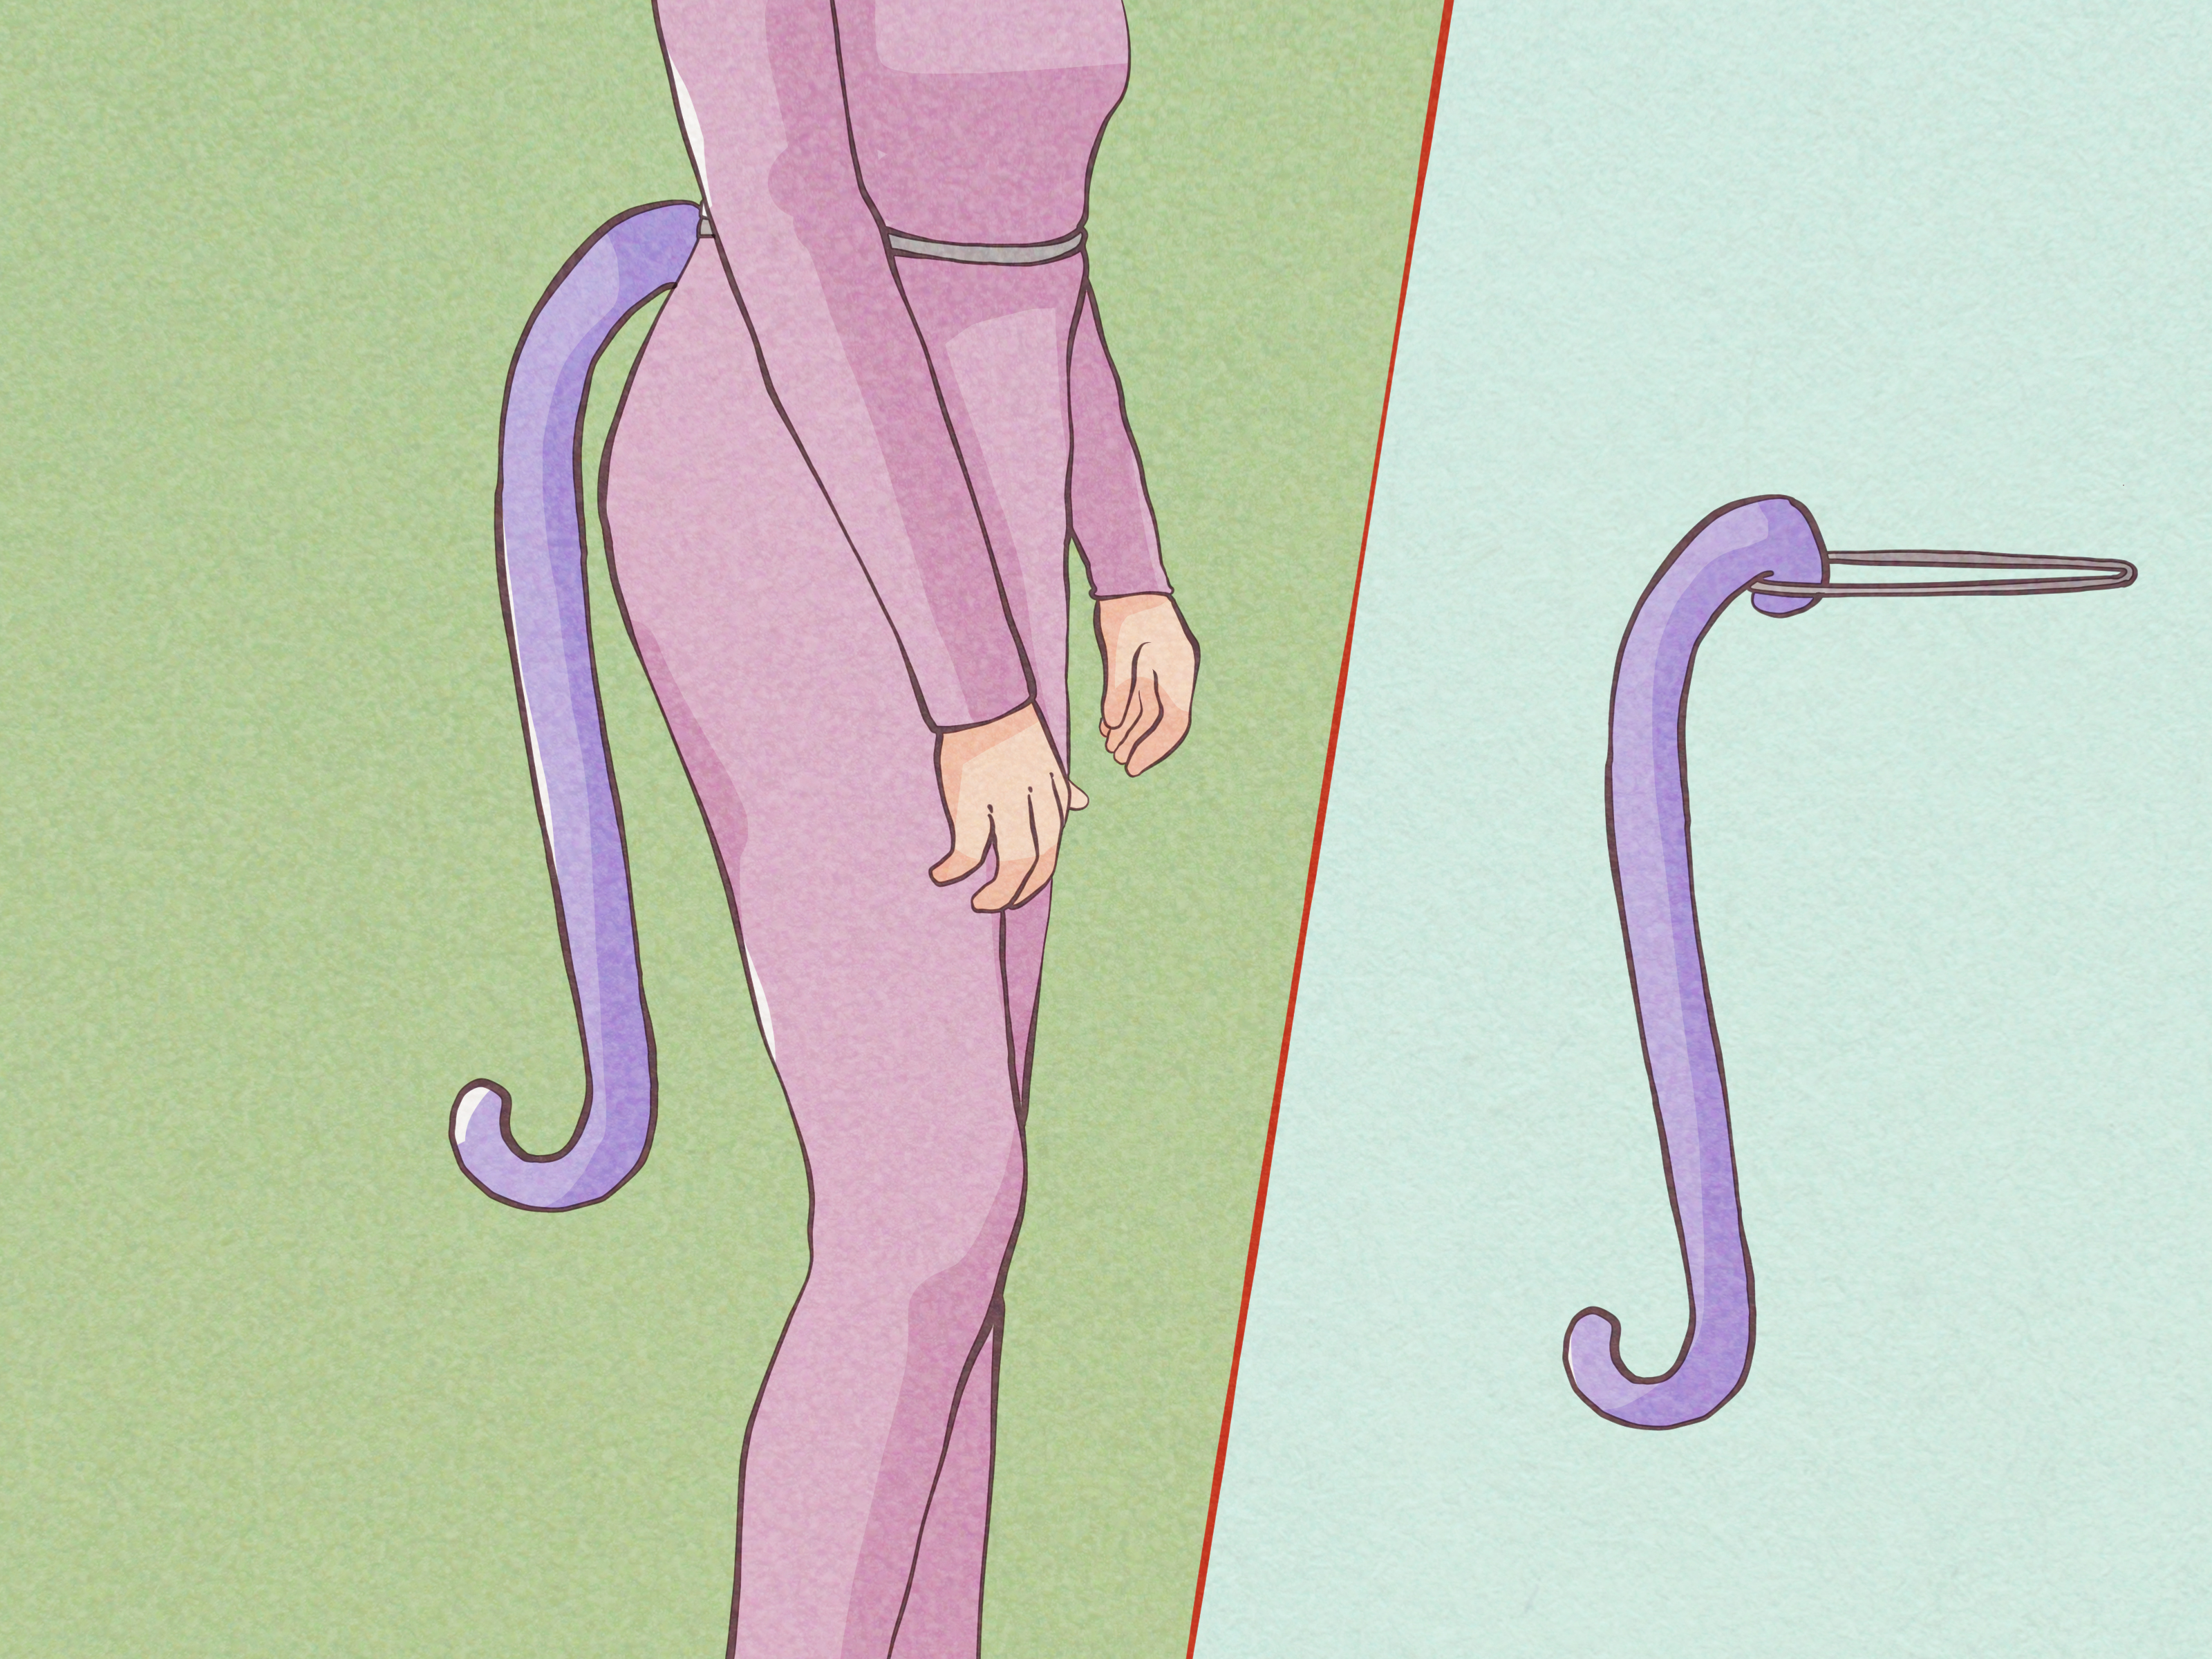
The easiest tail is a feather boa or faux fur trim attached to the back of the waistband with safety pins. To make it more structured, bend a lightweight wire into a gentle curve, wrap it in batting or fabric, and cover it with purple and pink fabric strips. Keep the wire ends covered and rounded so nothing pokes through.
Another simple option is to stuff a long tube sock with fiberfill, fabric scraps, or old socks. Wrap pink and purple strips around it, glue or stitch them in place, and attach the tail to a belt or ribbon. A removable belt tail is helpful because you can sit down without feeling like you are wrestling a pool noodle.
Step 4: Create the Famous Grin
The grin is the star of the costume. Use black eyeliner to sketch a large smile from cheek to cheek. Fill the inside with white face paint, then outline large teeth with black liner. Add purple shading around the mouth for a cartoon effect.
If face paint is not your favorite, cut a wide grin from white felt or cardstock, draw teeth with a black marker, and attach it to a thin dowel as a photo prop. You can hold it in front of your face for pictures and remove it when eating. This is extremely useful because nachos and face paint are not natural allies.
Way 2: Make a Hoodie or Bodysuit Cheshire Cat Costume
This method is ideal if you want a more polished Cheshire Cat costume that still feels comfortable. A hoodie, onesie, bodysuit, or matching sweat set gives you a full-body base. You can sew, glue, or paint the stripes depending on your skill level.
What You Need
- Pink or purple hoodie, onesie, bodysuit, or pajama set
- Fabric paint in the opposite stripe color
- Painter’s tape or chalk for marking stripes
- Cardboard to place inside clothing while painting
- Faux fur or fleece for ears and tail
- Needle and thread, fabric glue, or hot glue
- White gloves or pink gloves for paws
- Optional purple wig or temporary hair color spray
Step 1: Choose the Right Base
A hoodie is a smart base because you can attach ears directly to the hood. A onesie is even easier because it already gives you a head-to-toe costume shape. For adults, a purple hoodie with pink leggings or pink joggers is comfortable and modern. For kids, soft pajamas or sweats are practical because they stay warm during trick-or-treating.
Choose fabric that is not too thin. Fabric paint can bleed through lightweight material, so slide cardboard inside the garment before painting. If you are painting leggings, stretch them slightly over cardboard so the stripes do not crack too much when worn.
Step 2: Paint the Stripes
Lay the hoodie or bodysuit flat. Use painter’s tape or washable chalk to mark horizontal stripes across the torso, sleeves, legs, and hood. Paint between the lines with fabric paint and let each side dry completely before flipping the garment.
The stripes do not have to match perfectly from front to back, but they should feel balanced. Put more stripes on the sleeves, hood, and tail because those areas are highly visible in photos. If you want a softer look, use a sponge brush to dab the paint instead of brushing it on heavily.
Let the paint cure according to the product instructions. This step matters. Wearing wet fabric paint may create a costume, but it will also create a very confusing chair pattern wherever you sit.
Step 3: Sew or Glue Ears to the Hood
Cut four ear shapes from fleece or faux fur: two outer pieces for each ear. Cut two smaller inner ear triangles from pink felt. Glue or sew the inner pieces to the front ear pieces. Place each front and back ear piece together, right sides facing, then sew or glue around the edges, leaving the bottom open. Turn the ears right side out and add a little stuffing if you want them plush.
Attach the ears to the hood with hand stitches or strong fabric glue. Position them while the hoodie is on a table, then try the hoodie on before securing everything permanently. Ears placed too far back may disappear in photos. Ears placed too far forward may make you look surprised by your own costume.
Step 4: Make a Plush Tail
Cut two long curved tail shapes from fleece or faux fur. Place them together, sew or glue around the edge, and leave an opening at the base. Turn the tail right side out and stuff it lightly. If you want a poseable tail, insert a covered wire through the center, making sure the ends are padded and secure.
Attach the tail to the back of the hoodie, onesie, or a separate belt. A belt attachment is more practical because the tail can be removed for driving, sitting, or surviving a crowded Halloween party where everyone is carrying a drink and no one is watching where your tail is.
Step 5: Add Paws and Finishing Details
White gloves, pink gloves, or fingerless gloves make easy paws. You can glue small felt ovals to the palms for paw pads. Add striped leg warmers, bright sneakers, or fuzzy slippers if the event is indoors. For a more dramatic Alice in Wonderland costume, add a purple wig, glitter eye makeup, or a collar with a tiny sign that says “This Way” and “That Way.”
Way 3: Make a Makeup-Focused Cheshire Cat Costume
This version is perfect when you do not want to craft a full outfit. The makeup does most of the work, while the clothing stays simple. It is also great for adults who want a stylish Cheshire Cat Halloween costume rather than a head-to-toe fuzzy outfit.
What You Need
- Black, pink, purple, or striped clothing
- Cat ear headband
- White face paint or cream makeup
- Black eyeliner or face paint
- Pink and purple eyeshadow
- Makeup sponge and small detail brush
- Setting powder or setting spray
- Optional false lashes, glitter, or rhinestones
Step 1: Start With a Simple Outfit
Wear a purple dress, pink top with black pants, striped tights, or a black base outfit with bright accessories. The outfit can be as simple as leggings and a shirt because the makeup will carry the character. Add cat ears and a tail if you have them. If not, the grin and color palette will still make the costume recognizable.
Step 2: Create a Purple and Pink Eye Look
Blend pink shadow on the eyelids and purple shadow through the crease. Extend the shadow outward in a dramatic cat-eye shape. Add black eyeliner with a wing, then draw small whisker dots near the nose. A little shimmer near the inner corners of the eyes gives the look a Wonderland glow.
For a spookier style, use darker purple around the temples and under the cheekbones. For a cute style, keep the colors soft and add blush. For a glam style, add lashes and glitter. The Cheshire Cat is flexible. He has been mysterious for over a century; he can handle rhinestones.
Step 3: Draw the Cheshire Grin
Use a white face paint or cream makeup to draw a wide smile shape from cheek to cheek. Keep the upper and lower edges curved so the grin looks exaggerated. Fill the shape with white, then use black eyeliner or face paint to outline the mouth and separate the teeth.
Make the teeth large and slightly uneven. Perfect tiny teeth can look too realistic, while big cartoon teeth look more like the Cheshire Cat. Shade the corners of the grin with purple or black to add depth. Set the makeup with powder or setting spray so it lasts longer.
Step 4: Keep Makeup Safe and Comfortable
Use cosmetic-grade face paint or makeup made for skin. Do not use craft paint, acrylic paint, marker, or random “this is probably fine” products from the garage. Check labels, avoid products not intended for the eye area near the eyes, and do a patch test before the event if you have sensitive skin. Remove the makeup gently at the end of the night with a proper cleanser or makeup remover.
If the costume is for a child, consider using a smaller grin around the mouth rather than covering the entire lower face. This makes eating, drinking, and talking easier. It also reduces the chance of the makeup becoming a mysterious frosting-like substance by the end of the evening.
Budget-Friendly Cheshire Cat Costume Ideas
You can create a strong Cheshire Cat look without buying a full costume. Start by checking your closet for pink, purple, black, or striped clothing. A purple hoodie, pink shirt, striped socks, or bright leggings can become the foundation. Craft stores, dollar stores, thrift shops, and old costume bins are excellent places to find supplies.
Cheap Materials That Work Well
- Duct tape: Great for fast stripes on clothing you do not mind altering.
- Felt: Ideal for ears, paw pads, teeth, and tail stripes.
- Feather boas: Perfect for fluffy tails, cuffs, and collars.
- Old hoodies: Comfortable base pieces that can be painted or decorated.
- Temporary hair spray: Adds color without committing to a wig.
- Cardstock: Useful for a removable grin prop or oversized teeth.
If you are dressing a group, make the Cheshire Cat the boldest costume and keep the rest simpler. Alice can wear a blue dress and white apron, the White Rabbit can carry a clock, and the Mad Hatter can wear a thrifted jacket and decorated hat. Group costumes do not need to be expensive when each person has one or two recognizable details.
Cheshire Cat Costume Ideas for Adults
For an adult Cheshire Cat costume, decide whether you want cute, spooky, glam, or cozy. A fitted striped dress with cat ears creates a party-ready look. A hoodie and leggings create a comfortable Halloween costume for walking, hosting, or taking kids trick-or-treating. A black outfit with dramatic Cheshire makeup creates a stylish version that does not require much crafting.
For a glam version, wear a purple wig, bold lashes, glitter eyeshadow, and a painted grin. Add a faux fur tail and platform boots if you want extra drama. For a spooky version, use darker purple shading, sharper teeth, and smoky eye makeup. For a funny version, carry a sign that says “I’m not all there,” then occasionally hide behind furniture. That is not required, but it is deeply on brand.
Cheshire Cat Costume Ideas for Kids
For children, comfort and safety matter most. Use soft clothing, avoid long dragging tails, and make sure shoes are practical. A striped hoodie and leggings are easier than a stiff costume. Face paint should be minimal, skin-safe, and easy to remove. If a child dislikes face paint, use a felt grin attached to a stick or a smile printed on a shirt instead.
Choose flame-resistant or snug-fitting materials when possible, especially around candles, jack-o’-lanterns, or outdoor decorations. Avoid masks that block vision. If trick-or-treating after dark, add reflective tape to shoes, bags, or the tail. The Cheshire Cat may disappear in Wonderland, but children should stay visible in crosswalks.
Common Mistakes to Avoid
Using the Wrong Paint
Only use face paint or makeup designed for skin. Fabric paint belongs on fabric. Craft paint belongs on crafts. Wall paint belongs far away from your face and possibly your life choices.
Making the Tail Too Heavy
A giant tail looks fun until it pulls down the waistband all night. Keep the tail lightweight and attach it securely to a belt, hoodie, or elastic waistband.
Forgetting Mobility
Test the costume before the event. Sit, walk, bend, and move your arms. If you cannot pick up your phone, tie your shoes, or reach the snack table, adjust the costume.
Overdoing the Stripes
Stripes are important, but the whole outfit does not need to look like a hypnotized candy cane. Place stripes where they show most: sleeves, torso, legs, ears, and tail.
Experience-Based Tips for Making a Cheshire Cat Costume
One of the best things about making a Cheshire Cat costume is that it rewards creativity more than perfection. In real life, the most memorable costume details are often the ones that look handmade in a charming way. A slightly crooked grin, a tail with extra bounce, or ears that lean in different directions can make the character feel more playful. The Cheshire Cat is supposed to be strange, so you have permission to let the costume be a little weird.
If you are making this costume for the first time, start with the pieces that create the biggest visual impact: stripes, ears, and grin. Those three elements will do most of the storytelling. You can add the tail, gloves, wig, and accessories later if time allows. Many DIY costumes become stressful because people start with tiny details before finishing the main silhouette. Do not spend two hours perfecting paw pads if you still do not have ears. That is how people end up at parties wearing one glove and a haunted expression.
Another helpful experience is to test your materials early. Fabric paint may dry darker than expected. Duct tape may peel from stretchy fabric. Hot glue may not hold well on certain smooth materials. Face paint may feel dry or tight after an hour. Try a small sample before decorating the whole outfit. This is especially important if the costume is for a child who may reject itchy fabric, tight headbands, or heavy makeup with the passion of a tiny courtroom attorney.
Comfort should always win. A costume that looks amazing for five minutes but feels miserable for three hours is not a success. Choose breathable clothes, soft waistbands, and shoes you can actually walk in. If you are attending an outdoor event, layer the costume over warm clothing. A pink-and-purple striped hoodie is much more useful on a chilly night than a thin costume dress that leaves you shivering like a dramatic Victorian ghost.
For photos, exaggerate the most recognizable features. Make the ears a little larger, the tail a little curlier, and the grin a little wider than you think you need. Small details disappear in pictures, especially in dim Halloween lighting. If you are doing makeup, take a test photo before leaving home. Sometimes a grin that looks bold in the mirror looks faint on camera. Add contrast with black outlines and white teeth so the smile pops.
Finally, embrace the character. The Cheshire Cat is not just a striped cat; it is a mood. Tilt your head, smile mysteriously, point in two directions at once, and give unhelpful but confident advice like, “You will get there eventually, probably.” A DIY Cheshire Cat costume becomes much more fun when you act a little mischievous. After all, anyone can wear ears. Only a true Wonderland cat can make people wonder whether you are arriving, leaving, or slowly vanishing near the dessert table.
Conclusion
Making a Cheshire Cat costume can be simple, affordable, and wildly fun. For a fast option, create a no-sew costume with a striped shirt, felt ears, a boa tail, and a painted grin. For a more polished look, decorate a hoodie, onesie, or bodysuit with fabric paint and plush accessories. For a last-minute or adult-friendly version, let bold Cheshire Cat makeup do the heavy lifting while your outfit stays simple.
The best DIY Cheshire Cat costume is the one that fits your time, budget, comfort, and personality. Focus on the pink and purple stripes, the cat ears, the curved tail, and the unmistakable grin. Add safe makeup, comfortable materials, and a little Wonderland attitude, and you will have a costume that is instantly recognizable without needing to buy a full store-bought outfit. Whether you are headed to a Halloween party, school event, cosplay gathering, or Alice in Wonderland group costume night, this mischievous cat look is ready to appear, disappear, and steal the spotlight.
Note: Use only cosmetic-grade face paint on skin, test makeup before the event, keep costumes comfortable and visible, and choose safer materials for children’s Halloween outfits.