Folding a letter sounds like one of those tiny life skills everyone is supposed to magically know, right up there with replacing a smoke detector battery without chirping at the ceiling like a frustrated bird. But the moment you have a formal letter, a wedding card, a resume, an invoice, or a handwritten thank-you note in front of you, the questions start marching in: Which way should the paper face? Should the crease go in first? Why does this once-flat page now look like it lost a fight with a desk drawer?
The good news is that learning how to fold and insert a letter into an envelope is simple once you know the three most useful methods. Whether you are mailing a standard business letter in a #10 envelope, tucking a personal note into a greeting card envelope, or preparing a document that needs to look polished when opened, the right fold makes your message easier to read, easier to mail, and much more professional.
This guide explains three practical ways to fold a letter, how to insert each one properly, and how to avoid the most common envelope mistakes. Think of it as etiquette meets office survival skillswith fewer paper cuts, hopefully.
Why Folding a Letter Correctly Still Matters
In a world of instant messages and emails that begin with “Just circling back,” a physical letter has a special kind of power. It feels intentional. It has weight. It says, “I cared enough to use paper, ink, and possibly a stamp that cost more than I remembered.”
But presentation matters. A clean fold helps the letter fit neatly inside the envelope, protects the contents during mailing, and gives the recipient a smooth opening experience. For business correspondence, a neat fold can make invoices, cover letters, contracts, and professional notices look more credible. For personal letters, it adds a thoughtful finishing touch.
Proper folding also matters for mailing rules. In the United States, standard letter-size mail generally needs to be rectangular and thin enough to move through automated postal equipment. A bulky, uneven, overstuffed envelope may require extra postage or handling. Translation: your envelope should look like mail, not like it is hiding a granola bar.
Before You Fold: Set Yourself Up for Success
Before choosing a folding method, make sure your paper and envelope match. Most U.S. business letters are printed on standard 8.5-by-11-inch paper and mailed in a #10 business envelope, which is commonly about 4 1/8 inches by 9 1/2 inches. That size is perfect for a tri-fold letter.
For personal notes, invitations, greeting cards, or shorter messages, you may use smaller envelopes such as A-style envelopes, note card envelopes, or square envelopes. These often call for a half-fold or simple card-style insertion. If you are mailing important documents that should not be creased, use a large flat envelope instead.
Quick Supplies You May Need
You do not need fancy equipment, but a few simple tools can help:
- A clean, flat surface
- The correct envelope size
- A ruler or bone folder for sharp creases
- Clean, dry hands
- A printed or handwritten letter
- A pen for addressing the envelope before inserting the letter
Addressing the envelope before inserting the letter is a small but useful trick. It prevents dents, pressure marks, and accidental ink smudges on the contents. If you are using a window envelope, test the fold before sealing anything. The recipient’s address should appear clearly through the window without being cut off at the edges.
Method 1: The Standard Tri-Fold for a Business Envelope
The standard tri-fold is the most common way to fold a letter for a #10 envelope. This is the classic method used for business letters, invoices, cover letters, formal notices, and professional correspondence. If you have ever received a bank statement or office letter, you have probably seen this fold in action.
Best For
Use the tri-fold when mailing a standard 8.5-by-11-inch sheet in a long business envelope. It is especially useful for formal letters, job application materials, billing statements, and any document that needs to look tidy and professional.
Step-by-Step Instructions
Place the letter face up on a clean surface, with the top of the letter facing away from you. Imagine dividing the page into three equal horizontal sections. You do not have to measure perfectly, but precision helps.
First, bring the bottom third of the page upward. The bottom edge should land slightly below the top third of the page, leaving enough room for the final fold. Crease the fold firmly from the center outward to avoid wrinkles.
Next, fold the top third downward over the first fold. The top edge should line up neatly with the bottom crease. Press the fold with your fingers, a ruler, or a bone folder. The result should be a clean, compact rectangle that fits smoothly inside a #10 envelope.
How to Insert It Into the Envelope
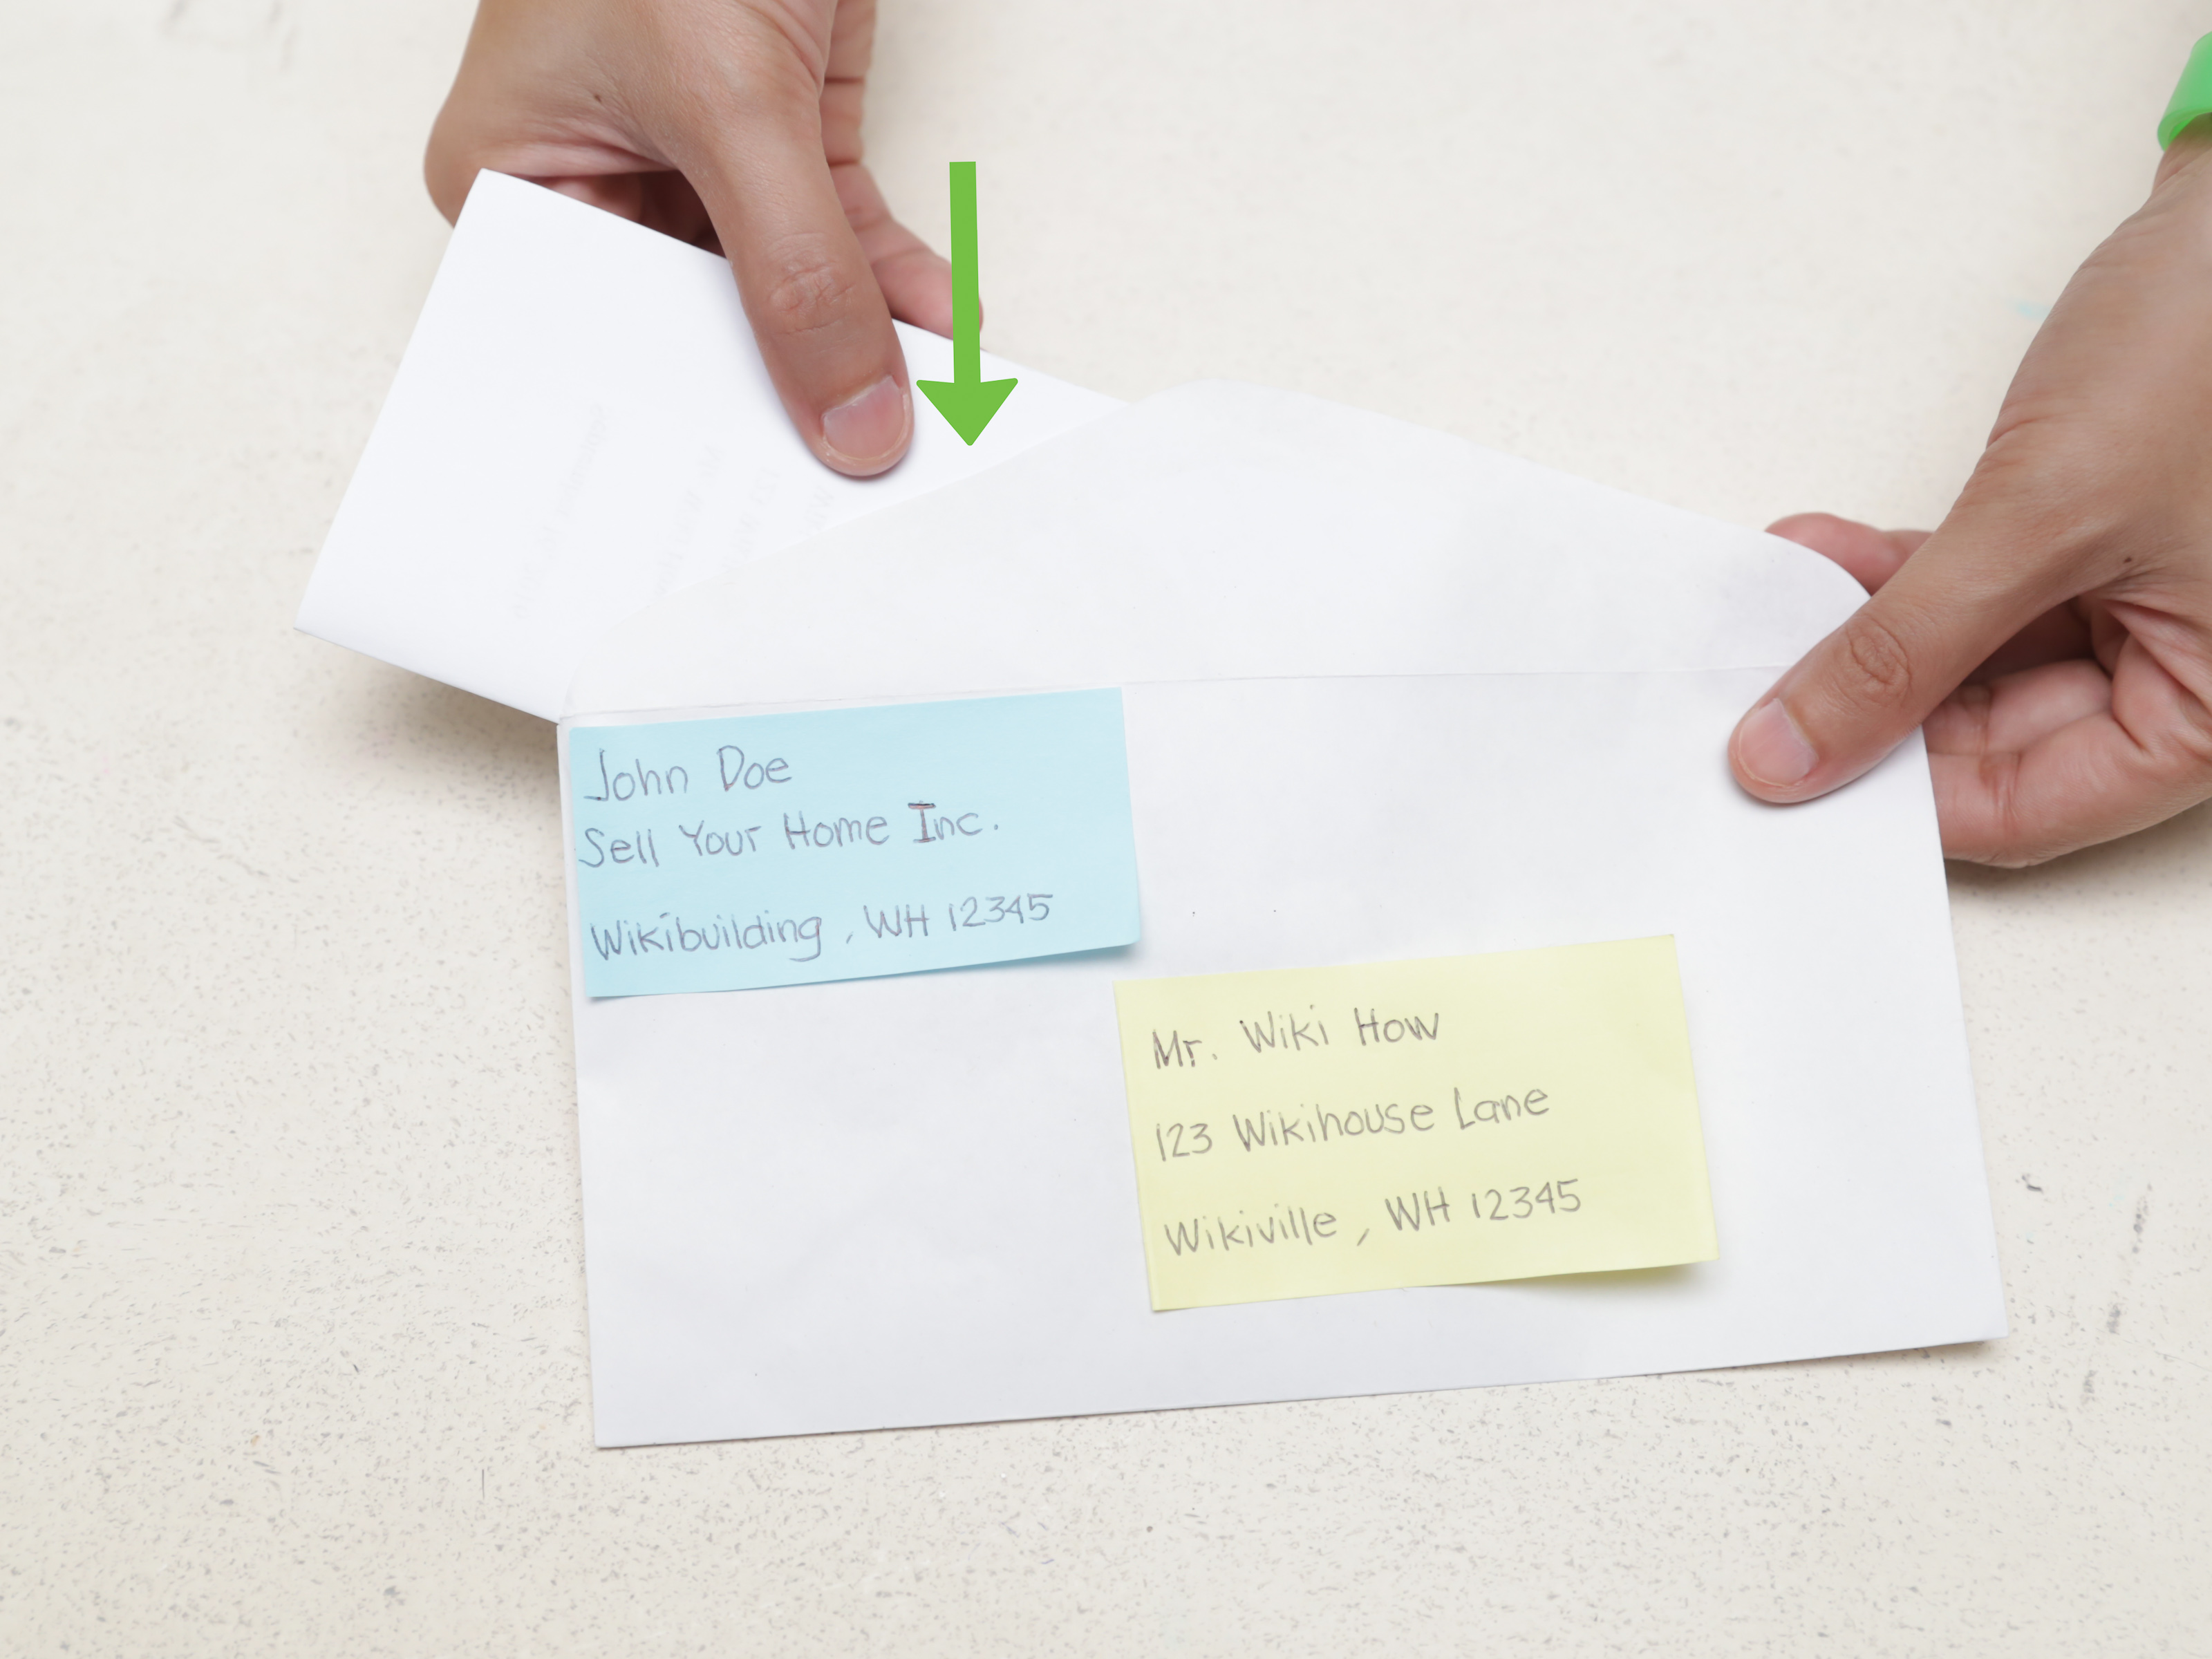
Hold the envelope with the flap side facing you. Insert the folded letter so the final folded edge goes into the envelope first. Many people also prefer placing the letter so that when the recipient pulls it out, the top of the letter is ready to open and read naturally. For professional mail, the cleanest experience is one where the reader does not have to flip the paper around like they are solving a tiny office puzzle.
If the letter has a letterhead, make sure it remains clean and unbent. For window envelopes, the address block must align with the window after folding. Test one copy before preparing multiple letters, because even a small formatting change can shift the address out of view.
Pro Tip
Use the envelope itself as a measuring guide. Place the paper under the envelope and mark the approximate height of the envelope lightly in your mind. Your first fold should create a panel slightly shorter than the envelope height, allowing the letter to slide in without jamming.
Method 2: The Z-Fold for Easy Opening and Window Envelopes
The Z-fold, also called an accordion fold, is another excellent way to fold a letter into thirds. Instead of folding both panels inward like a standard tri-fold, you fold one panel forward and the other backward. When viewed from the side, the paper forms a “Z” shape.
This method is popular for documents that need to open quickly or show information in a specific order. It can also work well with certain window envelopes, depending on where the address is printed.
Best For
Use a Z-fold for statements, notices, forms, simple brochures, and letters where the opening sequence matters. It is also helpful when you want the recipient to unfold the page in one smooth motion rather than opening nested folds.
Step-by-Step Instructions
Lay the letter face up on a flat surface. Again, imagine the page divided into three equal horizontal sections.
Fold the bottom third upward, creasing it neatly. Then flip the paper or fold the top third backward, in the opposite direction from the first fold. The panels should stack evenly, forming a compact rectangle.
The key difference is direction. A standard tri-fold tucks the panels inward like a brochure. A Z-fold alternates direction, which makes the paper open more like an accordion. Very official. Slightly dramatic. Surprisingly satisfying.
How to Insert It Into the Envelope
Insert the folded letter with the crease entering first, keeping the panel that should be seen first oriented toward the opening. If using a window envelope, check the address carefully. The address block should sit fully inside the window, with enough blank space around it so that postal equipment and human readers can see it clearly.
For business mailings, print one sample, fold it, insert it, and hold it up to the light. If the address is too high, low, left, or right, adjust your document template before printing a full batch. Nothing ruins an efficient office afternoon faster than realizing 200 letters have addresses hiding shyly behind the envelope paper.
Pro Tip
If your letter includes a detachable form, payment slip, or return section, a Z-fold may make it easier for the recipient to see the most important information first. This is why many statements and office mailers use variations of this style.
Method 3: The Half-Fold for Personal Letters, Cards, and Small Envelopes
The half-fold is the simplest method and often the best choice for personal correspondence. It works well for handwritten notes, greeting letters, thank-you messages, invitations, and stationery designed to be folded once.
Unlike the tri-fold, the half-fold does not try to squeeze a full-size business letter into a long envelope. Instead, it creates a clean card-like shape. It feels more personal and less corporate, which is ideal when your message says “thinking of you” rather than “please remit payment within 30 days.”
Best For
Use the half-fold for personal letters, note paper, greeting cards, informal invitations, sympathy notes, holiday letters, and stationery that comes with matching envelopes.
Step-by-Step Instructions
Place the letter face down if you want the writing protected on the inside. Bring the bottom edge up to meet the top edge, aligning the corners carefully. Press the fold from the center outward, then sharpen the crease with your fingers or a ruler.
If the paper is thick, do not force the crease aggressively. Heavy stationery can crack or wrinkle if pressed too hard. A gentle but firm fold is enough. The goal is elegance, not origami boot camp.
How to Insert It Into the Envelope
For a traditional personal note, insert the folded edge first. If the envelope flap is facing you, the folded edge usually goes down into the envelope, and the open edges remain closer to the flap. This helps protect the letter and gives the recipient a natural way to remove and open it.
For greeting cards, the front of the card typically faces the back of the envelope, with the fold going in first. That way, when the recipient removes the card, the front design is easy to see. It is a small detail, but small details are where good manners like to live.
Pro Tip
If you are mailing a photo, keepsake, or delicate enclosure with your letter, place it inside the fold or use a protective sleeve. Avoid loose items sliding around inside the envelope, especially if they could bend the letter or create lumps.
How to Choose the Right Folding Method
Choosing the right fold depends on the paper size, envelope size, purpose, and level of formality. A job cover letter should not be folded like a birthday card. A heartfelt note to your grandmother does not need to look like a utility bill. Context is everything.
Choose the Standard Tri-Fold When…
You are mailing a standard business letter, invoice, resume cover letter, formal request, office notice, or professional document in a #10 envelope. It is the safest all-purpose choice for U.S. business correspondence.
Choose the Z-Fold When…
You want the letter to open smoothly, the document includes panels or sections, or you are using a window envelope that requires a specific address position. It is practical, efficient, and great for documents that need to reveal information in order.
Choose the Half-Fold When…
You are sending a personal letter, greeting card, invitation, thank-you note, or folded stationery. It feels warmer and more traditional than a business-style fold.
Common Mistakes to Avoid
Even a simple letter can go sideways if you rush the final steps. Here are the most common mistakes people make when folding and inserting a letter into an envelope.
Folding Before the Ink Dries
If you printed the letter or wrote it by hand, give the ink a moment to dry. Folding too soon can smear the text, especially on glossy paper or with gel pens. A beautiful letter with a mysterious blue streak across the middle is not quite the polished look most people are going for.
Using the Wrong Envelope Size
A standard business letter fits well in a #10 envelope when folded into thirds. If you try to cram multiple sheets, thick paper, or extra inserts into the same envelope, it may become bulky. For several pages, consider a larger envelope or use fewer folds.
Making Uneven Creases
Uneven folds can make the letter difficult to insert and awkward to open. Align corners before pressing down, and crease from the center outward. A ruler can help create a crisp line.
Sealing Too Soon
Always double-check the contents before sealing. Make sure the letter is signed, the correct pages are included, and the envelope is addressed properly. There are few office tragedies more humbling than sealing an envelope and immediately spotting the unsigned signature line.
Ignoring Postage Rules
Standard letters must meet size, shape, thickness, and weight requirements to qualify for regular letter postage. If your envelope is square, rigid, unusually thick, or oversized, it may cost more to mail. When in doubt, check current postal guidance before sending.
Extra Tips for a Professional Finish
Use clean paper without wrinkles or bent corners. Make sure the letter is signed if a signature is expected. Keep the fold lines straight and avoid overhandling the page. If the letter is formal, use a clean white or neutral envelope. If it is personal, choose stationery that matches the tone of your message.
For business letters, use a clear format with readable spacing. Block format is common because it keeps text aligned and easy to scan. Leave space between paragraphs, keep the message concise, and place the recipient’s address in the proper area if you are using a window envelope.
For handwritten letters, write slowly enough to keep the text legible. The charm of handwriting disappears quickly if the recipient needs a magnifying glass, a detective board, and three cups of coffee to decode it.
Real-Life Experience: What Folding Letters Teaches You
There is something unexpectedly calming about folding a letter. It is one of those ordinary tasks that makes you slow down for a moment. You line up the corners, press the crease, smooth the paper, and suddenly the message feels complete. The act is small, but it carries a sense of care.
Anyone who has prepared a stack of letters for mailing knows that the first few folds are where you learn humility. The first letter may come out slightly crooked. The second one might be better. By the fifth, you start feeling like the unofficial mayor of Envelope Town. You learn that paper has a personality. Thin copy paper folds easily but wrinkles if you handle it too much. Thick stationery looks beautiful but demands patience. Glossy paper behaves like it has somewhere better to be.
One useful experience is learning to fold a letter with the recipient in mind. When someone opens a formal letter, they should be able to unfold it naturally and begin reading without rotating the page. That sounds minor, but it makes the message feel more polished. In business settings, these little touches can quietly support your professionalism. A neatly folded cover letter, invoice, or proposal suggests that you pay attention to details before anyone even reads the first sentence.
Personal letters teach a different lesson. A half-fold note tucked into a matching envelope feels intimate and warm. It does not need to be perfect in a machine-made way. In fact, a tiny human imperfection can make it more charming. A handwritten thank-you note with a careful fold often feels more meaningful than a flawless email typed in twelve seconds. The envelope becomes part of the experience: the recipient opens it, slides out the paper, unfolds the message, and gets a small pause from the digital noise of the day.
Another lesson is that preparation saves frustration. Address the envelope first. Test the fold before printing twenty copies. Keep your hands clean. Do not seal the envelope until you know the letter is inside, signed, and facing the right direction. These habits sound obvious until the one time you forget them and mail an empty envelope, which is a bold but not especially effective communication strategy.
Folding letters also reminds you that presentation does not have to be complicated. You do not need luxury stationery or professional mailing equipment to make a letter look good. A flat surface, a careful crease, and the right envelope are usually enough. The goal is not perfection; the goal is respectfor the message, for the recipient, and for the small tradition of sending something tangible through the mail.
In a way, folding a letter is the final handshake before your words leave home. Done well, it protects the paper, improves the presentation, and makes the recipient’s first impression just a little better. That is a lot of responsibility for two or three creases, but paper has always been surprisingly good at carrying meaning.
Conclusion
Learning how to fold and insert a letter into an envelope is a simple skill that makes your mail look cleaner, more professional, and more thoughtful. Use the standard tri-fold for business letters and #10 envelopes, the Z-fold for easy-opening documents or window envelopes, and the half-fold for personal notes, greeting cards, and invitations.
The right fold helps your letter fit properly, protects the contents, and gives the recipient a better opening experience. Whether you are mailing a formal document or a handwritten note, a neat fold says you cared enough to finish the job well. And honestly, in a world full of rushed messages and typo-filled texts, that little bit of care stands out.
Note
This article is based on commonly used U.S. mailing practices, standard business correspondence formatting, and practical envelope-handling guidance. Postal requirements can change, so unusual, oversized, rigid, international, or heavy mail should be checked against current mailing rules before sending.