Aloe vera is supposed to be the “easy” plant. You give it sunlight, forget it exists for a bit, and it rewards you by looking cool and vaguely prehistoric. So when it suddenly flops like a tired pool noodle, it feels personal.
The good news: a drooping aloe plant is usually fixable. In most cases, your aloe is trying to tell you something very specifictoo much water, too little light, poor drainage, cold stress, or a pot situation that has become wildly dramatic. The trick is reading the clues correctly.
In this guide, you’ll learn why your aloe plant is drooping, how to identify the root cause, and 11 practical aloe plant care solutions to help your aloe vera stand up again (or at least stop acting like it needs a fainting couch).
Quick Diagnosis: What Kind of Drooping Are We Talking About?
Before jumping into fixes, look closely at the leaves and soil. “Drooping” can mean very different things in aloe care:
- Soft, mushy, yellowing leaves: often overwatering or root rot.
- Thin, wrinkled, curled, or puckered leaves: often underwatering.
- Long, weak, leaning leaves: often not enough light.
- One-sided leaning: usually phototropism (reaching toward light).
- Outer leaves splaying on a mature plant: sometimes normal aging and growth habit.
- Collapsed after a cold night or draft: temperature stress.
Once you know which kind of droop you have, the fix gets a lot easier.
11 Plant Care Solutions for a Drooping Aloe Plant
1) Pause Watering and Check the Soil Before Doing Anything Else
If your aloe is flopping, the first move is not “more water.” In fact, that’s how many aloes go from “sad” to “memorial service.”
Aloe vera is a succulent, meaning it stores water in its leaves. That makes it drought tolerant, but also easy to overwater. Stick your finger into the soil (a couple of inches deep if the pot is large). If it’s still damp, wait. If the pot feels heavy and the soil is wet, your aloe may already be in trouble.
Best practice: Use a soak-and-dry approach. Water thoroughly, then let the soil dry out before watering again. Don’t follow a rigid “every Saturday” schedulethe plant doesn’t own a calendar.
2) Repot Into Fast-Draining Succulent Soil
Aloe roots hate sitting in dense, soggy potting mix. If your plant is in regular moisture-retentive potting soil, that alone can cause drooping.
Repot into a cactus/succulent mix or make a gritty blend (for example: potting mix plus coarse sand, pumice, or perlite). The goal is airflow and fast drainage, not swampy luxury.
Signs your current mix is the problem:
- Soil stays wet for several days
- Water pools on top before slowly sinking
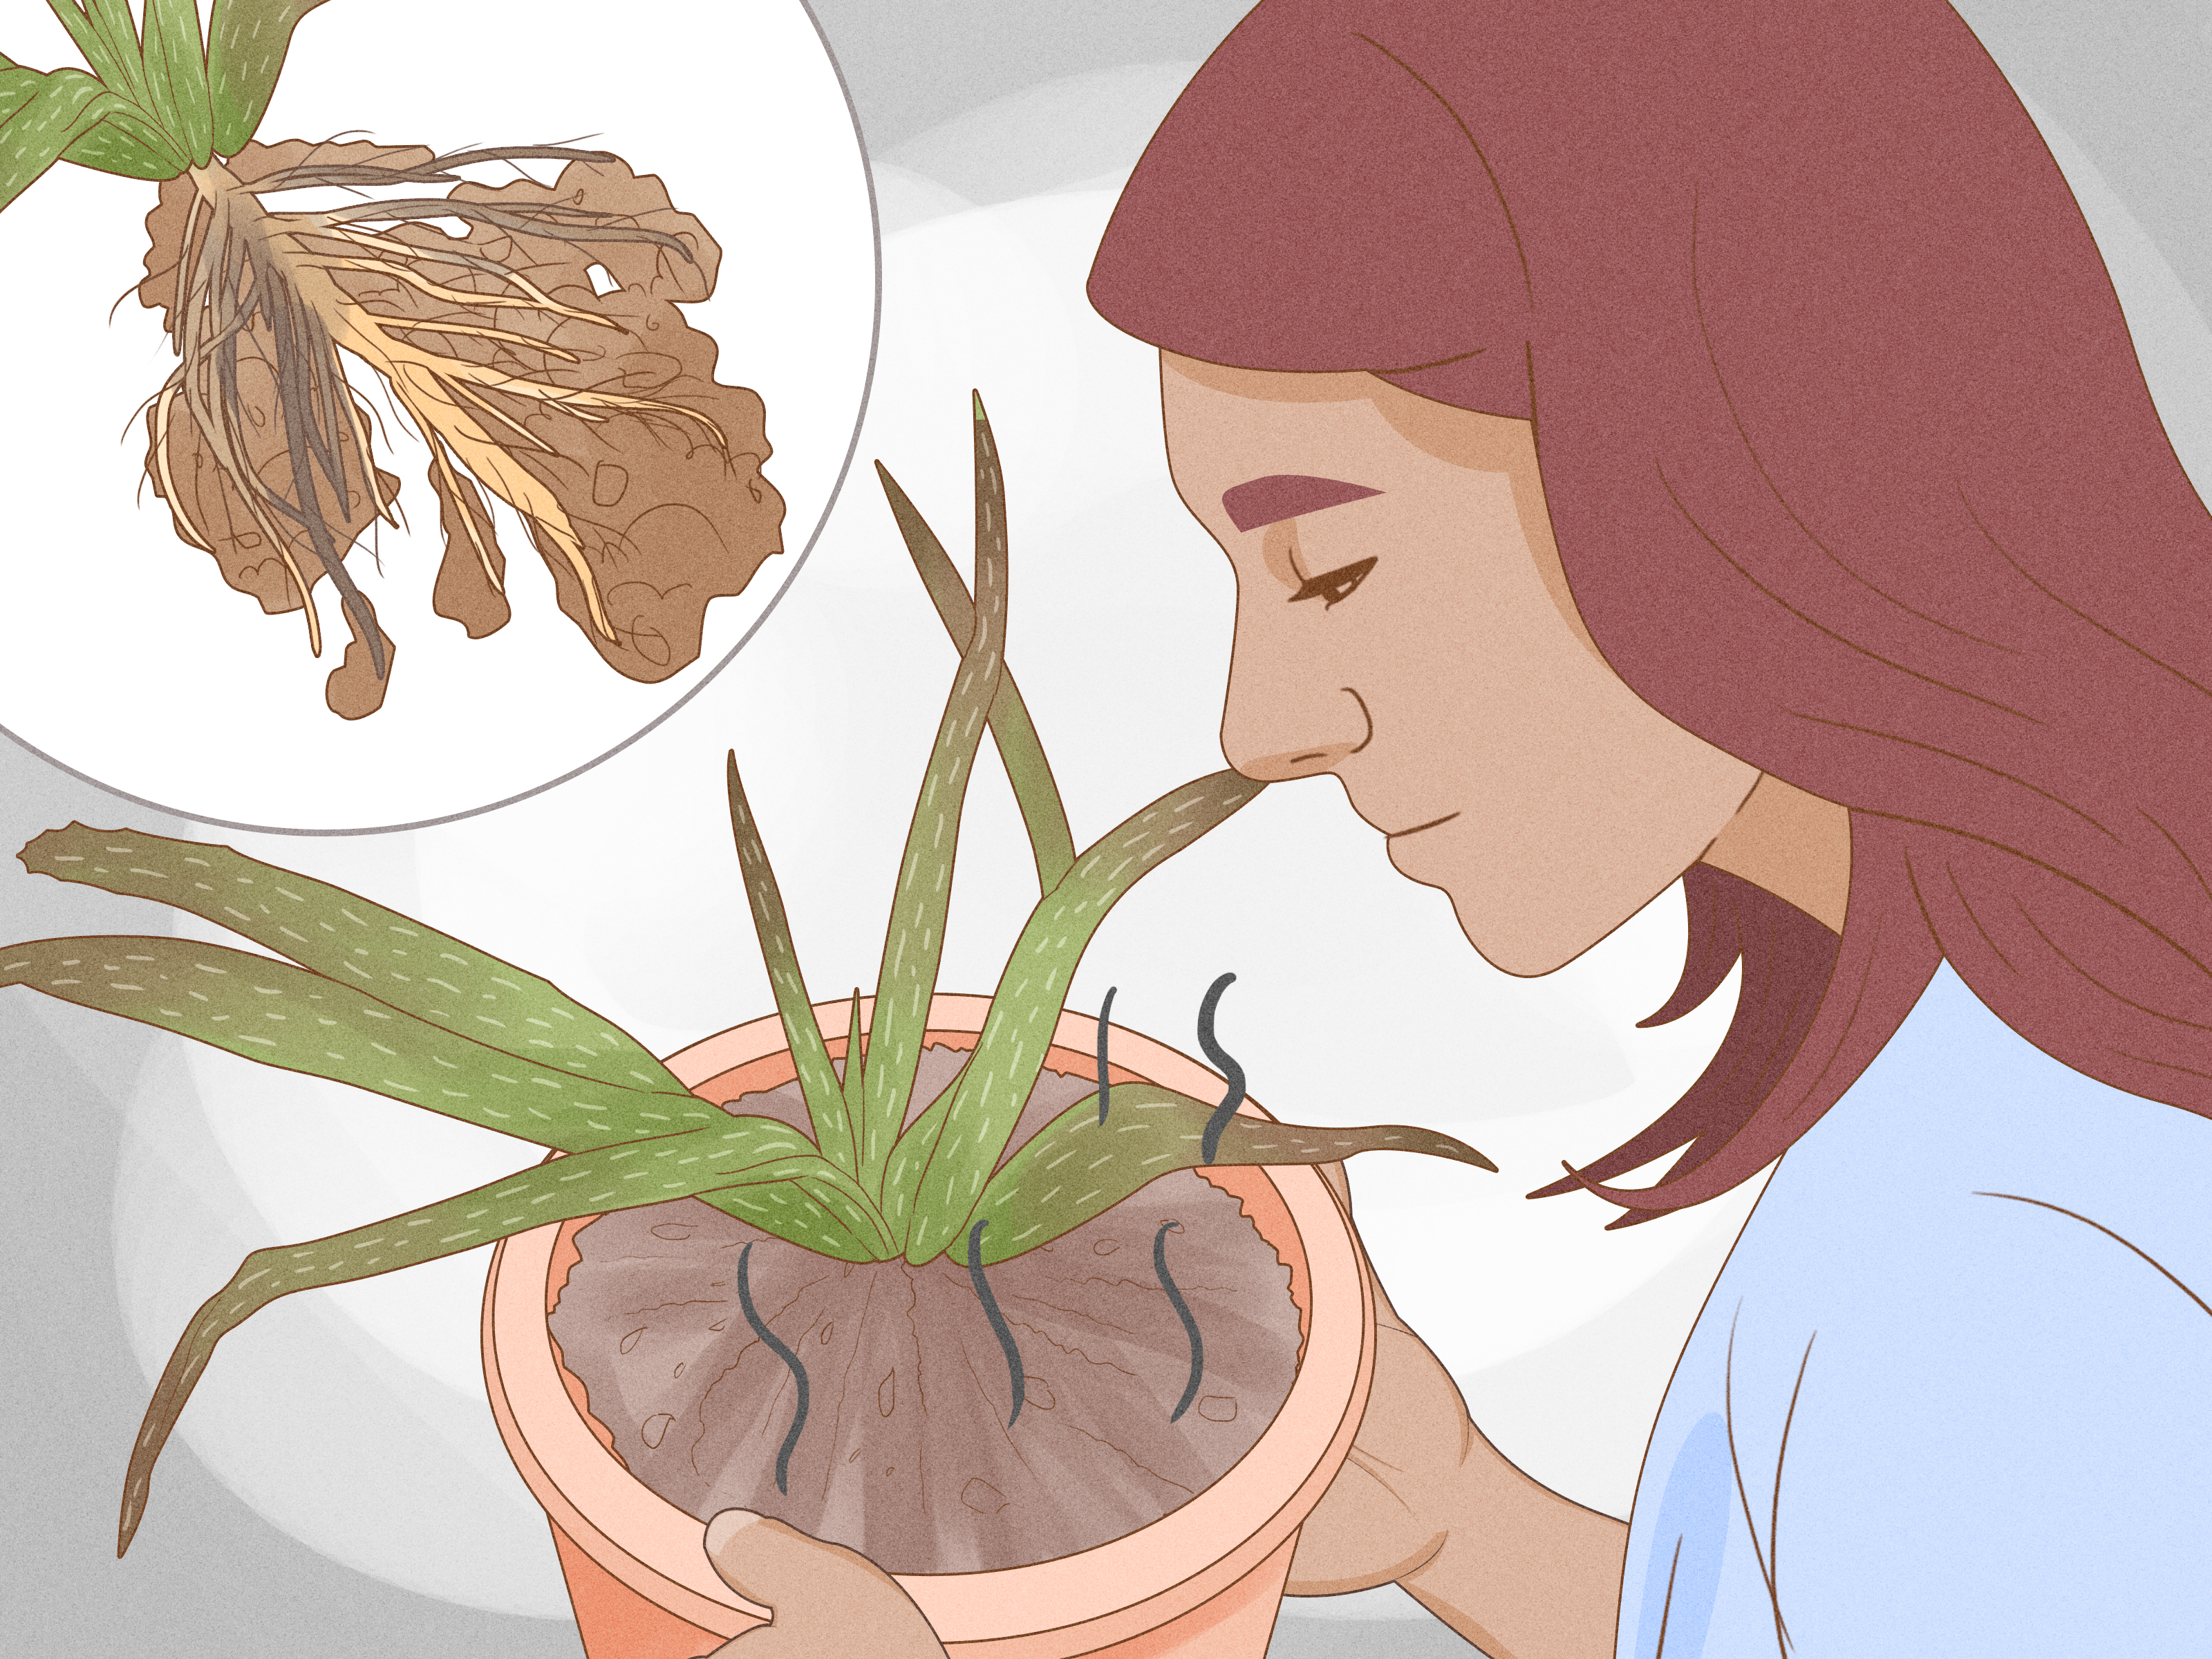
- The root ball smells sour or musty
- Leaves feel soft even though the plant “looks watered”
3) Make Sure the Pot Has Drainage Holes (Yes, This Matters That Much)
A stylish pot with no drainage hole is basically a decorative trap. Aloe vera plants need containers that allow excess water to escape.
Choose a pot with at least one good drainage holemore is even better. Clay or terracotta pots are especially helpful because they’re porous and allow soil to dry faster than plastic or glazed containers.
Also, never let the pot sit in standing water. Empty the saucer after watering. If your aloe sits in water, roots can rot quickly, and drooping leaves are often the first visible sign.
4) Inspect for Root Rot and Perform an Aloe “Rescue Repot”
If your aloe is drooping badly and the soil is wet, gently unpot it and inspect the roots. Healthy roots are usually firm and pale. Rotten roots are brown/black, mushy, and may smell unpleasant.
How to rescue a droopy aloe with root rot:
- Remove the plant from the pot.
- Brush off soggy soil.
- Trim mushy or dead roots with clean scissors.
- Remove badly rotted lower leaves if needed.
- Let the roots air-dry for a short period (a few hours to overnight, depending on damage).
- Repot into fresh, dry succulent mix in a clean pot with drainage.
- Wait a few days before watering lightly.
This sounds dramatic because it isbut it’s often the difference between recovery and compost.
5) Fix Underwatering With a Deep Watering (Not a Tiny Splash)
Yes, aloe can also droop from too little water. Underwatered aloe leaves often look thinner, wrinkled, puckered, or curled, and the plant may seem limp rather than mushy.
If the soil is bone dry and has pulled away from the pot edges, water may run straight through without rehydrating the root ball. In that case, a deeper watering method can help.
What to do: Water thoroughly until excess drains out. If the soil is hydrophobic (repelling water), bottom watering for a short soak can help re-wet the root ball. Then let the soil drain completely.
The goal is not “water more often forever.” The goal is to restore a healthy cycle: deep watering + full drying.
6) Give It Brighter Light (But Don’t Fry It)
Aloe vera needs bright light to keep leaves firm and upright. In low light, leaves may become weak, stretched, and floppy as the plant reaches for a better light source.
Indoors, a bright south- or west-facing window is often ideal. If your home is dim, supplemental grow lights can help a lotespecially in winter.
Important: Don’t move a low-light aloe straight into harsh full sun overnight. That’s how you trade drooping for sunburn. Increase light gradually over several days to a couple of weeks.
7) Rotate the Pot to Prevent Leaning and One-Sided Growth
If your aloe is healthy but leaning dramatically to one side, it may simply be chasing sunlight. Aloes are not shy about this. They will absolutely throw their posture out the window to get better light.
Rotate the pot about a quarter turn regularly (many gardeners do this after watering). Over time, this encourages more balanced growth and can reduce the “I’m trying to escape the window” look.
If the plant is already very bent, rotation alone won’t fix it overnightbut it helps prevent future lopsided growth.
8) Protect It From Temperature Stress and Cold Drafts
Aloe likes warm conditions and can react badly to cold rooms, frosty nights, or drafty windows. Temperature stress can lead to drooping, discoloration, and damaged leaf tips.
If your aloe recently drooped after being placed near a cold window, an exterior door, or outdoors on a chilly night, move it to a warmer spot right away. Most aloes do well in typical indoor temperatures, but they should be protected from frost and cold exposure.
Tip: If you move aloe outdoors in summer, bring it back in before temperatures dip too low at night.
9) Right-Size the Pot (Too Big Can Be a Problem)
Bigger isn’t always better. A pot that is too large can hold excess moisture for too long, which increases the risk of root rot and drooping.
Aloe vera often does best in a container that fits the root system without a huge amount of extra wet soil surrounding it. If you’re repotting, size up modestlynot to a bucket “for future growth.”
A wider, stable pot also helps mature aloe plants that become top-heavy. Aloe roots are relatively shallow, and older plants can tip or sprawl if the container is narrow and unstable.
10) Prune Damaged Leaves and Manage Pups to Reduce Weight and Chaos
Sometimes your aloe is drooping because it’s physically overloadeddamaged leaves, crowded pups, or a mature rosette that has gotten heavy and sprawly.
Start by removing:
- Dead or shriveled leaves
- Severely damaged or rotting leaves
- Outer leaves with extensive browning (if they’re not recovering)
If the pot is crowded with pups (baby aloe plants), divide and repot them. This reduces competition for space and moisture and can make the mother plant more stable.
Also, a helpful reality check: some drooping of older outer leaves on a mature aloe can be normal. Not every sprawling aloe is sick. Sometimes it’s just grown up and gotten a little dramatic.
11) Cut Back Fertilizer and Check for Pests
Aloe doesn’t need heavy feeding. Overfertilizing can push weak, overly soft growth and stress the plant. If you’ve been fertilizing frequently, back off. Many aloe plants do just fine with little to no fertilizer, or only light feeding during active growth.
While you’re at it, inspect for pestsespecially mealybugs, scale, or mites. Pest damage can weaken leaves and cause decline that looks like drooping from watering issues.
What to look for:
- Cottony white clusters (mealybugs)
- Sticky residue
- Small bumps on leaves (scale)
- Distorted growth or scarring
Treat early, isolate the plant if necessary, and recheck weekly until it’s clean.
How Long Does It Take a Drooping Aloe to Recover?
Aloe recovery is usually measured in weeks, not hours. Existing droopy leaves may not spring back perfectly, especially if they were damaged by rot, sunburn, or cold stress. What you’re really watching for is:
- New leaves growing firmer and more upright
- No further yellowing or mushiness
- Better posture after light and watering corrections
- Healthy root growth after repotting
In other words: don’t expect a movie makeover montage by tomorrow. Expect steady improvement with consistent care.
Common Mistakes That Keep Aloe Plants Drooping
- Watering on a schedule instead of checking soil moisture
- Using regular potting soil that stays wet too long
- Keeping aloe in a dark corner “for aesthetics”
- Moving it from low light to harsh sun too fast
- Using a pot without drainage holes
- Letting it sit in a water-filled saucer
- Overpotting (too large a container)
- Ignoring winter dormancy and watering like it’s July
Final Thoughts
If you’ve been asking, “Why is my aloe plant drooping?”, the answer is usually a care mismatchnot a lost cause. Aloe vera is forgiving, but it has a few non-negotiables: bright light, well-draining soil, a pot with drainage, and a watering routine based on dryness rather than habit.
Start with the basics: inspect the soil, check the roots, improve drainage, and correct light. Once you fix the root cause, your aloe can absolutely bounce back. And if your mature plant still has a few outer leaves lounging dramatically to the side? Congratulations. You may simply own a healthy aloe with personality.
Experience-Based Notes: 500+ Words of Real-World Aloe Drooping Scenarios and Lessons
One of the most common real-life aloe drooping situations happens in apartments with limited natural light. A plant starts out looking fine because it was recently purchased from a greenhouse and still has strong structure. Then, after a few months in a dim room, the leaves begin leaning, flattening, and stretching toward the nearest window. The owner often assumes the plant needs more water because it “looks tired,” but extra watering in low light makes the problem worse. The better fix is usually to move it closer to a bright window, rotate the pot regularly, and reduce watering frequency while the soil dries more slowly.
Another very common experience is the “gift pot problem.” Aloe is placed in a decorative ceramic container with no drainage hole because it looks amazing on a shelf. For a while, nothing seems wrong. Then the leaves get soft, droopy, and sometimes translucent near the base. When the plant is finally removed, the bottom soil is soggy and the roots are brown and mushy. This is frustrating, but it’s also extremely fixable if caught early. Repotting into a terracotta pot with cactus mix often makes a dramatic difference over the next few weeks.
A third scenario is the opposite: the “I forgot this plant existed” aloe. These plants can survive neglect, but they still need water sometimes. In real homes, especially with heating or air conditioning running, potting mix can dry hard and shrink away from the pot sides. When watered from the top, the water may race down the gap and out the drainage hole, leaving the root ball mostly dry. People say, “But I watered it!”and they did, technically. In this case, a slow, deep watering or short bottom soak usually helps restore turgor, and the leaves gradually look fuller again.
Seasonal changes also surprise people. An aloe that was happy in summer can droop in winter because the environment changed: shorter days, colder windows, and slower evaporation. Many plant owners continue summer watering habits into winter, which often leads to overwatering symptoms. A useful habit is to reassess care every season instead of assuming the same routine works year-round. Aloe care is simple, but it is not static.
There’s also the “mature aloe drama” phase. Older plants may naturally sprawl, produce lots of pups, and become top-heavy. This can look like decline even when the plant is healthy. In practice, dividing pups, cleaning up old leaves, and repotting into a wider, more stable container often restores a neater shape. Some growers even keep a temporary support stake while the plant re-roots after repotting. It’s not cheatingit’s physical therapy for succulents.
Finally, one of the best lessons from real aloe care is this: don’t panic and make five changes at once. A drooping aloe responds best when you diagnose one likely cause, correct it, and then observe. If you repot, change light, fertilize, prune heavily, and water deeply all on the same day, you won’t know what helped (or what hurt). Aloes reward patient, boring consistency. Which is great news, because “patient and boring” is much easier than “mystical plant whisperer.”