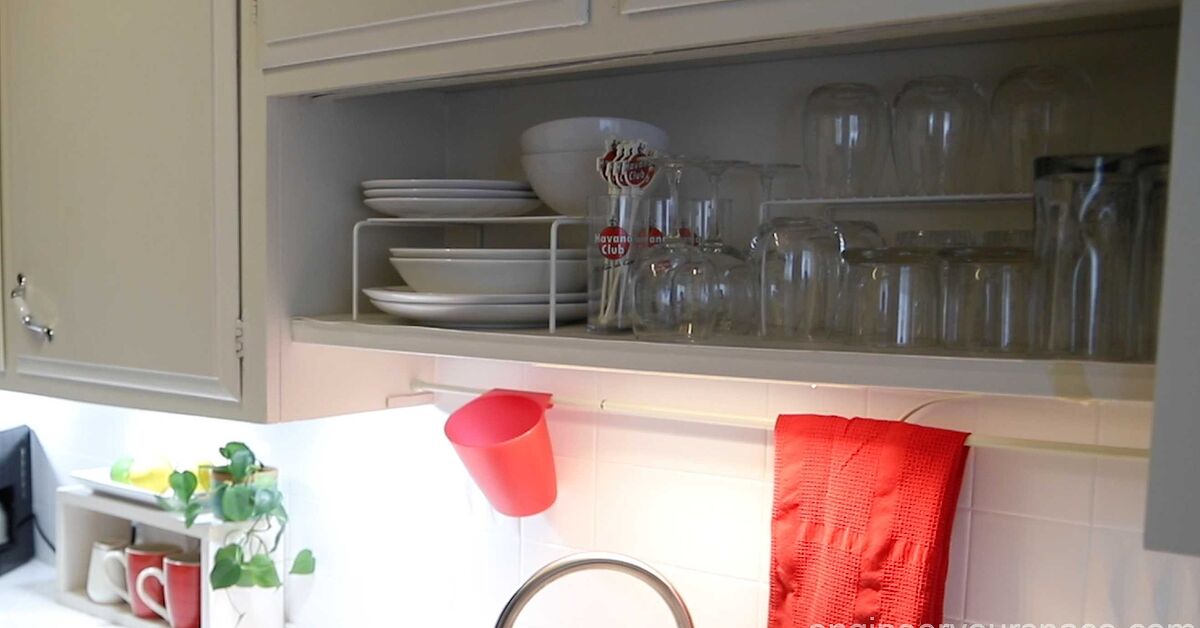
A small kitchen has a special talent: it can make three coffee mugs, one cutting board, and a banana look like a full-scale storage emfectly functional kitchen can feel darker, narrower, and busier than it really is. An open-shelving quick makeover offers a practical way to lighten the visual weight, improve access to everyday dishes, and give a tired wall a fresh personality without launching a full renovation.
The trick is not to rip out every cabinet and display your entire collection of mismatched food containers like a museum exhibit. Successful open shelving in a small kitchen is selective. It combines attractive daily-use items, sturdy installation, sensible spacing, and enough closed storage to hide the things no guest needs to see. Yes, that includes the plastic cup from a gas station you visited in 2014.
Why Open Shelving Works in a Small Kitchen
Traditional upper cabinets provide valuable storage, but their depth and solid fronts can visually push into a compact room. Replacing one or two cabinets with shallower shelves allows the eye to continue toward the wall, backsplash, or window. The kitchen often feels more open even when its actual dimensions have not changed by a single inch.
Open shelves can also be adapted to awkward spaces where a standard cabinet would be too large. A short shelf beside a window, a narrow ledge above a coffee station, or a pair of corner shelves can turn unused wall area into accessible storage. Design and organization publications consistently recommend open shelving for selected small-kitchen zones because it can preserve storage while reducing visual bulk. Makes Everyday Items Easier to Reach
Open shelving works best when it supports the way you actually cook. Plates near the dishwasher, mugs over the coffee maker, and bowls near the breakfast-prep area can shorten daily routines. You see what you have, grab it quickly, and put it back without opening and closing cabinet doors twenty-seven times before lunch.
Items that are used frequently are also less likely to sit long enough to collect noticeable dust. That is why plates, cereal bowls, drinking glasses, coffee mugs, and a few reliable serving pieces usually perform better on open shelves than decorative objects that receive attention only during leap years. Houzz and other design sources recommend prioritizing daily essentials while using closed cabinets for unattractive, seldom-used, or visually chaotic items. Creates a Low-Demolition Makeover
A small kitchen makeover does not always require new flooring, new countertops, and a contractor who begins every sentence with, “Once we open the wall…” Removing the doors from an existing cabinet, replacing one upper cabinet with shelves, or installing shelves on an empty wall can create a significant visual change with limited disruption.
For homeowners who are unsure about the look, testing the concept is smart. Remove the doors from one upper cabinet for a few weeks. Arrange the contents as though the cabinet were an open display. This trial reveals whether you enjoy the accessibility and whether your household can maintain the appearance before permanent changes are made. n the Makeover Before Removing Anything
The difference between charming open shelves and a wall-mounted yard sale is planning. Before buying wood, brackets, or an extremely optimistic number of matching jars, study what is already stored in the target cabinet.
Perform a Shelf Audit
Take everything out and divide it into four practical groups:
- Daily-use items: plates, bowls, glasses, mugs, and frequently used ingredients.
- Display-worthy items: attractive pitchers, serving bowls, cookbooks, or handmade pottery.
- Closed-storage items: appliances, food packages, plastic containers, and assorted kitchen tools.
- Exit candidates: duplicates, damaged dishes, novelty mugs, and items nobody remembers buying.
If the daily-use and display-worthy groups can fit comfortably on the proposed shelves, the project is promising. If the cabinet currently contains a slow cooker, waffle maker, blender, bulk cereal, medicine, six mixing bowls, and a mysterious electrical cord, removing it without creating replacement storage will simply move the clutter elsewhere.
Choose a Partial Conversion
In most small kitchens, a hybrid layout is more practical than a wall of completely open storage. Keep closed cabinets for appliances, pantry packaging, cleaning supplies, and less attractive cookware. Use open shelving in one visually important area, such as beside the range hood, above a beverage station, or on the wall next to a window.
This balanced approach provides the airy feeling of open storage without requiring every object in the kitchen to audition for a decorating magazine. Current design guidance increasingly favors combining shelves with cabinets rather than treating the decision as an all-or-nothing contest. d the Best Location for Open Shelves
The best shelf location improves storage without interfering with cooking, cleaning, lighting, or headroom. Begin with empty wall areas that are easy to reach but not constantly exposed to steam and grease.
Good Locations
- Beside a kitchen window, where shelves can frame the opening without blocking natural light.
- Above a coffee or tea station for mugs, beans, filters, and small canisters.
- On a short wall that is too narrow for a standard cabinet.
- Above a stretch of counter used for serving or breakfast preparation.
- Near the dishwasher for quick storage of plates, bowls, and glasses.
- In a corner where custom-length shelves can use otherwise wasted space.
Locations That Need Extra Thought
Shelves directly beside or above a cooktop can collect airborne grease more quickly. A shelf over a sink may be exposed to splashes, while one above a toaster or countertop oven may interfere with heat clearance. Always follow appliance-manufacturer clearances and local safety requirements. If the only available wall is next to the stove, reserve the shelves for washable, frequently used items rather than cookbooks, woven baskets, or delicate décor.
Select the Right Shelf Size and Material
Open shelves should be deep enough to hold their contents but shallow enough to preserve the visual advantage. Many small-kitchen shelves work well when they are designed around the actual plates, glasses, jars, or bowls that will live on them. Measure the largest item instead of guessing.
Depth
A narrow shelf may be sufficient for spice jars, drinking glasses, or mugs. Dinner plates and mixing bowls generally require more depth. Before installation, place the proposed shelf board on a table and arrange the intended contents. If plates hang over the edge or bowls must be balanced like circus performers, choose a deeper board.
Thickness and Style
Thicker wood shelves create a substantial architectural look and pair well with farmhouse, industrial, and transitional kitchens. Slim shelves feel lighter and may suit contemporary rooms, but their support system must still be rated for the planned load.
Common materials include solid wood, plywood with a finished edge, metal, and glass. Wood brings warmth and can be painted or stained. Metal offers an industrial appearance and is easy to wipe clean. Glass can preserve light but requires frequent cleaning and appropriate mounting hardware. The material should coordinate with the kitchen while remaining practical for dishes and food storage.
Install Open Shelving Safely
A shelf holding dishes is not the place for improvised hardware. Plates are heavier than they look when stacked, and a row of ceramic bowls can turn a weak anchor into a very short-lived home-improvement decision.
Locate Wall Studs
Use a stud finder and confirm the locations before drilling. Whenever possible, secure the shelf mounting system directly into studs. When the shelf position does not align with adequate framing, use anchors specifically rated for the wall type and expected weight. Tile, masonry, plaster, and drywall may require different bits, anchors, and installation methods.
Home-improvement installation guides emphasize locating studs, using proper anchors, leveling the shelf, and following the hardware manufacturer’s weight limits. A professional installer may be the safer choice for heavy shelves, fragile tile, uncertain wall construction, or shelves carrying substantial dishware. ose Visible or Hidden Brackets
Visible brackets can become part of the design. Black metal brackets add contrast, while painted wood corbels suit traditional or cottage kitchens. Hidden brackets create a floating appearance but require careful installation and compatible shelf construction.
Do not assume that “floating” means “magically suspended by confidence.” Hidden support rods, backplates, and anchors still carry the load. Check the total capacity of the complete system, not just the shelf board.
Check Spacing and Reach
The lowest shelf should leave enough working space above the countertop and avoid crowding faucets, small appliances, or tall containers. A commonly used starting point is approximately the height of a traditional upper cabinet above the counter, but the correct position depends on the household, backsplash, shelf depth, and items being stored. Lowe’s planning guidance suggests placing a lower open shelf around 18 inches above the counter as a general reference, not a universal rule. painter’s tape to mark the proposed shelf dimensions on the wall. Live with the outline for a day. Reach toward it, open nearby cabinet doors, operate the faucet, and imagine unloading dishes. This five-minute simulation can prevent months of bumping your forehead into a poorly placed shelf.
A Quick Open-Shelving Makeover Plan
Step 1: Empty and Declutter
Remove everything from the cabinet or wall area. Donate duplicates and relocate seasonal pieces. Small kitchens improve dramatically when storage decisions begin with fewer objects rather than more organizers.
Step 2: Remove the Cabinet or Doors
For a reversible makeover, remove only the doors and hardware. Fill unused screw holes and paint the interior for a finished appearance. For full cabinet removal, shut off nearby electrical circuits when appropriate, identify wiring or plumbing, protect the countertop, and obtain help supporting the cabinet during removal.
Step 3: Repair and Paint the Wall
Patch holes, sand rough areas, and apply paint or extend the backsplash. A clean background makes inexpensive shelving look intentional. Light wall colors can increase brightness, while a darker or patterned backsplash can turn the shelves into a focal point.
Step 4: Mark and Install Supports
Use a level, stud finder, pencil, and measuring tape. Install brackets or a floating-shelf mounting plate according to the manufacturer’s directions. Confirm that every support is level before adding the shelf.
Step 5: Test Before Styling
Apply gentle pressure and test the shelf with a lighter load before adding stacks of dishes. Recheck all fasteners. Increase the load gradually and remain within the stated capacity of the hardware and shelf material.
Step 6: Style for Function First
Place the most frequently used items on the lowest shelf. Less frequently used serving pieces can sit higher. Leave breathing room between groups so the arrangement looks deliberate rather than packed.
How to Style Open Shelves Without Creating Clutter
The simplest styling formula is repetition plus restraint. Repeat a few colors, materials, or shapes, then stop before every inch is occupied.
Use a Limited Color Palette
White dishes, clear glassware, warm wood, and one accent color create a calm foundation. Your dishes do not need to match perfectly, but they should look related. Group similar colors together instead of distributing them randomly across the shelves.
Create Practical Zones
Stack dinner plates together, nest bowls, line up glasses, and place coffee supplies in one section. Small trays can group salt, pepper, oils, or tea accessories. Baskets and attractive containers can conceal small objects, but label them if nobody else in the household can remember what is inside.
Vary Heights Carefully
Combine low stacks of dishes with a taller pitcher, cutting board, or vase. A small plant or fresh greenery can soften the arrangement, but avoid turning useful kitchen storage into a greenhouse that happens to contain two plates. Designers often recommend adding greenery sparingly and maintaining visible space around displayed items. p Heavy Items Low
Cast-iron cookware, large appliances, and heavy mixing bowls are usually safer in lower cabinets or deep drawers. Open shelves are better suited to lighter objects that can be reached and returned comfortably.
Cleaning and Maintenance
Open shelves are not maintenance-free. Dust, cooking residue, and splashes remain visible, especially near the range. However, a realistic storage strategy can reduce the workload.
- Store items that are used and washed frequently.
- Wipe shelves during the regular kitchen-cleaning routine.
- Avoid overcrowding so objects can be moved easily.
- Use washable containers instead of absorbent decorative materials near cooking areas.
- Keep rarely used pieces in closed cabinets.
Open shelving may not suit every household. Busy kitchens, enthusiastic frying, large dish collections, and relaxed organizing habits may benefit from more closed storage. Several design experts note that shelves can become cluttered and require more dusting, which is why lifestyle should guide the decision more than trend forecasts. ter-Friendly Open-Shelving Ideas
Renters should obtain permission before removing cabinets or drilling into tile. A freestanding baker’s rack, narrow bookcase, rolling kitchen cart, countertop riser, or shelving unit can deliver a similar open-storage effect without permanent alterations.
Another option is to remove cabinet doors carefully, label the hardware, and store everything safely for reinstallation before moving. The cabinet interior can then function as open shelving without changing the basic structure. Temporary wallpaper or removable liner can improve the background, provided the product is appropriate for the cabinet finish.
Composite Makeover Experience: Lessons From a Tiny Kitchen
The following example combines common outcomes reported in small-kitchen makeovers rather than describing one specific household. Imagine a compact galley kitchen with dark upper cabinets on both sides, limited counter space, and one narrow window at the far end. The room technically has enough storage, but it feels like a hallway wearing cabinets as shoulder pads.
The first instinct might be to remove every upper cabinet. After a storage audit, however, that plan quickly becomes less charming. One cabinet contains everyday dishes, while another holds a blender, food-storage containers, baking supplies, vitamins, and an impressive population of takeout sauce packets. Removing everything would improve the photograph but damage the kitchen’s daily function.
The better solution is to replace only the cabinet nearest the window with two wood shelves. This opens the sightline toward the natural light while preserving most of the closed storage. The shelves are sized specifically for six dinner plates, six bowls, everyday glasses, and coffee mugs. A small pitcher and one plant provide decoration without stealing useful space.
During planning, painter’s tape reveals that the original proposed shelves are too long. They would extend over the sink and make the faucet area feel crowded. Shortening them by several inches creates a cleaner frame around the window and reduces the risk of accidental head contact. This is a useful reminder that shelf placement should be tested from standing, cooking, washing, and unloading positionsnot admired only from across the room.
The installation also exposes a typical surprise: the preferred bracket locations do not perfectly match the wall studs. Rather than trusting generic plastic anchors with stacks of ceramic dishes, the mounting plan is adjusted so the main supports connect to framing. The design changes slightly, but the finished shelves are safer. Good DIY projects often involve choosing structural reality over perfect visual symmetry.
Once the shelves are installed, the first styling attempt includes too much: dishes, cookbooks, framed art, a candle, three jars, two plants, a decorative cutting board, and a tiny ceramic chicken with no known purpose. The shelves look smaller than before. Removing half the objects immediately improves the result. Everyday dishes remain, while the cookbooks and backup glassware return to closed storage.
The practical benefit becomes obvious during the first week. Unloading the dishwasher is faster, guests can find glasses without opening every cabinet, and the window wall feels brighter. The shelves also encourage better habits because clutter can no longer be pushed behind a door. When a new mug arrives, an old one leaves. Open storage quietly introduces an inventory limit.
The biggest maintenance lesson is location. Because the shelves sit away from the cooktop, ordinary weekly dusting is enough. Had they been installed next to the range, the same pale wood and displayed glassware would have needed more frequent degreasing. Placement affects cleaning almost as much as styling.
The experience shows why a successful open-shelving makeover is less about following a fashionable look and more about editing intelligently. Removing one cabinet can be more effective than removing five. Measuring real objects beats choosing shelf depth by appearance. Empty space is part of the design. Most importantly, the shelves must support normal life after the makeover photographs have been taken and the ceramic chicken has been returned to wherever it came from.
Conclusion
An open-shelving quick makeover can make a small kitchen feel brighter, more personal, and easier to use. The strongest results come from selective cabinet removal, sturdy mounting, thoughtful shelf dimensions, and a disciplined mix of open and closed storage. Keep daily essentials within reach, hide visual clutter, and leave enough empty space for the shelves to breathe.
Open shelving is not automatically better than cabinets, nor is it automatically outdated. It is a tool. Used in the right location and matched to realistic household habits, it can transform a cramped kitchen without the cost and disruption of a complete remodel.
Note: This article synthesizes practical guidance from established U.S. home-design, remodeling, organization, and DIY publications, including This Old House, Better Homes & Gardens, HGTV, Apartment Therapy, Lowe’s, The Home Depot, Bob Vila, Real Simple, Houzz, House Beautiful, Martha Stewart, and Southern Living. Always follow the shelf manufacturer’s installation instructions, load limits, appliance clearances, and applicable local requirements. ode>