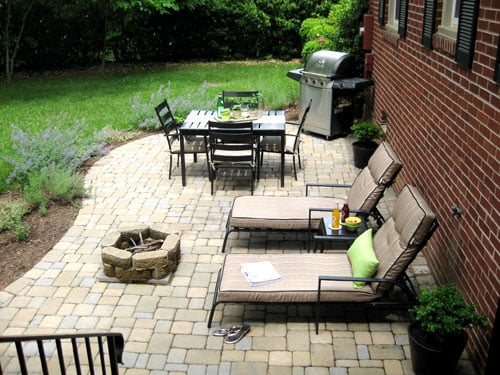
A backyard fire pit has a remarkable ability to turn an ordinary patch of ground into everyone’s favorite gathering place. Add a few chairs, a stack of dry firewood, and enough marshmallows to alarm a dentist, and suddenly your yard feels like a private campgroundwithout the questionable public-restroom situation.
Making a DIY fire pit is also more approachable than many homeowners expect. A basic above-ground design can often be completed over a weekend using common landscaping tools, compactable gravel, heat-safe blocks, and a metal fire ring. The challenge is not simply stacking stones into a circle. The real work lies in choosing a safe location, creating a stable base, managing drainage, and protecting ordinary masonry from direct flame.
This guide explains how to build a durable wood-burning fire pit while avoiding the shortcuts that frequently lead to leaning walls, cracked blocks, smoky fires, or tense conversations with the local fire marshal.
Choose the Right DIY Fire Pit Design
For a first project, an above-ground circular fire pit is usually the most forgiving design. Curved landscaping blocks create the exterior wall, while a steel ring or fire-brick liner shields those blocks from intense heat. The finished pit is attractive, relatively easy to repair, and simple to customize.
Above-Ground Fire Pit
An above-ground pit is built on a compacted aggregate base and normally rises three or four block courses above the surrounding surface. It provides a visible barrier around the fire and does not require deep excavation. This is the best all-around option for many DIY builders.
In-Ground Fire Pit
An in-ground fire pit can blend neatly into a patio, but it requires more excavation and careful drainage. Air circulation may also be weaker unless the design includes proper vents. Rainwater, leaves, and adventurous frogs can collect in a poorly drained pit, so this style requires more planning than simply digging a hole and hoping for the best.
Fire Pit Kit
A manufactured fire pit kit includes blocks shaped to fit together, and many kits also provide a metal insert. Kits reduce measuring and cutting, making them useful for beginners. Follow the manufacturer’s instructions exactly, particularly for liner placement, adhesive, ventilation, and required clearances.
Pick a Safe Location
Location is the most important fire pit decision because even a beautifully built pit becomes a bad investment when it sits beneath a tree, beside a wooden fence, or directly under the neighbor’s collection of extremely dry decorative flags.
Place a fire pit outdoors on level ground and at least 10 feet from anything combustible. Houses, sheds, fences, decks, patio furniture, tents, shrubs, tall grass, and overhanging branches all count. Some jurisdictions and manufacturers require 15, 20, or even 25 feet, so treat 10 feet as a general minimum rather than universal permission.
Look upward as well as outward. The area above the pit should be open, with no roof, awning, utility line, tree canopy, or pergola in the path of rising heat and embers. Avoid low areas where smoke settles and locations where prevailing wind routinely carries smoke toward doors, windows, or neighboring properties.
Before excavating, contact the national 811 utility-location service or the appropriate local utility-marking program. A shallow fire pit base may not seem deep enough to encounter buried infrastructure, but irrigation pipes, low-voltage lighting, communication cables, and other lines can be surprisingly close to the surface.
Determine the Best Fire Pit Size
A typical backyard fire pit has an interior opening of approximately 30 to 36 inches. That size provides room for manageable logs without encouraging a bonfire large enough to receive its own weather system. Depending on block thickness, the exterior diameter may measure roughly 40 to 50 inches.
A finished wall height of about 12 to 16 inches is comfortable for many above-ground designs. A taller wall may restrict heat and airflow, while a very low wall offers less protection from rolling logs and windblown embers.
Plan the seating area at the same time. Leave enough space for chairs to remain well away from the flames while allowing people to walk behind them without stepping into flower beds. Covering the surrounding area with pavers, gravel, decomposed granite, or another noncombustible material creates a cleaner and safer gathering zone.
Tools and Materials
Recommended Materials
- Blocks or pavers specifically approved for fire pit construction
- A properly sized steel fire ring or heat-rated liner
- Crushed stone or paver base
- A small amount of leveling sand, when recommended by the block system
- Fire brick and refractory mortar for a masonry-lined design
- Exterior masonry adhesive approved by the block manufacturer
- Lava rock or another fire-rated aggregate, if required by the design
- Gravel or pavers for the surrounding noncombustible area
Useful Tools
- Tape measure, stakes, string, and marking paint
- Shovel, rake, and wheelbarrow
- Hand tamper or rented plate compactor
- Two-foot or four-foot level
- Rubber mallet
- Masonry chisel and hammer, if blocks require fitting
- Caulk gun for masonry adhesive
- Work gloves, eye protection, hearing protection, and a dust mask
Do not assume that every attractive stone is fire-safe. Moisture trapped inside porous or water-saturated rock can expand when heated, causing the material to crack or spall. River rocks are especially risky around direct flame. Standard concrete blocks may also deteriorate when repeatedly exposed to intense heat.
The safest approach is to use components designed for fire features and separate the decorative exterior wall from the flames with a metal ring or properly installed fire-brick liner.
How to Make a DIY Fire Pit Step by Step
Step 1: Lay Out the Fire Pit
Place the metal ring on the proposed site and arrange one course of blocks around it. This dry layout reveals the actual diameter, joint spacing, and number of blocks needed. It is much easier to adjust the circle now than after excavating half the yard.
Drive a stake into the center and attach a string equal to the desired radius. Use marking paint to draw the excavation boundary. Make the prepared area several inches wider than the finished wall so every block rests fully on the base.
Step 2: Remove Grass and Soil
Remove sod, roots, organic material, and loose topsoil. Depending on the block thickness and site conditions, excavation is commonly around 6 to 8 inches deep. Continue until you reach firm, stable soil.
Check the depth in several places. Uneven excavation creates an uneven base, and an uneven base produces a fire pit with the posture of a tired flamingo.
Step 3: Compact the Subgrade
Rake the exposed soil smooth and compact it thoroughly. If the soil is extremely soft, muddy, or rich in organic matter, additional excavation may be necessary. A structure is only as stable as the material supporting it.
Make sure the surrounding grade directs surface water away from the pit. A slight drainage strategy is useful; a dramatic slope through the center is not.
Step 4: Install the Aggregate Base
Add approximately 3 to 4 inches of crushed paver base in shallow layers. Lightly moisten each layer and compact it before adding the next. Crushed aggregate locks together better than rounded pea gravel and creates a firmer foundation.
Use a level across several directions. The base must be flat from side to side, not merely smooth. Continue adding, removing, and compacting material until the bubble remains centered.
If the chosen system calls for leveling sand, spread only a thin layer over the compacted base. Sand can help fine-tune the first course, but a thick sand bed may shift or wash out.
Step 5: Set the First Course
Place the first block on the base and tap it gently with a rubber mallet. Add the neighboring block and check both pieces for level. Continue around the circle, checking every few blocks rather than waiting until the final joint exposes a two-inch mistake.
Set a long level across opposite sides of the circle to confirm that the entire course lies in the same plane. The first course controls everything above it, so this is the moment to be patient, fussy, and mildly obsessed.
Step 6: Add the Fire Ring or Liner
Place the steel fire ring inside the first course and confirm that it fits according to the manufacturer’s specifications. The ring should sit evenly without forcing blocks outward.
For a fire-brick design, install the liner with refractory materials rated for high temperatures. Ordinary mortar and decorative brick are not automatic substitutes. Follow product instructions for joint thickness, curing time, expansion clearance, and maximum temperature.
Step 7: Build the Remaining Courses
Stack the next course with vertical joints offset from the course below. Staggered joints improve stability and create a more professional appearance. Dry-stack the wall first to verify alignment.
If adhesive is part of the approved system, lift one block at a time, apply small beads of exterior masonry adhesive, and replace it. Keep adhesive away from direct flame and do not seal ventilation openings required by the design. Some fire pit kits are intended to remain dry-stacked, so never add adhesive simply because the tube was on sale.
Continue until the wall reaches the planned height. Recheck level after every course and make corrections immediately.
Step 8: Finish the Interior
Depending on the design, the bottom may remain compacted aggregate or receive a shallow layer of fire-rated lava rock. Avoid filling the pit with ordinary river stone, construction debris, or unknown decorative gravel.
Keep drainage in mind. Water should not become trapped against the blocks or inside a sealed bowl unless the system includes a drain. For a gas fire pit, burner pans, fuel lines, ventilation, media depth, and ignition components must follow the manufacturer’s requirements and local code. Gas installations are generally not the place for improvisational plumbing.
Step 9: Create a Noncombustible Surround
Remove dry grass, leaves, mulch, and other flammable material around the finished pit. Extend pavers, gravel, or another noncombustible surface far enough to accommodate seating and normal foot traffic.
Arrange chairs so nobody must lean over the fire to enter or leave the circle. Maintain a kid-free and pet-free zone of at least 3 feet around the flames, and increase that distance whenever conditions or the fire size warrant it.
Step 10: Allow Materials to Cure
Do not light a fire immediately if the project uses adhesive, mortar, or poured concrete. Follow all curing instructions. Trapped moisture and uncured products can weaken the structure when heated too soon.
Once the required curing period has passed, begin with a small fire. A modest first burn allows you to observe airflow, smoke direction, liner movement, and drainage without stress-testing the pit with a tower of logs.
How to Use a Backyard Fire Pit Safely
Keep the fire small and manageable. Burn only clean, dry, seasoned wood. Properly dried firewood lights more easily, produces more usable heat, and generally creates less smoke than wet or freshly cut wood.
Never burn pressure-treated lumber, painted wood, plywood, particleboard, plastic, trash, leaves, or household waste. These materials can release hazardous fumes, create excessive smoke, and send lightweight embers into the air.
Do not use gasoline, lighter fluid, or other flammable liquids to start or revive the fire. Use dry tinder, kindling, or an approved commercial fire starter. Keep a garden hose, bucket of water, fire extinguisher, or shovel with sand nearby before lighting the first match.
Avoid burning during windy weather, drought restrictions, air-quality alerts, or red-flag conditions. Sparks that appear harmless at ground level can travel surprisingly far. Never leave the fire unattended, even for “just a minute.” Fire has never respected anyone’s quick trip inside for more salsa.
When the evening ends, spread the logs and embers, apply water, stir thoroughly, and apply more water until no glow, flame, or heat remains. Follow any specific extinguishing instructions provided with the fire pit system.
Maintenance That Keeps the Fire Pit Looking Good
Remove ash regularly, but only after it is completely cold. Transfer cooled ashes into a dedicated metal container with a tight-fitting lid and store it away from combustible materials. Do not dump ashes directly into a plastic trash can, compost bin, cardboard box, or dry garden bed.
Inspect the metal liner, masonry joints, blocks, and cap pieces for movement or damage. Small shifts can usually be corrected early by resetting blocks and restoring the base. A leaning wall should not be treated as rustic charm.
Keep drainage openings clear, remove leaves before each use, and cover the pit when it is fully cold. A weather-resistant cover reduces water penetration, freeze-thaw damage, staining, and the likelihood of discovering an entire leaf ecosystem inside the pit next spring.
Common DIY Fire Pit Mistakes
Building Directly on Grass
Grass and topsoil decompose and settle, causing blocks to shift. Excavate to stable soil and install a compacted aggregate base.
Skipping the Heat Barrier
Decorative landscaping blocks are not necessarily designed for direct flame. Protect them with an approved steel ring, fire brick, or integrated liner.
Using Random Rocks
Unknown, porous, or waterlogged stones can fracture when heated. Use materials specifically rated for high-temperature fire features.
Ignoring Drainage
A pit that holds water develops stains, odors, freeze damage, and unstable base conditions. Grade the site carefully and follow the drainage details of the chosen design.
Making the Fire Too Large
A backyard fire pit is intended for a controlled recreational fire, not a Viking funeral. Use a few appropriately sized logs and maintain clear space above the flames.
A Realistic Weekend-Build Experience: Lessons First-Time Builders Learn
The most surprising part of making a DIY fire pit is how little time is spent dramatically stacking handsome blocks and how much time is spent crouching beside a level. The finished wall may rise in less than an hour, but the base preparation determines whether it remains attractive for one season or many years.
A common Saturday-morning experience begins with an optimistic dry layout. The blocks look perfect on the grass, the metal ring fits, and the builder briefly wonders why anyone pays a professional. Then excavation starts. Sod arrives in heavy, awkward chunks, roots appear exactly where the shovel lands, and the supposedly level yard reveals that it has been quietly sloping since the house was built.
The useful lesson is to avoid rushing the excavation. Removing an extra inch of loose soil is easier than rebuilding a settled wall later. Setting the excavated soil on a tarp also saves cleanup time and prevents small mountains of dirt from becoming permanent landscape features.
Compaction is the next reality check. Pouring all the gravel into the hole at once and pounding the top creates a firm crust over loose material. Better results come from adding the base in thin lifts and compacting each one. It feels slower, but the total difference may be only 15 or 20 minutes. Those minutes are considerably cheaper than dismantling the pit after its first winter.
The first course usually requires the greatest patience. One block sits high, the next rocks slightly, and tapping the third affects the second. Experienced builders resist the urge to say, “Close enough; the upper rows will fix it.” Upper rows do not fix it. They magnify it. The practical method is to level each block against its neighbors and repeatedly check across the entire diameter.
Another lesson concerns material handling. Fire pit blocks may look pleasantly compact in the store, but after carrying several dozen from a vehicle to the backyard, they begin to feel as though they were quarried from a neutron star. Positioning materials near the work area before construction reduces unnecessary trips. A wheelbarrow, work gloves, and a willing helper are not signs of weakness; they are signs that your back has read the project plan.
Dry-stacking every course before applying adhesive is also worth the effort. It reveals awkward joints, color clusters, chipped edges, and blocks that do not sit correctly. Turning imperfect faces inward or redistributing colors can make a budget project look carefully designed.
The final surprise often comes during the first fire. Smoke direction changes with the breeze, chairs feel closer to the heat than they did during layout, and a path that seemed generous may become cramped when everyone arrives carrying drinks and roasting sticks. Beginning with a small test fire makes it possible to adjust the seating arrangement and remove overlooked hazards.
The best overall experience comes from treating the project as two separate jobs: first build a safe, level foundation; then build the attractive fire pit everyone sees. The invisible work is less photogenic, but it is what keeps the visible work standing straight.
Final Thoughts
Making a DIY fire pit is an achievable backyard project when safety and foundation work receive as much attention as appearance. Choose an open location, comply with local fire regulations, excavate to stable soil, compact the base carefully, and use materials intended for repeated heat exposure.
A steel liner or correctly installed fire-brick interior protects the decorative wall, while a noncombustible surrounding area makes the finished space safer and more comfortable. Once construction is complete, burn only dry, untreated wood, supervise every fire, and extinguish the embers completely.
The result is more than a circle of blocks. It becomes a place for cool evenings, long conversations, toasted marshmallows, and stories that improve in direct proportion to the number of sparks floating into the night.