A comfortable house should not require wool socks in the living room, a desk fan in the bedroom, and a monthly energy bill that inspires dramatic music. When certain rooms are always too hot, too cold, drafty, humid, or difficult to heat and cool, the problem may not be your HVAC equipment. The real culprit is often the building envelopethe combination of insulation, air barriers, windows, doors, floors, walls, and ceilings separating indoor space from outdoor conditions.
Good home insulation slows heat transfer, but insulation performs best when it is properly installed and paired with effective air sealing. The goal is not merely to stuff more material into every available cavity. It is to create a continuous thermal boundary, stop unwanted airflow, control moisture, and maintain appropriate ventilation. Here is how to make your house more comfortable without turning the project into an expensive game of “guess where the draft is coming from.”
Start With an Energy Assessment, Not a Shopping Cart
Before buying rolls of fiberglass or enough spray foam to encase a small automobile, determine where your house is losing conditioned air. Common warning signs include uneven room temperatures, cold floors, unusually hot ceilings, condensation, recurring ice dams, musty odors, and heating or cooling systems that run for long periods.
A professional home energy assessment may include a blower-door test, infrared imaging, duct-leakage testing, combustion-safety checks, and a visual inspection of insulation levels. A blower door depressurizes the house so technicians can locate leaks that are difficult to detect under normal conditions. Thermal imaging can reveal missing insulation, air leakage, and temperature differences behind finished surfaces.
Homeowners can perform a basic inspection by checking the attic, basement, crawlspace, exterior-wall penetrations, recessed fixtures, plumbing openings, attic hatch, and areas where additions meet the original structure. However, older homes, moisture-damaged buildings, and houses with combustion appliances deserve professional evaluation before major air-sealing work begins.
Air-Seal Before Adding Insulation
Insulation and air sealing perform different jobs. Insulation resists heat flow through building materials, while an air barrier limits the movement of air between conditioned and unconditioned spaces. Fiberglass batts may slow heat transfer, but they do not automatically stop air from slipping through gaps around wiring, plumbing, framing, ducts, or ceiling penetrations.
That is why air sealing should generally happen before new insulation is installed. Once an attic is buried under loose-fill material, reaching hidden cracks becomes considerably harder. It is a bit like deciding to repair the subfloor after installing the carpetpossible, perhaps, but unnecessarily adventurous.
Seal the Largest Openings First
Begin with major leakage paths such as open wall cavities, dropped soffits, plumbing chases, chimney framing gaps, attic kneewalls, and holes around ducts. Smaller openings around electrical wires and plumbing vents can often be sealed with caulk or one-component expanding foam. ENERGY STAR guidance recommends caulk for relatively narrow cracks and spray foam for larger gaps, provided the product is suitable for the application.
Do Not Seal Everything With the Same Product
Standard foam should not be applied directly against hot flues, chimneys, or fixtures that require clearance from combustible materials. These areas may need sheet-metal blocking, fire-rated sealant, or another code-approved assembly. Recessed lights must also be checked to determine whether they are rated for insulation contact. When electrical or fire-safety conditions are uncertain, bring in a qualified contractor or electrician rather than relying on optimistic improvisation.
Give the Attic First-Class Treatment
For many existing homes, the attic offers one of the best opportunities to improve comfort. Warm indoor air can escape through ceiling penetrations during cold weather, while intense roof heat can increase cooling loads during summer. An under-insulated attic may leave upstairs rooms uncomfortable even when the HVAC system is working properly.
Seal the attic floor before adding insulation. Pay close attention to top plates, wiring holes, plumbing penetrations, exhaust-fan housings, attic access openings, and gaps around chases. Finished attics require additional care because kneewalls, sloped ceilings, and open floor cavities can create complicated leakage paths.
Protect Soffit Ventilation
In a conventionally vented attic, insulation should not block soffit vents. Install baffles or rafter vents where needed so outdoor air can move from the soffits toward upper attic vents. Baffles also help prevent wind from washing through loose or fibrous insulation near the eaves. The insulation and air barrier should remain aligned, with no convenient highways for outdoor air to travel through the assembly.
Insulate and Weatherstrip the Attic Hatch
An attic hatch or pull-down stairway is essentially a door between the living area and an extreme-temperature zone. Add rigid insulation or a purpose-built insulated cover, then weatherstrip the perimeter so the access panel closes tightly. This relatively small project can reduce drafts and eliminate a weak spot in an otherwise well-insulated ceiling.
Install Batt Insulation Without Gaps or Compression
Fiberglass and mineral-wool batts are widely used because they are accessible, familiar, and suitable for many open framing cavities. Unfortunately, a batt that is folded, compressed, loosely fitted, or cut around an obstruction like a decorative scarf cannot deliver its intended performance.
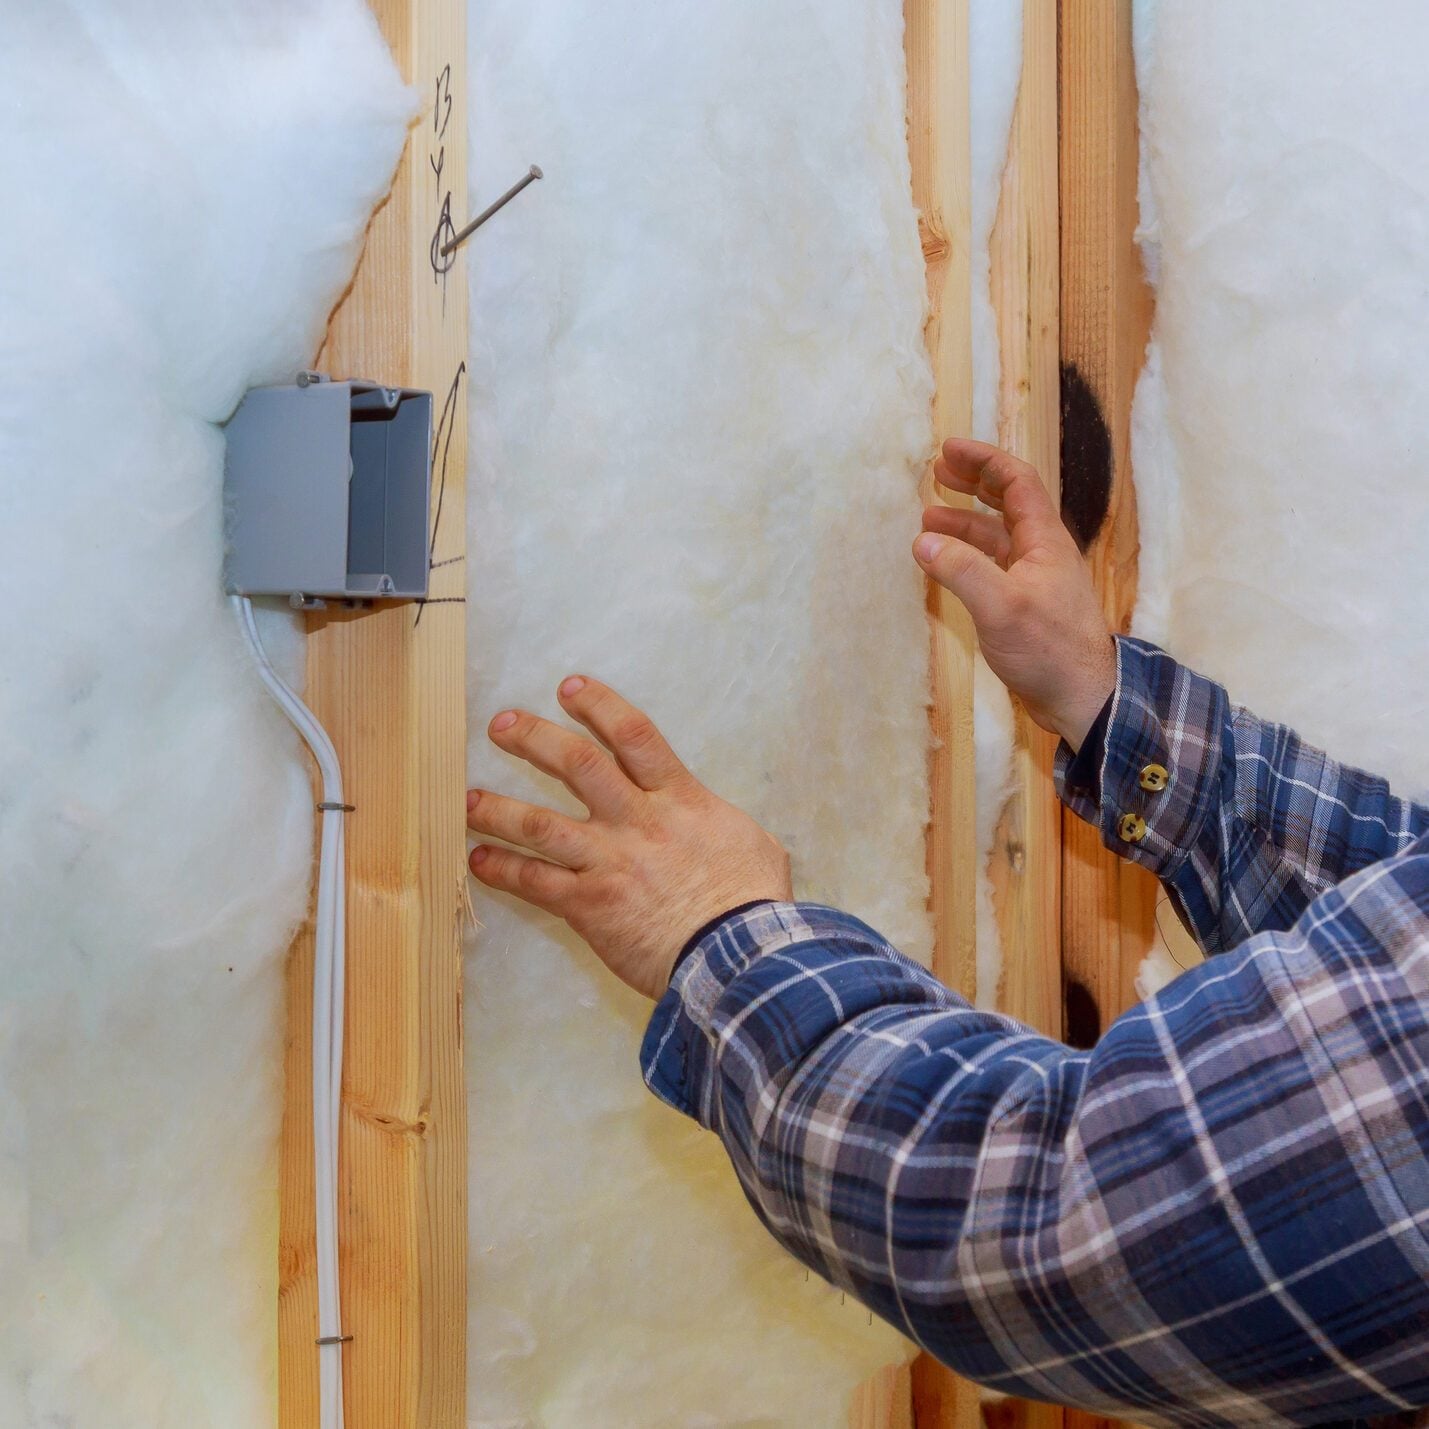
Each batt should fill the cavity completely and remain in contact with the air-control surface. Split insulation around electrical wires rather than pushing the entire batt behind or in front of them. Cut precise openings around electrical boxes, pipes, blocking, and braces. Fill narrow spaces with properly sized pieces rather than squeezing oversized scraps into place.
Compression reduces thickness and changes thermal performance. Avoid forcing thick batts into shallow framing cavities. Around windows and doors, use low-expansion foam or appropriate fibrous insulation without packing it so tightly that the frame bows. Full coverage matters more than creating the fluffiest-looking installation on the block.
Choose Insulation Based on the Application
No single insulation material is automatically best for every house. Climate, cavity depth, moisture exposure, budget, fire requirements, installation access, and the existing wall or roof assembly should guide the decision.
Fiberglass Batts and Loose-Fill Fiberglass
Fiberglass is commonly used in walls, floors, and attics. Batts work well in open, regularly spaced framing when carefully fitted. Loose-fill fiberglass can cover irregular attic surfaces and surround obstructions more effectively than batts.
Cellulose
Cellulose is frequently blown into open attics or dense-packed into existing wall cavities. It can be especially useful when retrofitting older framed walls without removing all the interior drywall or exterior siding. Proper density, moisture conditions, and installation technique are important because incomplete filling or settlement can leave weak areas.
Rigid Foam Board
Rigid foam can provide continuous insulation over framing and is often used on foundation walls, rim joists, exterior sheathing, and certain roof assemblies. Seams and edges may need to be taped or sealed to form part of an air-control layer. Exposed foam generally requires a code-approved thermal or ignition barrier, such as gypsum board, depending on its location.
Spray Polyurethane Foam
Spray foam can insulate and reduce air leakage in difficult cavities, but performance depends heavily on surface preparation, product selection, thickness, mixing, and installer skill. Open-cell and closed-cell products have different vapor characteristics and R-values. Because an incorrect roof or wall assembly can trap moisture, large spray-foam projects are better designed and installed by experienced professionals.
Do Not Ignore Walls and Thermal Bridges
Exterior walls may contain insulation while still losing substantial heat through studs, headers, rim areas, and other framing members. These paths are called thermal bridges because they allow heat to bypass cavity insulation. Continuous insulation installed across the framing can reduce this effect during major renovations or siding replacement.
In an existing house, blown-in cellulose or fiberglass may be installed through small access holes when wall cavities are empty. Before proceeding, investigate knob-and-tube wiring, water leaks, deteriorated sheathing, blocked cavities, and interior vapor-control materials. Masonry walls require a strategy that accounts for rain absorption, inward or outward drying, condensation risk, and climate. Filling random spaces with foam without understanding the wall is not a moisture plan; it is a chemistry experiment with drywall.
Seal and Insulate Rim Joists
The rim joistthe perimeter framing where the floor system meets the foundationis a common source of drafts. It often contains cracks around sill plates, utility penetrations, and framing joints.
Depending on local conditions and code requirements, rim-joist cavities may be sealed with cut-and-cobble rigid foam plus compatible sealant, professionally applied spray foam, or another approved system. The sill plate and penetrations should be included in the air-sealing work. Address termite inspection requirements, bulk-water entry, and wood decay before covering the area.
Fix Basement and Crawlspace Moisture First
Insulation cannot solve an active water problem. Before insulating a basement or crawlspace, correct roof drainage, grading, plumbing leaks, foundation cracks, groundwater entry, and uncontrolled soil moisture. Installing insulation against a wet wall may hide damage while giving mold a quiet place to organize a family reunion.
Basement-wall insulation can make below-grade spaces warmer and reduce heat loss, but the assembly must tolerate moisture and allow appropriate drying. In some climates and construction types, rigid foam or closed-cell spray foam is installed directly against foundation walls, followed by a code-required protective covering.
Crawlspace strategies depend on whether the space is vented or encapsulated. A vented crawlspace is generally insulated at the floor above, with careful air sealing and protection against wind. An encapsulated crawlspace typically moves the thermal and air boundary to the foundation walls and includes ground vapor control, drainage, air sealing, and a method of conditioning or dehumidifying the space. Local climate and building codes should determine the final design.
Improve Floors Over Garages and Unconditioned Spaces
A bedroom above a garage often becomes the house’s unofficial climate experiment. The room may be chilly in winter, hot in summer, and uncomfortable throughout the shoulder seasons because insulation is missing, compressed, or exposed to moving air.
The floor cavity should be fully insulated and enclosed on all sides. Air-seal plumbing, wiring, duct, and framing penetrations, particularly where the garage connects to the living space. This improves thermal comfort while helping limit the movement of garage pollutants into occupied rooms.
Seal and Insulate Ductwork Outside Conditioned Space
Ducts running through attics, crawlspaces, garages, or unfinished basements can lose heating and cooling before the air reaches the room. Leaky return ducts may also pull dust, humid air, insulation fibers, or pollutants into the HVAC system.
Seal duct joints with approved duct mastic or listed foil tapenot ordinary cloth-backed “duct tape,” which has somehow retained a name it frequently does not deserve. After sealing, insulate ducts to the level required for their location and climate. Crushed, disconnected, or poorly designed ducts should be repaired rather than wrapped and politely ignored.
Match R-Value to Your Climate and Assembly
R-value measures resistance to conductive heat flow. A higher R-value generally indicates greater resistance, but the recommended amount varies by climate zone and building component. Attics in cold climates typically require more insulation than those in warm climates, while walls, floors, crawlspaces, and foundations have their own targets.
Do not select insulation by R-value alone. Gaps, compression, air movement, moisture, thermal bridging, and poor installation can reduce real-world performance. Current energy-code tables commonly call for high ceiling R-values, but exact requirements differ according to climate zone, framing design, local amendments, and whether continuous insulation is included. Check the locally adopted code rather than assuming a national table applies unchanged to your address.
Balance Air Sealing With Ventilation
A tighter house can be more comfortable and efficient, but it still needs fresh-air management. Cooking, bathing, cleaning, breathing, and drying laundry add moisture and pollutants indoors. After extensive air sealing, verify that bath fans vent outdoors, the kitchen exhaust works correctly, combustion appliances operate safely, and the home has adequate ventilation.
The U.S. Environmental Protection Agency recommends controlling indoor moisture and generally keeping relative humidity around 30% to 50% when practical. Persistent window condensation, mold, musty odors, or unusually stuffy air may indicate a moisture or ventilation problem. Weatherization should reduce uncontrolled leakage, not eliminate thoughtful ventilation.
Comfort Improvements You May Notice
When insulation and air sealing are properly designed and installed, homeowners may notice fewer drafts, warmer floors, more consistent room temperatures, quieter interiors, shorter HVAC cycles, and less strain on heating and cooling equipment. ENERGY STAR estimates that air sealing and insulating accessible areas can produce meaningful heating and cooling savings in a typical existing U.S. home, although actual results vary with climate, fuel prices, house condition, and project scope.
The most successful projects focus on the complete enclosure rather than one dramatic product. A thick attic blanket will not compensate for an open plumbing chase. Premium wall insulation will not fix a wet basement. An expensive HVAC replacement will not stop outdoor air from entering around an unsealed attic hatch. Comfort comes from details working together.
Experience-Based Lessons From Realistic Insulation Projects
The following observations reflect common patterns reported by homeowners, energy auditors, builders, and insulation professionals. They are illustrative experiences rather than claims about one specific property.
The Cold Bedroom Was Not an HVAC Problem
In a typical two-story home, one corner bedroom may remain cold even though the furnace is large enough and the supply register is open. Homeowners often assume the room needs a bigger duct or a portable heater. An inspection may instead reveal wind moving through poorly fitted insulation above the exterior wall, plus an open floor cavity behind an attic kneewall.
After blocking the cavity, sealing framing joints, installing baffles, and restoring full-depth insulation, the room temperature may become noticeably more stable. The lesson is simple: before changing mechanical equipment, confirm that the room is actually separated from outdoor conditions. A furnace cannot efficiently heat a bedroom that is quietly sharing air with the attic.
More Attic Insulation Did Not Fix the Draft
Another common experience involves homeowners adding several inches of loose-fill insulation but still feeling drafts near interior walls and ceiling fixtures. The reason is usually that the insulation was installed over leakage paths rather than after they were sealed.
When the material is temporarily moved aside, contractors may find open top plates, plumbing penetrations, gaps around exhaust fans, and a poorly fitted attic hatch. Sealing those openings often improves comfort more than simply adding another layer of insulation. The experience reinforces a core building-science principle: insulation slows heat flow, but moving air can carry heat and moisture around it.
The Finished Basement Developed a Musty Smell
A homeowner may frame a wall against a cool concrete foundation, fill it with fiberglass, and cover it with drywall. The room initially looks excellentfresh paint, new flooring, perhaps even a suspiciously ambitious home theater. Months later, a musty odor appears because moisture from the foundation or indoor air is condensing inside the wall.
A better project begins with exterior drainage, grading, foundation repairs, humidity control, and an insulation system designed for below-grade moisture exposure. The practical lesson is that comfort upgrades should never conceal active water problems. Dryness is not an optional accessory for insulation; it is part of the assembly.
The Home Became Tighter but More Humid
Air sealing can successfully reduce drafts while also revealing weaknesses in ventilation. For example, a family may notice higher bathroom humidity after attic bypasses and window gaps are sealed. The insulation work did not create the moistureshowers, cooking, plants, and daily activities were already producing it. The previous house simply leaked enough air to remove some moisture accidentally.
The proper response is not to reopen random cracks. It is to improve controlled ventilation by repairing bath fans, venting them outdoors, using kitchen exhaust, adjusting dehumidification, or installing a balanced ventilation system when appropriate. A comfortable house should be tight enough to control but ventilated enough to remain healthy.
The Smallest Project Delivered the Most Noticeable Result
Not every comfort improvement requires a full renovation. In some homes, weatherstripping an attic hatch, sealing a leaky rim joist, insulating exposed ducts, or closing a large plumbing chase creates an immediate difference. One draft near the sofa can make an entire room feel cold even when the thermostat reports a reasonable temperature.
This is why prioritization matters. Start with the biggest leaks and weakest boundaries, measure the results, and continue systematically. Home insulation is less like buying one miracle product and more like assembling a team. Air barriers, insulation, moisture control, ventilation, and HVAC systems must all play their positions. When they do, the house feels calmer, temperatures become more predictable, and the thermostat no longer behaves like it is negotiating a hostage release.
Conclusion
Making a house more comfortable begins with understanding how heat, air, and moisture move through it. Inspect the building before choosing materials, seal major air leaks before adding insulation, and prioritize accessible areas such as the attic, rim joists, basement, crawlspace, and ducts. Install insulation continuously without gaps or compression, protect ventilation paths, and use assemblies appropriate for the local climate.
Most importantly, treat the house as a complete system. Insulation affects moisture, ventilation, indoor air quality, combustion safety, HVAC performance, and structural durability. Straightforward projects may be suitable for careful homeowners, but complicated rooflines, wet foundations, old wiring, combustion appliances, and large spray-foam installations warrant professional guidance. The goal is not simply a higher R-value. It is a quieter, drier, healthier house in which every room feels like it belongs to the same season.