Some DIY projects begin with a trip to the hardware store. This one begins with breakfast. If you have unfinished wood, a pile of used coffee grounds, and a dangerous level of confidence after watching three home-makeover videos, you can create a warm, rustic stain without buying a traditional wood stain. Coffee staining wood is inexpensive, beginner-friendly, low-waste, and surprisingly satisfying. It will not turn pine into mahogany overnight, and it will not perform like a factory-made oil stain, but it can give raw wood a soft brown tone that looks cozy, handmade, and intentionally imperfect.
The best part? Used coffee grounds are already paid for. They have done their morning job, and now they get a second career as a natural wood stain. This guide explains how to stain unfinished wood with used coffee grounds, how to make the color stronger, when to add vinegar and steel wool, how to avoid blotches, and how to seal the finished piece so your charming coffee-tinted shelf does not become a sticky coaster for life.
Why Use Coffee Grounds as a Wood Stain?
Coffee contains natural pigments that can tint porous materials, including fabric, paper, and unfinished wood. When brewed into a concentrated liquid, coffee creates a soft brown wash that sinks into open wood grain. The effect is subtle, earthy, and more “antique farmhouse” than “brand-new furniture showroom.” That is exactly why many DIYers love it.
Using coffee grounds as wood stain also fits the upcycling mindset. Instead of tossing spent grounds straight into the trash, you can reuse them for a practical home project. Coffee grounds are commonly repurposed for composting, deodorizing, cleaning, and craft dyes, so using them to color unfinished wood is a natural extension of the same idea. It is budget-friendly, accessible, and a little bit delightfully weirdthe holy trinity of weekend DIY.
What Coffee Stain Looks Like on Wood
Coffee stain usually produces a light to medium brown finish. The final shade depends on the strength of the brew, the number of coats, the wood species, and whether you combine coffee with vinegar and steel wool. On pine, coffee can appear golden brown or slightly tan. On oak, it may look deeper because oak has more pronounced grain and natural tannins. On poplar, the color may be muted and sometimes uneven. On birch or maple, results can be pale unless you use several coats.
Think of coffee stain as a tint, not a heavy pigment. If you want a dramatic espresso-brown finish in one coat, a commercial wood stain will be more predictable. If you want a soft, natural, aged effect with character, coffee is ready to clock in.
Supplies You Will Need
Before you start, gather everything so you are not sprinting around the house with wet stain on your gloves and panic in your eyes.
- Unfinished wood project or scrap test board
- Used coffee grounds
- Hot water
- Glass jar or heat-safe container
- Fine mesh strainer, coffee filter, or cheesecloth
- Foam brush, natural bristle brush, lint-free cloth, or old cotton T-shirt
- Sandpaper: 120-grit, 180-grit, and 220-grit
- Vacuum, tack cloth, or clean microfiber cloth
- Disposable gloves
- Optional: white vinegar or apple cider vinegar
- Optional: 0000 steel wool for a darker aged stain
- Optional: black tea for extra tannins
- Clear protective topcoat such as water-based polyurethane, oil-based polyurethane, paste wax, or furniture oil
The Simple Coffee Stain Recipe
This basic recipe uses only used coffee grounds and hot water. It is the best place to start if you want a gentle, natural brown tone.
Ingredients
- 1 cup used coffee grounds
- 1 to 1 1/2 cups hot water
Instructions
Place the used coffee grounds in a glass jar. Pour hot water over them and stir. Let the mixture steep for at least 30 minutes. For a stronger stain, let it sit for several hours or overnight. Strain the liquid through a coffee filter, cheesecloth, or fine mesh strainer. The smoother the liquid, the easier it will be to apply evenly.
If you want a darker stain, reduce the water or add more coffee grounds. You can also simmer the strained coffee gently on the stove to concentrate it, then let it cool before applying. Do not apply boiling liquid to wood. Wood has enough drama already.
Optional Darker Recipe: Coffee, Vinegar, and Steel Wool
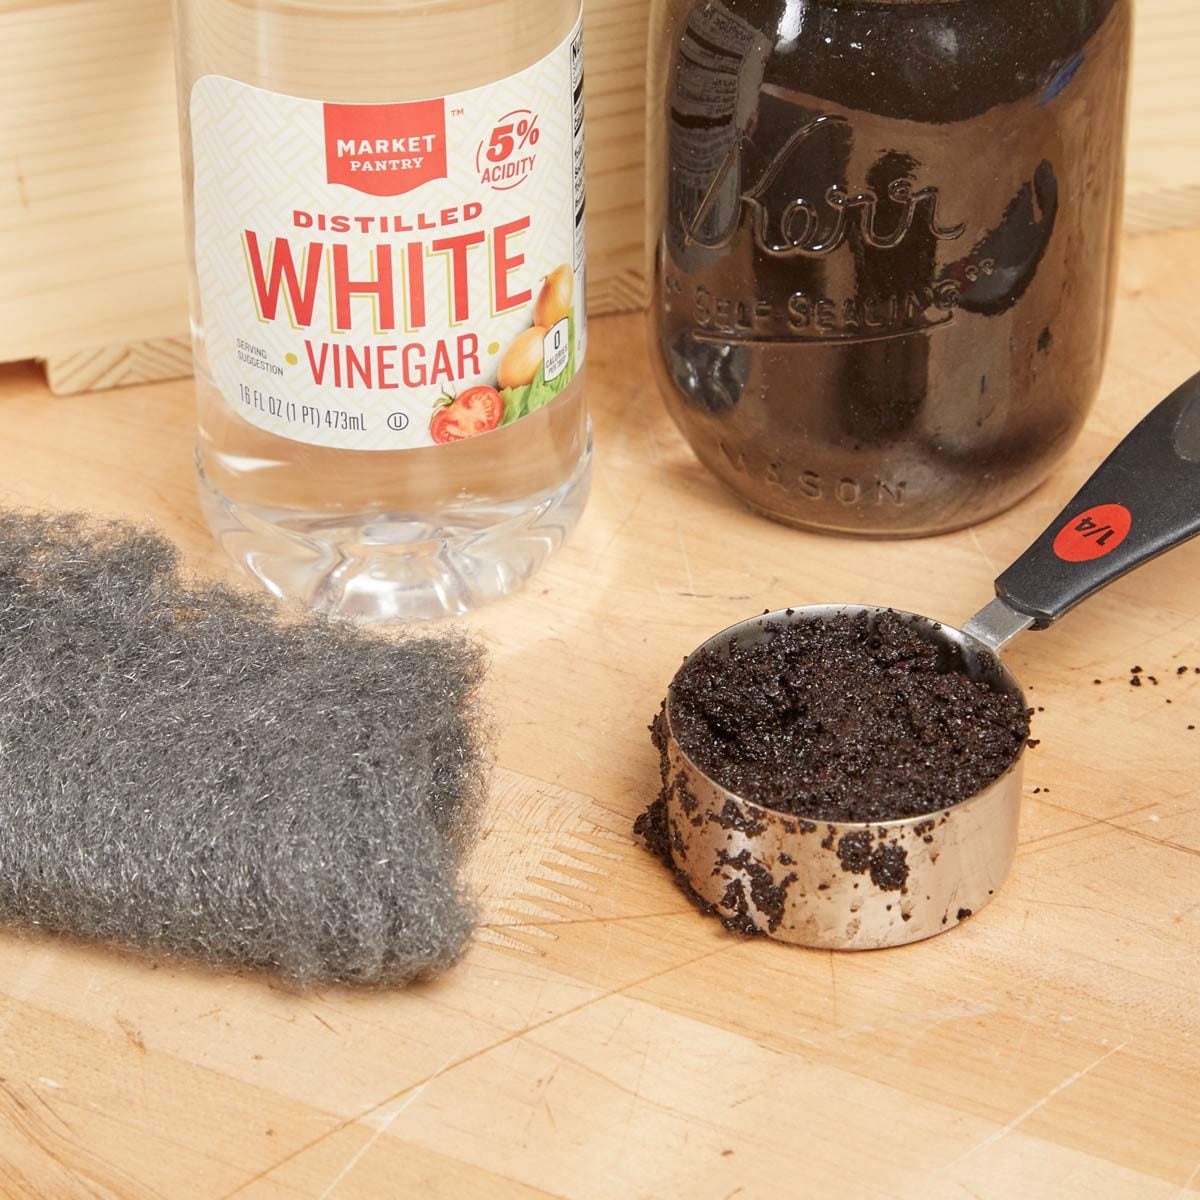
If plain coffee gives you a lighter color than you want, you can make a more reactive stain using vinegar and steel wool. This method works because vinegar slowly breaks down the steel wool, creating an iron-rich solution. When that solution meets tannins in the wood, it can darken the surface and create a weathered, aged appearance.
Coffee can add warmth and extra color, while black tea can add tannins. This is especially helpful on lower-tannin woods like pine. The result is less predictable than store-bought stain, but that unpredictability is part of the rustic charm. Translation: test first, unless you enjoy surprises with sandpaper consequences.
Ingredients
- 1 cup used coffee grounds
- 1 to 1 1/2 cups hot water
- 1 cup white vinegar or apple cider vinegar
- One small piece of 0000 steel wool
- Optional: 2 to 4 black tea bags brewed strongly
Instructions
Place the steel wool in a glass jar and cover it with vinegar. Leave the lid loose or poke a small vent hole in it, because the reaction can release gas. Let the mixture sit for 24 to 48 hours. The longer it sits, the stronger and darker it may become. Meanwhile, steep your used coffee grounds in hot water, then strain the liquid. For more depth, brew strong black tea separately.
To apply, brush the coffee or tea onto the wood first and let it dry. Then apply the vinegar and steel wool solution. The color may look underwhelming at first, then darken as it reacts and dries. This is normal. Do not keep slapping on coats in a panic. Give chemistry a moment to put on its tiny lab coat.
Step-by-Step: How to Stain Unfinished Wood with Used Coffee Grounds
Step 1: Choose the Right Wood
Coffee stain works best on raw, unfinished wood. If the wood already has paint, varnish, polyurethane, wax, or factory sealer on it, the coffee will mostly sit on top and wipe away. You need open wood pores for stain absorption. This method is great for unfinished pine boards, craft wood, crates, shelves, picture frames, small tables, wood signs, and rustic decor pieces.
For large furniture, always test first. Natural stains can behave differently from board to board, even within the same wood species. A hidden underside, back edge, or scrap from the same project is your best friend.
Step 2: Sand the Wood Smooth
Sanding is not glamorous, but it is the difference between “beautiful handmade finish” and “why does this feel like a raccoon chewed it?” Start with 120-grit sandpaper if the wood is rough. Move to 180-grit, then finish with 220-grit. Always sand with the grain to avoid visible scratches.
Do not over-sand with very fine paper before staining. If the surface becomes too polished, it may absorb less stain. A 220-grit finish is usually smooth enough for furniture and open enough for color absorption.
Step 3: Clean Off Dust
After sanding, remove every bit of dust you can. Vacuum the surface, wipe it with a clean cloth, or use a tack cloth. Dust left on the wood can mix with the stain and create muddy streaks. Coffee already has enough personality. It does not need sawdust garnish.
Step 4: Test the Stain
Apply the coffee stain to a scrap piece of the same wood. Let it dry completely before judging the color. Wet stain almost always looks darker than dry stain. If the color is too light, apply another coat or make a stronger coffee concentrate. If it is too dark or uneven, dilute the stain with water or sand lightly and try again.
Step 5: Apply the First Coat
Dip a foam brush or lint-free cloth into the strained coffee stain. Apply it evenly in the direction of the grain. Keep a wet edge as you work so you do not create lap marks. Avoid puddles, especially around corners, knots, and end grain. End grain drinks stain quickly and can turn darker than the rest of the board.
After applying, wipe off any excess with a clean cloth. This helps reduce streaks and gives you more control. If you want a rustic look, you can leave a little more stain in crevices and grain lines.
Step 6: Let It Dry Fully
Let the wood dry for at least one to two hours between light coats. Humidity, temperature, wood type, and how much liquid you applied will affect drying time. If the wood feels cool, damp, or sticky, it is not ready for the next coat. Be patient. This is staining, not a microwave burrito.
Step 7: Add More Coats for Deeper Color
One coat of coffee stain may be subtle. Two or three coats usually create a warmer tone. For a noticeably darker finish, apply several thin coats rather than one heavy coat. Thin coats dry more evenly and reduce blotching.
If using the vinegar and steel wool method, allow the reaction coat to dry completely before deciding whether to add more. The color can continue developing as it dries.
Step 8: Lightly Sand Between Coats if Needed
Water-based stains can raise the grain of unfinished wood, making the surface feel slightly fuzzy. Coffee stain is water-based, so this can happen. Once the surface is fully dry, lightly sand with 220-grit paper or a fine sanding pad. Use a gentle touch. You are smoothing the raised fibers, not trying to erase your project from history.
Step 9: Seal the Wood
Coffee stain needs a protective topcoat. Without sealing, the color can fade, rub off, or absorb moisture. For shelves, frames, and decor, water-based polyurethane works well because it dries clear and keeps the coffee tone from becoming too amber. For a warmer, richer look, oil-based polyurethane or varnish can deepen the color, but it may add a golden cast.
For low-contact decorative pieces, paste wax or furniture oil can create a soft, natural sheen. For tabletops, benches, and anything that may meet cups, spills, or enthusiastic toddlers, use a more durable clear coat. Apply thin coats, let each coat dry according to the product directions, and sand lightly between coats if recommended.
How to Get the Best Color
Use Strong Coffee Concentrate
Weak coffee produces weak stain. If your mixture looks like sad beige water, it will probably stain like sad beige water. Use a high ratio of grounds to water, steep longer, or reduce the strained liquid slightly to concentrate the color.
Apply Multiple Thin Coats
Layering is the secret. A single coat may only whisper. Three coats start speaking in a respectable indoor voice. Let each coat dry before applying the next so the wood can absorb color evenly.
Try Black Tea Before Coffee
Black tea adds tannins, which can help deepen reactive stains when vinegar and steel wool are used. Brush strong black tea onto the unfinished wood, let it dry, then apply coffee or the vinegar solution. This works especially well when you want an aged gray-brown tone.
Choose Wood Species Carefully
Oak, walnut, and other open-grain woods tend to show more character. Pine is affordable and common, but it can blotch. Poplar may turn muted or slightly greenish depending on the board. Maple can resist color because it is dense. Always test, because wood enjoys humbling confident people.
Common Mistakes to Avoid
Using Coffee Grounds Directly Without Straining
Rubbing wet grounds directly onto wood can create dark specks, grit, and uneven patches. It may work for scratch touch-ups on dark furniture, but for staining unfinished wood, a strained liquid is cleaner and easier to control.
Skipping the Test Board
Natural stains are unpredictable. Coffee strength, wood grain, sanding level, and drying conditions all affect the final color. A five-minute test can save you from sanding an entire shelf back to bare wood while questioning your life choices.
Applying Too Much Liquid
Flooding the wood can raise the grain, create uneven drying, and leave tide marks. Apply thin, even coats. Wipe away excess. Let the wood dry fully.
Forgetting the Topcoat
Coffee stain is not a protective finish. It adds color, not durability. If the piece will be touched, cleaned, or used, seal it. A clear coat locks in the color and protects the surface from moisture and wear.
Expecting Perfect Uniformity
If you want a flawless factory finish, use commercial stain and follow the manufacturer’s directions. Coffee stain is charming because it is organic, variable, and slightly unpredictable. It is not messy if done carefully, but it is naturally imperfect.
Best Projects for Coffee-Stained Wood
Coffee stain is ideal for small to medium DIY projects where warmth and rustic character matter more than exact color matching. Try it on floating shelves, farmhouse signs, picture frames, crates, serving trays, plant stands, unfinished boxes, candle holders, wall hooks, decorative ladders, and small accent tables.
It is less ideal for floors, outdoor furniture, cutting boards, bathroom vanities, or high-moisture areas unless you use a suitable protective finish. Even then, coffee stain is not the most durable or predictable choice for heavy-duty surfaces.
Safety and Cleanup Tips
Plain coffee stain is fairly low-risk, but basic workshop safety still applies. Wear gloves if you do not want brown fingertips. Protect your work surface with plastic, cardboard, or a drop cloth. Keep liquids away from outlets and power tools. Let stained rags dry flat before disposal, especially if you later use oil-based finishes.
If you use vinegar and steel wool, work in a ventilated area and keep the jar loosely covered while it reacts. Do not seal the jar tightly during the reaction. Label the mixture clearly so nobody mistakes it for a tragic salad dressing. Keep it away from children and pets.
Experience Notes: What It Is Actually Like to Stain Wood with Coffee Grounds
The first thing you notice when staining unfinished wood with used coffee grounds is that the process feels more like making a craft potion than using a standard finishing product. Commercial stain smells like a project. Coffee stain smells like a kitchen that accidentally wandered into a workshop. That makes the experience more pleasant, especially for small indoor projects, although you still need ventilation once you start sealing the wood.
In practice, the biggest surprise is how light the first coat can look. Many beginners expect the wood to turn dark brown immediately because coffee in a mug looks nearly black. Wood does not see it that way. The first coat often dries to a gentle tan or honey-brown color. That is not failure; it is simply how a water-based natural tint behaves. The color builds slowly, and the project starts looking better after the second or third coat.
The second lesson is that sanding matters more than the coffee recipe. A board sanded unevenly will stain unevenly. Rough patches absorb more color. Polished patches absorb less. Corners and end grain darken faster. If you rush the prep, the stain will politely expose every shortcut you took. It is not rude. It is just honest.
The third lesson is that different woods behave like different personalities at a family reunion. Pine is friendly and affordable, but it can be blotchy. Oak is dramatic in a good way because the grain catches color beautifully. Poplar can be unpredictable. Maple may barely react unless the stain is strong and layered. This is why a scrap test is not optional if the final appearance matters.
The vinegar and steel wool version is more exciting, but also more chaotic. When it works, it creates a deeper aged tone that looks like the wood has been hanging out in an old barn telling stories. When it does not work, it may turn gray, brown, or oddly uneven depending on tannin levels and application. Adding strong black tea before the vinegar solution can help, especially on woods that do not naturally have much tannin.
One practical trick is to stain all visible pieces in the same session. If you are making shelves, stain every shelf with the same batch of coffee stain. If you make a fresh batch two days later, the strength may be different, and the color may shift. Natural stain does not come with a barcode formula, so consistency comes from controlling your process.
Another useful experience-based tip is to strain the coffee twice. A single pass through a mesh strainer can still leave fine sediment. That sediment may settle into corners or dry as tiny specks. Running the liquid through a coffee filter takes longer, but it creates a smoother stain. Yes, using a coffee filter to filter coffee stain made from used coffee grounds is a little circular. DIY is allowed to be poetic.
Finally, sealing is where the project becomes real furniture instead of a temporary art experiment. Coffee stain alone can look beautiful, but a clear topcoat gives it depth and protection. Water-based polyurethane keeps the color closer to the original coffee tone. Oil-based finishes add warmth and amber color. Wax gives a soft look but less protection. The right choice depends on whether the piece will be admired from a distance or attacked daily by coffee mugs, keys, mail, and life.
Conclusion
Learning how to stain unfinished wood with used coffee grounds is a simple, affordable way to give raw wood a warm, rustic finish while reusing something you probably already have in the kitchen. The method works best when you treat it as a natural tint rather than a commercial stain replacement. Sand the wood well, brew a strong coffee concentrate, apply thin coats, test before committing, and seal the finished piece with a protective topcoat.
For a soft brown tone, coffee and hot water may be enough. For a darker, aged effect, combine coffee with black tea, vinegar, and steel wool. Either way, the result is handmade, charming, and satisfyingly low-waste. Your used coffee grounds get one last heroic mission, and your unfinished wood gets a finish with personality. That is a pretty good deal for something that started the morning at the bottom of a filter basket.