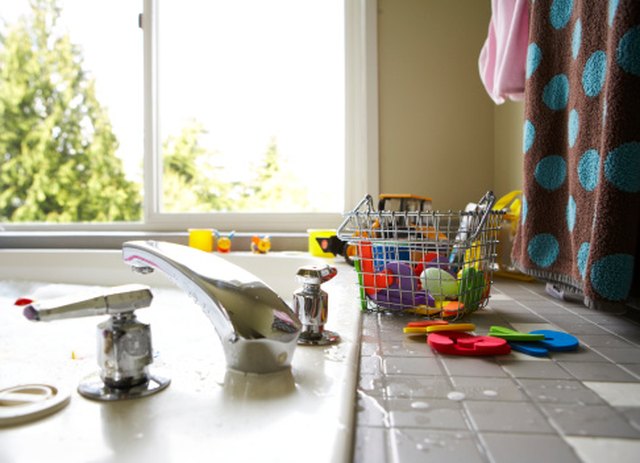
A dripping faucet has a special talent for turning a quiet kitchen or bathroom into a tiny percussion concert. Drip. Drip. Drip. If the offender is a Waltec faucet, the good news is that many repairs are simple, affordable, and very doable for a careful homeowner with basic tools. Waltec faucets are known for practical, durable designs, and many older two-handle models can be repaired by replacing worn washers, O-rings, cartridges, or faucet seats instead of replacing the whole fixture.
This guide explains how to repair a Waltec faucet step by step, including how to diagnose the leak, remove the handle, inspect the cartridge or stem, replace common parts, and test the faucet properly. Whether you are dealing with a kitchen faucet, bathroom sink faucet, or tub and shower valve, the repair usually comes down to one principle: water is sneaky, but rubber parts are sneakier when they wear out.
Note: Faucet designs vary by age and model. Older Waltec faucets may use hot and cold cartridges, washers, and renewable seats. Before buying parts, remove the old component and compare it carefully with the replacement.
Understanding the Waltec Faucet Before You Start
Waltec faucets are often found in two-handle sink and tub/shower setups. Many traditional Waltec repairs involve compression-style or cartridge-style components. In a two-handle faucet, one side controls hot water and the other controls cold water. Inside each handle is a stem or cartridge that opens and closes the water flow. At the bottom, a washer presses against a faucet seat to stop water. Over time, the washer can harden, flatten, crack, or develop a groove. When that happens, water slips past and the faucet drips from the spout.
In other cases, the problem is not the washer but the O-ring, packing washer, screw, or seat. If water leaks from the handle, the issue is often around the stem, packing, or O-ring. If water drips from the spout, the washer, cartridge, or valve seat is the usual suspect. If the faucet feels stiff, squeaky, or hard to turn, mineral buildup and worn internal seals may be part of the problem.
Tools and Parts You May Need
Do not attack the faucet with the entire toolbox like you are auditioning for a home-improvement disaster show. Gather a small, organized set of tools first. Most Waltec faucet repairs require only common items.
Basic tools
- Adjustable wrench
- Phillips and flathead screwdrivers
- Needle-nose pliers
- Seat wrench or Allen-style seat removal tool
- Utility knife or small pick
- Clean rag or towel
- Plumber’s grease
- Flashlight
- Small container for screws and parts
Common Waltec replacement parts
- Waltec hot cartridge or stem
- Waltec cold cartridge or stem
- Rubber washers
- O-rings
- Fiber washers
- Stem screws
- Faucet seats, often 9/16-inch by 24 TPI on many Waltec-style applications
- Complete Waltec faucet repair kit, when available
A repair kit can be a convenient choice because it often includes washers, O-rings, fiber gaskets, screws, and sometimes seats. Still, do not assume every kit fits every faucet. Waltec has older and newer parts, and some older cartridges are model-specific. If your faucet was made before 1990, compare the old hot and cold cartridges very carefully.
Step 1: Diagnose Where the Faucet Is Leaking
Before shutting off water and taking things apart, identify the leak location. This helps you avoid replacing the wrong part and saying unkind things about plumbing in front of the sink.
If the faucet drips from the spout
A spout drip usually means water is passing through the closed valve. On a Waltec faucet, this often points to a worn washer, damaged cartridge, or pitted faucet seat. If only the hot side is leaking, the hot stem or cartridge may be worn. If only the cold side leaks, check the cold side. If you are unsure, turn off one supply valve at a time and watch whether the drip stops.
If water leaks around the handle
A handle leak usually means the stem packing, O-ring, or cartridge seal is failing. Sometimes tightening the packing nut slightly will stop a small leak, but do not overdo it. Too much force can make the handle hard to turn or damage the assembly.
If water leaks below the sink
This may not be an internal Waltec faucet problem at all. Check supply lines, shutoff valves, mounting nuts, and the drain assembly. Dry everything with a towel, run the water, and use a flashlight to find the first wet spot.
Step 2: Shut Off the Water Supply
Look under the sink for the hot and cold shutoff valves. Turn them clockwise until closed. If you are repairing a tub or shower faucet without local shutoff valves, you may need to shut off water to the house. After shutting off the water, open the faucet handles to relieve pressure and drain leftover water from the lines.
Cover the drain with a rag or stopper. This one small step can save you from watching a tiny screw vanish into the plumbing underworld. Lay parts on a towel in the order you remove them. Taking a quick photo with your phone before each step is also smart, especially if you are the kind of person who believes “I’ll remember how this goes” and then immediately does not.
Step 3: Remove the Faucet Handle
Most Waltec handles have a decorative cap or index button on top. Pry it up gently with a small flathead screwdriver or utility knife. Under the cap, you should find a handle screw. Remove the screw, then pull the handle straight off. If the handle is stuck because of mineral buildup, wiggle it gently. Avoid prying aggressively against finished surfaces.
Once the handle is off, remove any sleeve, escutcheon, or trim piece that blocks access to the stem or cartridge. Use a towel around chrome parts before gripping them with pliers or a wrench. Chrome scratches easily, and scratched chrome has a way of looking at you judgmentally forever.
Step 4: Remove the Stem or Cartridge
Use an adjustable wrench to loosen the retaining nut or bonnet nut. Turn it counterclockwise. Once the nut is loose, remove the stem or cartridge. Some stems thread out; others pull straight out after the retaining hardware is removed. Keep steady pressure and avoid forcing the part at an angle.
Inspect the stem or cartridge closely. Look for cracked plastic, worn threads, flattened washers, brittle O-rings, corrosion, or missing screws. If the washer at the bottom is grooved or flattened, it should be replaced. If the cartridge body is damaged, replacing the entire cartridge is usually better than trying to rebuild it one tiny piece at a time.
Step 5: Replace the Washer, O-Rings, or Cartridge
If your Waltec faucet uses a washer at the bottom of the stem, remove the small screw holding it in place. Install a new washer of the same size and shape, then reinstall the screw snugly. Do not overtighten it; rubber needs to sit flat, not be crushed like a pancake at a breakfast buffet.
If the O-rings are worn, remove them with a small pick or screwdriver. Coat the new O-rings lightly with plumber’s grease and slide them into place. Plumber’s grease helps the parts move smoothly and protects rubber from drying out too quickly.
If you are replacing the full cartridge, match hot and cold sides correctly. On many two-handle faucets, hot and cold cartridges may turn in opposite directions. Installing the wrong cartridge can cause the handle to turn backward or fail to shut off properly. Compare the old part with the new one, including length, diameter, thread style, stem shape, and turning direction.
Step 6: Inspect and Replace the Faucet Seat
The faucet seat is the small metal surface inside the valve body where the washer seals. Even a brand-new washer may leak if the seat is rough, cracked, or pitted. Shine a flashlight into the valve body. If the seat looks damaged or feels rough, replace it.
Use a seat wrench or the correct Allen-style tool to remove the seat. Turn counterclockwise to loosen it. Take the old seat to the hardware store or plumbing supplier and match it precisely. Many Waltec-style replacement seats are listed as 9/16-inch by 24 threads per inch, but you should still verify your exact faucet. Apply a small amount of plumber’s grease to the new seat threads, then install it clockwise until snug. Do not overtighten because brass threads can be damaged.
Step 7: Reassemble the Faucet
Insert the repaired or replacement stem back into the faucet body. Thread it in carefully or align it according to the faucet design. Reinstall the retaining nut, sleeve, trim, handle, screw, and decorative cap. The handle should turn smoothly without wobbling or binding.
If the handle feels too tight, do not ignore it. Disassemble and check alignment. A misaligned cartridge or overtightened packing nut can shorten the life of the repair. A good faucet repair should feel boringly smooth. Boring is excellent in plumbing. Exciting usually means towels.
Step 8: Turn the Water Back On and Test
Turn the shutoff valves back on slowly. Open the faucet and let both hot and cold water run for a minute. This clears loose debris from the line. Check around the handle, spout, and under the sink. Turn the faucet off and wait. Watch for drips.
If the leak is gone, congratulations: you have defeated the drip. If it still leaks from the spout, the seat may be damaged, the washer may be the wrong size, or the cartridge may not be fully seated. If it leaks around the handle, inspect the O-ring, packing washer, or retaining nut again.
Troubleshooting Common Waltec Faucet Problems
The faucet still drips after replacing the washer
Check the faucet seat. A worn seat can cut into a new washer quickly. Also confirm that the washer is the correct thickness and diameter. A washer that is close but not exact may still leak.
The handle turns the wrong way
You may have installed a hot cartridge on the cold side or a cold cartridge on the hot side. Compare the stem orientation and turning direction with the original part.
The handle is hard to turn
Remove the stem or cartridge and apply plumber’s grease to the O-rings. Check for mineral buildup inside the handle or trim. Make sure the retaining nut is snug but not overtightened.
The faucet has weak water flow after repair
Remove and clean the aerator at the tip of the spout. Small pieces of debris can break loose during repair and clog the screen. Soak the aerator in vinegar if mineral buildup is present, then rinse and reinstall it.
When to Repair vs. Replace a Waltec Faucet
Repair is usually worthwhile when the faucet body is solid, parts are available, and the finish is in decent condition. Replacing washers, O-rings, cartridges, and seats costs far less than installing a new faucet. It also keeps a dependable fixture working instead of sending it to the landfill.
Replacement may be smarter if the faucet body is cracked, heavily corroded, or leaking from multiple places. If parts are hard to find, if the handles are stripped, or if the finish is badly damaged, a new faucet may save time. For shower valves hidden inside the wall, be especially cautious. A simple stem repair is fine for many DIYers, but damaged in-wall plumbing may call for a licensed plumber.
Safety Tips for a Cleaner Repair
Never work on a faucet without shutting off the water first. Use moderate hand pressure, not brute force. If a part refuses to move, apply penetrating oil, wait, and try again. Protect finished surfaces with tape or cloth. Keep old parts until the faucet is fully repaired, because they are your best reference when buying replacements.
Also, do not ignore a small drip. According to water-efficiency guidance, even a faucet dripping once per second can waste thousands of gallons per year. That tiny drip is not just annoying; it is quietly billing you for water you never got to enjoy.
Real-World Experience: What Repairing a Waltec Faucet Teaches You
Repairing a Waltec faucet is one of those household jobs that looks intimidating until the handle comes off. Then you realize the faucet is not magic. It is a stack of practical parts doing a simple job under pressure. The trick is patience. Rushing a faucet repair usually creates more work, while moving slowly turns the job into a manageable puzzle.
One common experience is discovering that the visible leak is not always the whole story. A homeowner may start with a spout drip and assume the washer is the only problem. After opening the faucet, they find the washer is worn, but the seat is also rough. Replacing only the washer may stop the leak for a few days, then the drip returns. Replacing both the washer and the seat gives the rubber a smooth surface to seal against and usually makes the repair last much longer.
Another lesson is that old faucets deserve respect. Many older Waltec faucets were built to be repaired, not thrown away. That is a refreshing idea in a world where some products seem designed to give up the moment the warranty expires. With the correct cartridge, washer, O-ring, and seat, an older faucet can keep working beautifully. The challenge is matching parts carefully. Bring the old stem or cartridge with you when shopping. If ordering online, compare photos, dimensions, model numbers, and hot/cold orientation.
It is also common to underestimate mineral buildup. In hard-water areas, handles may stick, trim sleeves may resist removal, and aerators may clog after the repair. A little vinegar, patience, and gentle cleaning can make a big difference. Avoid using excessive force on old chrome or brass parts. If you round off a nut or crack a trim piece, the job becomes less charming very quickly.
The most satisfying part of repairing a Waltec faucet is the final test. You turn the water back on, run the faucet, shut it off, and wait. No drip. No hiss. No tiny puddle forming under the handle. Just silence. That silence is the sound of a small household victory. It may not earn a parade, but it can save water, reduce irritation, and make you feel unusually proud every time you pass the sink.
For beginners, the best advice is simple: take photos, organize parts, and do not throw anything away until the faucet works. Use a towel to protect the sink. Cover the drain. Buy quality replacement parts. If something does not fit easily, stop and check why. Plumbing rewards careful thinking more than muscle. The faucet is not trying to defeat you; it is just waiting for the right washer.
In the end, learning how to repair a Waltec faucet gives you more than a leak-free fixture. It gives you confidence. The next time a handle drips or a faucet squeaks, you will not immediately imagine a giant plumbing bill. You will know where to start, what to inspect, and when to call a professional. That is useful knowledge, and unlike the old washer you replaced, it does not wear out.
Conclusion
Repairing a Waltec faucet usually means identifying the leak, shutting off the water, removing the handle, inspecting the stem or cartridge, replacing worn washers or O-rings, checking the faucet seat, and reassembling everything carefully. The job is practical, affordable, and often easier than expected. A dripping faucet may sound small, but fixing it can save water, protect your sink area, and extend the life of a well-built fixture.
If your Waltec faucet still leaks after replacing the obvious parts, do not panic. Recheck the seat, confirm the cartridge orientation, clean the aerator, and make sure every seal is properly installed. When the faucet body is damaged or parts are unavailable, replacement may be the better option. But in many cases, a simple repair kit and a calm Saturday morning are all you need to turn that annoying drip into peaceful silence.