Fresh corn is one of summer’s great joys. It is sweet, juicy, sunny, and somehow able to make a Tuesday night dinner feel like a backyard party. Unfortunately, removing corn from the cob can also make your kitchen look like a tiny yellow confetti cannon went off near the sink. Kernels bounce. Juice splatters. One rogue piece always lands in the weirdest possible place, usually where your sock finds it first.
The good news is that learning how to remove corn from the cob without making a mess is not difficult. You do not need superhero knife skills, a degree in produce engineering, or the emotional strength to chase kernels across the counter. You just need the right setup, a sharp knife, and a method that works with gravity instead of against it.
In this guide, you will learn the cleanest ways to cut corn off the cob, when to use each method, how to prep the ears first, what mistakes to avoid, and how to store or freeze the kernels once they are off. If you love sweet corn but hate kitchen chaos, welcome. You are among friends.
Why Cutting Corn Off the Cob Gets So Messy
Corn is round, slippery, and packed with tightly attached kernels that release with a little pop. If you stand an ear on a flat cutting board and start hacking away, those kernels have exactly one dream: escape velocity. The cob rolls, the knife angle gets awkward, and the pieces scatter like they were late for another appointment.
The solution is simple. You want the cob to stay stable and the kernels to fall into something deep enough to catch them. That is the whole game. Once you understand that, the process becomes much cleaner, safer, and faster.
What You Need Before You Start
Basic tools
For the cleanest results, gather a sharp chef’s knife, a large bowl or Bundt pan, a cutting board, and a kitchen towel. That is enough for most home cooks. A dull knife makes the job harder because it crushes and drags instead of slicing cleanly.
Optional helpers
You can also use a rimmed baking dish, roasting pan, or sheet pan setup if you do not have a Bundt pan. Some cooks like a corn stripper gadget, and those can work well, but they are not necessary. A smart setup beats a drawer full of single-purpose gadgets almost every time.
Prep the corn first
Remove the husks and silks. Rinse the ear if needed, then trim the stem end if it is long or uneven. A flatter bottom makes the cob easier to steady. If a few silky strands remain, do not panic. Corn has never filed a complaint over one stubborn silk.
The Best Method: Use a Bundt Pan or Bowl-in-Bowl Setup
If your goal is loose kernels for salads, soups, chowders, tacos, salsa, casseroles, or freezing, this is the best all-around method. It is neat, practical, and refreshingly low drama.
How to do it
- Place the tip of the cob into the center hole of a Bundt pan, or invert a smaller bowl inside a larger bowl.
- Stand the ear upright on the raised center.
- Hold the ear near the top with one hand.
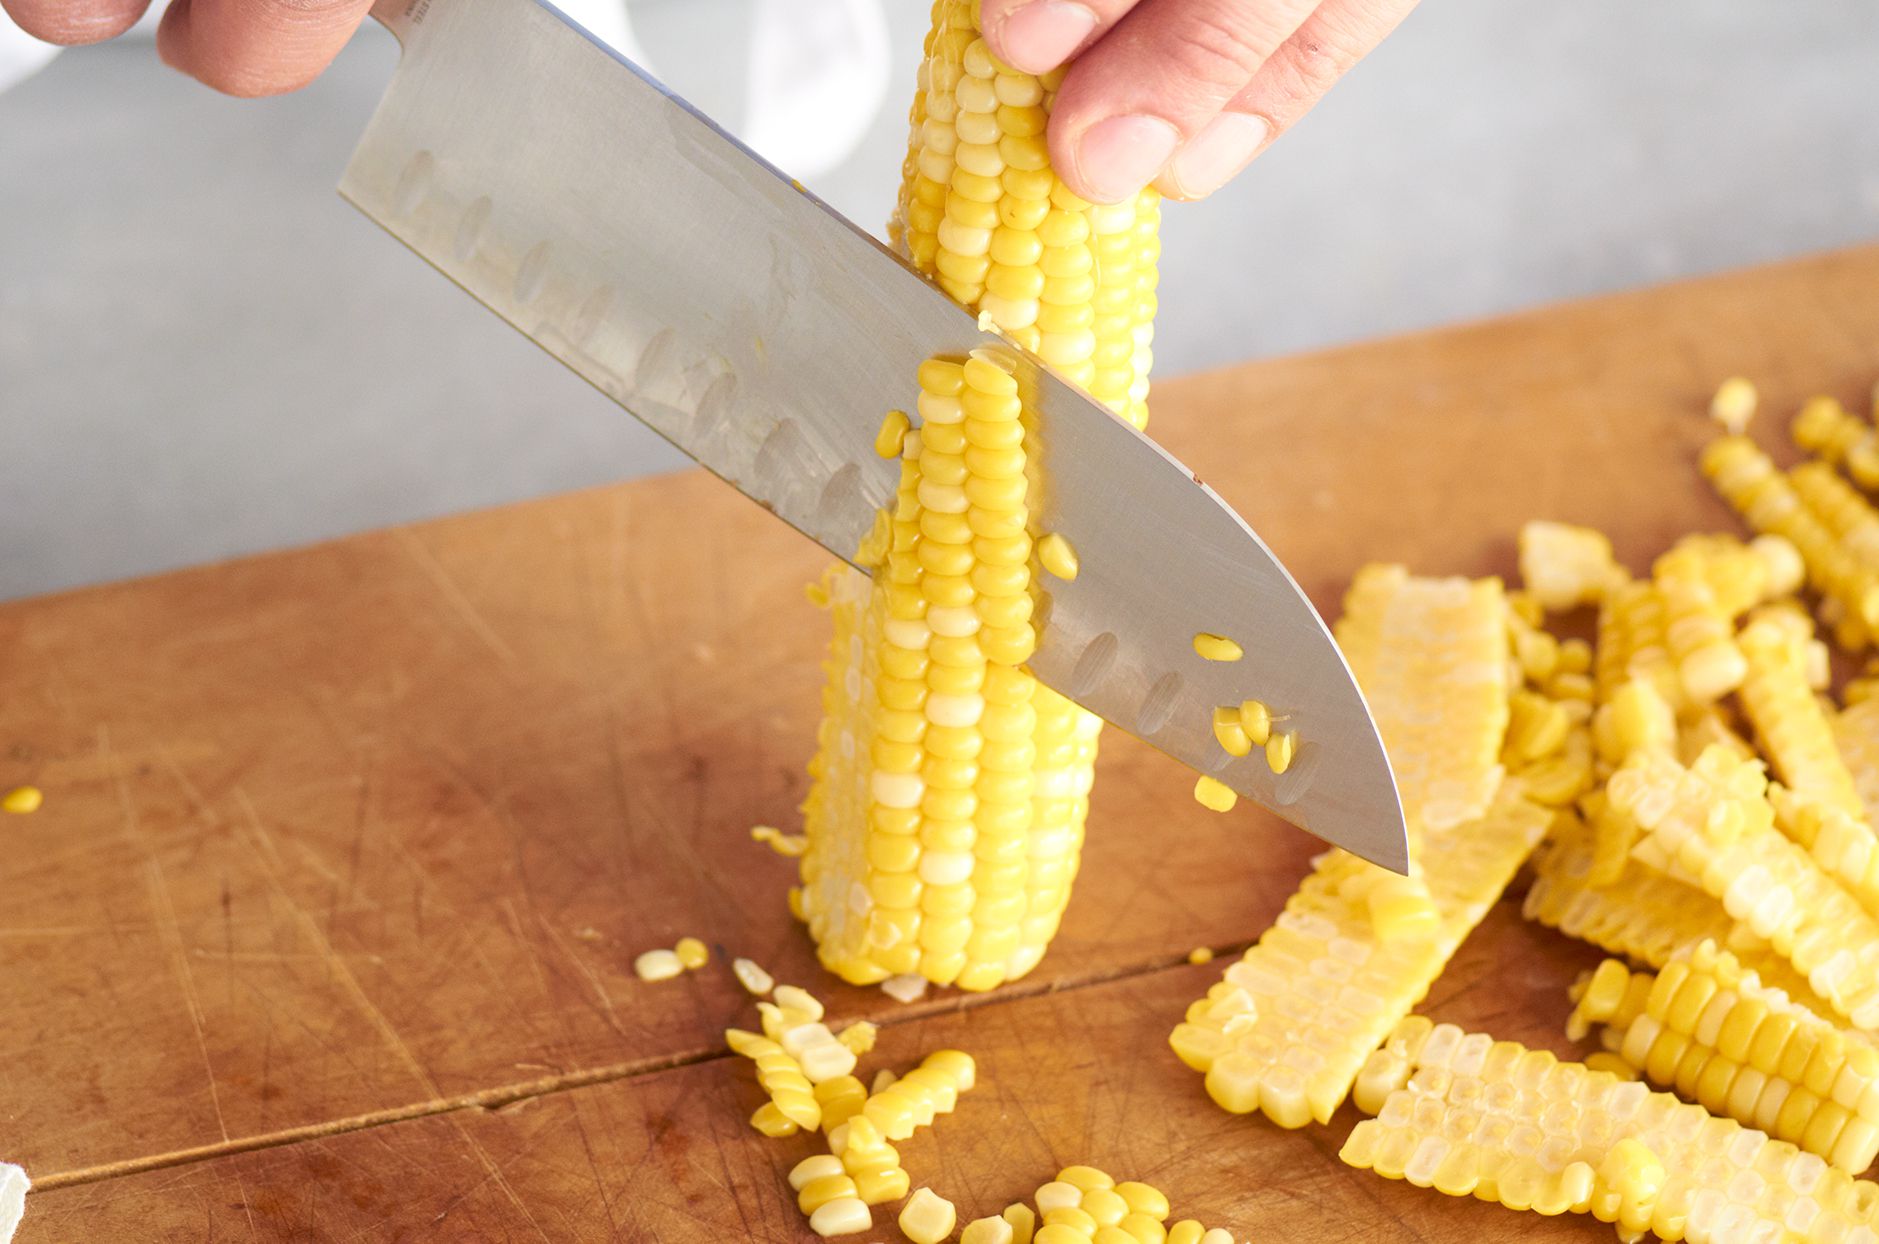
- Using a sharp knife, slice downward in long strokes.
- Rotate the ear and repeat until all the kernels are removed.
The pan or bowl catches the kernels instead of launching them across the kitchen. It also lifts the ear high enough that you are less likely to bang your knife into the side of the bowl. That matters more than it seems. Your knife does not enjoy surprise contact with ceramic or metal.
Why this method works so well
The cob stays upright, gravity works in your favor, and the kernels have a place to land. It is especially helpful when you are cutting several ears at once because you can keep going without sweeping the counter every thirty seconds.
Bonus flavor move
After you cut off the kernels, scrape the cob lightly with the back of your knife if you want to collect the sweet, starchy corn milk for soups, chowders, skillet corn, or corn risotto. That little bit of extra flavor is liquid gold in summer cooking.
The Prettiest Method: Cut Corn Planks on a Board
Sometimes you do not want lots of loose kernels. Sometimes you want larger strips or planks of corn that look rustic and impressive in a composed salad, grain bowl, or vegetable platter. This method is a little slower, but the presentation is excellent.
How to do it
- Secure your cutting board with a damp towel underneath so it does not slide.
- Lay the shucked ear on its side.
- Use a sharp knife to slice off one side, creating a plank of connected kernels.
- Rotate and repeat around the cob.
This method creates bigger, more dramatic pieces. It is not the fastest option for six ears destined for the freezer, but it is wonderful when appearance matters. Think summer salads, grilled platters, and anything you want to look casually fancy.
The Best Backup Method: Baking Dish or Sheet Pan Setup
No Bundt pan? No problem. Use a rimmed baking dish, roasting pan, or rimmed sheet pan with a cutting board inside. Stand the cob on the board and slice downward. The dish walls catch flying kernels, and cleanup stays manageable.
This is a great fallback if your kitchen is short on fancy shapes but rich in practical baking gear. It is also a smart choice when working with a lot of corn, because a larger dish gives you more room to maneuver.
Should You Cut Corn Raw or Cooked?
Both can work. The right choice depends on what you plan to do next.
Cut it raw if
You are sautéing it, adding it to salads, using it in fritters, or cooking it in another recipe right away. Raw kernels are firm, crisp, and easy to work with.
Cook or blanch it first if
You plan to freeze it. Brief blanching helps preserve quality, color, and texture. If you want to freeze whole-kernel corn, blanch the ears, cool them quickly in ice water, drain well, and then cut off the kernels. This gives you a better result later when the corn shows up in soups, casseroles, or skillet dinners in the middle of winter when summer feels like a rumor.
An optional silk-saving shortcut
If you are fighting stubborn husks and silk, microwaving the ears in their husks can make shucking easier. Once cooked and cool enough to handle, the ear can slip out more cleanly, often taking the silk with it. Then you can cut off the kernels with less fuss. It is not required, but it is a handy trick for busy weeknights.
How Deep Should You Cut?
This is where many people go wrong. If you cut too shallow, you leave half the good stuff behind. If you cut too deep, you shave off woody cob material and create chewy, unpleasant bits in your bowl.
The sweet spot is to cut about two-thirds of the depth of the kernel for most uses. That gives you the tender part without taking the cob along for the ride. If you are making cream-style corn, you can go shallower first and then scrape. If you are preserving or canning, follow the method carefully because scraping is not always appropriate.
How to Choose the Best Corn Before You Cut It
Mess-free cutting starts at the store or market. Great corn is easier to prep and tastes much better when you are done.
Look for these signs
- Bright green, tight husks
- Fresh-looking silk that is not dry and brittle
- Plump kernels that fill out the ear
- No obvious insect damage or shriveled spots
If you gently peek or feel through the husk, the kernels should seem full and even. Once corn is picked, its sugars begin turning to starch, so the best corn is the freshest corn. Buy what you can use soon, refrigerate it quickly, and do not let it hang out on the counter pretending it has all the time in the world.
Common Mistakes That Create a Bigger Mess
Using a dull knife
A dull blade crushes, slips, and makes you work harder. Sharp knives are safer when used carefully because they cut where you want them to cut.
Working on a flat surface with no catcher
This is how kitchens become corn snow globes. Give the kernels somewhere to fall.
Holding the cob awkwardly
Stability matters. Trim the end if needed and use a setup that keeps the cob steady.
Cutting too deep
If white cob bits end up in your pile, back off slightly on your next pass.
Trying to rush through six ears in one minute
Corn rewards rhythm, not panic. A smooth downward slice works better than aggressive chopping.
What to Do with Fresh Corn Kernels Right Away
Once the kernels are off, your options expand quickly. Fresh corn can go straight into a skillet with butter and a pinch of salt, into a pasta sauce, into chowder, or into a salad with tomatoes, basil, lime, and a little cheese. You can stir it into cornbread batter, fold it into fritters, or toss it into tacos. One ear usually gives about half a cup of kernels, which is useful when you are planning recipes.
Fresh kernels are also excellent in quick sautés because they cook fast and hold their sweetness well. A hot pan, a little fat, and a few minutes are often all you need.
How to Freeze Corn Off the Cob
If you want to preserve peak-season flavor, freezing is a very smart move.
Simple freezing method
- Shuck the corn and remove the silk.
- Blanch the ears in boiling water for about 4 minutes.
- Transfer them to ice water and cool completely.
- Drain well.
- Cut the kernels from the cob.
- Pack into freezer bags or containers, remove excess air, label, and freeze.
Some cooks like to spread the kernels in a single layer on a sheet pan first, freeze them briefly, and then transfer them to bags. That helps keep the kernels loose instead of freezing into one giant corn brick. A corn brick is still technically corn, but it is much less cooperative at dinnertime.
How to Keep Cleanup Easy
Even the best technique leaves a few clues behind, but cleanup should not feel like a side quest.
- Work near the sink or on an easy-to-wipe counter.
- Set a damp towel under bowls or boards for stability.
- Keep a small bowl nearby for silks and trimmed ends.
- Wipe up corn milk promptly so it does not dry sticky.
- Use the pan or bowl method from the start instead of “seeing how it goes” on a flat board.
That last point is the big one. The clean method is easier than the messy method, not harder. Once you try it, you probably will not go back.
Extra Kitchen Experience: What This Usually Looks Like in Real Life
In real home kitchens, removing corn from the cob is rarely a glamorous moment. It usually happens while dinner is half-started, the cutting board is already crowded, and someone is asking whether the chicken is supposed to smell like that. That is why the best corn-cutting method is not the one that looks most dramatic in a video. It is the one that works when you are tired, hungry, and just trying to get the salsa done before people arrive.
A common experience goes like this: a cook stands the corn on a flat cutting board, takes a confident first slice, and immediately watches kernels scatter in three directions. One lands in the salt bowl. Another falls off the counter. A third somehow sticks to your forearm like it is making a point. That is the exact moment most people decide there must be a better way. And there is.
The first time you use a Bundt pan or bowl-in-bowl setup, the difference feels almost suspicious. Suddenly, the kernels fall where they are supposed to fall. The cob stays upright. Your knife moves smoothly. Instead of looking like you lost a fight with a vegetable, you look like someone who has their life together. Or at least someone who has a plan for corn, which is close enough.
Another very real experience is discovering that fresh corn changes character depending on how you cut it. Loose kernels are perfect for quick sautés, chowders, and taco fillings. Larger planks or strips feel a little more special. They make simple salads look restaurant-worthy, even if the rest of the meal is just grilled chicken and whatever dressing was still in the fridge. The cut affects not only the mess level but also the final look and texture of the dish.
Many cooks also learn that timing matters. Fresh corn tastes best when you use it quickly. If you buy a big bag at the market with ambitious dreams and then leave it untouched for days, the flavor fades and the texture gets starchier. The good experience is buying it, chilling it, and using it soon. The excellent experience is cutting off extra kernels the same day and freezing them for later, because future you will be wildly impressed by your past competence.
There is also the oddly satisfying part: the rhythm. Once you get the hang of it, cutting corn off the cob becomes one of those kitchen tasks that feels almost meditative. Slice, rotate, slice, rotate, done. It stops feeling like a mess waiting to happen and starts feeling like a small skill you actually own. That is a nice shift. Cooking gets easier when you have a few dependable moves like this in your back pocket.
And finally, there is the reward. Freshly cut corn tastes brighter than the boxed or canned version, especially in simple recipes where the ingredient has nowhere to hide. Corn salad tastes sweeter. Chowder tastes deeper. Skillet corn tastes like summer decided to show off. That is why this tiny technique matters. It removes one annoying barrier between you and a very good ingredient. Less mess, less frustration, more buttery corn in your bowl. That is a trade almost everyone is happy to make.
Conclusion
If you have ever avoided a recipe because cutting corn off the cob seemed messy, awkward, or mildly ridiculous, you can retire that excuse today. The secret is not fancy equipment. It is using a setup that supports the cob and catches the kernels. A Bundt pan, two bowls, or a baking dish can turn a chaotic task into a fast, tidy one.
Choose fresh ears, chill them quickly, use a sharp knife, cut at the right depth, and decide whether you want loose kernels or pretty planks. From there, the job is easy. And once you do it a couple of times, you will wonder why you ever let corn boss you around in the first place.