Few digital mysteries are as annoying as a Microsoft Word document that weighs more than a family photo album. One minute you are polishing a neat report, resume, proposal, ebook, school assignment, or client contract. The next minute, your Word file size has exploded to 87 MB and refuses to attach to an email. Suddenly, your document is not a document anymore. It is a small moon with bullet points.
The good news? You usually do not need advanced software, a computer science degree, or a dramatic “delete everything and start over” moment. Most oversized Word documents are bloated because of a few usual suspects: giant images, hidden editing data, old file formats, embedded fonts, pasted objects, tracked changes, and metadata that hangs around like an uninvited party guest.
This guide explains how to reduce a Microsoft Word file size using five simple fixes that work for everyday documents. Whether you are trying to upload a file to a website, email a proposal, submit an assignment, or keep your computer from groaning every time you click Save, these practical steps will help you shrink a Word document without wrecking the layout.
Why Is My Microsoft Word File So Large?
Before fixing the problem, it helps to know why the file became huge in the first place. A Word document may look simple on the screen, but behind the scenes it can carry images, formatting instructions, fonts, charts, comments, revision history, embedded spreadsheets, PDFs, screenshots, and old document data. Word is powerful, but it is not always tidy. It will happily carry extra baggage unless you tell it to pack lighter.
The most common reason for a large Word document is images. Modern phone photos can be several megabytes each. If you insert ten full-resolution pictures into a Word document, the file may grow faster than your inbox anxiety. Screenshots, scanned pages, high-resolution logos, and copied images from websites can also inflate the document.
Other causes include saving in the older .doc format, embedding custom fonts, keeping cropped picture areas, pasting large Excel tables as embedded objects, storing tracked changes, and leaving hidden metadata in the file. The good news is that most of these issues are easy to fix once you know where to look.
Fix 1: Save the Document as a Modern .DOCX File
If your file still ends in .doc, start here. The older Word format was useful in its day, but it is not as efficient as the modern .docx format. A DOCX file is built with compression in mind, which means it usually stores document content more efficiently than the old format.
How to Convert .DOC to .DOCX
Open the document in Microsoft Word. Click File, then choose Save As. In the “Save as type” menu, select Word Document (*.docx). Give the file a new name so you keep the original as a backup. Then click Save.
If Word shows Compatibility Mode at the top of the window, you can also go to File > Info and look for the Convert option. Converting the file updates it to the newer format and may reduce the file size, especially if the document was created years ago or has traveled through multiple Word versions.
This fix is simple, but do not underestimate it. Converting to DOCX can also unlock newer Word features, improve editing behavior, and make later compression steps easier. Think of it as moving your document from an overstuffed attic into a modern storage closet with actual shelves.
Fix 2: Compress Images Inside Microsoft Word
Images are the heavyweight champions of Word file bloat. If your document includes product photos, headshots, scanned forms, charts, screenshots, or decorative graphics, compressing pictures is usually the fastest way to reduce Word document size.
How to Compress Pictures in Word
Click any image in your document. Go to the Picture Format tab. Select Compress Pictures. In the dialog box, uncheck Apply only to this picture if you want to compress every image in the document. Then choose an appropriate resolution.
For a document that will mainly be viewed on a screen, 150 ppi is often enough. For email or simple online submission, 96 ppi may work well. For high-quality print, you may want a higher setting, but remember the tradeoff: better image quality usually means a larger file.
Also check the option to delete cropped areas of pictures. This matters because when you crop an image in Word, the hidden cropped-out parts may still remain inside the file. Visually, you see only the neat little headshot. Secretly, Word may still be storing the entire original vacation photo, including the background, the random stranger, and possibly your lunch.
Use the Right Image Quality for the Job
Not every document needs print-shop image quality. A resume with a small logo, a classroom handout, or a client draft does not need giant 4000-pixel images. Choose a resolution that matches the purpose of the file. If the document will be read on laptops and phones, screen-friendly compression is usually enough.
After compressing images, save the file under a new name and compare the size. On Windows, you can right-click the file and choose Properties. On Mac, select the file and press Command + I. The result can be dramatic. A document that was too large to upload may suddenly behave like a normal, civilized file.
Fix 3: Remove Picture Editing Data and Avoid Image Bloat
Compressing images is powerful, but there is another image-related setting that many people miss: picture editing data. Word may store information that lets you restore edited images to their original state. That is convenient when you are designing, but it can add unnecessary size when the document is finished.
How to Discard Image Editing Data
Go to File > Options > Advanced. Scroll to Image Size and Quality. Choose the current document from the dropdown menu if needed. Check Discard editing data. Also make sure Do not compress images in file is not selected. Then save the document.
This tells Word not to keep extra image information that you no longer need. The tradeoff is simple: after discarding editing data, you may not be able to restore images to their original uncropped or unedited versions inside the document. For a final copy, that is usually fine. For a working design file, keep a backup first.
Insert Images the Smart Way
Another smart habit is to resize images before inserting them into Word. If you only need a 2-inch-wide image, do not insert a massive photo straight from a DSLR or phone camera. Resize or export it first using a photo editor, then insert the smaller version.
Use Insert > Pictures rather than dragging, dropping, copying, and pasting from random sources. Copy-paste can sometimes bring along extra formatting or data. Screenshots can also be deceptively large, especially when pasted directly from the clipboard. If you take a screenshot, save it as an optimized image first, then insert it.
Choose image formats wisely. JPEG is usually good for photos. PNG is better for screenshots, logos, and graphics with sharp edges or transparency. Avoid using large TIFF or BMP images unless there is a specific professional reason. Word documents are not storage lockers for enormous image files. They are documents. Let them live light.
Fix 4: Remove Embedded Objects, Fonts, and Unnecessary Media
Embedded objects are another sneaky reason a Word document becomes huge. You might paste an Excel chart, attach a PDF, insert a PowerPoint slide, or embed another file inside the document. It may look like a small icon or a neat chart, but Word may be carrying the entire original file inside your document.
Link Instead of Embed When Possible
If you need to include a large spreadsheet, PDF, or presentation, consider linking to it instead of embedding it. In Word, go to Insert > Object > Create from File. When appropriate, choose Link to file instead of embedding a full copy.
Linking keeps the Word document smaller because the external file is stored separately. This is useful for internal teams, shared drives, or project folders. The downside is that the link can break if the external file is moved, renamed, or not shared with the recipient. For files you send outside your organization, use links only when you are sure the recipient can access the linked material.
Watch Out for Embedded Fonts
Custom fonts can also increase file size. Font embedding helps preserve the look of a document on another computer, but it can add weight. If you do not need special fonts, turn off font embedding.
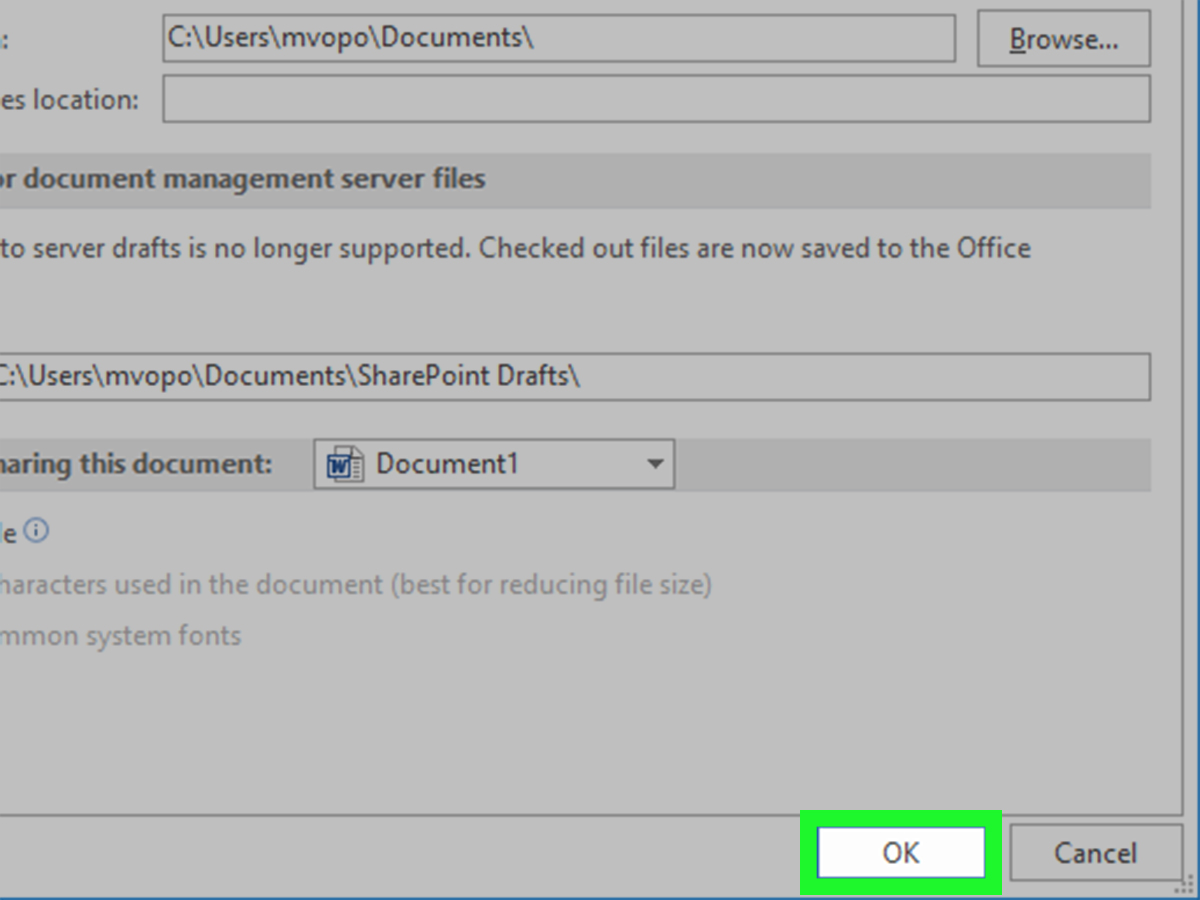
Go to File > Options > Save. Look for Preserve fidelity when sharing this document. If Embed fonts in the file is checked, uncheck it unless the document absolutely requires those fonts. If you must embed fonts, choose options such as embedding only the characters used when available.
For most business documents, reports, resumes, and school papers, standard fonts like Calibri, Aptos, Arial, Times New Roman, Georgia, and similar system fonts are safer and smaller. Your document does not need a rare boutique font named “Corporate Peacock Sans” unless the brand police are already knocking.
Fix 5: Accept Track Changes, Delete Comments, and Inspect the Document
A Word file can contain more than the words you see on the page. It may store comments, tracked changes, hidden text, document properties, author information, custom XML data, previous edits, and other behind-the-scenes material. This hidden content may not always be the biggest file-size problem, but it can add clutter and create privacy concerns.
Accept or Reject Tracked Changes
If Track Changes was used during editing, turning it off is not enough. The revisions remain in the file until you accept or reject them. Go to the Review tab. Use Accept or Reject to resolve changes. You can review them one by one or use Accept All Changes if the document is final.
Next, delete comments. Modern Word comments may need to be deleted from the comment thread menu. Once comments and revisions are gone, save a clean copy. This can make the file smaller and much easier to read, especially for long documents that have gone through multiple review rounds.
Use Document Inspector Before Sharing
Word includes a built-in feature called Document Inspector. To use it, click File > Info > Check for Issues > Inspect Document. Select the types of content you want Word to check, then click Inspect. You can remove comments, revisions, document properties, hidden text, and other hidden data.
Always save a backup before removing hidden data. Some items cannot be restored with Undo once removed. A good workflow is to keep one editable master copy and create one clean, smaller sharing copy. That way, your future self can still make edits while your recipient gets the polished version.
Bonus Tips to Reduce Word File Size Even More
Copy Everything Into a New Blank Document
If a Word file has been edited for months or passed between many people, it can collect formatting weirdness. Create a new blank document, then copy the main content from the old file into the new one. Avoid copying the final paragraph mark if possible, because it can carry document-level formatting baggage. Save the new file as DOCX and compare sizes.
Break Very Large Documents Into Smaller Files
If your document is a 300-page manual with dozens of high-resolution images, consider splitting it into chapters. Smaller files are easier to edit, upload, email, and troubleshoot. You can always combine them later for final PDF export.
Export to PDF When Editing Is Not Needed
If the recipient only needs to read or print the document, a compressed PDF may be better than a Word file. PDF export can flatten some elements and make sharing easier. However, keep the Word version as your editable master file.
Avoid Using Word as a Photo Album
Word is excellent for text-heavy documents with supporting visuals. It is less ideal for storing hundreds of full-size images. If your document is image-heavy, optimize the images first or use a layout tool designed for large visual projects.
Quick Checklist: How to Reduce a Microsoft Word File Size
- Save the file as a modern .docx document.
- Compress all pictures using Picture Format > Compress Pictures.
- Delete cropped areas of images.
- Discard image editing data after saving a backup.
- Resize large images before inserting them into Word.
- Link to large files instead of embedding them when practical.
- Turn off embedded fonts unless they are required.
- Accept or reject tracked changes.
- Delete comments and run Document Inspector.
- Save a clean copy and compare file sizes.
Real-World Experience: What Actually Works Best
In real-world use, the fastest fix is almost always image compression. If someone sends a Word document that is too large to email, the first thing to check is whether it contains photos, screenshots, scans, or logos. A single phone photo can be larger than an entire text-only report. Insert five or ten of those, and suddenly the file behaves like it is trying to qualify for a heavyweight boxing match.
A practical example: imagine a 12-page project proposal with team headshots, product photos, screenshots, and a few scanned signatures. The text itself may be tiny. The formatting may be harmless. But if every image was inserted at full resolution, the file could easily become too large for email. Compressing all pictures to 150 ppi and deleting cropped areas may reduce the file dramatically while keeping it perfectly readable on screen.
The second most useful habit is saving a clean final copy. Many people work in the same document for weeks. They add comments, resolve comments, reopen old comments, track changes, paste charts, crop images, replace images, and send the file to three reviewers who all have opinions. By the end, the file has history. Some of that history is useful during editing, but unnecessary when sharing the final version.
A clean-copy workflow prevents headaches. Keep one file named something like Project-Proposal-Working.docx. Then create another file named Project-Proposal-Final-Clean.docx. In the clean copy, accept tracked changes, delete comments, compress images, remove metadata, and save. This gives you a lightweight sharing version without destroying your editable archive.
Another lesson from everyday document work: do not paste giant screenshots directly into Word all day and expect the file to stay small. Screenshots are convenient, but they add up. If you are writing software documentation or tutorials, save screenshots separately, crop them properly, resize them, and then insert them. Your document will be easier to manage, and your laptop fan will not sound like it is preparing for takeoff.
Embedded Excel files are another common surprise. A small table pasted from Excel may not be just a table. Depending on how it was pasted, it may include a workbook object. That can make the Word file larger and sometimes slower. If the data does not need to remain editable as a spreadsheet, paste it as a simple table or image. If the spreadsheet must remain live, consider linking it or sharing it separately.
Fonts can be tricky too. Designers and brand teams may care deeply about exact typography, and sometimes they are right. But for everyday documents, embedded fonts are often unnecessary. If the file is going to a teacher, client, hiring manager, or colleague, standard fonts are usually the safer choice. They reduce compatibility problems and help keep the file smaller.
The final experience-based tip is to test after every major fix. Do not apply ten changes at once and then wonder which one worked. Save a copy, check the file size, compress images, check again, remove hidden data, check again, and so on. This helps you learn what caused the bloat. In many cases, one step will be the obvious hero. Give that step a tiny imaginary cape.
Reducing a Word file size is not about making the document ugly or stripping it down to plain text. It is about removing waste. Keep the content. Keep the layout. Keep the useful visuals. Delete the invisible leftovers, oversized media, and unnecessary baggage. Your document will open faster, upload easier, email more reliably, and behave less like it has been eating printer ink for breakfast.
Conclusion
Learning how to reduce a Microsoft Word file size is mostly about knowing where Word hides the weight. Start with the biggest wins: convert old files to DOCX, compress images, delete cropped picture areas, and discard unnecessary editing data. Then move on to embedded objects, fonts, tracked changes, comments, and hidden metadata.
The best approach is to keep a working copy and create a clean sharing copy. That gives you the best of both worlds: an editable document for future changes and a smaller, polished file for email, upload, or delivery. With these five simple fixes, you can shrink a bulky Word document without sacrificing clarity, professionalism, or your remaining patience.
Note: The recommendations in this article are based on current Microsoft Word features and widely accepted document-optimization practices. Menu names may vary slightly depending on your Word version, operating system, and Microsoft 365 update channel.