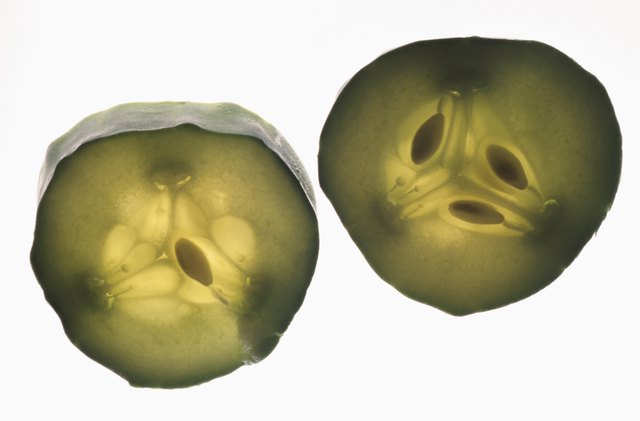
If you’ve ever crunched into a cold, garlicky dill pickle and thought, “I could eat a whole jar of these,” I have good news: you absolutely can and you can make the whole jar yourself. Homemade dill pickles are surprisingly simple, don’t require fancy equipment, and give you full control over flavor, crunch, and spice. It’s exactly the kind of straightforward, practical kitchen project you’d expect to see on eHow: step-by-step, no drama, all flavor.
Whether you want quick refrigerator dill pickles for tonight’s burgers or classic canned dill pickles to stock your pantry, the basics are the same: fresh cucumbers, the right vinegar, enough salt, plenty of dill, and a safe brine. Once you understand the foundation, you can adjust seasonings, heat level, and even pickle shapes like a pro.
What Makes a Dill Pickle a “Dill” Pickle?
All pickles start with cucumbers, but dill pickles earn their name from one star ingredient: dill weed or dill heads. Fresh dill adds the signature herbal, slightly grassy flavor that balances the sharpness of vinegar and the bite of garlic. From there, you’re building layers of taste using:
- Vinegar: Usually white distilled vinegar (5% acidity) for a clean, sharp flavor.
- Water: Dilutes the vinegar to the right level while keeping acidity safe for canning recipes.
- Salt: Typically pickling or canning salt so you don’t get cloudy brine.
- Garlic and spices: Peppercorns, mustard seeds, coriander, bay leaves, and red pepper flakes are all fair game.
The big choice is how you’re preserving them: quick refrigerator dill pickles (ready fast, stored in the fridge) or processed canned dill pickles (shelf-stable, great for big batches). Let’s talk cucumbers and gear first, then we’ll walk through both methods.
Choosing the Right Cucumbers for Dill Pickles
Not all cucumbers are pickle material. For crisp homemade dill pickles, look for:
- Pickling cucumbers: Often called Kirby or “picklers,” 3–4 inches long, with bumpy skins and few seeds.
- Very fresh: Firm, no soft spots, wrinkling, or yellowing. The fresher the cucumber, the crunchier the pickle.
- Uniform size: So they pickle evenly in the jar and process at the same rate.
Wash cucumbers in cold water and trim 1/16 inch off the blossom end (the end opposite the stem). The blossom end contains enzymes that can make pickles soft, so trimming is an easy insurance policy for crunchier dill pickles.
Essential Equipment for Making Dill Pickles
You don’t need a full homesteading setup to learn how to make dill pickles at home. You probably own most of this already:
For Refrigerator Dill Pickles
- Glass jars with tight-fitting lids (pint or quart size)
- Nonreactive saucepan (stainless steel, glass, or enamel)
- Cutting board and sharp knife
- Measuring cups and spoons
For Canned Dill Pickles (Shelf-Stable)
- Canning jars with new lids and bands
- Large pot or water-bath canner with a rack
- Jar lifter or tongs
- Nonreactive saucepan for brine
- Clean kitchen towels
A nonreactive pot is important when heating vinegar brine. Aluminum or uncoated cast iron can react with acid and affect both flavor and color.
Basic Dill Pickle Brine: The Safe, Reliable Formula
Brine is where science meets flavor. For safe vinegar pickles, you need a strong enough acid level to keep harmful bacteria in check. A good, classic canning-style dill pickle brine looks something like this for 6–7 pints:
- 4 cups (1 quart) white distilled vinegar, 5% acidity
- 4 cups water
- 1/2 cup pickling or canning salt
- Optional: 2–4 tablespoons sugar to balance sharpness (won’t make the pickles sweet; just softer on the palate)
For refrigerator dill pickles, many recipes use equal parts water and vinegar with 2–4 teaspoons of salt per quart jar, since you’re relying on refrigeration rather than a sealed canning process. You still get that bold dill pickle flavor, just with less processing and more flexibility.
Important safety note: Don’t dilute the vinegar beyond what your recipe specifies, and use vinegar with known acidity (typically labeled 5%). If you want a less sharp flavor, add a bit of sugar rather than cutting the vinegar.
How to Make Refrigerator Dill Pickles (Fast & Easy)
If you’re new to pickling or just impatient (no judgment), refrigerator dill pickles are the perfect starting point. No hot water bath, no special canning skills, just crisp pickles in a few days.
Ingredients for 2 Quart Jars
- 2 pounds small pickling cucumbers
- 2 cups water
- 2 cups white vinegar (5% acidity)
- 3 tablespoons pickling salt
- 2–3 teaspoons sugar (optional)
- 6–8 cloves garlic, peeled and lightly crushed
- 8–10 fresh dill sprigs or 2–3 dill heads
- 1 teaspoon whole black peppercorns per jar
- 1/2 teaspoon mustard seeds per jar
- Pinch of red pepper flakes or a sliced hot pepper (optional, for heat)
Step-by-Step Instructions
- Prep the cucumbers. Wash, trim the blossom ends, and cut into spears, chips, or leave small cucumbers whole. Smaller pieces pickle faster.
- Pack the jars. Divide garlic, dill, peppercorns, mustard seeds, and optional chili between two clean quart jars. Pack cucumbers snugly but not so tight they get crushed.
- Make the brine. In a saucepan, combine water, vinegar, salt, and sugar. Bring just to a simmer, stirring until the salt (and sugar, if using) dissolves.
- Pour and cool. Carefully pour the hot brine over the cucumbers, leaving about 1/2 inch headspace at the top. Tap jars gently or run a clean utensil around the inside to release trapped air bubbles.
- Cover and chill. Let jars cool to room temperature, then cap tightly and refrigerate.
Refrigerator dill pickles start tasting good in about 24 hours, but they really shine after 3–4 days. They’ll keep in the fridge for several weeks, though crunch and flavor are best in the first month.
How to Make Canned Dill Pickles (Shelf-Stable)
If you’re staring at a mountain of cucumbers from the garden or you just love seeing rows of homemade dill pickles lined up in the pantry hot water bath canning is your friend. The basic steps are similar to the eHow-style approach: pack, brine, process, and cool.
Ingredients for About 6–7 Pints
- 4–5 pounds pickling cucumbers (3–4 inches)
- 4 cups white vinegar (5% acidity)
- 4 cups water
- 1/2 cup pickling or canning salt
- 12–14 garlic cloves, peeled
- 12–14 dill sprigs or 6–7 dill heads
- 2–3 teaspoons mustard seeds
- 1–2 teaspoons black peppercorns
- Optional: bay leaves, red pepper flakes, or small hot peppers
Canning Instructions
- Prepare jars and canner. Wash jars, lids, and bands in hot, soapy water. Rinse well. Keep jars hot in simmering water (not boiling) until ready to fill. Fill a large canner or stockpot with water and bring to a simmer.
- Make the brine. Combine vinegar, water, and salt in a nonreactive pot. Bring to a boil, stirring until the salt dissolves. Keep the brine hot but not furiously boiling.
- Pack the jars. Place a couple of garlic cloves, a dill sprig or head, and any spices into each hot jar. Pack cucumbers tightly but gently, leaving 1/2 inch headspace at the top. Whole cucumbers, spears, or thick slices all work.
- Add hot brine. Ladle hot brine into each jar, still leaving 1/2 inch headspace. Remove air bubbles by sliding a clean, non-metallic utensil along the inside of the jar.
- Wipe and lid. Wipe rims with a clean, damp cloth. Center lids on jars and screw bands on fingertip tight snug but not cranked down.
- Process in a hot water bath. Place jars on the rack in the canner, making sure they are covered by at least 1 inch of water. Bring to a full rolling boil and process pints according to your tested recipe and altitude (commonly around 10–15 minutes for dill pickles; always follow a reliable canning guide).
- Cool and check seals. Turn off the heat, remove the lid, and let jars sit in the hot water a few minutes to settle. Lift jars out and place on a towel, leaving space between them. Don’t tilt or retighten bands. Let cool 12–24 hours. Check lids they should be concave and not flex when pressed in the center.
Label jars with the date, then store in a cool, dark place. For the best dill pickle flavor, try to wait at least 2–3 weeks before opening. (Yes, this is the hard part.)
How to Keep Dill Pickles Crunchy
A floppy pickle is just a cucumber that lost a fight. To keep yours crisp and crunchy:
- Use very fresh cucumbers. They should be firm, not bendy.
- Trim the blossom end. That tiny slice you cut off makes a big difference.
- Keep processing times reasonable. Overprocessing in the water bath will soften pickles.
- Consider cold-pack methods. Packing raw cucumbers and pouring hot brine over them (instead of pre-cooking) helps preserve texture.
- Optional aids: Some canning recipes use “pickle crisp” (calcium chloride) for extra snap. Use only as directed on the package.
Refrigerator dill pickles almost always stay crunchier than canned ones because they skip the longer boiling step. If maximum crunch is your priority, stick to fridge pickles or small, very firm cucumbers.
Dill Pickle Flavor Variations to Try
Once you’ve nailed a basic dill pickle recipe, play with different flavor profiles while keeping the vinegar/water/salt ratio the same for safety.
Extra-Garlic Dill Pickles
Double the garlic and add a pinch of red pepper flakes to each jar. These are bold, punchy, and perfect for serious pickle fans (and vampires’ least favorite snack).
Spicy Dill Pickles
Add a sliced jalapeño or other hot pepper to each jar, plus extra red pepper flakes. Great on sandwiches, burgers, and charcuterie boards.
Dill Pickle Chips for Sandwiches
Cut cucumbers into 1/4-inch rounds instead of spears. They pickle faster and fit perfectly on burgers or fried chicken sandwiches.
Garlic-Dill Spears for Snack Jars
Cut cucumbers into spears and pack them tightly with whole garlic cloves and fresh dill heads. These are ideal for snacking straight from the jar or serving alongside grilled meats.
Food Safety Tips for Homemade Dill Pickles
Pickles feel fun and casual, but food safety still matters, especially with shelf-stable canned dilly pickles:
- Use vinegar with 5% acidity. Check the label. This is the standard strength home-canning recipes are written for.
- Don’t freestyle the acid ratio. Always follow a tested dill pickle recipe for the vinegar, water, and salt proportions.
- Use clean, hot jars. Wash thoroughly and keep jars hot until filling to reduce breakage and contamination.
- Follow recommended processing times. Adjust for altitude as directed in trusted canning guides.
- When in doubt, throw it out. If a jar doesn’t seal, if the brine looks cloudy in a way that seems off, or if you see mold, don’t taste it.
Refrigerator dill pickles are more forgiving but still need basic hygiene: clean jars, fresh ingredients, and consistent refrigeration.
Serving Ideas for Homemade Dill Pickles
Of course, you can just eat dill pickles straight from the jar that’s the default snack. But homemade pickles deserve a few starring roles:
- Stack pickle chips on burgers, grilled chicken sandwiches, or veggie sandwiches.
- Add spears to lunch boxes alongside cheese, crackers, and nuts.
- Chop into tuna salad, egg salad, or potato salad for bright tang and crunch.
- Serve a small bowl with charcuterie boards or cheese plates.
- Save leftover brine for quick pickled onions, salad dressings, or marinating chicken.
Once you see how easy homemade dill pickles are, that store-bought jar is going to start looking a little lonely in the back of the fridge.
Real-Life Lessons: Experience Making Dill Pickles at Home
Recipes tell you what to do; experience tells you what actually happens when you’re juggling a pot of boiling brine, a sink full of cucumbers, and a cat who thinks the jar rings are toys. Here are some “I learned this the hard way” notes that make the process smoother and the results more reliable.
1. Start with a small batch. It’s tempting to go all in and pickle 20 pounds of cucumbers the first time you get excited about homemade dill pickles. But a smaller test batch even just two or three jars lets you dial in your seasoning. Maybe you discover you like more garlic, less salt, or extra spice. Once you know your perfect dill pickle style, scaling up feels a lot less risky.
2. Prep everything before you boil anything. Brine moves fast. Once it’s hot and ready, you don’t want to be washing cucumbers or rummaging through the spice drawer. Lay out jars, lids, spices, garlic, and dill. Slice cucumbers, trim the blossom ends, and decide whether they’re becoming spears, chips, or staying whole. When the brine’s ready, you’re just pouring and capping, not scrambling.
3. Don’t panic if the brine looks cloudy later. A little cloudiness can happen from spices, garlic, or mineral content in your water, especially in refrigerator dill pickles. That doesn’t always mean something went wrong. However, if you see mold, off smells, or bulging lids on canned pickles, that’s your cue to discard the jar. Trust your senses and your common sense.
4. Figure out your family’s “dill level.” Some people want a whisper of dill; others want their pickles to taste like they fell into a dill forest. The nice thing about homemade dill pickles is you can adjust by jar. If you’re not sure, start with a moderate amount of dill and make one “extra-dill” jar with a few extra sprigs. Taste-test after a week and decide what feels “perfect” to you.
5. Label jars with more than just the date. The first time you make multiple batches, every jar looks the same, but they’re not. Add a tiny note to the lid or label: “extra garlic,” “spicy,” or “no sugar.” You’ll thank yourself when you’re trying to find the jar that made everyone say, “These. These are the good ones.”
6. Give them as gifts but keep a jar for yourself. Dill pickles make excellent hostess gifts, holiday extras, and “thank you for helping me move” offerings. People love something homemade, and a jar of crisp pickles feels special because most folks never make them. Just make sure you stash a few jars in the back of your own pantry, or you’ll end up giving them all away and staring sadly at your empty shelves.
7. Accept that your first batch is a starting point, not the final word. Experienced picklers tweak, adjust, and refine every year. One season you might be into mildly salty spears; the next, you’ll crave spicy garlic dill chips. As long as you respect the safe vinegar and salt ratios, you can have fun with spices and shapes. Think of each batch of dill pickles as a snapshot of what you liked that season not a contract you signed for life.
In the end, learning how to make dill pickles at home is less about perfection and more about confidence. Once you’ve done it once or twice, you’ll look at a big pile of cucumbers with excitement instead of dread. Your burgers will be happier, your sandwiches will be snappier, and your fridge will gain a permanent resident: a proudly labeled jar that says, “Homemade Dill Pickles Do Not Eat Entire Jar in One Sitting.” (No promises.)