If your skin has been feeling rough, dull, or generally “meh,” a homemade sugar and coffee scrub might be the tiny spa moment your bathroom has been waiting for. It is simple, affordable, smells like a cozy café, and takes less time to make than convincing yourself you do not need another online shopping cart full of skincare products.
A sugar and coffee scrub is a physical exfoliant, meaning it uses small granules to help loosen and remove dead skin cells from the skin’s surface. Sugar adds gentle polishing power, while coffee grounds bring texture and a rich aroma that makes your shower feel slightly more luxurious than usual. Add a moisturizing carrier oil, and you have a body scrub that can leave skin feeling smoother and softer.
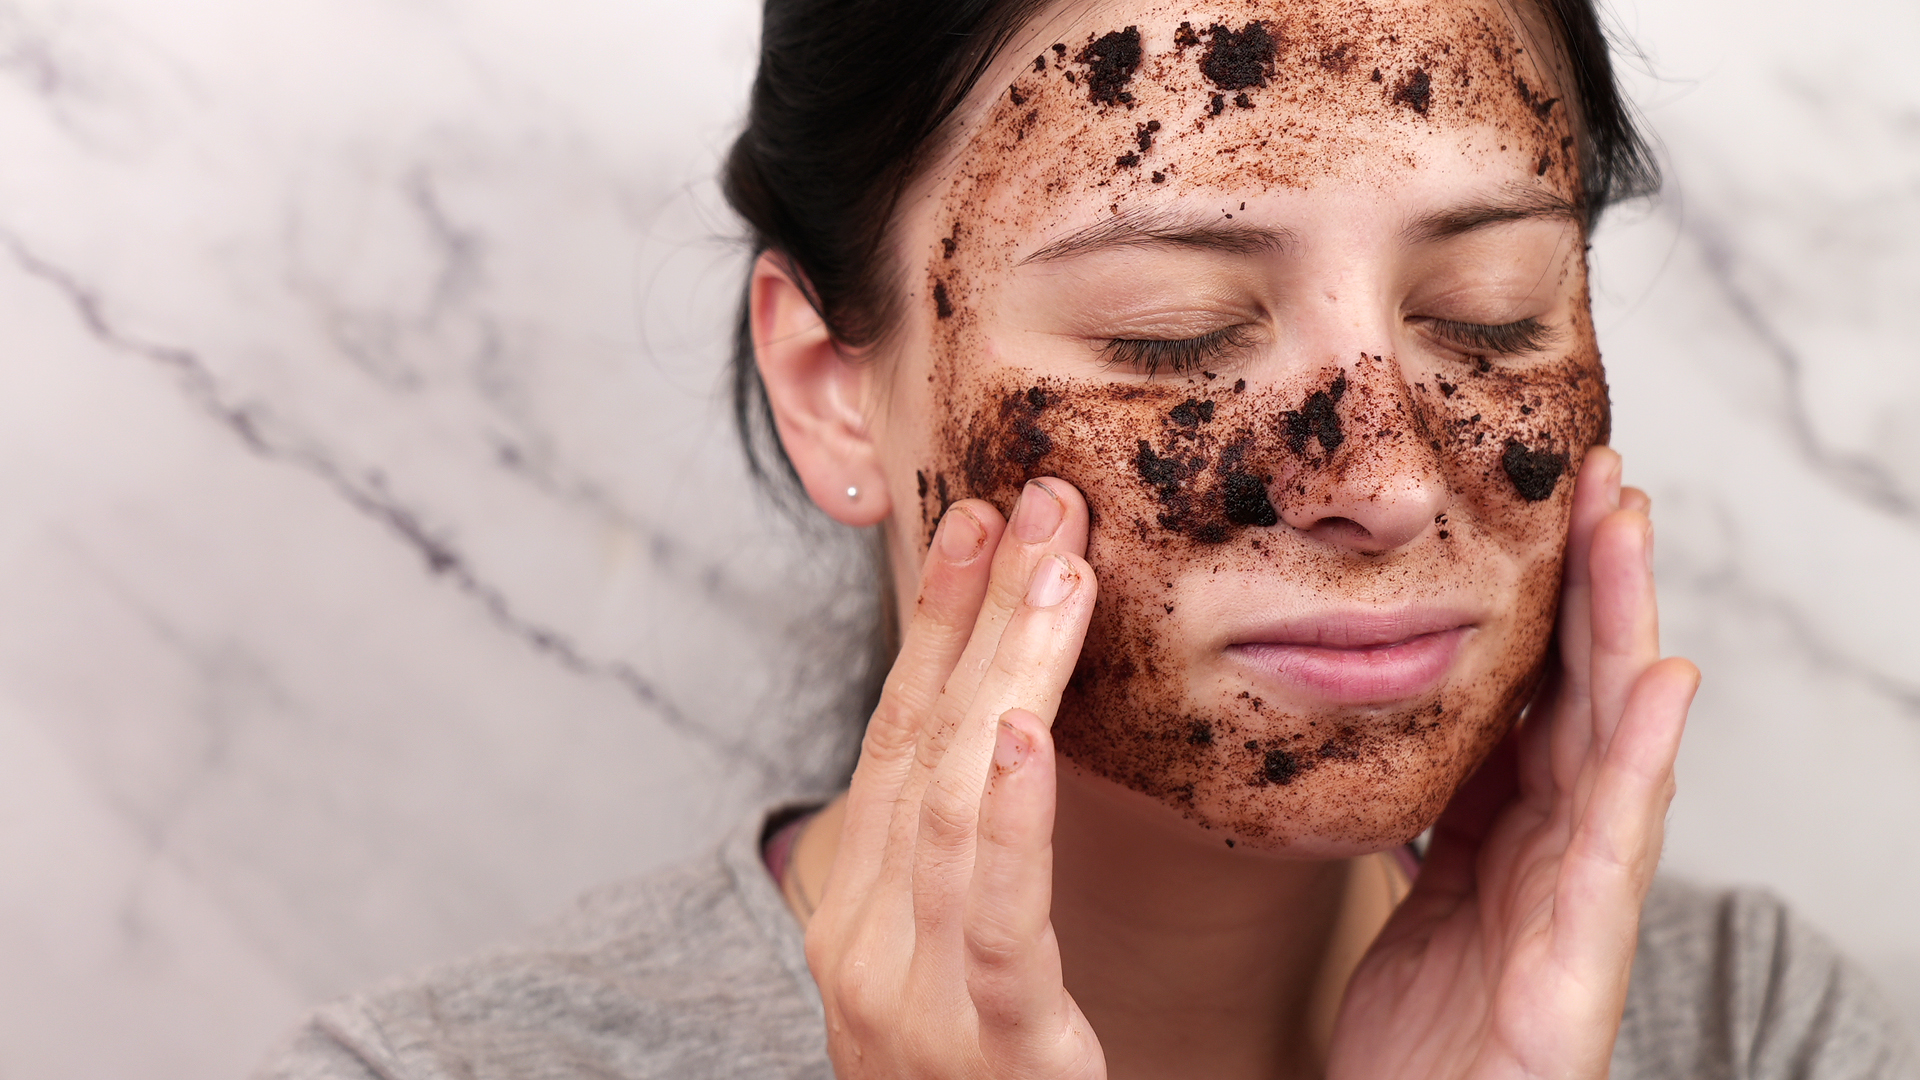
Before we start mixing like kitchen chemists, here is the important grown-up note: physical scrubs should be used gently. Scrubbing harder does not mean better results. It means your skin may file a complaint. Use these recipes mainly for the body, especially areas like arms, legs, elbows, knees, and feet. Avoid using coarse sugar or coffee scrubs on delicate facial skin, broken skin, sunburn, active rashes, or irritated areas.
What Is a Sugar and Coffee Scrub?
A sugar and coffee scrub is a DIY exfoliating body scrub made by combining granulated sugar, ground coffee, and a softening ingredient such as coconut oil, olive oil, almond oil, jojoba oil, or honey. The mixture is massaged over damp skin in light circular motions, then rinsed away with lukewarm water.
The goal is not to sand your skin like an old wooden table. The goal is to gently buff away surface buildup so skin feels smoother and looks fresher. When used correctly, a homemade coffee sugar scrub can be a pleasant addition to a weekly body care routine.
Benefits of a Homemade Coffee Sugar Scrub
1. It Helps Smooth Rough Skin
Sugar crystals and coffee grounds create a gritty texture that can help polish areas where dead skin tends to build up. Think elbows, knees, heels, and legs before shaving. These spots often appreciate a little extra attention.
2. It Can Make Moisturizer Work Better
When dead skin cells sit on the surface, moisturizers may not spread or absorb as evenly. Gentle exfoliation can help your lotion, body butter, or oil glide on more smoothly afterward. Translation: your moisturizer gets a better chance to do its job instead of just sitting there looking decorative.
3. It Is Affordable and Easy to Customize
Store-bought body scrubs can be lovely, but some cost enough to make your wallet whisper, “Was this necessary?” A DIY sugar and coffee scrub uses common pantry ingredients and can be adjusted for your preferred texture, scent, and skin feel.
4. It Smells Like a Coffee Shop
Let us not pretend the aroma is not part of the appeal. Coffee grounds add a warm, energizing scent that makes the scrub feel indulgent without needing synthetic fragrance. If your skin is sensitive, skipping added fragrance or essential oils is usually the safer choice.
Before You Begin: Safety Tips for DIY Scrubs
Homemade skincare can be fun, but your skin is not a test kitchen with Wi-Fi. Use clean utensils, make small batches, and avoid ingredients that commonly irritate your skin. If you have eczema, psoriasis, acne-prone skin, allergies, or very sensitive skin, check with a dermatologist before using physical scrubs.
Do a Patch Test First
Apply a small amount of the scrub to a small area of your arm and wait 24 hours. If you notice itching, burning, redness, bumps, or irritation, skip it. Coffee, oils, honey, and essential oils can all trigger reactions in some people.
Use Gentle Pressure
Massage the scrub lightly for about 20 to 30 seconds per area. Do not press hard. Your skin should feel polished, not punished.
Avoid Sensitive Areas
Keep sugar and coffee scrubs away from the eyes, lips, freshly shaved skin, open cuts, sunburn, active irritation, and delicate facial skin. For the face, a dermatologist-recommended gentle exfoliant is usually a better option than rough homemade granules.
Moisturize Afterward
Exfoliation can leave skin feeling dry if you do not follow up. After rinsing, pat your skin dry and apply a moisturizer while the skin is still slightly damp.
Be Careful in the Shower
Oil-based scrubs can make the tub slippery. Rinse the floor well, step carefully, and do not turn your shower into a surprise skating rink.
Recipe 1: Classic Sugar and Coffee Body Scrub
This is the easiest version and a great starting point for beginners. It has enough grit to polish rough areas but enough oil to keep the mixture spreadable.
Ingredients
- 1/2 cup finely ground coffee
- 1/2 cup brown sugar or white sugar
- 1/4 cup coconut oil, olive oil, almond oil, or jojoba oil
- 1 teaspoon honey, optional
- 1/2 teaspoon vanilla extract, optional for scent
Instructions
- Add the ground coffee and sugar to a clean bowl.
- Pour in the carrier oil slowly and stir until the mixture looks like damp sand.
- Add honey if you want a slightly thicker, more conditioning texture.
- Mix well, then transfer the scrub to a clean, dry jar with a lid.
- Use within one to two weeks, and keep water out of the jar.
How to Use It
In the shower, wet your skin with warm water. Scoop a small amount of scrub with clean, dry fingers or a spoon. Massage gently over arms, legs, elbows, knees, or feet using small circular motions. Rinse thoroughly with lukewarm water, pat dry, and apply moisturizer.
Best For
This classic coffee sugar scrub is best for normal, dry, or rough body skin. It is especially useful before applying body lotion or before shaving your legs. Use it once a week to start. If your skin tolerates it well, you may use it up to twice weekly, but daily scrubbing is usually too much for most skin types.
Recipe 2: Gentle Oat, Sugar, and Coffee Scrub
This version is slightly softer because it includes finely ground oats. Oats help create a creamier texture and reduce the harshness of the scrub. It is still a physical exfoliant, but it feels less aggressive than a coffee-and-sugar-only blend.
Ingredients
- 1/4 cup finely ground coffee
- 1/4 cup brown sugar
- 1/4 cup finely ground oats
- 3 tablespoons jojoba oil, almond oil, or olive oil
- 1 tablespoon plain yogurt or honey, optional
Instructions
- Blend oats into a fine powder using a food processor or blender.
- Combine the oat powder, coffee, and sugar in a clean bowl.
- Add oil one tablespoon at a time until the scrub becomes soft and spreadable.
- Stir in honey or plain yogurt if using immediately.
- If adding yogurt, do not store the scrub. Make it fresh and use it right away.
How to Use It
Apply to damp body skin with very light pressure. Massage briefly, then rinse well. Because oats can cling to the skin, take an extra moment to rinse thoroughly. Follow with a fragrance-free body lotion or cream.
Best For
This gentle coffee scrub recipe is ideal for people who want a softer texture. It works well on arms, legs, and dry patches on the body. However, if your skin is highly reactive, inflamed, or eczema-prone, skip DIY scrubs and ask a dermatologist what type of exfoliation is safest for you.
Choosing the Right Ingredients
Coffee Grounds
Use finely ground coffee, not large coarse grounds. Fine grounds feel smoother and are less likely to scratch the skin. Fresh coffee grounds smell strongest, but used coffee grounds can work if they are fully dried first. Damp used grounds may spoil faster, so only use them in a same-day scrub.
Sugar
Brown sugar is softer than white sugar and often feels gentler in body scrubs. White sugar has a sharper texture and may be better reserved for rougher spots like feet. Avoid large raw sugar crystals unless you are using the scrub only on thick skin, such as heels.
Carrier Oil
Coconut oil gives a rich feel but may not be ideal for acne-prone areas. Olive oil is easy to find and deeply moisturizing, though it can feel heavier. Jojoba oil is lightweight and closer to the skin’s natural oils. Sweet almond oil is smooth and pleasant, but avoid it if you have a nut allergy.
Honey
Honey makes the scrub sticky in a good way. It helps bind the ingredients and gives the mixture a softer feel. Use a small amount, or the scrub may become too tacky to spread comfortably.
How Often Should You Use a Sugar and Coffee Scrub?
Start with once a week. That is enough for many people. If your skin feels smooth, comfortable, and not irritated, you can consider using it twice weekly on rough body areas. Avoid using a physical scrub every day, especially if your skin is dry, sensitive, or easily irritated.
Signs you are over-exfoliating include stinging, redness, tightness, flaking, burning, shiny-looking skin, or new bumps. If that happens, stop using the scrub and switch to gentle cleansing and moisturizing until your skin calms down.
Where Should You Use a Coffee Sugar Scrub?
A sugar and coffee body scrub works best on thicker body skin. Good areas include legs, arms, elbows, knees, feet, and dry patches on the body. Use extra caution on the chest, neck, bikini line, and underarms because these areas may be more sensitive.
Avoid using this scrub on your face. Facial skin is thinner and more delicate, and sugar crystals can be too abrasive. If your face needs exfoliation, consider a gentle product designed specifically for facial use.
Storage Tips for Homemade Scrubs
Because DIY scrubs do not contain preservatives, they do not last as long as commercial products. Make small batches and store them in a clean, dry, airtight jar. Keep water out of the container because moisture can encourage bacteria or mold.
Oil, sugar, and dry coffee scrubs can usually be stored for one to two weeks if handled carefully. If your recipe includes yogurt, milk, fresh fruit, or other perishable ingredients, use it immediately and discard leftovers. If the scrub smells odd, changes color, grows mold, or develops a strange texture, toss it. Your skin deserves better than mystery paste.
Common Mistakes to Avoid
Scrubbing Too Hard
This is the number one mistake. Let the texture do the work. Your hand should guide the scrub, not attack your skin like it owes you money.
Using Coarse Grounds
Coarse coffee grounds can feel too rough. Finely ground coffee is more comfortable and easier to rinse away.
Skipping Moisturizer
After exfoliating, moisturizer is not optional. It helps support the skin barrier and keeps the freshly polished feeling from turning into dryness.
Adding Too Many Essential Oils
Essential oils may smell wonderful, but they can irritate skin. If you use them, keep the amount extremely low. For sensitive skin, fragrance-free is usually the smarter route.
Using It on Irritated Skin
Never apply a scrub to sunburned skin, open cuts, rashes, active eczema, or inflamed bumps. When skin is already upset, exfoliation is like sending a marching band into a library.
Experience-Based Tips for Better Results
The best time to use a sugar and coffee scrub is near the end of a warm shower. By then, the skin is damp and softened, which helps the scrub spread more evenly. Avoid hot water because it can strip natural oils and make skin feel drier afterward. Warm water is the sweet spot.
One helpful trick is to apply body wash first, rinse, and then use the scrub. This way, your skin is clean before exfoliation, and the scrub is less likely to drag. After rinsing off the scrub, apply a body cream while your skin is still slightly damp. This locks in hydration and gives that smooth, “I just left a spa but actually I am still in my bathroom” feeling.
If you plan to shave, exfoliate first and shave afterward with a proper shaving cream or gel. This may help remove flaky buildup and create a smoother surface. However, do not scrub aggressively before shaving, and do not use the scrub immediately after shaving because freshly shaved skin can be more sensitive.
For rough heels, use the scrub after soaking your feet for a few minutes. Massage gently, rinse, then apply a thick foot cream. Put on cotton socks afterward if you want to feel like a person who has their life together. For elbows and knees, use small circles and focus on moisturizing afterward because these areas can get dry quickly.
Another real-life tip: use less oil than you think at first. You can always add more. Too much oil makes the scrub runny and may leave your shower floor slippery. The ideal texture should look like wet sand, not soup. If the mixture becomes too oily, add more sugar or coffee until it thickens.
If the scent of coffee feels too strong, mix the coffee with oats or use less coffee and more brown sugar. If you want a sweeter aroma, a tiny splash of vanilla extract can help. Avoid heavy perfume oils, especially if your skin tends to react.
Finally, be consistent but not obsessive. A scrub is a supporting actor, not the entire skincare movie. The real glow comes from gentle cleansing, regular moisturizing, sun protection, enough sleep, and not treating your skin like a kitchen countertop. Use your DIY coffee sugar scrub as a weekly treat, and your skin is more likely to stay calm, smooth, and happy.
Conclusion
Learning how to make a sugar and coffee scrub is simple, satisfying, and budget-friendly. With just a few pantry ingredients, you can create an exfoliating body scrub that helps smooth rough skin and makes your shower routine feel more indulgent. The key is to keep the texture fine, use gentle pressure, avoid sensitive or irritated areas, and moisturize afterward.
The classic sugar and coffee body scrub is perfect for a quick weekly polish, while the oat-based version offers a softer option for those who prefer a gentler feel. Use these recipes wisely, store them safely, and remember: skincare should never feel like a wrestling match. Gentle wins.
Personal Experience Notes: Making and Using a Sugar and Coffee Scrub
The first time you make a sugar and coffee scrub, the process feels almost too easy. You look at the bowl, look at the ingredients, and think, “That’s it?” Yes, that is it. The beauty of this scrub is that it does not require fancy tools, complicated formulas, or a chemistry degree you definitely did not sign up for. A spoon, a bowl, and a clean jar are enough.
In practice, the most important part is texture. A good scrub should be thick enough to scoop but soft enough to spread. If it falls apart in your hand, it needs more oil. If it drips between your fingers, it needs more sugar or coffee. The “wet sand” texture is the goal. Once you see it, you will know.
When using the scrub, the biggest lesson is restraint. It is tempting to rub harder, especially on rough knees or heels, but gentle circles work better. Heavy pressure can leave skin feeling irritated instead of smooth. A light touch gives a cleaner, more comfortable result.
The classic recipe feels richer because of the oil. It leaves skin soft, especially on legs and arms. The oat version feels creamier and less scratchy, which makes it a nice choice for people who dislike intense scrubs. Both rinse well, but the oat recipe may take a little more water to wash away completely.
One small inconvenience is cleanup. Coffee grounds can cling to the shower floor, so it helps to rinse the tub right away. If your drain is sensitive, use the scrub sparingly and avoid dumping large amounts down the drain. A little scrub goes a long way.
The best result usually comes when the scrub is followed by a moisturizer. Without lotion, skin may feel smooth at first but dry later. With moisturizer, the softness lasts longer. This is especially noticeable during colder months, when skin tends to feel drier and more textured.
Overall, a homemade sugar and coffee scrub is not a miracle treatment, and it will not transform your skin overnight. But as a simple body care ritual, it is genuinely enjoyable. It smells good, feels satisfying, and gives rough areas a softer finish. Sometimes skincare does not need to be dramatic. Sometimes it just needs to be a small jar of coffee, sugar, and oil waiting politely in your bathroom.