Every Minecraft player has that moment. You build a cozy starter base, organize your chests, place a furnace, admire your bed, and then a zombie strolls in like it pays rent. That is when a normal door starts to feel less like security and more like a polite suggestion. If you want a safer entrance, learning how to make a door that locks in Minecraft is one of the most useful beginner redstone skills you can pick up.
The good news? You do not need command blocks, mods, or a PhD in redstone spaghetti. A lockable Minecraft door can be built with an iron door, redstone dust, a button, a lever, and a simple circuit that controls whether the entrance can open. The key idea is simple: wooden doors can be opened by hand, while iron doors require redstone power. That makes iron doors the best choice for a basic locked door in survival mode.
This guide walks you through a practical 12-step build for a simple lockable iron door. It is designed for players who want a secure base entrance that can be opened from the inside, controlled from a hidden lever, and improved later with pressure plates, hidden buttons, or even a combination lock. Whether you play Java Edition or Bedrock Edition, the core logic is the same: control the redstone signal, and you control the door.
What Is a Locking Door in Minecraft?
A locking door in Minecraft is not exactly the same as a real-life keyed door. In vanilla Minecraft, there is no standard “lock this door with a key” feature for ordinary survival doors. Instead, players create a locking effect by using redstone. When the circuit allows power to reach the iron door, it opens. When the circuit blocks power, the door stays closed.
Think of the iron door as a stubborn bouncer. It does not care how nicely you right-click. It only opens when redstone says, “They’re on the list.” That is why iron doors are ideal for bases, storage rooms, villager trading halls, mob farms, and secret rooms.
Materials You Need
Before you start digging holes in your floor like a panicked mole, collect these materials:
- 1 iron door
- 1 button
- 1 lever
- Redstone dust, about 8 to 15 pieces
- Building blocks that match your wall or floor
- Optional: 1 pressure plate for the inside exit
- Optional: 1 redstone repeater if your wiring is longer than expected
- Optional: trapdoors, carpets, or blocks to hide the mechanism
To craft an iron door, place six iron ingots in a two-column by three-row pattern in a crafting table. Buttons are easy to make from stone, wood planks, or other valid materials depending on your version. A lever requires a stick and cobblestone. Redstone dust comes from mining redstone ore, usually found deeper underground.
How to Make a Door That Locks in Minecraft: 12 Steps
Step 1: Choose the Door Location
Pick the entrance you want to secure. A one-block-wide doorway is easiest for beginners, but this design can be adapted for double doors later. For your first attempt, build it in a flat wall with at least a little space behind the wall or under the floor for wiring.
If you are building in survival mode, choose a safe area and light it up. Nothing ruins a redstone lesson faster than a creeper arriving with strong opinions about your architecture.
Step 2: Place the Iron Door
Place the iron door in the doorway. Stand where you want the outside of the entrance to be, then place the door so it lines up neatly with the wall. Iron doors cannot be opened by hand, which is exactly why they work well for a lockable Minecraft door.
Test it by right-clicking or tapping the door. Nothing should happen. Congratulations, you have successfully installed a very expensive wall. Now it is time to make it useful.
Step 3: Add an Outside Button
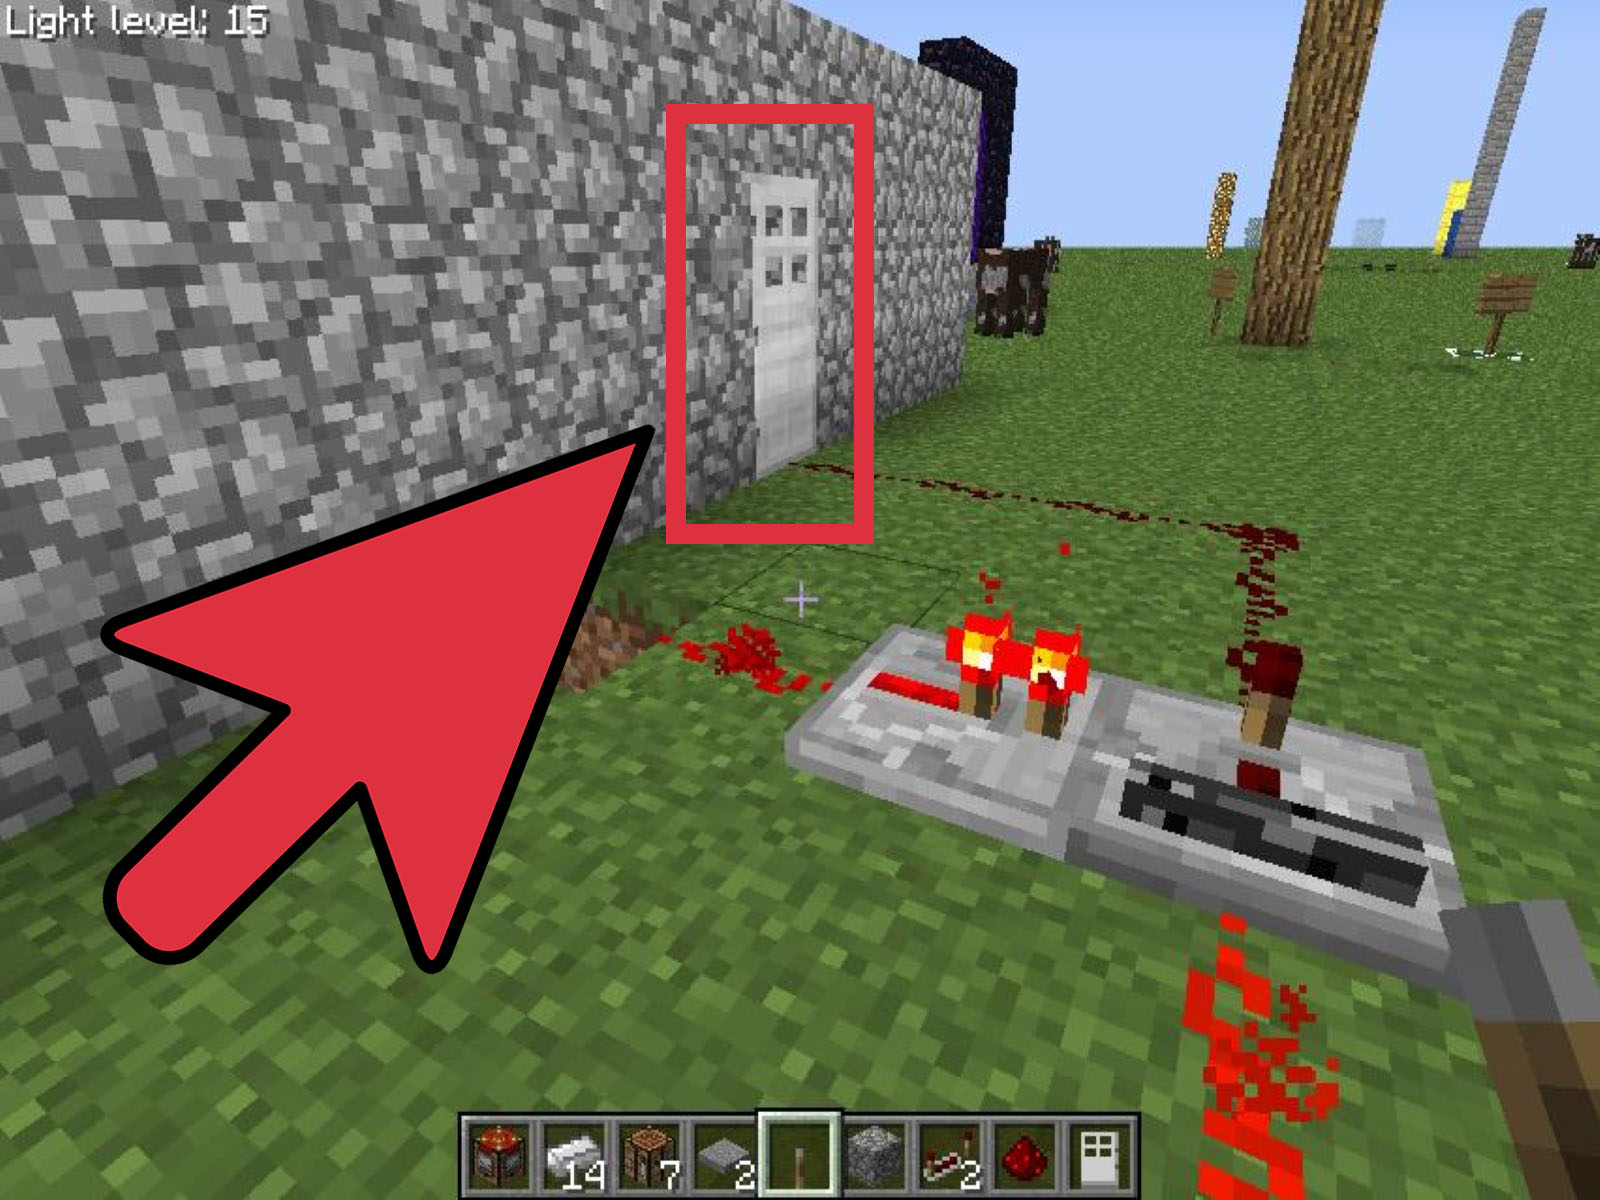
Place a button on the outside wall next to the iron door. A button sends a short redstone pulse when pressed. This is better than an outside lever because a lever can accidentally leave the door open. A button opens the door briefly, giving you enough time to walk through before it closes again.
For extra security, do not place the button directly beside the door if you are playing on a multiplayer server. Hide it behind a corner, under a stair, or in a decorative block pattern. A button in plain sight is not a lock; it is a welcome mat with extra steps.
Step 4: Dig a Small Redstone Channel
Dig a one-block-deep channel from the button area toward the door. If the button is directly beside the door, you may not need much wiring. If it is hidden, you will need a short trail of redstone dust running from the button’s block to a block adjacent to the iron door.
Redstone dust carries power, but only for a limited distance before the signal fades. For a small base entrance, this usually is not a problem. If your hidden button is far away, use a redstone repeater to refresh the signal.
Step 5: Connect Redstone Dust to the Door
Place redstone dust in the channel so the button can power the iron door. The door can be powered by redstone dust, an adjacent powered block, a repeater facing into it, or another active redstone component. In simple terms, get a redstone signal to the door, and the door opens.
Press the button to test the circuit. If the iron door opens, your basic wiring works. If it does not, check whether the redstone dust actually reaches a block next to the door. Redstone is picky. It is basically Minecraft’s version of a cat: powerful, mysterious, and occasionally refusing to do the obvious thing.
Step 6: Add an Inside Exit Button or Pressure Plate
Now add a way to exit from inside your base. The safest beginner method is a button on the inside wall. Press it, walk out, and the door closes behind you. This prevents mobs from triggering the entrance from outside.
You can also use a pressure plate on the inside. This feels smoother because the door opens when you step on it. However, pressure plates can be activated by players, mobs, and sometimes items depending on the type. For security, use pressure plates only on the inside of your base, not outside.
Step 7: Install a Hidden Lock Lever
This is the part that turns a simple iron door into a door that locks. Place a lever somewhere inside your base, preferably hidden behind a block, under a counter, in a storage room, or behind a painting-style decoration. This lever will control whether the outside button can open the door.
The easiest beginner approach is to use the lever as a cutoff switch. When the lever is in the “unlocked” position, the button’s redstone signal can reach the door. When the lever is in the “locked” position, the redstone path is interrupted or overridden so the outside button no longer works.
Step 8: Create the Lock Cutoff
To create a basic cutoff, route the outside button’s redstone line through a small space controlled by the lever. One simple method is to place a block in the signal path and power that block with the lever so it changes the circuit behavior. Another beginner-friendly method is to use the lever to power the iron door from the inside when you want it held open or to disable the line connected to the outside button by removing access to the signal path.
For a cleaner design, use a redstone torch inverter. A redstone torch can flip a signal: when the block it is attached to receives power, the torch turns off; when the block loses power, the torch turns on. This lets you create a lock switch that allows or blocks the button signal. It sounds fancy, but it is just Minecraft saying “opposite day” with glowing dust.
Step 9: Test Locked and Unlocked Modes
Test the door in both positions. First, set the lever to unlocked. Go outside and press the button. The iron door should open. Then go inside, flip the lever to locked, go outside again, and press the button. The door should stay closed.
If the button still opens the door while locked, your cutoff is not actually cutting off the power. Follow the redstone trail and look for accidental connections. Redstone dust can connect around corners, up blocks, and into nearby components in ways that surprise new builders.
Step 10: Hide the Wiring
Once the lock works, cover the redstone channel with floor blocks, wall blocks, carpet, stairs, slabs, or other decorations. If other players can see the redstone line, they may figure out how the door works. A visible circuit is like writing your password on a sign and then wondering why your diamonds disappeared.
Try to make the entrance look natural. Stone bricks, deepslate, wood beams, bookshelves, barrels, and trapdoors all make great camouflage. If your base has a theme, blend the lock into that theme instead of making it look like a suspicious redstone rash on the wall.
Step 11: Improve Security with Smart Placement
A lockable Minecraft door is only as secure as the area around it. If someone can dig around the door, break the wall, or climb through the roof, your lock is mostly decoration. For survival worlds, this is usually fine because the main goal is mob protection. For multiplayer servers, build stronger walls and consider using protected claims if the server has them.
You can make the entrance more secure by placing the outside button farther away, hiding it behind a block, or making the door part of a secret hallway. You can also build a second iron door behind the first one, creating a tiny airlock. That way, even if one door opens, the next one still protects the base.
Step 12: Upgrade to a Combination Lock Later
Once you understand the simple lock, you can upgrade it. A combination lock uses multiple levers, buttons, or item frames to control a redstone signal. Only the correct pattern opens the door. This is more complicated, but it is a fun project when you are ready to move beyond beginner redstone.
For example, you might create a wall with five levers and make only lever two and lever four part of the correct code. If the wrong levers are active, the signal does not reach the iron door. Advanced versions use redstone torches, repeaters, comparators, item frames, lecterns, or hidden inputs.
Best Door Lock Designs for Beginners
Simple Iron Door with Button
This is the easiest design. Place an iron door and connect it to a button. It is not truly locked if the button is visible, but it keeps villagers and most mobs from casually opening the door by hand. It is great for starter homes, mines, and small farms.
Iron Door with Hidden Button
This version hides the opener. Place the button behind a corner, under a stair, or on the side of a nearby block. It is still simple, but much better for secret rooms and multiplayer bases.
Iron Door with Interior Lock Lever
This is the design explained in the 12 steps above. The door opens with a button when unlocked, but an inside lever can disable the outside entrance. It is practical, cheap, and easy to repair.
Pressure Plate Exit Door
Put a pressure plate only on the inside. This lets you leave quickly while keeping the outside secure. Avoid outside pressure plates unless you do not mind mobs, pets, villagers, or wandering chaos triggering the door.
Combination Lock Door
This is better for players who enjoy redstone puzzles. A combination lock can protect valuable storage rooms, but it takes more space and testing. It also looks extremely cool, which is half the point of redstone engineering.
Common Mistakes to Avoid
Using a Wooden Door for Security
Wooden doors are useful, cheap, and attractive, but they are not ideal for a locking system because players can open them by hand. Some mobs can interact with wooden doors, and zombies can break them in Hard difficulty. Use iron when security matters.
Putting a Pressure Plate Outside
An outside pressure plate is convenient, but it can also invite trouble. A mob stepping on the plate may open your door. If your goal is a secure base, use an outside button or hidden input instead.
Leaving the Lock Lever Visible
If the lock lever is easy to find, the lock is easy to beat. Hide it inside the base, behind decoration, or in a private room. In single-player, this is mostly for style. In multiplayer, it matters much more.
Forgetting to Test Both Sides
Always test the door from outside and inside. Make sure you can enter when unlocked, cannot enter when locked, and can always exit safely. A secure door that traps you inside is not security. It is a very small prison with crafting tables.
Java vs. Bedrock: Does This Work in Both?
Yes, the general idea works in both Minecraft Java Edition and Bedrock Edition. Iron doors need redstone power, buttons create short pulses, levers provide toggle power, and pressure plates react when stepped on. However, some detailed redstone behavior can vary slightly between editions, especially with more advanced circuits.
If you are building a simple lockable iron door, you should be fine in either edition. If you move into compact combination locks, piston doors, or hidden redstone builds, test the design in your version before decorating around it.
Practical Example: A Secure Starter Base Door
Imagine you have a small mountain base. The entrance is one block wide and two blocks tall. You place an iron door in the entrance, add a stone button outside, and place an inside button for leaving. Under the floor, you run redstone dust from the outside button to the door. Then you add a hidden lever inside a nearby storage alcove. When the lever is off, the outside button works. When the lever is on, the circuit is blocked and the door refuses to open from outside.
This gives you a clean, survival-friendly security system. You can return from mining, press the hidden outside button, enter the base, and flip the lock lever before sorting your loot. It is simple enough to build early in the game, but useful enough to keep even after your starter house becomes a castle, bunker, wizard tower, or suspiciously square mega-mansion.
Extra Experiences and Player Tips for Making a Locking Door in Minecraft
The first time you build a lockable Minecraft door, expect it to feel a little awkward. Redstone is not difficult once you understand the logic, but the game does not always explain why something works. You place dust, press a button, stare at the door, and nothing happens. Then you move one block, and suddenly everything works like you are a genius. That is normal. Redstone rewards testing more than guessing.
One helpful habit is to build your locking door in creative mode first. Lay out the iron door, button, lever, and redstone dust on a flat test world. Do not worry about making it pretty. Use bright blocks for the circuit path so you can see what connects to what. Once the door works, rebuild it in your survival world using blocks that match your base. This saves iron, redstone, and emotional damage.
Another experience-based tip is to separate convenience from security. A pressure plate on both sides of an iron door feels great until a mob steps on it. If you are building a cozy single-player house, that may not matter much. If you are protecting a villager trading hall, storage room, or multiplayer base, keep the outside trigger manual and hidden. Buttons are usually safer than pressure plates because they require intentional activation.
For hidden buttons, try placing them in places that look decorative. A button on a stone brick wall can look like a detail instead of a control. A wooden button on a log beam can disappear into a rustic build. You can also hide the entrance itself by placing it behind a waterfall, in a mine tunnel, behind bookshelves, or inside a fake storage area. The best Minecraft security is often not a stronger lock; it is making other players walk past the entrance without noticing it.
If you play on a server, remember that redstone locks are not unbreakable. A player with permission to break blocks can often dig around the door. That does not make the design useless. It just means the lock should be part of a bigger plan. Use server claims, hidden rooms, decoy chests, strong walls, and smart base placement. Redstone locks are excellent for controlled access, roleplay builds, minigames, puzzle maps, and mob protection, but they are not magic force fields.
Finally, do not be afraid to upgrade slowly. Start with one iron door and two buttons. Add a hidden lever. Then try a pressure plate exit. Later, experiment with a two-door airlock, a piston door, or a lever combination lock. Each small improvement teaches you another redstone concept. Before long, you will go from “Why is this dust glowing?” to “I built a secret vault behind a fireplace that opens only when I flip the third lever and press a button hidden under a trapdoor.” That is the beauty of Minecraft: today you lock a door; tomorrow you accidentally invent a suspiciously complicated underground security system.
Conclusion
Learning how to make a door that locks in Minecraft is one of the best beginner redstone projects because it is useful immediately. With an iron door, a button, a lever, and a little redstone dust, you can protect your base, control access to storage rooms, and stop mobs from treating your house like a public hallway.
The most important lesson is simple: iron doors respond to redstone, and redstone can be controlled. Once you understand that, a locked door becomes more than a door. It becomes the first step toward secret bases, puzzle entrances, hidden vaults, and redstone builds that make your friends say, “Wait, how did you do that?”