Linking a bank account to PayPal can make online payments, withdrawals, and money transfers considerably easier. Instead of entering payment details whenever you shop, you can choose your connected bank from your PayPal Wallet and get on with your day. Your wallet may not become any lighter, but at least the checkout process will.
PayPal offers two main ways to connect a U.S. bank account: instant verification using your online banking credentials or manual verification using two small deposits. The instant method is quicker, while the manual method is useful if your bank does not support an instant connection or you prefer not to provide online banking credentials.
This guide explains how to link your bank account to your PayPal account on the website and mobile app, confirm it correctly, solve common errors, and protect your financial information.
Why Link a Bank Account to PayPal?
A linked bank account can serve as a payment method and a destination for eligible PayPal withdrawals. It may also help you verify that you own the financial information associated with your PayPal profile.
Once your account is linked and confirmed, you may be able to:
- Pay for eligible purchases directly from your bank account.
- Transfer money from PayPal to your bank.
- Add money to your PayPal balance when the feature is available.
- Choose your bank as a payment method during checkout.
- Reduce the need to enter banking information repeatedly.
You generally do not have to add money to your PayPal balance before making a purchase. If an eligible bank account appears as a payment option, PayPal can request the money from that account when you check out. In some situations, PayPal may require a linked debit or credit card as a backup payment method.
What You Need Before Getting Started
Gathering the correct information first can turn the linking process into a two-minute job instead of an afternoon spent squinting at error messages.
For instant bank confirmation
You will normally need:
- An active PayPal account.
- Access to your bank’s online or mobile banking service.
- Your bank username and password.
- Access to any verification code required by your bank.
For manual bank confirmation
You will typically need:
- Your bank’s nine-digit ACH routing number.
- Your checking or savings account number.
- The account type.
- Access to your bank statement or transaction history.
Your routing and account numbers may appear in your bank’s app, online account details, monthly statement, or paper checks. On a traditional check, the routing number is generally the first nine-digit group along the bottom. Be careful not to enter the check number or a wire-transfer routing number. Large banks can use different routing numbers for ACH transfers and wires.
The name associated with the bank account should match the name on your PayPal account. A nickname, outdated surname, or business name attached to a personal PayPal profile can cause the connection to fail.
How to Link Your Bank Account to PayPal on the Website
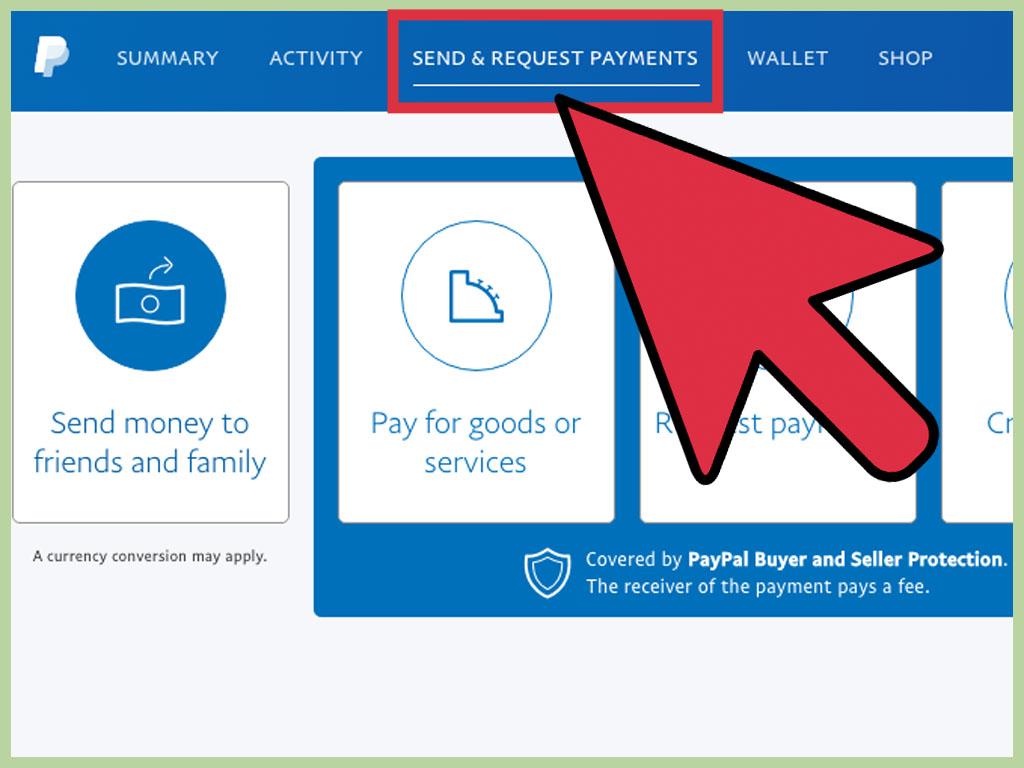
The exact wording may shift slightly as PayPal updates its interface, but the current U.S. website process centers on the Wallet page.
- Open PayPal in a new browser window by typing paypal.com into the address bar.
- Log in to your PayPal account.
- Select Wallet near the top of the page.
- Click Link a card or bank.
- Select Link a bank account.
- Search for your financial institution or choose it from the displayed list.
- Select instant verification or choose the option to link the bank another way.
- Follow the prompts and review the information before submitting it.
If you choose instant verification, PayPal will direct you through a third-party connection process. After you select your bank, enter your online banking credentials on the authorized connection screen. Your bank may ask for a one-time security code before approving access.
If instant linking is not offeredor you simply do not want to use itselect Link your bank another way. Enter the requested routing number, account number, and account type. PayPal will then begin the manual confirmation process.
How to Link a Bank Account in the PayPal App
PayPal occasionally reorganizes its mobile menus, so your version of the app may use either an Accounts or Wallet tab. The basic steps remain similar:
- Open the official PayPal app and sign in.
- Tap Accounts or Wallet.
- Choose Add banks and cards or tap the plus sign beside linked payment methods.
- Select Banks.
- Find your bank in the list or search for it by name.
- Choose instant verification or manual linking.
- Complete the security prompts and submit your information.
If these buttons are not visible, update the PayPal app through the Apple App Store or Google Play Store. You can also complete the process through PayPal’s website in a mobile browser.
Instant Verification vs. Manual Verification
Both methods can produce the same result: a confirmed bank account in your PayPal Wallet. The main differences involve speed, convenience, and the information you are comfortable providing.
Instant verification
Instant confirmation is usually the fastest option. You select your bank, sign in through the secure connection flow, and authorize the requested access. PayPal says it uses a third-party provider to confirm account details and, when needed, check balances and transactions to help payments process.
You can review or remove eligible permissions later in your PayPal settings. Before agreeing, read the authorization screen so you understand what information will be shared.
Instant linking is convenient when:
- Your bank participates in the connection service.
- You have your banking credentials available.
- You need to confirm the account quickly.
Manual verification with small deposits
Manual verification does not require you to enter your online banking password into the connection flow. Instead, you provide your bank routing and account numbers. PayPal then sends two small deposits to the account, generally within three business days.
Each deposit is normally between $0.01 and $0.99. For example, you might see deposits of $0.07 and $0.18. PayPal may later withdraw the combined amount, so those pennies are not the beginning of your early-retirement fund.
Manual confirmation is useful when:
- Your bank does not support instant verification.
- The instant connection repeatedly fails.
- You prefer to enter routing and account numbers manually.
- You use a smaller bank or credit union that is not listed.
How to Confirm PayPal’s Small Deposits
Adding an account manually is only the first half of the process. You must return to PayPal and enter the exact deposit amounts before the bank can be fully confirmed.
- Wait up to three business days for the deposits to appear.
- Sign in to your bank account and open its transaction history.
- Write down the two PayPal deposit amounts in the order shown.
- Log in to PayPal and open Wallet.
- Select the bank account marked as unconfirmed.
- Enter the exact deposit amounts.
- Click or tap Submit or Confirm.
If the deposits are $0.07 and $0.18, enter .07 and .18. Do not enter their total unless PayPal specifically requests it.
Some banks combine the deposits into one transaction. If that happens, contact PayPal or try instant confirmation. Do not make repeated guesses: PayPal may disable and remove the bank after three incorrect attempts.
How Long Does Bank Verification Take?
Instant confirmation can finish in minutes when the bank connection works normally. Manual verification usually takes up to three business days. Weekends and federal holidays do not count as business days, so a request made late Friday may not be ready until the following week.
Confirmation time should not be confused with transfer time. A standard transfer between PayPal and a bank can take several business days even after the bank is confirmed. PayPal states that adding money through a linked bank may take up to five business days because the transaction moves through the Automated Clearing House network.
Why Can’t You Link Your Bank Account to PayPal?
A linking error is often caused by inconsistent information rather than a broken PayPal account. Check the following possibilities before trying again.
The names do not match
The legal or business name on the bank account should correspond with the name registered with PayPal. If your name recently changed, update the relevant account information. PayPal may require you to remove the bank and add it again after a bank-side name change.
The wrong routing number was entered
Confirm that you are using the ACH routing number associated with your account. Do not automatically use a routing number found through a general internet search because banks may assign different numbers by state, transaction type, or account history.
The bank is already linked elsewhere
PayPal limits how often a bank account can be be associated with different PayPal profiles. Its U.S. guidance states that a bank account cannot be linked to more than three PayPal accounts over its lifetime. An account may also be blocked if it remains connected to another PayPal profile with a limitation or negative balance.
You have reached PayPal’s linking limit
A PayPal account can have up to eight linked bank accounts at one time. If you have reached that limit, remove an unused account before adding another one.
The bank account is not compatible
The account must generally be held with a U.S. bank for the U.S. PayPal process. Some prepaid products, online-only accounts, and other specialized financial accounts may not be compatible.
Your PayPal account has a limitation
Open PayPal’s Resolution Center and look for requests to verify your identity or resolve an account restriction. A limitation can prevent you from adding, removing, or using a bank account.
The bank rejected an earlier transaction
PayPal may remove a bank account after receiving a declined-payment or stopped-payment notice. Contact your bank to confirm that the account is open, supports ACH transactions, and has the correct ownership information.
How to Use a Linked Bank Account Safely
Linking a bank account creates a convenient route to your money, which makes account security especially important.
- Start from the official app or website. Do not link your bank through an unexpected email or text message.
- Use a unique PayPal password. A password reused on several websites can expose multiple accounts after one data breach.
- Enable two-step verification. An authenticator app, security code, or passkey adds protection beyond a password.
- Never share verification codes. PayPal, your bank, and legitimate support agents should not ask you to read a one-time login code to them.
- Turn on account alerts. Notifications can help you spot an unfamiliar payment or withdrawal quickly.
- Review both accounts regularly. Check PayPal activity and your bank statement instead of assuming every transaction is legitimate.
- Verify recipients before paying. A correctly linked bank cannot protect you from voluntarily sending money to an impersonator.
If you notice an unauthorized transaction, report it through PayPal’s Resolution Center and contact your financial institution promptly. The Federal Trade Commission also recommends reporting payment-app scams through ReportFraud.ftc.gov.
How Bank Payments Work After Linking
When you pay with a linked bank account, the seller may receive credit before the bank transfer has fully cleared. The underlying ACH process can take several business days.
Keep enough money in your account until the transaction clears. If the bank rejects the payment, PayPal may attempt the transfer again or charge an available backup payment method. If neither succeeds, your PayPal balance could become negative, and your bank might charge a returned-payment fee.
Before completing a purchase, review the payment method shown at checkout. Having a bank connected does not mean PayPal will use it for every transaction. A card, PayPal balance, or other payment method may be selected instead.
Real-World Experiences and Practical Lessons
The following common experiences illustrate where the linking process tends to go smoothlyand where tiny details create surprisingly large headaches.
Experience 1: Instant linking works in a few minutes
A user with a large national bank selects the institution from PayPal’s list, signs in through the bank connection window, and approves a security notification in the bank’s app. The account appears in PayPal almost immediately. The most important lesson is to keep the bank’s authentication method nearby. If a security code is sent to an old telephone number, the “instant” process becomes considerably less instant.
Experience 2: A credit union requires manual deposits
A local credit union does not appear in the instant-linking list, so the user enters the ACH routing number and savings account number manually. The deposits are requested on Thursday evening but do not appear until Tuesday because the weekend is not part of the banking schedule. After entering both amounts exactly, the account is confirmed. The lesson: count business days, not calendar days, and resist the urge to guess.
Experience 3: The routing number looks correct but is not
A customer copies a wire-transfer routing number from the bank’s website. PayPal accepts the format, but the deposits never arrive. The customer later discovers that the bank uses a separate ACH routing number. After removing the incomplete link and entering the ACH details shown inside online banking, confirmation works. The lesson is simple: a nine-digit number can look official while still being the wrong number for the job.
Experience 4: A name mismatch blocks the account
A bank account uses a recently changed legal surname, while the PayPal profile still displays the previous name. Repeated attempts produce the same generic error. Once the account holder updates the required identity information and ensures both records match, linking succeeds. This situation is particularly common after marriage, divorce, a legal name change, or a business restructuring.
Experience 5: Linking succeeds, but the first payment is declined
A confirmed bank appears in the Wallet, yet PayPal does not allow it for a particular purchase. The user assumes confirmation failed, but the real cause is a payment-specific security review or the absence of an acceptable backup method. Choosing a debit card completes the purchase. The lesson is that linking eligibility and transaction approval are related, but they are not identical.
Experience 6: The cautious route is slower but more comfortable
Some users prefer manual deposits because they do not want to authorize a third-party connection to their bank. Others value instant linking enough to accept the permissions after reviewing them. Neither choice is automatically superior. The practical decision depends on bank support, urgency, and personal comfort with data access. Read the authorization details and select the method you understand.
A useful final check
After confirmation, make a modest transfer or carefully review the payment screen on your next purchase. Confirm that the correct bank is displayed, watch the transaction in both PayPal and online banking, and leave sufficient funds in the account until it clears. A small, controlled first transaction is much easier to troubleshoot than discovering a problem during a large or time-sensitive payment.
Conclusion
To link your bank account to PayPal, open the Wallet or Accounts section, select the option to add a bank, and choose instant or manual verification. Instant confirmation is usually faster, while manual verification uses two small deposits and can take up to three business days.
Most connection problems come from mismatched names, incorrect ACH details, account limitations, unsupported financial products, or a bank that has already been linked to too many PayPal profiles. Verify every number directly with your bank, avoid guessing deposit amounts, and protect the finished connection with two-step verification and transaction alerts.