Crocheting a toilet seat cover is one of those projects that makes people pause, blink twice, and then say, “Wait… that is actually kind of charming.” And yes, it is. A handmade crochet toilet seat cover can add warmth, color, texture, and a little old-school personality to a bathroom that otherwise looks like it was designed by a committee of plain white tiles. It is practical, washable, customizable, and surprisingly beginner-friendly once you understand the shape.
This guide explains how to crochet a toilet seat cover from start to finish, including how to measure the lid, choose yarn, pick a hook, build the oval shape, add elastic or ties, and keep the finished piece clean. The goal is not to make your bathroom look like a yarn store exploded in it. The goal is to create a neat, removable, comfortable cover that fits properly and survives real life, including humidity, laundry day, and that one family member who somehow closes the lid with the force of a medieval drawbridge.
What Is a Crochet Toilet Seat Cover?
A crochet toilet seat cover is a handmade fabric cover designed to fit over the toilet lid, not the open seat ring. It usually has an oval or rounded shape, depending on the toilet style, and is held in place with elastic, drawstring ties, buttons, or a fitted edge. Most covers are made with washable yarn and simple stitches such as single crochet, half double crochet, double crochet, or shell stitch.
Modern versions tend to be more minimal than the fuzzy bathroom sets of past decades. You can make a plain farmhouse-style cover in cream cotton, a bright retro cover with scalloped edges, or a soft acrylic version that matches your bath mat. The best design is removable, easy to wash, and snug enough that it does not slide around like a tiny rug with commitment issues.
Before You Start: Measure Your Toilet Lid
Toilet lids are not all the same size. Some are round, some are elongated, and some appear to have been designed by someone who wanted crocheters to suffer. Before you chain a single stitch, measure your lid.
Measurements You Need
- Length: Measure from the hinge area to the front edge of the lid.
- Width: Measure across the widest part of the lid.
- Edge depth: Measure how much the lid curves downward at the edge.
- Hinge space: Note where the cover should stop so it does not interfere with the hinges.
A round toilet lid is often shorter and wider, while an elongated lid is longer and narrower. Your crochet cover should be slightly smaller than the top surface before edging, because the border, elastic, or drawstring will help pull it into place.
Best Yarn for a Crochet Toilet Seat Cover
The best yarn for a crochet toilet seat cover is washable, durable, and comfortable. Bathrooms are humid places, and anything used there should be cleaned regularly. For that reason, avoid delicate fibers that require fussy care. This is not the moment for luxury alpaca unless your bathroom has its own butler.
Good Yarn Options
- Worsted-weight acrylic: Affordable, durable, easy to wash, and widely available.
- Cotton yarn: Absorbent, sturdy, and crisp, though it may stretch when wet.
- Cotton-acrylic blend: A nice balance of structure, softness, and washability.
- Bulky rug yarn: Great for a thick vintage-style cover, but it may feel heavy.
Worsted-weight yarn is the easiest choice for most beginners. It creates a cover that is thick enough to feel substantial but not so bulky that the lid looks like it is wearing a winter coat. Choose a color that coordinates with your bathroom, but think practically. White looks fresh until real life enters the room. Medium shades, heathers, soft neutrals, and variegated yarns hide minor wear better.
Recommended Crochet Hook Size
For worsted-weight yarn, a 5.0 mm hook, commonly labeled H-8 in U.S. sizing, is a good starting point. If your stitches are tight, move up to a 5.5 mm hook. If your fabric looks loose or floppy, move down to a 4.5 mm hook. The finished fabric should feel dense enough to hold its shape but flexible enough to stretch over the lid.
Gauge matters here, but not in a scary sweater-math way. Crochet a small swatch, measure how many stitches fit into 4 inches, and use that information to adjust your starting chain. A toilet seat cover does not need the engineering precision of a moon landing, but it does need to fit the lid instead of hovering awkwardly nearby.
Materials and Tools
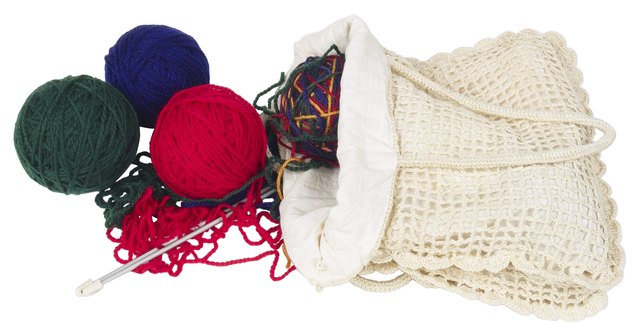
- 2 to 4 skeins of washable worsted-weight yarn, depending on lid size and stitch pattern
- 5.0 mm crochet hook, or size needed to get a firm but flexible fabric
- Tape measure
- Stitch markers
- Yarn needle for weaving in ends
- Scissors
- Elastic cord, flat elastic, or cotton cord for the fitted edge
- Safety pin or bodkin for threading elastic
- Optional buttons, appliqués, or contrasting yarn for edging
Helpful Crochet Abbreviations
Most crochet toilet seat cover patterns use basic U.S. crochet terms. Here are the abbreviations you will see most often:
- ch: chain
- sl st: slip stitch
- sc: single crochet
- hdc: half double crochet
- dc: double crochet
- st: stitch
- rnd: round
- inc: increase
How to Crochet a Toilet Seat Cover Step by Step
This beginner-friendly method creates an oval cover worked from the center outward. It can be adjusted for round or elongated toilet lids by changing the starting chain and the number of increase rounds.
Step 1: Make a Foundation Chain
Start with a foundation chain that is about two-thirds the length of your toilet lid. For a round lid, your chain may be shorter. For an elongated lid, make it longer. As a general example, you might begin with 28 to 36 chains for a standard lid using worsted-weight yarn.
Do not stretch the chain while measuring. Lay it flat on the lid. It should sit along the center line, leaving room at both ends for rounded shaping. If it reaches almost the full length of the lid, it is too long. The oval grows as you crochet around both sides.
Step 2: Work Around the Chain
Work single crochet or half double crochet into the second chain from the hook and continue across. At the final chain, place several stitches into the same chain to turn the corner. Then crochet along the opposite side of the foundation chain. This creates the first oval round.
Place a stitch marker at the beginning of the round. It will help you keep track of your increases, especially when your oval begins to look like a small yarn pancake.
Step 3: Increase at Both Ends
Continue working in rounds, increasing at the two curved ends. The straight sides usually need fewer increases, while the ends need more shaping. A simple method is to add two or three increases evenly around each end during every round until the oval is close to the lid size.
Lay your work on the toilet lid every few rounds. This is the easiest way to check the fit. If the crochet piece cups upward, you need fewer increases. If it ripples like a potato chip with ambition, you have too many increases. Pull back the round and adjust. Crochet is forgiving; it lets you redo things without judging you out loud.
Step 4: Build the Top Panel
Keep crocheting until the top panel covers most of the lid surface. Stop when it is about 1 inch smaller than the lid all around. The edging will add extra width and help the cover grip.
For a firm cover, use single crochet. For a softer, quicker cover, use half double crochet. For a decorative look, alternate rounds of double crochet and shell stitch. Just remember that open stitches look pretty but may stretch more. A bathroom item needs beauty and backbone.
Step 5: Add a Decorative Border
Once the oval top panel fits, add a border. A simple single crochet border gives a neat edge. A scalloped border adds vintage charm. A shell border looks decorative without being too difficult.
To make a basic shell border, skip one stitch, work five double crochet stitches into the next stitch, skip one stitch, then slip stitch into the next stitch. Repeat around the cover. If the shells crowd at the end, adjust by skipping an extra stitch or using a smaller shell. Crochet borders are part math, part art, and part “close enough but still cute.”
Step 6: Create the Fitted Edge
The fitted edge is what keeps the toilet seat cover from sliding off. You have several options:
- Elastic casing: Crochet a fold-over edge and thread elastic through it.
- Drawstring edge: Weave cotton cord through spaces around the border.
- Button tabs: Crochet small tabs that fasten underneath the lid.
- Elastic loops: Add elastic loops at key points for a removable fit.
The drawstring method is the easiest for beginners. Crochet one round of double crochet near the edge, then weave a cord or elastic through the spaces. Pull gently until the cover hugs the lid, tie securely, and tuck the ends underneath.
Step 7: Test the Fit
Place the cover over the lid and adjust the tension. It should be snug but not strained. Open and close the lid several times to make sure the cover does not interfere with the hinges. If the back edge bunches up, remove a few stitches or make the back section flatter. If the front slips, tighten the drawstring or add small underside tabs.
Step 8: Weave in Ends and Finish
Weave in every yarn end securely with a yarn needle. Because this item will be washed, do not simply snip the ends and hope for the best. Hope is not a finishing technique. Weave each tail in multiple directions through the wrong side of the stitches.
If your yarn allows it, wash and dry the cover before regular use. This helps relax the stitches and reveals whether the fit changes after laundering. If it stretches slightly, tighten the elastic or drawstring.
Simple Beginner Pattern for a Crochet Toilet Seat Cover
Use this as a flexible starter pattern. Adjust the chain and rounds based on your lid measurements.
Basic Oval Cover Pattern
- Ch 32 for a standard elongated lid, or ch 26 to 28 for a round lid.
- Work hdc in the second ch from hook and in each ch across.
- Work 5 hdc in the last ch to round the end.
- Continue along the opposite side of the chain, working hdc in each ch.
- Work 4 hdc in the final ch and join with a sl st, or continue in a spiral.
- For the next rounds, increase evenly at both ends while keeping the sides mostly straight.
- Continue until the oval is about 1 inch smaller than the lid edge.
- Work one round of sc for stability.
- Work one round of dc to create spaces for a drawstring.
- Finish with one round of sc or shell stitch.
- Thread elastic cord through the dc spaces, fit over the lid, and tie securely underneath.
This pattern is intentionally adjustable because toilet lids vary. The most important rule is to check the fit often. A custom fit is the whole reason handmade bathroom decor gets to walk into the room with confidence.
Design Ideas for a Crochet Toilet Seat Cover
Classic White Spa Style
Use white or cream cotton-acrylic yarn and a tight single crochet stitch. Add a simple border and keep the design minimal. This style works well in farmhouse, cottage, and neutral bathrooms.
Retro Shell Stitch Cover
Use pastel yarn and a shell border for a vintage-inspired look. Soft pink, mint, pale yellow, and sky blue give the project a cheerful throwback feeling without turning your bathroom into a time capsule.
Modern Textured Cover
Try alternating front-loop and back-loop stitches to create ribbing. A textured cover in charcoal, beige, sage, or navy can look surprisingly modern. Yes, even a toilet seat cover can have a design philosophy.
Matching Bathroom Set
If you enjoy coordinated crochet projects, make a matching toilet tank topper, tissue box cover, or small rug. Keep the colors consistent but avoid covering every surface. A little crochet says “handmade charm.” Too much crochet says “the yarn has taken control.”
Cleaning and Care Tips
A crochet toilet seat cover should be removable and washable. Since it lives in the bathroom, clean it regularly. Choose yarn with care instructions that match your lifestyle. If you know you will not hand-wash anything unless there is a parade in your honor, pick machine-washable yarn.
- Wash the cover separately or with similar soft items.
- Use mild detergent and follow the yarn label.
- Dry flat when possible to preserve shape.
- Avoid bleach unless the yarn label says it is safe.
- Make two covers so one can be in use while the other is being washed.
For general bathroom hygiene, keep the toilet lid and surrounding hard surfaces clean with appropriate household cleaning products. A crochet cover should never replace routine cleaning. Think of it as decor, not a force field.
Common Mistakes to Avoid
Making the Cover Too Large
Crochet stretches, especially after use and washing. If your cover is already loose before adding elastic, it will probably slide around later. Aim for a slightly smaller top panel and let the fitted edge do its job.
Using Yarn That Cannot Be Washed Easily
Bathroom crochet needs practical yarn. Save delicate fibers for shawls, scarves, and things that do not live near plumbing.
Skipping the Fit Checks
Do not wait until the end to test the cover. Lay it on the lid every few rounds. This small habit saves you from making a beautiful oval that fits absolutely nothing in your house.
Forgetting the Hinges
Leave space near the back of the lid. A bulky edge can prevent the lid from opening and closing smoothly. The cover should sit on the lid, not start a wrestling match with it.
How Long Does It Take to Crochet a Toilet Seat Cover?
Most crocheters can finish a simple toilet seat cover in one afternoon or over a weekend. Beginners may need more time because of measuring, adjusting, and possibly unraveling a few rounds. That is normal. Every crocheter has frogged a project. The yarn comes out, the coffee gets refilled, and dignity slowly returns.
A basic single-color cover is faster than a decorative shell-stitch or appliqué design. If you want flowers, stripes, or raised texture, plan for extra time. The good news is that this project is small enough to finish before it becomes one of those mysterious unfinished objects hiding in a closet.
Practical Experience: What I Learned Making Crochet Toilet Seat Covers
The first thing you learn when making a crochet toilet seat cover is that measuring matters more than confidence. Confidence may get you started, but the tape measure gets you a cover that actually fits. Many beginners assume toilet lids are basically the same size. They are not. A round lid and an elongated lid can differ enough that the same pattern may look perfect on one and slightly ridiculous on the other. Always measure the lid, then use the pattern as a guide rather than a law carved into stone.
Another useful lesson is that yarn choice changes everything. Acrylic yarn is forgiving, affordable, and easy to wash, which makes it great for a first attempt. Cotton looks clean and crisp, but it can become heavy and stretch when damp. Bulky yarn works quickly, but it may create a cover that feels too thick or makes the lid close awkwardly. For most bathrooms, a medium-weight washable acrylic or cotton blend gives the best balance of comfort, structure, and maintenance.
Fit problems usually come from the increase rounds. If the oval starts waving at you from the table, you have increased too much. If it curls into a bowl, you have not increased enough. The easiest fix is to stop every few rounds and place the project directly on the toilet lid. This feels a little funny the first time, but it works. The lid becomes your blocking board, measuring guide, and brutally honest project manager.
The back edge near the hinges deserves special attention. A thick border in that area can bunch up, especially when the lid opens. One practical trick is to keep the back edge flatter and less decorative than the front. Put the pretty scallops where people can see them and keep the hinge area simple. This small design choice makes the cover look better and function better.
Elastic is another detail that separates a cute project from a useful one. A loose cover may look nice for the first five minutes, but it will shift every time the lid moves. A drawstring is easy to install and adjust, while elastic gives a cleaner fitted look. If you use elastic, do not pull it too tight. The cover should hug the lid, not squeeze it like it owes money.
Washing is where good finishing proves itself. Weaving in ends securely is not optional. Bathroom items get handled, stretched, and laundered, so loose tails will eventually sneak out. Weave each end in several directions on the wrong side, then trim carefully. After the first wash, check the fit again. Some yarns relax, and the drawstring or elastic may need a small adjustment.
Finally, the best crochet toilet seat covers are the ones that match the bathroom without overpowering it. A simple neutral cover can look cozy and intentional. A colorful cover can be playful and nostalgic. A heavily decorated cover can be fun, too, but it should still be easy to remove and wash. Handmade decor works best when it is both charming and realistic. After all, this is crochet for a bathroom, not a museum exhibit guarded by velvet ropes.
Conclusion
Learning how to crochet a toilet seat cover is a fun way to practice shaping, measuring, edging, and finishing while making something genuinely useful. The project is small enough for beginners, customizable enough for experienced crocheters, and quirky enough to make your bathroom feel less generic. Start with washable yarn, measure carefully, shape the oval gradually, and add a fitted edge that keeps everything in place.
A crochet toilet seat cover may not be the most glamorous project in the yarn world, but it has personality. It is practical, handmade, and just unusual enough to start a conversation. And honestly, any crochet project that can make a bathroom smile deserves a little respect.