A mudroom should catch muddy shoes, dripping coats, runaway be glove that has been missing since February. Unfortunately, many homes do not have a dedicated mudroom. What they have is a narrow hallway, an awkward corner, or a few feet of wall beside the garage door.
That is more than enough space to start.
With a few boards, basic tools, and a realistic plan, you can build an organized entryway that looks intentional rather than improvised. The best DIY mudroom projects combine four practical functions: a place to sit, a place for shoes, hooks for hanging items, and a small landing zone for keys and mail. Designers and experienced DIY builders consistently recommend planning around the household’s everyday routine instead of trying to squeeze an oversized showroom-style hall tree into a small space. >
Plan the Mudroom Before Buying Lumber
A successful DIY entryway begins with observation, not sawing. Spend a few days noticing what people drop near the door. Count the regularly worn shoes, coats, bags, umbrellas, sports equipment, and pet supplies. Then design storage for those itemsnot for every possession your family has accumulated since the invention of the coat hanger.
Measure the available space
Measure the width, depth, and height of the wall or corner you want to use. Mark the location of doors, outlets, switches, vents, baseboards, and trim. Confirm that a bench will not interfere with a door swing or create a narrow walking path.
In a compact entryway, vertical storage is especially valuable. A shallow bench paired with wall-mounted hooks and a shelf can provide useful organization without consuming much floor space. Corners, unused walls, former closets, and areas beneath stairs can also become practical drop zones. hoose open or closed storage
Open cubbies make shoes and baskets easy to reach. Closed cabinets hide visual clutter and prevent your entryway from looking like a sporting-goods store after an earthquake. Many homes benefit from a combination: open shoe storage for daily items and closed storage for seasonal gear.
Whatever system you choose, keep frequently used items accessible. Out-of-season coats, duplicate shoes, empty delivery boxes, and broken umbrellas should not occupy premium entryway real estate. n>
Best Wood and Materials for DIY Entryway Projects
Plywood is one of the most versatile materials for benches, cubbies, and cabinets. Three-quarter-inch plywood creates strong structural panels, stays relatively stable, and can be trimmed with solid-wood boards or edge banding for a finished appearance. Several established DIY plans use a plywood carcass with simple face trim because the construction is strong, adaptable, and manageable for intermediate beginners. mon pine boards are affordable and easy to cut, making them appropriate for shelves, hook rails, slatted racks, and painted furniture. Poplar is smoother and often produces a cleaner painted finish. Hardwoods such as oak or maple cost more but are excellent for visible bench tops that must tolerate years of bags, boots, and people sitting down with dramatic sighs.
Medium-density fiberboard, or MDF, offers a smooth painted surface and clean edges. However, it is heavy and vulnerable to swelling when moisture reaches unsealed areas. If MDF is used near wet boots or rain jackets, every face and edge should be thoroughly primed and painted. n>
1. Build a Simple Open Shoe Bench
An open shoe bench is one of the easiest DIY wood projects for a mudroom or entryway. It provides seating while keeping shoes visible and off the main walking path.
Basic design
Build a rectangular bench using a solid top, two side panels, and a lower shelf. Add a center divider if the bench is wider than about four feet or if the shelf feels flexible. A typical entryway bench is approximately 17 to 19 inches high, but you should adjust the dimensions for your family and available space.
For a beginner-friendly version, use three-quarter-inch plywood for the sides and top, then install a pine board or plywood shelf several inches above the floor. Pocket-hole screws, countersunk wood screws, or glue-and-screw construction can all produce a sturdy result when used correctly. Entryway bench plans from major woodworking resources commonly combine simple box construction with shelves or cubbies because the design is easy to customize. ake it look built in
Add narrow face trim around the front edges, caulk small seams, and paint the bench the same color as the wall trim. Remove the baseboard behind the unit so it can sit flush against the wall, or notch the rear corners to fit around existing molding.
Anchor the finished bench to wall studs, especially if children may climb on it. A bench that slides forward every time someone ties a shoe is not furniture; it is a low-budget amusement-park ride.
2. Create a Wall-Mounted Shelf With Coat Hooks
A hook shelf offers enormous organizational value while using very little material. It can be installed above a bench or used by itself in an extremely narrow entryway.
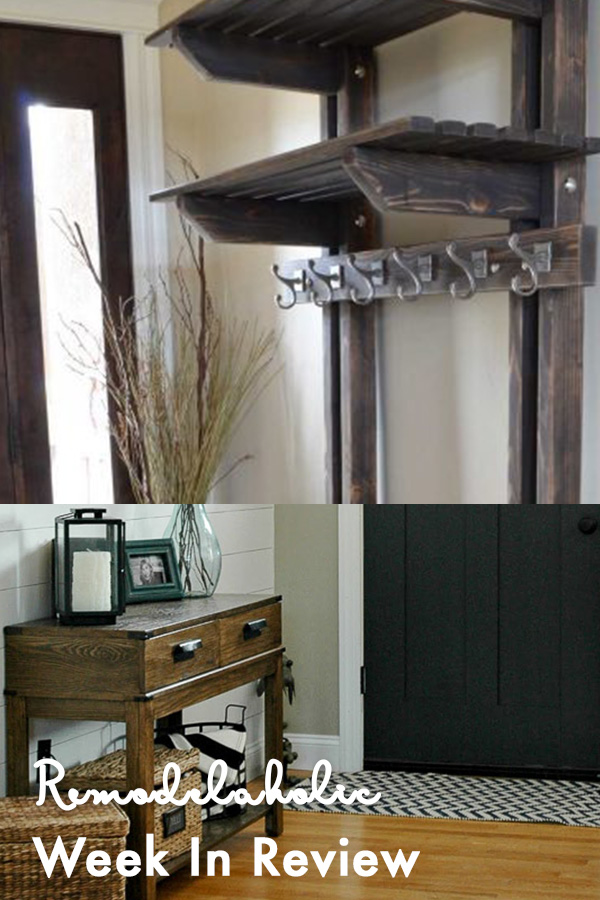
Start with a horizontal backboard made from a 1-by-6 or 1-by-8 board. Attach a shelf across the top with glue and screws, then add triangular wood brackets underneath. Install sturdy hooks along the face, leaving enough space between them for bulky coats and bags.
Locate the wall studs and drive mounting screws through the backboard into solid framing. Drywall anchors may be appropriate for very light accessories, but a rack expected to hold winter coats, loaded backpacks, or handbags should be secured to studs.
A shelf-and-hook system can become a complete miniature mudroom when paired with baskets, a boot tray, and a small bench. Woodworking plans from Rockler, Kreg, Family Handyman, and other U.S. project resources use this same compact combination because it creates hanging, display, and storage space without requiring a full cabinet. n>
3. Make Personalized Family Cubbies
When multiple people share an entrance, individual cubbies can prevent one person’s soccer bag from becoming everyone’s problem. Build a long upper shelf, add vertical dividers underneath, and install one or two hooks inside each section.
Assign a cubby to each household member. Add a wooden nameplate, painted initial, chalkboard label, or small brass tag. Baskets on the upper shelf can hold hats, gloves, sunscreen, reusable shopping bags, and other seasonal supplies.
Keep cubby dimensions realistic. A compartment that looks perfectly symmetrical on paper may be too narrow for an actual backpack. Measure the largest everyday items before choosing divider spacing.
Freestanding mudroom cabinets and full storage systems often combine upper cubbies, hooks, a bench, and lower shoe compartments. This structure can be simplified into a wall-mounted version when floor space is limited. n>
4. Build a Floating Entryway Console
A floating console is ideal for a small front entrance where a full-depth table would crowd the walkway. Use a narrow board or plywood box between 8 and 12 inches deep. Mount it securely to studs with a French cleat, heavy-duty brackets, or concealed supports designed for the expected weight.
Add one shallow drawer for keys, charging cables, sunglasses, and mail. A simpler beginner version can use an open shelf with two small baskets. Hang a mirror above the console and place a shoe tray or low baskets underneath.
Small-space design guidance frequently recommends narrow consoles, floating shelves, wall hooks, mirrors, and shallow storage because they define an entryway without blocking circulation. n>
5. Turn Wooden Crates Into a Modular Storage Bench
Wooden crates offer a fast route to entryway storage, particularly for renters or beginners who are not ready to build cabinets from scratch. Select sturdy crates with flat, undamaged sides. Sand every surface carefully, then arrange the crates horizontally to create open compartments.
Fasten neighboring crates together with screws and attach them to a continuous plywood base. Add a thick wood top that extends slightly beyond the front and sides. The unified top makes the collection look like furniture rather than a produce department.
Before using the project as seating, confirm that the crates and connections can safely support the intended load. Lightweight decorative crates may be appropriate only for storage. When uncertain, build an independent internal frame from 2-by-2 lumber and treat the crates as decorative cubbies.
Crates, repurposed boxes, and modified shelving units have long been used as practical foundations for mudroom benches and entryway organizers. n>
6. Add a Slatted Boot and Shoe Rack
Wet shoes need airflow and a surface that does not trap every grain of dirt. A slatted rack provides both. Build two rectangular side frames, connect them with narrow horizontal slats, and leave consistent gaps between the slats by using scrap-wood spacers during assembly.
Place a removable waterproof tray below the rack to catch water and mud. For tall boots, install a second level with upright dowels or leave one section open. A wall-mounted version can free additional floor space, although it must be anchored securely.
Boot trays, raised shoe storage, and benches near the entrance help contain moisture and keep footwear from spreading across the floor. n>
7. Build a Flip-Top Storage Bench
A flip-top bench hides bulky items while maintaining a clean exterior. Build a strong rectangular box, reinforce the corners, and attach a substantial top with durable hinges.
The lid should open smoothly and remain controlled. Use a toy-box lid support, soft-close hardware, or safety hinge to reduce the risk of the top falling onto fingers. Drill discreet ventilation holes if the compartment will hold shoes or damp outdoor gear.
Do not create one enormous storage cavity unless you enjoy excavating twelve scarves to locate a dog leash. Add dividers or use removable bins so items remain separated.
Hinged benches are a proven entryway solution because they combine seating with concealed storage. Project plans often add safety-conscious lid hardware, internal compartments, or under-seat organization to improve everyday usability. n>
8. Install a Board-and-Batten Mudroom Wall
A simple panel treatment can make separate benches, shelves, and hooks look like one custom-built system. Install horizontal and vertical trim boards over the wall to create a board-and-batten pattern. Place hooks on the horizontal rail, preferably where screws can enter studs or solid blocking.
Use a level throughout the installation. Fill nail holes, caulk narrow gaps, prime the trim, and paint the entire wall treatment in one durable color. A contrasting stained bench top can add warmth while disguising minor wear.
This project is especially useful when you want a built-in appearance without constructing floor-to-ceiling cabinetry. Board-and-batten panels, beadboard, trim, benches, and upper shelves are frequently combined in mudroom makeovers to create a cohesive architectural feature. n>
Finishing Wood for a Hardworking Entryway
Mudroom furniture faces abrasion, moisture, dirt, and frequent cleaning. Sand the wood progressively, remove the dust, and follow the finish manufacturer’s instructions. Prime knots and exposed edges before painting. Semi-gloss or satin paint is generally easier to wipe clean than a flat wall finish.
For natural wood, apply a durable protective topcoat suitable for interior furniture. Pay special attention to bench tops, lower shelves, and exposed plywood edges. Allow paint, stain, and clear finishes to cure fully before loading the project with baskets and wet shoes.
Provide plenty of fresh air while painting or applying finishes. The U.S. Environmental Protection Agency recommends ventilation during remodeling and when using products that may release volatile organic compounds. Pressed-wood panels, adhesives, paints, and varnishes can release indoor pollutants, making product instructions and good airflow important. n>
Essential Woodworking Safety
Wear eye and hearing protection, support lumber securely, and use the correct blade for each cut. Keep tool guards functioning and keep hands away from the cutting path. Unplug tools before changing blades or making adjustments.
Use dust collection whenever possible and work in a well-ventilated area. Sanding, routing, and cutting can generate large amounts of fine dust. OSHA identifies machine contact, kickback, flying material, noise, wood dust, and finishing chemicals among the principal hazards associated with woodworking. ally, anchor tall cabinets, hall trees, cubby towers, and heavily loaded hook systems to structural framing. A beautiful storage unit should organize the familynot fall on it.
Lessons Learned From Building DIY Mudroom and Entryway Projects
The most useful lesson from working on entryway projects is that perfect woodworking matters less than thoughtful placement. A beautifully constructed bench will not solve clutter when the shoe openings are too small, the hooks are mounted too high for children, or the mail shelf is located six steps away from where people naturally drop the mail.
On early projects, it is tempting to start with an attractive online photo and copy every visible detail. The better approach is to begin with household behavior. One family may need ten low shoe cubbies and only three coat hooks. Another may own almost no shoes but require space for helmets, tote bags, dog equipment, and winter jackets. The dimensions should reflect the users, not an imaginary catalog family that apparently owns two beige coats and never receives a package.
Mockups are surprisingly helpful. Before cutting lumber, outline the proposed bench and cabinets with painter’s tape. Place cardboard boxes where the cubbies will go. Sit at the proposed bench height. Open nearby doors. Carry a laundry basket through the walkway. This simple test can expose problems that a drawing does not reveal.
Another lesson is to complete as much sanding and finishing preparation as possible before final installation. Sanding between tight cubbies is unpleasant and slow. Painting the back of a cabinet after it has been attached to a wall is even less entertaining. Pre-sand the components, ease sharp edges, and prime difficult-to-reach surfaces before assembly.
Direct measurements also tend to outperform theoretical measurements. Walls may not be perfectly square, floors may slope, and baseboards may change thickness around a corner. Cut major pieces slightly oversized when appropriate, test the fit, and trim carefully. For visible trim, holding the board in position and marking the cut can produce a tighter fit than relying entirely on a tape measure. Experienced builders use direct marking and matched cuts to reduce small alignment errors. rage should also be designed with an exit strategy. Open cubbies are convenient, but they collect dust. Deep flip-top benches hide clutter, but small items sink to the bottom. Baskets solve many of these problems because they can be removed, cleaned, relabeled, and replaced as the family’s routine changes.
Durability often comes from ordinary details: pilot holes that prevent splitting, glue applied to clean joints, screws driven into structural material, sealed plywood edges, and a finish allowed to cure properly. Rushing the final coat because everyone wants to use the new bench immediately can leave permanent bag marks or stuck baskets. The furniture has waited its entire wooden life to become a mudroom bench. It can wait another day.
Finally, build in stages when the project feels overwhelming. Start with a bench. Add the hook rail later. Install an upper shelf when you know what needs to be stored there. A modular entryway assembled over several weekends can be more functional than a giant one-time build based on guesses. Mudroom systems with separate benches, shelves, towers, hooks, and rolling components demonstrate how effectively modular pieces can adapt to different homes and routines. n>
Conclusion
Easy DIY wood projects can transform an ignored entrance into one of the most useful areas in the house. A basic bench creates seating. A lower shelf controls shoes. A hook rail lifts coats and bags off the floor. Cubbies, baskets, and a narrow console give small belongings a predictable home.
The key is not building the largest possible mudroom system. It is creating a durable setup that matches the available space and the way your household actually enters and leaves the home. Begin with accurate measurements, choose one manageable project, and add storage only where it solves a genuine problem.
When the finished entryway keeps shoes out of the hallway and helps everyone locate their keys on the first attempt, you will know the project was successful. The attractive woodwork is simply a very handsome bonus.