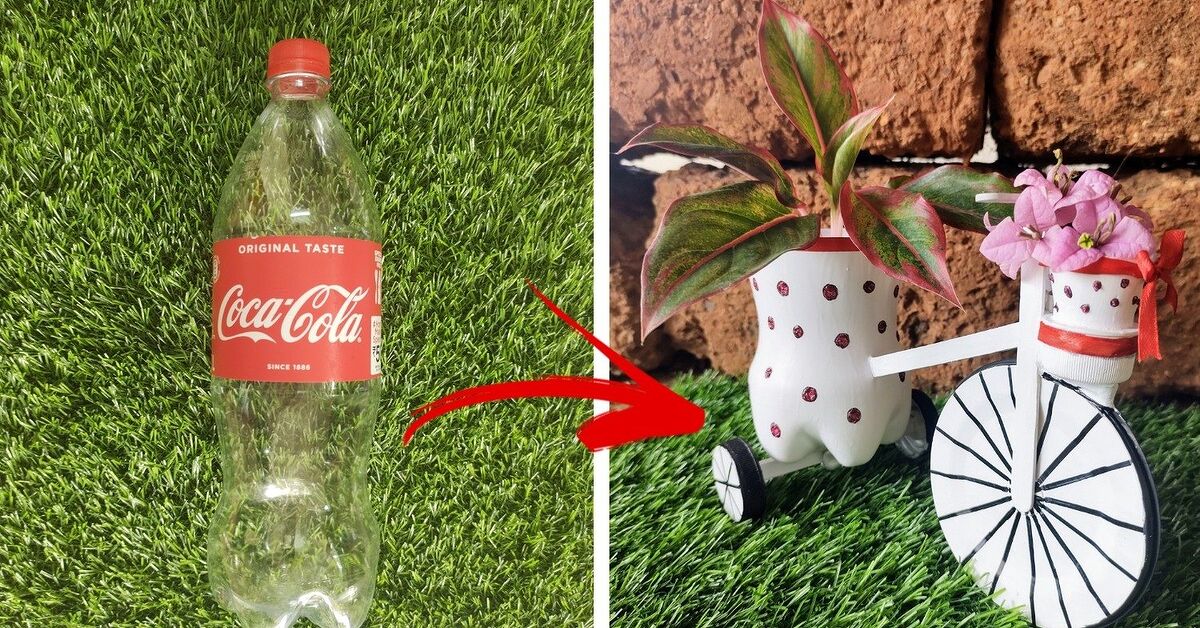
That empty soda bottle may look destined for the recycling bin, but it is also lightweight, waterproof, easy to cut, and suspiciously eager for a second career. With a little planning, ordinary beverage bottles and plastic jugs can become planters, organizers, garden tools, storage containers, and even a neighborhood bird café.
Plastic bottle upcycling will not solve plastic pollution by itself. Reducing disposable packaging remains the better long-term goal. Still, reusing a clean container before recycling it can extend its useful life, save money, and keep you from buying another plastic gadget. These 13 practical ideas favor function over glitter-covered clutteralthough nobody will stop you from adding googly eyes.
Prepare Plastic Bottles Safely Before Cutting
Choose bottles that originally held water, soda, milk, juice, shampoo, or ordinary household detergent. Never repurpose containers that held pesticides, automotive fluids, solvents, pool chemicals, or other hazardous substances. Even a thorough rinse may not remove dangerous residues.
Empty the bottle, remove the label, wash it with warm soapy water, rinse it, and let it dry completely. Mark cutting lines with a permanent marker. An adult should make the first opening with a craft knife; scissors can usually finish the job. Cut away from your hands and work on a protected, stable surface.
Freshly cut plastic can be surprisingly sharp. Round the corners, smooth rough areas with fine-grit sandpaper, or cover exposed edges with durable tape. Avoid open flames, candles, boiling liquids, ovens, and high-temperature tools. Heating unknown plastic can deform it and release unpleasant fumes.
Finally, check local recycling rules before starting. Once a bottle is cut, painted, glued to another material, or reduced to small pieces, it may no longer be accepted by a curbside recycling program. Upcycle bottles you will genuinely usenot 47 “future craft supplies” quietly forming their own civilization in the garage.
13 Useful Plastic Bottle Upcycling Ideas
1. Make a Sturdy Household Scoop
A handled milk jug or detergent bottle has the bones of an excellent scoop. Lay the clean, dry jug on its side and draw a diagonal line from below the handle toward the lower front corner. Cut away the bottom and part of the side while preserving the handle and capped neck.
Use the finished scoop for potting mix, birdseed, rock salt, pet litter, or workshop materials. Label it clearly and assign it to one job. A scoop that has touched detergent, soil, or chemicals should never migrate into the flour bin, no matter how adventurous your baking has become.
2. Turn the Neck Into a Funnel
Cut the upper third from a clean beverage bottle, remove the cap, and invert the neck. You now have a simple funnel for transferring dry goods, filling planters with soil, or pouring leftover paint back into its original can.
Trim the wide cut edge evenly and tape it if necessary. Keep separate funnels for food-safe and nonfood tasks, and use only a bottle that originally contained food or beverages for pantry ingredients. A narrow-neck water bottle works for liquids, while a wide-neck juice bottle handles seeds or granular fertilizer more easily.
3. Build a Self-Watering Planter
Cut a bottle across the middle. Make a small hole in the cap and thread a strip of clean cotton cord through it. Invert the top half into the bottom, add potting mix and a small plant, and pour water into the lower reservoir. The cord acts as a wick, drawing moisture upward as the mix dries.
Keep the reservoir below the soil chamber so roots do not remain submerged. This DIY plastic bottle planter works well for small ornamentals and herbs, but it is not entirely maintenance-free. Check the water level, rinse the reservoir occasionally, and watch for algae or mosquitoes. “Self-watering” means helpful assistant, not unpaid full-time gardener.
4. Create a Mini Greenhouse or Garden Cloche
A clear two-liter bottle can protect a young transplant from cool wind and minor temperature swings. Remove the bottom, take off the cap for ventilation, and place the upper section over the plant. Press the edge slightly into the soil or anchor it so a gust does not send your greenhouse touring the neighborhood.
Clear milk or juice jugs can also become winter-sowing containers. Cut almost all the way around the middle, leaving a plastic hinge. Add drainage holes, fill the base with moist potting mix, sow suitable seeds, close the jug with weather-resistant tape, and leave the cap off for airflow and precipitation. Monitor it during warm weather because temperatures inside can climb quickly.
5. Assemble a Slow-Drip Watering Bottle
Poke one or two tiny holes in the cap of a clean bottle, fill it with water, replace the cap, and position it upside down in the soil beside a plant. Another method is to bury a perforated bottle upright, leaving its opening above the soil for refilling.
Test the system before relying on it during a trip. Flow varies with hole size, soil texture, temperature, air pressure, and whether soil plugs the openings. Begin with very small holes and check the moisture after several hours. A homemade bottle irrigator is useful for gradual watering, but it is less predictable than a calibrated drip system.
6. Construct a Vertical Pocket Planter
Lay a large bottle horizontally and cut a rectangular planting window from one side. Add drainage holes on the opposite side, thread strong cord through reinforced holes near both ends, and hang the bottle securely against a fence or balcony rail. Fill it with lightweight potting mix and compact plants.
Several bottles can form a vertical garden, but avoid making the arrangement excessively heavy. Secure every cord and anchor, keep drainage water away from walking surfaces, and inspect sun-exposed plastic for brittleness. Shallow-rooted flowers generally perform better than thirsty plants with ambitious root systems.
7. Open a Plastic Bottle Bird Feeder
Cut two small openings on opposite sides of a one- or two-liter bottle. Slide a smooth wooden dowel or sturdy twig through holes beneath the openings to create perches. Add tiny drainage holes in the bottom, fill the bottle with appropriate birdseed, and hang it where squirrels cannot immediately declare ownership.
Keep the openings smooth and large enough that birds cannot become trapped. Clean the feeder regularlyat least weekly in wet or heavily used conditionsand allow it to dry before refilling. Replace it if it becomes cracked, cloudy, sharp, or difficult to sanitize. Discard damp or moldy seed promptly.
8. Make a Gentle Watering Can
Use a pushpin or small nail to create several holes in a bottle cap. Fill the bottle, tighten the cap, and squeeze gently to produce a controlled shower. This is particularly useful for seedlings, terrariums, and small containers that might be washed out by a full-size watering can.
Test the spray over a sink before approaching delicate plants. Fewer holes create a slower flow; more holes create a broader shower. Store the bottle empty between uses, especially outdoors, so stagnant water does not become a mosquito nursery.
9. Organize Pens, Brushes, and Craft Tools
Cut several bottles at different heights and use the bottom sections as cups for pens, paintbrushes, rulers, scissors, crochet hooks, or makeup brushes. Smooth every rim, then place the containers in a shallow box or attach them to a stable backing board.
Transparent bottles make supplies easy to identify, while colored bottles hide visual clutter. Add labels instead of relying on memory; “miscellaneous tiny things” is how craft drawers eventually become archaeological sites. Avoid making cups too tall, or short tools will disappear into them.
10. Create Wall-Mounted Storage Pockets
Large, rigid jugs can become lightweight bins for gloves, cleaning cloths, seed packets, extension-cord accessories, or workshop odds and ends. Keep the handle and back panel intact while cutting a generous opening from the front. Smooth the edges and fasten the jug to a pegboard or sturdy rail through reinforced mounting points.
These recycled storage bins are intended for light objects. Plastic jugs are not structural hardware, so do not load them with heavy tools, sharp blades, or anything that could cause an injury if the container failed.
11. Sew a Zippered Coin or Supply Case
Cut the molded bottoms from two matching soda bottles. Sand the edges, align a zipper around the inside rims, and mark evenly spaced sewing holes. An adult can make the holes with an awl before stitching the zipper in place with strong thread.
The resulting case works for coins, buttons, beads, earbuds, or small game pieces. Because the plastic bottoms are rigid and transparent, the contents remain visible without being crushed. Keep the case away from toddlers if it holds small items, and make sure no sharp wire, needle, or zipper end remains exposed.
12. Seal an Open Bag With the Bottle Neck
Cut the threaded neck and shoulder from a clean, dry beverage bottle. Feed the open end of a bag through the neck, fold the bag outward over the threads, and screw on the cap. This reusable bag closure can help contain dry rice, beans, cereal, craft beads, or other lightweight materials.
For food, use only a clean neck from a food-grade beverage bottle and keep both the bag and closure completely dry. The improvised seal is convenient, but it is not reliably airtight, child-resistant, or pest-proof. Store perishables and ingredients requiring airtight protection in purpose-made containers.
13. Make a Sink-Side Sponge Holder
Cut the bottom three or four inches from a rigid bottle. Shape one side slightly higher as a splash guard, round the corners, and add several drainage holes. Place it on a small saucer or attach a suction cup through a reinforced hole to keep a sponge near the sink.
Drainage is essential because a sponge sitting in trapped water becomes a tiny swamp with excellent ambitions. Rinse the holder frequently, let it dry, and recycle or discard it when the plastic becomes cracked or develops areas that can no longer be cleaned.
Real-World Experience: What You Learn After a Weekend of Bottle Projects
The first practical lesson is that the bottle chooses the project more than the project chooses the bottle. Thin water bottles collapse when asked to serve as storage bins, yet their flexible walls work well for funnels and gentle watering tools. Thick detergent jugs produce excellent scoops and wall pockets. Clear soda bottles are the obvious winners for cloches because sunlight can reach the plant and moisture remains visible.
Cutting is usually the awkward part. Trying to force scissors through an intact bottle makes the plastic buckle and sends the cutting line on an unscheduled detour. A small starter opening made by an adult with a sharp craft knife allows scissors to enter cleanly. Drawing the line first also makes an enormous difference. Eyeballing a cut sounds efficient until the finished organizer leans like it has had a difficult morning.
Edge finishing deserves more attention than most cheerful craft photos suggest. Even when a rim does not feel sharp initially, a pointed corner can scratch skin after repeated use. Rounded cuts, light sanding, and edge tape turn a five-minute experiment into something suitable for daily life. The same principle applies to holes for cord: an unsupported hole may tear under tension, so doubling the plastic or adding a washer improves durability.
Garden projects require observation rather than blind optimism. A bottle irrigator that empties perfectly in loose potting mix may barely drip in dense soil. A clear cloche that protects seedlings on a cool morning can overheat them by afternoon. A vertical planter can dry faster than a conventional pot because it contains less soil and has more exposed surface area. Testing each project for several days reveals whether it genuinely fits the plant, climate, and watering routine.
The bird feeder creates a different kind of learning curve. Birds may ignore a new feeder for days, while squirrels understand its engineering specifications almost immediately. Strong hanging cord, sensible placement, smooth openings, and frequent cleaning matter more than decoration. Once seed gets wet, replacing it is safer than hoping sunshine will perform a miracle.
Organization projects tend to deliver the quickest satisfaction. A row of bottle-bottom cups can rescue a drawer full of markers in less than half an hour. The improvement lasts longer when each cup has a defined category and the collection is limited to a tray. Without that boundary, upcycled organizers can become clutter that organizes other cluttera plot twist worthy of a home-improvement sitcom.
The most valuable experience is learning when to stop. A bottle should not be upcycled merely because it exists. If a project is unstable, impossible to clean, badly degraded, or unlikely to be used, recycling the intact container may be the better option. Successful reuse is measured by usefulness and longevity, not by the number of plastic swans perched on a windowsill.
Conclusion: Give Useful Bottles One More Job
Plastic bottles are remarkably adaptable raw material. With careful cutting and a realistic purpose, they can water plants, protect seedlings, feed birds, organize supplies, seal bags, and replace several inexpensive household tools.
The smartest approach is still to reduce disposable plastic whenever possible, reuse only clean and suitable containers, and recycle projects once they reach the end of their useful livesif your local program accepts them. Choose one idea that solves an actual problem, make it safely, and enjoy the small victory of turning yesterday’s packaging into today’s useful object.