Note: This recipe is designed for real home bakers: dramatic enough for a Halloween party, simple enough for a weeknight, and forgiving enough that your first cupcake does not need to look like it graduated from pastry school.
Spiderweb cupcakes are the kind of Halloween dessert that looks as if it required a tiny haunted engineering degree. Good news: it does not. With chocolate cupcakes, creamy frosting, and a simple toothpick trick, you can create spooky spiderweb cupcakes that look bakery-worthy without summoning a kitchen disaster demon.
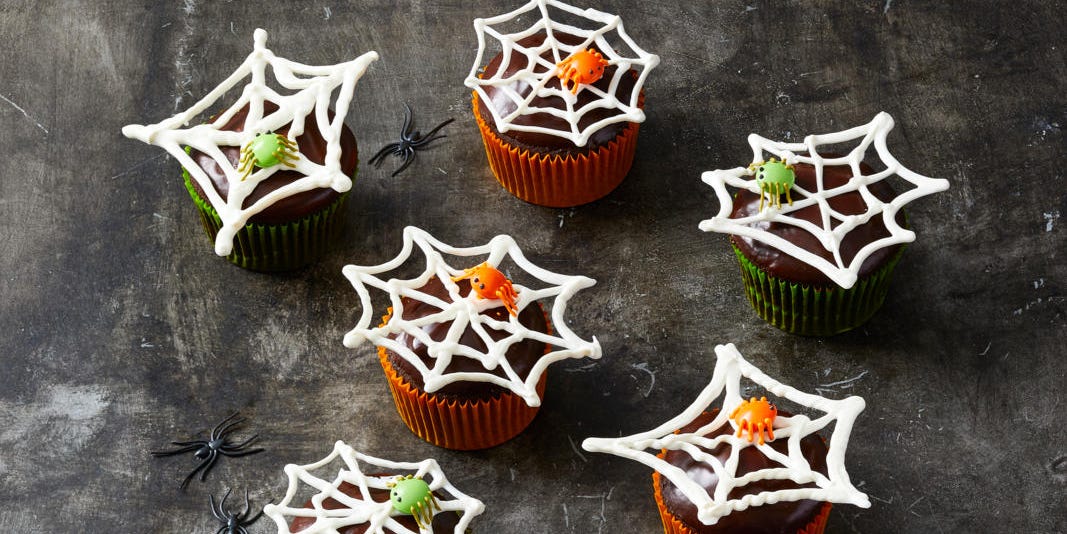
This best spiderweb cupcakes recipe starts with moist chocolate cupcakes, tops them with smooth vanilla frosting, then finishes each one with a black cocoa web design. The result is rich, cute, creepy, and very snackable. These Halloween cupcakes are perfect for classroom parties, trick-or-treat night, October birthdays, movie marathons, or any moment when regular cupcakes feel insufficiently haunted.
Why You’ll Love These Spiderweb Cupcakes
The best Halloween desserts walk a fine line: festive but not fussy, impressive but not impossible, sweet but not tooth-achingly chaotic. These cupcakes hit the sweet spot. The chocolate cupcake base is tender and deeply flavored, the vanilla buttercream gives you a bright canvas, and the spiderweb design comes together with simple circles and a toothpick.
You can make these from scratch, use a boxed cake mix in a hurry, or even decorate store-bought cupcakes if time is chasing you like a horror movie villain. The decorating method stays the same: pipe circles, drag lines outward, admire your edible web, and pretend you meant for every tiny wobble to be “rustic Halloween charm.”
Spiderweb Cupcakes Ingredients
For the Chocolate Cupcakes
- 1 cup all-purpose flour
- 1/2 cup unsweetened cocoa powder
- 3/4 teaspoon baking powder
- 1/2 teaspoon baking soda
- 1/2 teaspoon fine salt
- 2 large eggs, room temperature
- 3/4 cup granulated sugar
- 1/2 cup packed light brown sugar
- 1/3 cup vegetable oil
- 2 teaspoons vanilla extract
- 1/2 cup buttermilk, room temperature
- 1/2 cup hot coffee or hot water
For the Vanilla Frosting
- 1 cup unsalted butter, softened
- 3 1/2 cups powdered sugar
- 2 tablespoons heavy cream or milk, plus more as needed
- 2 teaspoons vanilla extract
- 1/4 teaspoon salt
For the Spiderweb Decoration
- 1/2 cup black decorating icing or black buttercream
- Small round piping tip or zip-top bag
- Toothpick or wooden skewer
- Optional: candy eyes, chocolate spiders, sprinkles, or gummy spiders
How to Make Spiderweb Cupcakes
Step 1: Prepare the Pan
Preheat the oven to 350°F. Line a standard 12-cup muffin pan with paper cupcake liners. Dark pans can bake faster, so check early if your pan is dark or nonstick. For extra-bright Halloween liners, you can double-line the pan so the colors stay more visible after baking.
Step 2: Mix the Dry Ingredients
In a medium bowl, whisk together the flour, cocoa powder, baking powder, baking soda, and salt. Whisking matters because cocoa powder loves to clump like it has secret plans. Break those clumps now so your batter bakes evenly.
Step 3: Mix the Wet Ingredients
In a large bowl, whisk the eggs, granulated sugar, brown sugar, oil, and vanilla until smooth. The oil keeps the cupcakes moist, while brown sugar adds a soft texture and a little caramel-like depth. Stir in the buttermilk until combined.
Step 4: Combine and Add Hot Coffee
Add the dry ingredients to the wet ingredients and whisk just until no large flour streaks remain. Slowly pour in the hot coffee or hot water while whisking gently. The batter will look thin, and that is correct. Thin chocolate cupcake batter usually bakes into a soft, moist crumb instead of a dry little cocoa brick.
Step 5: Fill and Bake
Divide the batter among the cupcake liners, filling each about two-thirds full. Bake for 17 to 20 minutes, or until the tops spring back lightly and a toothpick inserted into the center comes out clean or with a few moist crumbs. Let the cupcakes cool in the pan for 10 minutes, then transfer them to a wire rack. Cool completely before frosting, unless you enjoy watching buttercream slide off like a tiny sugary landslide.
Step 6: Make the Vanilla Frosting
Beat the softened butter for 2 minutes, until creamy. Add powdered sugar, 1 cup at a time, beating on low at first so your kitchen does not become a powdered sugar snow globe. Add cream, vanilla, and salt. Beat for 2 to 3 minutes until fluffy. If the frosting is too thick, add a teaspoon of cream. If it is too loose, add a little more powdered sugar.
Step 7: Frost the Cupcakes
Spread or pipe a smooth layer of vanilla frosting over each cooled cupcake. A flat or gently domed surface works best for the spiderweb design. If you pipe a tall swirl, the web will still look fun, but it may resemble a haunted cinnamon roll. Not a problem, just a different vibe.
Step 8: Pipe the Spiderweb
Place black icing in a piping bag fitted with a small round tip. Starting in the center of the cupcake, pipe three or four thin circles, each one larger than the last. They do not need to be perfect circles. Real spiderwebs are made by spiders, and spiders do not use protractors.
Step 9: Drag the Web Lines
Use a toothpick to drag lines from the center outward through the circles. Repeat 6 to 8 times around the cupcake. Wipe the toothpick between passes for cleaner lines. This simple dragging motion turns plain circles into a spooky web pattern almost instantly.
Step 10: Add the Final Halloween Touches
Add candy eyes, chocolate spiders, black sprinkles, orange sanding sugar, or gummy spiders. If using plastic spider rings or decorations, place them on top only for presentation and remove them before serving, especially for children.
Recipe Card: Best Spiderweb Cupcakes
Prep Time, Bake Time, and Yield
- Prep time: 35 minutes
- Bake time: 17 to 20 minutes
- Cooling time: 30 minutes
- Total time: About 1 hour 25 minutes
- Yield: 12 cupcakes
Instructions Summary
- Preheat oven to 350°F and line a muffin pan.
- Whisk flour, cocoa, baking powder, baking soda, and salt.
- Whisk eggs, sugars, oil, vanilla, and buttermilk.
- Combine wet and dry ingredients, then stir in hot coffee or water.
- Fill liners two-thirds full and bake 17 to 20 minutes.
- Cool completely.
- Beat butter, powdered sugar, cream, vanilla, and salt into frosting.
- Frost cupcakes smoothly.
- Pipe black circles and drag a toothpick outward to create webs.
- Decorate and serve.
Expert Tips for Perfect Spiderweb Cupcakes
Use a Smooth Frosting Surface
The cleaner the frosting surface, the sharper the web. Use an offset spatula or the back of a spoon to smooth the frosting before piping the black circles. Do not worry about perfection; the web design is wonderfully forgiving.
Work One Cupcake at a Time
Pipe the circles and drag the toothpick while the icing is still soft. If the frosting crusts over or the black icing dries, the toothpick will pull rather than glide.
Do Not Overfill the Liners
Filling cupcake liners two-thirds full helps create an even top and prevents overflow. Overflow cupcakes still taste good, but they look like they tried to escape the pan.
Cool Completely Before Decorating
Warm cupcakes melt frosting. Melted frosting ruins web lines. Ruined web lines lead to emotional snacking. Avoid the whole chain reaction by cooling the cupcakes fully.
Fun Variations
Marshmallow Spiderweb Cupcakes
Melt mini marshmallows briefly, let them cool just enough to touch, then stretch the sticky strands over frosted cupcakes. This creates a dramatic webbed look, especially over chocolate frosting. Lightly oil your fingers first, because marshmallow webs are adorable but clingy.
White Chocolate Spiderweb Cupcakes
Pipe melted white chocolate webs onto parchment paper and chill until set. Place the hardened webs upright or flat on top of the cupcakes. This method creates a crisp decoration with a satisfying snap.
Pumpkin Spiderweb Cupcakes
Add pumpkin pie spice to vanilla cupcakes or use pumpkin cupcakes as the base. Top with cream cheese frosting and pipe the same black web design. The flavor says fall; the decoration says, “Yes, I did bring dessert, and yes, it has a costume.”
Shortcut Spiderweb Cupcakes
Use your favorite boxed chocolate cake mix and canned vanilla frosting. The web technique still makes them look custom. This is a smart option for busy parents, last-minute hosts, or anyone whose October calendar has been eaten by costume shopping.
How to Store Spiderweb Cupcakes
Store decorated cupcakes in an airtight container at room temperature for up to 1 day or in the refrigerator for up to 3 days. Bring refrigerated cupcakes to room temperature before serving for the best texture. If using marshmallow webs or cotton candy-style decorations, add those close to serving time because humidity can make them soften or collapse.
Unfrosted cupcakes can be baked one day ahead and stored tightly covered at room temperature. You can also freeze the unfrosted cupcakes for up to 2 months. Thaw, frost, decorate, and let the spooky applause begin.
Common Mistakes to Avoid
Using Runny Frosting
If the frosting is too soft, the web lines may blur. Add powdered sugar a few tablespoons at a time until the frosting holds its shape.
Dragging Too Hard
A light touch creates cleaner web lines. Pressing too deeply can dig into the cupcake and pull crumbs into the frosting.
Making the Web Too Thick
Thin circles look more delicate and realistic. Thick lines can look heavy, though they still taste excellent, which is the cupcake’s main job.
What to Serve with Spiderweb Cupcakes
These Halloween cupcakes pair well with apple cider, hot chocolate, pumpkin punch, caramel popcorn, candy apples, or a big bowl of Halloween candy that everyone claims is “for the kids.” For parties, place the cupcakes on a black platter with orange napkins, candy eyes, and a few fake cobwebs around the table. Keep fake cobwebs away from the cupcakes themselves unless you want dessert with a side of craft-store lint.
Experience Notes: What I Learned Making Spiderweb Cupcakes
The biggest lesson from making spiderweb cupcakes is that the decorating process looks much scarier than it is. The first time you pipe circles on a cupcake, you may feel as if every line needs to be mathematically perfect. It does not. Once the toothpick drags through the circles, tiny mistakes disappear into the web design. In fact, slightly uneven webs often look better because real spiderwebs are irregular, delicate, and a little chaotic. Halloween is the one baking season where “slightly spooky and suspiciously crooked” counts as a design style.
Another useful experience: the frosting texture matters more than fancy equipment. A small round piping tip is helpful, but a zip-top bag with a tiny corner snipped off works well. The key is control. Cut the opening smaller than you think you need. You can always make it bigger, but once the bag is gushing icing like a haunted fire hose, there is no going back. For beginners, practicing a few circles on parchment paper first can build confidence before decorating the cupcakes.
Cooling is also non-negotiable. Warm cupcakes are tempting because they smell amazing, but frosting them too soon creates a mess. The buttercream softens, the web icing sinks, and the whole cupcake starts to look like it survived a tiny chocolate earthquake. Let the cupcakes cool completely. This one step makes decorating easier and gives the finished dessert a cleaner, more professional look.
When serving spiderweb cupcakes at a party, I have found that people notice contrast first. White frosting with black webs is classic because the design pops immediately. Orange frosting with black webs also looks fantastic and feels extra festive. Chocolate frosting with white webs has a darker, moodier look, especially if you add chocolate spiders or black sprinkles. For kids, candy eyes are always a hit. Add two eyes near the edge of the cupcake and suddenly the whole dessert has a personality. Is it cute? Is it watching you? Both.
For transportation, flatter frosting is safer than tall swirls. A smooth frosted top gives the web room to sit neatly and prevents cupcakes from bumping into the lid of the carrier. If you are taking these to school, work, or a Halloween potluck, decorate them after placing them in the carrier if possible. That way, you avoid smudging the webs during transfer. It is a small detail, but it saves the dramatic heartbreak of watching your best cupcake smear against a plastic lid five minutes before the party.
Finally, spiderweb cupcakes are ideal for group decorating. Set out cooled cupcakes, frosting, piping bags, sprinkles, and candy spiders, then let everyone make their own. Some webs will be elegant. Some will look like a spider had too much coffee. Either way, the activity is fun, the cupcakes are edible, and the photos are priceless. That is the real magic of this recipe: it creates dessert and entertainment at the same time.
Conclusion
The best spiderweb cupcakes recipe does not need complicated tools, rare ingredients, or professional decorating skills. A moist chocolate cupcake, fluffy vanilla frosting, black icing, and a toothpick are enough to create a Halloween dessert that looks festive and tastes even better. Whether you make them completely from scratch or take a shortcut with boxed mix, these cupcakes bring big spooky-season energy to the table.
Make them for parties, bake sales, family movie nights, or a cozy October weekend when the air feels crisp and your kitchen needs something chocolatey. Spiderweb cupcakes are playful, customizable, and just dramatic enough to make guests ask, “Wait, you made these?” Smile mysteriously. That is part of the recipe.