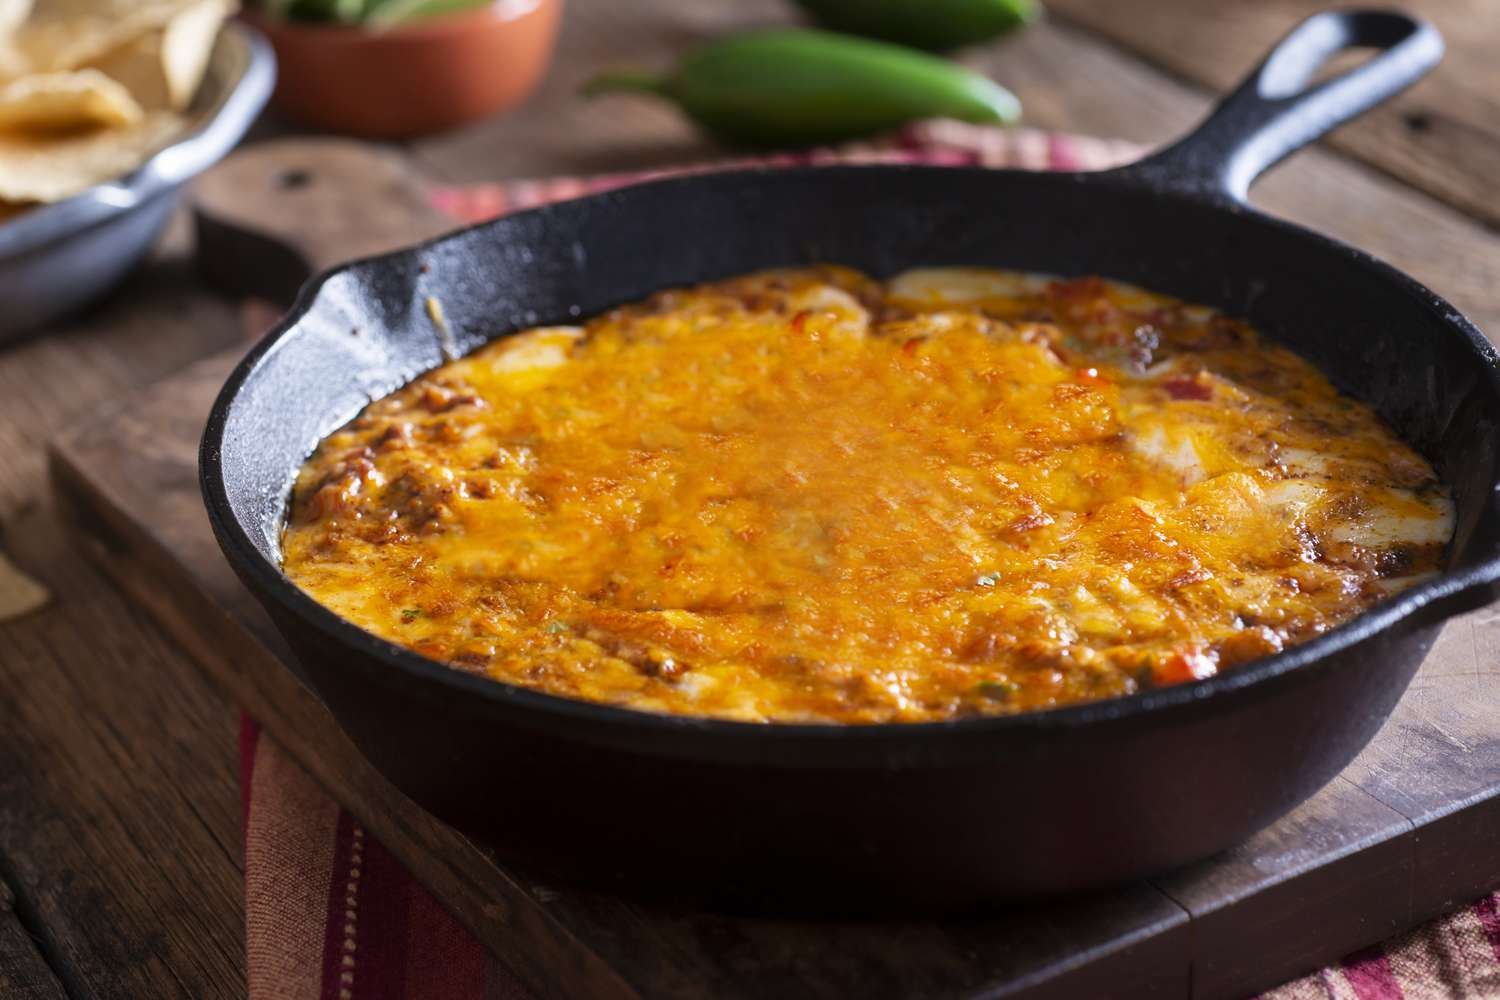
Some appetizers politely sit on the table and wait to be noticed. This baked Mexican chili cheese dip does not. It bubbles, stretches, smells like a taco night victory parade, and has the social confidence of someone who brought extra tortilla chips. Built with seasoned chili, cream cheese, salsa, jalapeños, cheddar, Monterey Jack, and a bright finish of fresh toppings, this hot dip is the kind of recipe that turns a normal gathering into a “Who made this?” situation.
This recipe is inspired by classic American game-day chili cheese dips, Tex-Mex queso, layered party dips, and the very real truth that melted cheese improves almost every room it enters. It is simple enough for beginners, flexible enough for experienced home cooks, and sturdy enough to survive a snack table full of hungry people circling like polite but determined chip-wielding hawks.
Why This Baked Mexican Chili Cheese Dip Works
The best baked Mexican chili cheese dip is creamy, scoopable, savory, lightly spicy, and not watery. That balance comes from layering textures and flavors rather than simply dumping cheese on chili and hoping the oven performs a miracle. Cream cheese forms the rich base, chili brings body and seasoning, salsa adds brightness, and shredded cheese melts into a golden blanket on top.
The Mexican-inspired flavor comes from cumin, chili powder, garlic, jalapeño, tomatoes, beans, green chiles, cilantro, and lime. It is not trying to be a traditional regional Mexican dish. It is a Tex-Mex party dip with Mexican-style ingredients, built for tortilla chips, football nights, movie marathons, potlucks, and those mysterious “small get-togethers” that somehow require enough food for twenty-seven people.
Ingredients for Baked Mexican Chili Cheese Dip
Main Ingredients
- 8 ounces cream cheese, softened: This creates the creamy base and keeps the dip rich.
- 2 cups prepared chili: Use homemade beef chili, turkey chili, bean chili, or a good-quality canned chili.
- 1 cup salsa: Choose medium salsa for balanced heat or hot salsa if your guests enjoy culinary drama.
- 1 cup shredded sharp cheddar cheese: Adds bold flavor and that classic chili cheese taste.
- 1 cup shredded Monterey Jack cheese: Melts smoothly and softens the sharpness of cheddar.
- 1/2 cup refried beans or black beans: Optional, but helpful for body and scoopability.
- 1 small jalapeño, finely diced: Remove seeds for mild heat; keep some seeds for more kick.
- 1/2 small onion, finely diced: Adds savory depth.
- 1 teaspoon chili powder: Brings warm Tex-Mex flavor.
- 1/2 teaspoon ground cumin: Adds earthy aroma.
- 1/2 teaspoon garlic powder: Because cheese and garlic are basically old friends.
- 1 tablespoon lime juice: Brightens the rich dip.
Fresh Toppings
- Diced tomatoes
- Sliced green onions
- Chopped cilantro
- Pickled jalapeños
- Sliced black olives
- A spoonful of sour cream
- Crumbled queso fresco or cotija
Step-by-Step Recipe
Step 1: Preheat the Oven
Preheat your oven to 375°F. Lightly grease an 8×8-inch baking dish, a pie plate, or a 10-inch oven-safe skillet. A cast-iron skillet works beautifully because it holds heat well and makes the dip look like it came from a restaurant where the napkins are tiny but the appetizers mean business.
Step 2: Build the Creamy Base
In a bowl, mix softened cream cheese with lime juice, garlic powder, cumin, and chili powder. Spread the mixture evenly across the bottom of your baking dish. Softened cream cheese is important here. Cold cream cheese will fight you like it has a personal grudge against spreading.
Step 3: Add Beans and Salsa
Spread refried beans or black beans over the cream cheese layer, then spoon salsa over the beans. This middle section gives the dip a thicker, more satisfying texture. It also prevents the chili from sinking completely into the cream cheese, which helps every scoop taste balanced.
Step 4: Add Chili
Spoon the chili evenly over the salsa layer. If your chili is very loose or soupy, simmer it for a few minutes first to reduce extra liquid. A thick chili makes a better dip because tortilla chips are brave, but they are not structural engineers.
Step 5: Add Onion, Jalapeño, and Cheese
Sprinkle the diced onion and jalapeño over the chili. Top with cheddar and Monterey Jack. For the smoothest melt, shred cheese from a block instead of using pre-shredded cheese. Bagged shredded cheese is convenient, but it often contains anti-caking ingredients that can make melted cheese slightly less silky.
Step 6: Bake Until Hot and Bubbly
Bake uncovered for 20 to 25 minutes, or until the cheese is melted, the edges are bubbling, and the center is hot. If you want a more golden top, broil for 1 to 2 minutes at the end. Watch carefully because broilers can turn cheese from “beautifully toasted” to “tiny dairy volcano” faster than you can say, “Where are the oven mitts?”
Step 7: Finish and Serve
Let the dip rest for 5 minutes before serving. Add tomatoes, green onions, cilantro, pickled jalapeños, and a spoonful of sour cream if desired. Serve hot with tortilla chips, corn chips, pita chips, toasted bread, bell pepper strips, or crunchy vegetables.
Best Chili to Use
This baked chili cheese dip recipe works with several types of chili. Beef chili gives the richest flavor and classic game-day personality. Turkey chili is lighter but still hearty. Bean chili makes the recipe vegetarian-friendly if you also choose vegetarian toppings and cheese. Canned chili is the fastest option and works well when you need an appetizer quickly.
The main rule is thickness. A chili with too much liquid can make the dip runny. If using homemade chili, choose a version with beans, ground meat, tomatoes, and a thick sauce. If using canned chili, stir it before layering and drain off any obvious excess liquid. The goal is a dip that clings to a chip, not one that slides off and redecorates your shirt.
Cheese Tips for a Creamier Dip
A mix of cheddar and Monterey Jack gives this dip its best flavor and texture. Cheddar brings sharpness, saltiness, and color. Monterey Jack melts smoothly and keeps the top layer creamy. Pepper Jack is an easy swap if you want extra heat. Mexican-style shredded cheese blends also work, especially when convenience is the priority.
For a smoother, queso-like finish, use freshly grated cheese. You can also stir 2 tablespoons of evaporated milk into the chili before layering if you want a softer, saucier middle. Do not overbake the dip after the cheese melts. Too much oven time can cause the cheese to separate and become oily.
Flavor Variations
Spicy Baked Mexican Chili Cheese Dip
Add chipotle peppers in adobo, hot salsa, cayenne pepper, or extra jalapeños. A little chipotle goes a long way and adds smoky depth. Start with 1 teaspoon minced chipotle, then adjust. This version is perfect for people who believe mild salsa is just tomato sauce wearing a tiny sombrero.
Loaded Nacho-Style Chili Cheese Dip
Add corn, black olives, diced avocado after baking, and crushed tortilla chips on top. Serve with extra salsa and sour cream. This turns the dip into a scoopable nacho casserole, which is excellent news for anyone who has ever wished nachos came with fewer loose toppings escaping across the plate.
Vegetarian Chili Cheese Dip
Use vegetarian chili with beans, lentils, or plant-based crumbles. Add roasted corn, black beans, green chiles, and a little smoked paprika for extra depth. Vegetarian chili dip can be just as hearty as the meat version when the chili base is well-seasoned and thick.
Extra Creamy Queso-Style Dip
Mix 1/2 cup queso dip or a few ounces of American cheese into the chili layer before baking. This creates a smoother, more restaurant-style texture. It is not fancy, but it works. Sometimes the secret ingredient is humility and a block of cheese that melts like it trained for the Olympics.
What to Serve With Mexican Chili Cheese Dip
Tortilla chips are the obvious choice, but they are not the only choice. Thick corn chips are great because they can handle the weight of the chili and cheese. Toasted baguette slices make the dip feel slightly more dressed up. Mini bell peppers add crunch and freshness. Celery sticks work if you want to pretend this whole situation is a salad. No judgment.
You can also spoon leftovers over baked potatoes, hot dogs, fries, scrambled eggs, rice bowls, or nachos. A good chili cheese dip does not retire after the party. It simply changes careers.
Make-Ahead Instructions
To make this dip ahead, assemble it up to 24 hours in advance, cover tightly, and refrigerate. When ready to bake, remove it from the refrigerator while the oven preheats. Add 5 to 10 extra minutes to the baking time because the dish will be cold. Wait to add fresh toppings until just before serving.
You can also prepare the chili layer ahead of time and store it separately. This is helpful when making homemade chili. The flavors often improve after resting overnight, which means tomorrow’s dip may taste even better than today’s. That is the kind of leftover math we can all support.
Storage and Reheating
Store leftover baked Mexican chili cheese dip in an airtight container in the refrigerator for up to 3 to 4 days. Reheat in the microwave in short intervals, stirring gently between each one. You can also reheat it in a covered baking dish at 325°F until hot. For food safety, leftovers should be reheated to 165°F.
If the dip thickens too much after chilling, stir in a splash of milk, evaporated milk, or salsa before reheating. Add fresh toppings again after warming, because tomatoes and cilantro are much happier when they are not microwaved into confusion.
Common Mistakes to Avoid
Using Watery Chili
Thin chili creates a loose dip. Simmer watery chili until thick before adding it to the baking dish. A thick chili layer gives the dip structure and makes every scoop satisfying.
Skipping the Rest Time
The dip needs about 5 minutes to settle after baking. If you attack it immediately, it may be too molten and messy. Delicious, yes, but also capable of turning your chip into a tiny shovel in a cheese swamp.
Overloading the Top
Fresh toppings are wonderful, but too many can cool the dip and make it watery. Use juicy toppings like tomatoes in moderation, and drain them first if needed.
Using Weak Chips
This dip is thick and hearty. Choose sturdy tortilla chips or corn chips. Thin chips may break, and nobody wants to fish chip fragments out of hot cheese like an appetizer archaeologist.
Nutrition and Serving Notes
This is a rich party appetizer, not a quiet bowl of steamed broccoli. A reasonable serving is about 1/4 cup, depending on the crowd and what else is being served. To lighten it slightly, use reduced-fat cream cheese, turkey chili, vegetarian chili, or more beans and vegetables. You can also serve it with bell pepper strips and cucumber rounds alongside chips.
For a bigger party, double the recipe and bake it in a 9×13-inch dish. Keep an eye on the center, as larger dishes may need extra time. If serving for a long event, keep the dip warm in a slow cooker on the warm setting after baking, stirring occasionally so the edges do not dry out.
Frequently Asked Questions
Can I make this dip without cream cheese?
Yes. You can replace cream cheese with refried beans, queso dip, sour cream mixed with shredded cheese, or a thicker layer of chili. However, cream cheese gives the dip its signature creamy base and helps hold the layers together.
Can I use Velveeta or American cheese?
Yes. Processed cheeses melt smoothly and can make the dip more queso-like. For a balanced flavor, combine a small amount with cheddar or Monterey Jack instead of replacing all the cheese.
Is this dip very spicy?
As written, it is medium-mild. The jalapeño and salsa add flavor without overwhelming heat. For a mild version, remove the jalapeño seeds and use mild salsa. For a hotter version, add chipotle, hot sauce, or pepper Jack cheese.
Can I freeze chili cheese dip?
You can freeze it, but the texture may change because cream cheese can become slightly grainy after thawing. If you do freeze it, store it tightly sealed for up to 2 months and reheat slowly, stirring in a splash of milk if needed.
Personal Experience: What Makes This Dip a Party Favorite
The first time I made a baked Mexican chili cheese dip like this, I underestimated it. I thought it would be one of several appetizers on the table, sitting politely beside salsa, guacamole, and a tray of vegetables that everyone admired but treated like table décor. Instead, the dip became the main event. People kept drifting back to it with the same innocent expression: “Oh, I’m just having one more chip.” That sentence, as history has shown, is rarely accurate.
What makes this recipe memorable is the contrast. The bottom layer is creamy and tangy. The chili is hearty and warmly spiced. The salsa adds brightness. The cheese on top melts into a stretchy, golden layer that makes every scoop feel dramatic in the best way. Add fresh cilantro, tomatoes, green onions, and pickled jalapeños at the end, and suddenly the whole dish wakes up. It tastes rich, but not flat. Comforting, but not boring. Fun, but not chaotic. Basically, it has better emotional balance than most group chats.
I have learned a few things from making this dip for different occasions. First, thickness matters. If the chili is too loose, the dip becomes messy and the chips surrender immediately. A thicker chili makes the whole dish easier to scoop and more satisfying to eat. Second, fresh toppings should be added after baking, not before. Cilantro and tomatoes lose their charm when baked too long. They are the confetti, not the foundation. Third, people love options. Put extra jalapeños, sour cream, lime wedges, and hot sauce on the side so guests can customize their own level of bravery.
This dip is especially useful because it fits almost any casual event. Game day? Perfect. Birthday snack table? Absolutely. Family movie night? Dangerous, but in a lovable way. Potluck? Bring it hot, bring chips, and prepare to answer questions. It also has that wonderful quality every host appreciates: it looks like more effort than it actually requires. Most of the work is layering ingredients in a dish, covering them with cheese, and letting the oven do the persuasive part.
My favorite way to serve it is in a cast-iron skillet with a ring of tortilla chips around the edge and fresh toppings scattered over the center. It looks rustic, colorful, and generous. If I want to make it feel like a full snack board, I add corn chips, mini peppers, warm flour tortillas, and a bowl of guacamole nearby. The dip becomes the anchor of the table, and everything else becomes a supporting actor trying its best.
Leftovers, when they exist, are surprisingly useful. A spoonful over scrambled eggs makes a bold breakfast. Spread over fries, it becomes chili cheese fries. Folded into a tortilla, it becomes an easy quesadilla filling. Added to rice, it becomes a quick burrito bowl. This is why I often make a little extra. Not because I lack self-control, of course. It is called planning.
The real secret is not just cheese, chili, or spice. It is serving something warm and shareable. A baked dip invites people to gather, scoop, laugh, hover, and negotiate over the last cheesy corner. That is the magic of this baked Mexican chili cheese dip recipe: it is easy food that feels festive. It does not need fancy plating or complicated technique. It just needs good ingredients, a hot oven, sturdy chips, and at least one person willing to say, “Okay, I need the recipe.”
Conclusion
Baked Mexican chili cheese dip is the kind of appetizer that earns repeat invitations. It is creamy, hearty, spicy enough to be exciting, and easy enough to make without turning your kitchen into a disaster documentary. With cream cheese, thick chili, salsa, beans, jalapeños, and a blend of cheddar and Monterey Jack, this recipe delivers big flavor in a simple baked dish.
Keep the chili thick, use freshly shredded cheese when possible, add fresh toppings after baking, and serve it hot with sturdy chips. Whether you are hosting game day, feeding family, or creating a snack table that deserves applause, this dip brings comfort, color, and just the right amount of cheesy chaos.