A sticking wood door has a special talent for becoming annoying at the exact wrong moment. You are carrying coffee, laundry, a sleeping baby, or your last shred of patience, and suddenly the door decides it has entered its “medieval drawbridge” era. The good news: most sticky doors are not dramatic structural mysteries. They are usually caused by humidity, loose hinges, worn screws, paint buildup, dirty edges, sagging, or a slightly shifted frame.
This step by step guide will show you how to stop a wood door from sticking without immediately reaching for the most aggressive tool in the garage. In fact, the smartest repair starts with observation, not sanding. Remove too much wood too soon and you may trade a sticky door for a drafty, rattling one. That is not a home improvement win; that is just a new problem wearing safety glasses.
Below, you will learn how to diagnose where the door is rubbing, tighten hinges, fix stripped screw holes, adjust the strike plate, manage humidity, sand or plane only when needed, and seal the repaired area so the problem does not come back with the next rainy week.
Why Wood Doors Stick in the First Place
Before fixing the door, it helps to know what made it misbehave. Wood is a natural material, which means it expands and contracts as indoor humidity changes. During humid weather, a wood door can swell just enough to rub against the jamb, header, threshold, or stop. During drier months, that same door may shrink back and behave perfectly, as if nothing ever happened. Classic door drama.
Humidity is only one suspect. Doors also stick when hinges loosen, hinge screws strip out, the frame shifts as the house settles, paint layers build up around the edge, the strike plate sits proud of the jamb, or the door rubs after new flooring or a thicker rug is installed. Exterior doors may also stick because of water exposure, failed weatherstripping, or poor sealing on the top and bottom edges.
Tools and Supplies You May Need
You probably will not need every item on this list. Start simple and move up only if the basic fixes do not work.
- Phillips-head screwdriver
- Flashlight
- Pencil, chalk, masking tape, or painter’s tape
- Carbon paper or a dark crayon for marking rub spots
- 3-inch wood screws
- Wood glue and toothpicks or wood dowels for stripped holes
- Sandpaper: 80-, 120-, and 180-grit
- Sanding block or palm sander
- Hand plane or electric planer, if heavy trimming is required
- Hammer and nail set for hinge pins
- Silicone spray, graphite lubricant, or light household oil
- Paint, primer, stain, polyurethane, or varnish to reseal bare wood
- Safety glasses, dust mask, and hearing protection if sanding heavily
Step 1: Find Exactly Where the Door Is Sticking
Do not guess. A sticky door is like a squeaky floorboard: the problem is often close to where you think it is, but not always exactly there.
Open and close the door slowly. Watch the gap around the top, latch side, hinge side, and bottom. A healthy interior door usually has a small, even reveal around the frame. If the gap is tight at the top latch corner, the door may be sagging from loose hinges. If it drags along the floor, the bottom may need adjustment. If it sticks near the latch, the strike plate or swollen edge may be the culprit.
How to Mark the Rubbing Area
Use painter’s tape or a pencil to mark where the door rubs. Another handy trick is to slide carbon paper between the door and jamb, then open and close the door. The pressure leaves a mark where contact happens. You can also rub chalk on the jamb, close the door, and check where the chalk transfers to the door edge.
This step matters because targeted repair saves time and prevents over-sanding. Your goal is not to remodel the door into a toothpick. Your goal is to remove friction where it actually exists.
Step 2: Clean the Door Edges and Frame
Sometimes a door sticks because dirt, grime, paint residue, or old wax has built up on the contact surfaces. This is especially common in kitchens, bathrooms, kids’ rooms, and older homes with several layers of paint.
Mix mild dish soap with warm water. Wipe the door edge, jamb, stop molding, and threshold. Dry everything thoroughly. If you see paint ridges or small bumps, gently scrape only the raised material with a putty knife or paint scraper. Be careful not to gouge the wood.
After cleaning, test the door again. If the sticking improves, you may only need a light sanding and a better finish. That is the door-repair equivalent of finding money in a coat pocket.
Step 3: Tighten the Hinge Screws
Loose hinges are one of the most common causes of a sticking wood door. Over time, the weight of the door pulls on the top hinge. The screws loosen, the door sags, and the latch-side top corner starts rubbing against the frame.
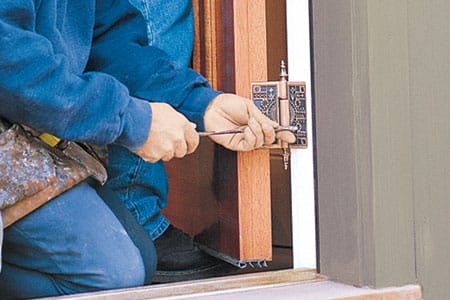
Use a manual screwdriver, not a power drill at full speed. A drill can strip old screw holes in seconds, and then your five-minute fix becomes a small woodworking side quest. Tighten the screws on both the door side and jamb side of each hinge. Pay special attention to the top hinge.
Close the door and check the gap. If the reveal improves and the rubbing disappears, celebrate responsibly. Open and close the door several times to make sure it stays aligned.
Step 4: Replace Short Hinge Screws with Longer Screws
If the hinge screws spin without tightening, the holes may be stripped. A common fix is to replace one or two screws in the top hinge with 3-inch wood screws. Longer screws reach beyond the thin jamb and bite into the wall framing behind it. This can pull the sagging hinge side back into position and lift the latch-side edge slightly.
Remove one screw from the top hinge on the jamb side. Drive in a 3-inch wood screw carefully. Do not bury it so hard that the jamb bends too far. Small adjustments make a big difference. Test the door after each screw. If needed, repeat with one screw in the middle hinge.
How to Fix Stripped Screw Holes
If longer screws are not appropriate or the hinge leaf still feels loose, fill the stripped hole. Remove the screw, dip wooden toothpicks or a small dowel in wood glue, and insert them into the hole. Let the glue dry, trim the excess flush, drill a small pilot hole, and reinstall the screw. This gives the screw fresh wood fibers to grip.
Step 5: Check the Strike Plate and Latch
A door that seems to stick may actually be catching at the latch. Look at the metal strike plate on the jamb. If it is loose, raised, crooked, or packed with paint, the latch bolt may drag instead of sliding cleanly into the opening.
Tighten the strike plate screws. If the plate sits proud of the jamb, remove it and scrape away paint buildup underneath. Reinstall it so it sits flush. If the latch is hitting the top or bottom edge of the strike hole, mark the contact point and carefully file the opening. For small alignment problems, this may be enough.
Do not enlarge the strike opening wildly. A sloppy strike plate can make the door rattle, reduce privacy, and look like it was repaired during a power outage by someone holding a spoon.
Step 6: Lubricate Hinges and the Latch
If the door is rubbing slightly and the hinges squeak or feel stiff, lubrication may help. Remove one hinge pin at a time by tapping it upward with a nail set and hammer. Clean the pin with a rag. Apply silicone spray, graphite lubricant, or a small amount of light oil. Reinsert the pin and swing the door several times to distribute the lubricant.
For the latch, use a small amount of graphite or silicone-based lubricant. Wipe away excess. Avoid heavy grease because it can attract dust and grime, which eventually turns into sticky black paste. Your door deserves better skincare than that.
Step 7: Control Indoor Humidity
If your wood door sticks mostly during humid weather, the real problem may be moisture. Bathrooms, laundry rooms, basements, and exterior entryways are especially prone to humidity-related swelling.
Use exhaust fans during showers and cooking. Run a dehumidifier in damp rooms. Check for leaks near exterior doors. Make sure weatherstripping is not trapping water against the wood. If the door swells every summer, trimming may help, but controlling moisture helps prevent the cycle from returning.
For exterior doors, inspect the top, bottom, and side edges. Many doors are painted on the faces but poorly sealed on the top and bottom. Bare or under-sealed end grain absorbs moisture quickly. If you sand or plane the door, always reseal the exposed wood.
Step 8: Sand Minor High Spots
If tightening, cleaning, and adjusting hardware do not solve the issue, it may be time to remove a small amount of material. Start with sanding, not planing, if the rub is minor.
Mark the sticking area. Remove the door if needed, or work carefully with the door open. Use 80- or 120-grit sandpaper on a sanding block for the high spot, then smooth with 180-grit. Sand evenly and check the fit often. A few passes may be all it takes.
Important Sanding Tip
Do not sand the entire edge just because one spot rubs. Focus on the marked area and feather the edges so the repair blends naturally. If the door is painted, sanding may expose bare wood. Prime and repaint the area after the fit is correct.
Step 9: Plane the Door Only When Necessary
Planing is the stronger fix for a badly swollen, uneven, or oversized door. It is effective, but it is also less forgiving. Once wood is gone, it is not coming back unless you enjoy advanced carpentry and emotional consequences.
Remove the door from its hinges and place it on stable sawhorses. Mark the area to be trimmed. Use a sharp hand plane and work in the direction of the wood grain. Take thin shavings, not heroic chunks. If using an electric planer, practice on scrap wood first and keep the tool moving steadily.
For a door that rubs at the bottom, you may need to trim the lower edge. Score the cut line with a utility knife first to reduce splintering, especially on painted or veneered doors. After planing, sand the edge smooth, rehang the door, and test the swing.
Step 10: Seal, Paint, or Finish the Repaired Area
This is the step many people skip, and it is the reason many sticky doors return like a bad sequel. Sanding or planing exposes fresh wood. Fresh wood absorbs moisture. Moisture causes swelling. Swelling causes sticking. And then you are back in the hallway asking the door why it has betrayed you.
Seal the repaired area with primer and paint, stain and polyurethane, or a suitable clear finish. For exterior doors, use a finish rated for outdoor exposure. Coat the top and bottom edges too, not just the visible face. Allow the finish to dry fully before closing the door for long periods, or fresh paint may stick to the jamb.
Common Sticky Door Problems and Quick Fixes
The Door Rubs at the Top Corner
This usually means the door is sagging. Tighten the top hinge screws first. If they are stripped, repair the holes or use longer screws that reach the framing.
The Door Drags on the Floor
Check whether new flooring, a rug, or a raised threshold is causing the issue. Tighten hinges before trimming. If the door still drags, sand or plane the bottom edge carefully.
The Door Sticks Near the Latch
Inspect the strike plate, latch bolt, and latch-side edge. Tighten the strike plate, remove paint buildup, and adjust the opening if the latch is slightly misaligned.
The Door Sticks Only in Summer
Humidity is likely the main cause. Improve ventilation, use a dehumidifier, and seal exposed wood. If the fit is still too tight during peak humidity, sand the rubbing area lightly while the door is swollen so you do not remove too much.
The Door Sticks After Painting
Paint may be too thick, not fully cured, or built up along the edges. Let the paint cure, then lightly sand high spots. Use thin coats when repainting, and avoid closing the door tightly before the finish has hardened.
When to Call a Professional
Many sticky doors are easy DIY repairs, but some problems deserve professional attention. Call a carpenter, handyman, or door specialist if the frame is visibly out of square, the door is severely warped, the wall has signs of structural movement, the exterior door leaks water, or the lock no longer aligns securely. You should also get help if the door is unusually heavy, antique, custom-made, or part of a fire-rated assembly.
A professional can determine whether the problem is the door, the frame, the foundation, moisture damage, or installation. That diagnosis can save you from sanding a perfectly innocent door when the jamb is the real troublemaker.
Prevention: How to Keep a Wood Door from Sticking Again
Once your wood door swings smoothly, a little maintenance keeps it that way. Check hinge screws every few months, especially on heavy doors. Keep painted edges clean. Touch up chipped paint before moisture reaches bare wood. Use bathroom and kitchen fans to reduce humidity. Lubricate hinges once or twice a year. Inspect exterior weatherstripping and thresholds before storm season.
If you live in a humid climate, consider using a dehumidifier in problem areas. For older wood doors, make sure all six sides are sealed: front, back, left edge, right edge, top, and bottom. The top and bottom are easy to forget because you rarely see them, but moisture definitely knows where they are.
Real-Life Experience: What Actually Works When a Wood Door Starts Sticking
In real homes, sticky doors rarely announce the exact cause with a tiny handwritten note. You usually discover the problem through daily irritation. The bedroom door needs a hip bump. The bathroom door wakes everyone up at midnight. The back door closes only when you use what can politely be called “firm encouragement.” After dealing with enough sticking wood doors, one lesson becomes clear: the easiest fix is often the correct fix, but only if you inspect first.
One common experience is the summer-only sticky door. It works beautifully in January, then becomes stubborn in July. In that case, sanding immediately can be risky. If you remove too much wood during a swollen season, the door may have an oversized gap when the air dries out. The better approach is to confirm the rub spot, improve ventilation, and sand only the smallest amount needed. A dehumidifier in a damp hallway or basement can make a surprising difference.
Another frequent situation is the sagging top corner. The door rubs near the upper latch side, and everyone assumes the wood has swollen. Then someone tightens the top hinge screws, and suddenly the door works again. This is why hinge inspection should come before sanding. A loose hinge can mimic a swollen door, but the repair is faster, cleaner, and cheaper.
Stripped screw holes are also extremely common in older houses. You turn the screwdriver, but the screw spins like it is stirring soup. Toothpicks and wood glue may sound like a cartoon repair, but they work well for small stripped holes. For heavier doors, longer screws into the framing are often more reliable. The trick is to adjust gradually. One long screw can shift the door enough; three over-tightened screws can pull the jamb too far and create a new alignment issue.
Paint buildup is another sneaky villain. A door may not be swollen or sagging at all. It may simply have decades of paint on the edge and jamb. In older homes, the paint layers can become thick enough to erase the original clearance. Light scraping and sanding can restore the gap without removing actual door structure. When repainting, thin coats are better than one thick coat that turns the door edge into a sticky frosting layer.
The biggest practical lesson is to test constantly. Tighten, test. Sand a little, test. Plane a little, test. Rehang, test. A door fit changes with tiny adjustments, and patience prevents overcorrection. It is tempting to “just take off a bit more,” but that phrase has caused many uneven gaps, rattling doors, and regretful sighs.
Finally, finishing the repaired edge matters more than people think. Bare wood may look harmless, but it drinks moisture. If you sand the top, bottom, or side of a door and leave it unfinished, you have created the perfect place for future swelling. Seal it, let it dry, and give the door a fair chance to remain civilized.
The most satisfying sticky-door repair is not always the most dramatic one. Sometimes it is a screwdriver, a little cleaning, one longer screw, and ten minutes of careful observation. The door swings smoothly, the house feels calmer, and you get to walk through the room without negotiating with a slab of wood. That is a small home victory, but a very good one.
Conclusion
Stopping a wood door from sticking is a step by step process: inspect the gap, identify the rub, clean the edges, tighten the hinges, repair stripped screws, adjust the strike plate, manage humidity, and sand or plane only when simpler fixes fail. The best repair is precise, patient, and finished properly with paint, stain, or sealer.
A sticking door may feel like a big nuisance, but in many cases, it is a beginner-friendly DIY project. Start with the least invasive solution and move carefully. Your door does not need brute force; it needs a little detective work, a screwdriver, and maybe a humble sanding block. Not glamorous, perhaps, but deeply satisfying.