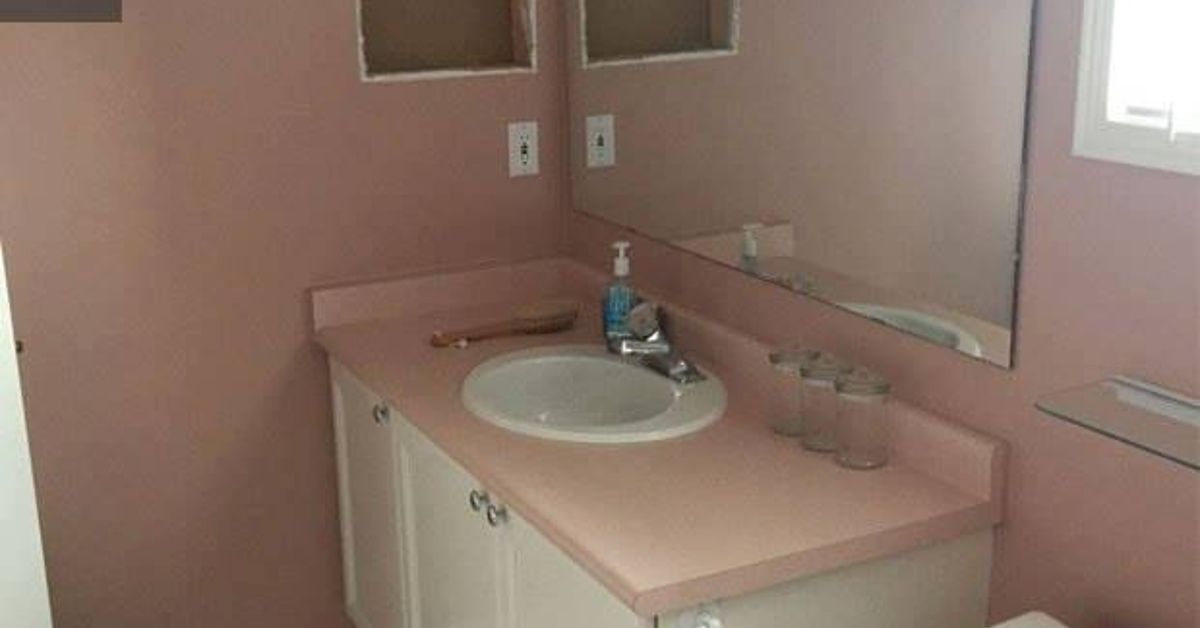
A bathroom makeover does not have to begin with a demolition hammer, a five-figure loan, and a temporary outdoor shower that alarms the neighbors. In many bathrooms, the layout still works, the plumbing is serviceable, and the biggest problems are cosmetic: tired paint, dated hardware, gloomy lighting, cracked caulk, cluttered counters, and a vanity that looks as if it has been emotionally exhausted since 1998.
The smartest budget bathroom makeover focuses on what people notice first and what moisture damages fastest. Paint, lighting, mirrors, hardware, storage, fresh sealant, and carefully chosen surface updates can create a dramatic transformation without moving pipes or rebuilding the shower. The goal is not to make an inexpensive bathroom look “cheap but cheerful.” The goal is to spend deliberately, protect the room from water, and make every dollar visible.
Start With a Makeover Plan, Not a Shopping Cart
Before buying a faucet because it looked handsome under warehouse lighting, inspect the bathroom in daylight. Separate the problems into three categories: safety, function, and appearance. Safety issues include loose outlets, water near unprotected electrical devices, soft flooring, active leaks, mold growth, and unstable fixtures. Functional issues include poor ventilation, weak lighting, inadequate storage, or a toilet that performs a dramatic encore after every flush. Appearance comes last.
Keeping the existing layout is one of the most effective ways to control costs. Moving a toilet, sink, tub, or shower can trigger plumbing, flooring, wall, permit, and inspection work. When the fixtures are in sensible locations, leave the pipes alone and improve what surrounds them. A budget makeover succeeds by editing the room, not by teaching the drain line a new dance routine.
Create a Simple Scope of Work
Write down exactly what will change. A realistic weekend-to-week makeover might include repainting the walls and vanity, replacing cabinet pulls, installing a new mirror and light fixture, updating the showerhead, adding shelves, replacing damaged caulk, and styling the room with a coordinated curtain and towels. Assign a maximum amount to each category and reserve 10% to 20% for surprises.
Measure everything twice: vanity width, faucet-hole spacing, mirror clearance, shelf depth, shower-curtain height, and the distance between electrical boxes and nearby trim. A $35 bargain is no bargain when it is two inches too wide and begins a second career in the garage.
Where to Spend and Where to Save
Spend on Water Control, Ventilation, and Reliable Fixtures
Do not cut corners on products that prevent water damage. Repair active leaks before painting, replace failed sealant, and confirm that the exhaust fan actually vents outdoors rather than into an attic or wall cavity. The EPA recommends exhausting bathroom moisture outdoors, while the Home Ventilating Institute generally recommends about 1 CFM of fan capacity per square foot for bathrooms under 100 square feet, with a minimum of 50 CFM.
Spend enough for a faucet, shutoff valve, showerhead, and light fixture from a manufacturer with clear installation instructions and replacement parts. The least expensive fixture is rarely a victory if it drips, corrodes, or requires an obscure adapter sold only during a full moon.
Save on Decorative Elements
Mirrors, towel hooks, shelves, baskets, framed art, shower curtains, cabinet hardware, and small accessories are excellent places to save. Shop clearance sections, reuse frames, refinish a secondhand stool, or repaint existing metal accessories with a coating approved for the material and environment. Repeating one finishsuch as brushed nickel, matte black, or warm brassmakes mixed-price pieces look intentional.
Painting a sound vanity is usually more economical than replacing it. Budget bathroom guides from major home-improvement and design publications repeatedly emphasize paint, hardware, mirrors, shower curtains, storage, and fixture swaps as high-impact updates.
Step-by-Step Budget Bathroom Makeover
1. Empty, Clean, and Diagnose the Room
Remove toiletries, textiles, wall decor, switch plates, and anything that can collect dust. Clean walls, trim, vanity surfaces, tile, and grout with products appropriate for those materials. Soap residue and hair spray can interfere with paint and adhesive, so “looks clean from the doorway” is not the standard.
Inspect the base of the toilet, the cabinet beneath the sink, the tub edge, shower corners, ceiling, and floor transitions. Stains, swelling, softness, persistent odors, or recurring discoloration may indicate a leak or moisture problem. Never paint over active mold or wet materials and call it modern minimalism.
2. Refresh the Walls With Bathroom-Appropriate Paint
Paint delivers one of the largest visual changes per dollar. Choose a washable, moisture-resistant interior coating intended for bathrooms or high-humidity rooms. Satin and semi-gloss finishes are commonly recommended because they tolerate cleaning and moisture better than flat paint. Proper surface preparation and ventilation matter as much as the color.
Light neutrals can make a small bathroom feel calmer and brighter, but white is not mandatory. Soft blue-green, clay, muted navy, mushroom, and warm gray can add personality without overwhelming the space. Test samples on more than one wall and view them in natural and artificial light. Bathroom bulbs have ruined many perfectly innocent paint colors.
3. Repaint the Vanity Instead of Replacing It
If the cabinet box is solid and the layout works, repaint it. Remove doors, drawers, hinges, and pulls. Degrease thoroughly, sand or degloss as required, repair dents, prime with a product suited to the existing surface, and apply a durable cabinet or trim enamel. Thin coats cure more evenly than one heroic, pudding-thick coat.
Finish with new pulls or knobs. Measure the center-to-center spacing of existing holes so replacements fit without additional drilling. When changing from knobs to pulls, use a hardware template. It costs less than replacing a door after discovering that “approximately level” is visible from space.
4. Upgrade the Mirror and Lighting
A larger mirror reflects light and visually expands a small room. You can replace a plain builder-grade mirror, frame it with moisture-tolerant trim, or hang a thrifted mirror after checking that its backing and frame are suitable for humid conditions.
Lighting should illuminate faces without creating theatrical shadows. Side-mounted sconces near eye level provide even light, while an overhead fixture can add general illumination. Use fixtures and bulbs rated for the bathroom location, and hire a licensed electrician when wiring, grounding, electrical boxes, or circuit protection need modification.
Bathrooms should have working GFCI protection where required. The U.S. Consumer Product Safety Commission explains that GFCIs reduce shock risk by interrupting power during a ground fault and recommends checking that bathroom outlets are protected and functioning.
5. Replace Small Fixtures for a Coordinated Look
A new faucet, showerhead, towel bar, toilet-paper holder, and robe hook can make the room feel cohesive. You do not need to replace every metal surface, but two or three repeated finishes create visual order. Before installing a faucet, confirm the sink configurationsingle-hole, centerset, or widespreadand check the condition of the supply lines.
Shut off the water, verify that the shutoff valves actually work, protect the basin, and test every connection slowly. Place dry paper towels beneath fittings; even a tiny leak becomes easy to spot. If valves are corroded, pipes move inside the wall, or a connection will not seal, stop and call a plumber.
6. Renew Caulk and Grout
Fresh caulk creates an immediate “clean bathroom” effect while protecting joints from water. Remove failed caulk completely, clean the surfaces, allow them to dry, and apply a bathroom-grade sealant appropriate for the materials. Silicone-based caulk is commonly recommended around tubs, showers, sinks, tile, glass, and metal because it is flexible and water resistant. Follow the manufacturer’s cure time before using the area.
Dirty grout may need cleaning rather than replacement. Repair missing or cracked grout where appropriate, but remember that grout and caulk serve different purposes. Changes of planesuch as where a tiled wall meets a tubtypically need flexible sealant, not a rigid patch that cracks again.
7. Improve the Floor Without Creating a Moisture Trap
If the existing floor is structurally sound, deep cleaning and a new washable rug may be enough. For a larger visual change, consider bathroom-rated luxury vinyl plank, sheet vinyl, or peel-and-stick tile installed according to the manufacturer’s instructions. The substrate must be flat, clean, dry, and compatible with the product.
Do not install decorative peel-and-stick products inside a shower or over a wet, unstable, or damaged surface. Tile paint should also be a system specifically designed for tile and the expected exposure. Products suitable for a backsplash may not survive a shower floor, where standing water and abrasion are relentless coworkers.
8. Add Storage That Uses Vertical Space
Clutter makes a newly painted bathroom look unfinished. Add floating shelves above the toilet, a shallow medicine cabinet, hooks behind the door, drawer organizers, or baskets beneath the vanity. Store daily-use items within reach and move bulk supplies elsewhere when possible.
Open shelves look best when they are not asked to hold twelve half-empty bottles and a hair dryer from college. Use matching containers for small essentials, leave some breathing room, and keep paper products away from splash zones.
9. Finish With Textiles and One Strong Design Idea
A shower curtain, bath mat, towels, and simple art can unite the room. Choose one focal point: a painted vanity, patterned curtain, bold mirror, wallpapered powder-room wall, or interesting floor. When every surface demands attention, the bathroom starts to feel like a tiny home-improvement trade show.
For humid full bathrooms, select washable textiles and moisture-tolerant art. In a powder room without a shower, you have more freedom to use wallpaper, wood accents, and decorative objects because steam is less intense.
An Illustrative $750 Bathroom Makeover Budget
Actual prices vary by region, room condition, and product quality, but a written example helps keep priorities realistic.
| Upgrade | Illustrative Budget |
|---|---|
| Wall and vanity paint, primer, and supplies | $150 |
| Mirror or DIY mirror frame | $100 |
| Light fixture | $100 |
| Faucet or showerhead | $120 |
| Cabinet and wall hardware | $70 |
| Caulk, grout repair, and cleaning materials | $60 |
| Shelves, baskets, curtain, and towels | $100 |
| Contingency fund | $50 |
This budget assumes the toilet, tub, floor, plumbing layout, and major electrical components remain in place. If the room has leaks, rotten subflooring, unsafe wiring, extensive mold, or failed waterproofing, spend the money on repairs first. A stylish basket cannot negotiate with structural damage.
Common Budget Makeover Mistakes
Buying Before Measuring
Clearance items are seductive, but dimensions control the project. Record measurements and take photos before shopping.
Skipping Surface Preparation
Paint cannot bond well to soap film, glossy laminate, loose coatings, or damp walls. Cleaning, sanding, priming, and drying are not optional side quests.
Using the Wrong Product in a Wet Area
A material labeled “water resistant” is not automatically approved for continuous wet exposure. Follow installation instructions, especially around showers, floors, outlets, and lighting.
Starting Too Many Projects at Once
Finish demolition and repair work before opening every box in the house. Follow a clear sequence: fix moisture problems, clean, prepare, paint, install fixtures, seal joints, organize, and decorate.
DIYing Beyond Your Skill Level
Painting and hardware swaps are forgiving. Electrical changes, hidden plumbing, structural repairs, waterproof shower assemblies, and hazardous-material removal are not. Check local permit requirements and hire qualified professionals when an error could cause fire, flooding, or a ceiling raining downstairs.
Experience-Based Lessons From a Realistic Budget Makeover
Consider a typical 5-by-8-foot hall bathroom with beige walls, an oak vanity, a frameless sheet mirror, weak lighting, dingy caulk, and almost no storage. Nothing is dramatically broken, which is good news. The room is not asking for demolition; it is asking for attention.
The first lesson from projects like this is that cleaning changes the plan. Once the vanity, tile, grout, fan cover, and baseboards are properly scrubbed, some “replacement” items become perfectly usable. The tile may be dated but neutral. The tub may be dull but intact. A project that looked like a $5,000 remodel can shrink into a focused $700 to $1,200 refresh because the expensive surfaces do not actually need to leave the building.
The second lesson is that preparation takes longer than the glamorous part. Removing hardware, labeling hinges, patching holes, sanding the vanity, taping edges, and waiting for primer to dry can consume most of day one. The final coat may take twenty minutes, but it only looks good because several less photogenic hours happened first. Rushing the cure time is especially tempting in a one-bathroom home. Plan alternate routines before disconnecting the sink or applying caulk, because the family will suddenly need the bathroom every seven minutes.
The third lesson is to choose the focal point early. In this example, a deep blue vanity becomes the star. That decision makes the rest easier: warm-white walls, a simple black-framed mirror, black pulls, a white shower curtain, and natural wood shelves. Without a focal point, budget shopping can produce six unrelated “great deals.” Individually they are charming; together they look like strangers assigned to the same group project.
The fourth lesson is that lighting can outperform expensive decor. Replacing a dim, yellowed fixture with a properly rated fixture and flattering bulbs makes the paint look cleaner, the mirror more useful, and the entire room larger. It also exposes every missed patch and crooked shelf, which is lighting’s less popular but honest personality.
The fifth lesson is to install and test in stages. After reconnecting the faucet, run cold water, then hot water, and then fill and drain the basin while inspecting every joint. After replacing caulk, respect the cure time. After mounting shelves, load them gradually. Small tests catch small problems before they become wet drywall, broken glass, or an emergency conversation with the downstairs neighbor.
The sixth lesson is that the final 10% creates the “after” photo. Align the hardware, touch up paint, conceal cords, remove labels, clean the mirror, fold the towels, and clear the countertop. A room can contain several successful DIY projects and still feel unfinished when the details are sloppy. Conversely, a modest bathroom can feel polished when edges are clean, finishes repeat, and daily clutter has a home.
Most importantly, budget makeovers work best when homeowners accept the room they have. The goal is not to imitate a luxury spa with imported stone and a bathtub large enough to qualify as inland navigation. The goal is a bathroom that is brighter, cleaner, safer, easier to maintain, and more pleasant every morning. That is a meaningful renovation, even if the toilet never moved an inch.
Conclusion
A successful DIY bathroom makeover on a budget is built on restraint. Keep a functional layout, repair moisture problems first, prepare surfaces carefully, and concentrate spending on paint, lighting, a refreshed vanity, reliable fixtures, ventilation, sealant, and storage. Decorative updates can be inexpensive, but they should support a clear design plan rather than compete for attention.
Work in a sensible order, test plumbing connections, use products rated for humid or wet locations, and know when to call a professional. With careful measurements and patient preparation, even a modest budget can produce a bathroom that feels cleaner, brighter, more organized, and far more expensive than it was.
Research note: This article synthesizes practical guidance from This Old House, The Home Depot, Lowe’s, the U.S. Environmental Protection Agency, ENERGY STAR, the Home Ventilating Institute, the U.S. Consumer Product Safety Commission, the National Association of REALTORS®, Better Homes & Gardens, HGTV, Family Handyman, and IKEA U.S. Costs are illustrative and vary by location, bathroom condition, product selection, permit requirements, and labor needs.