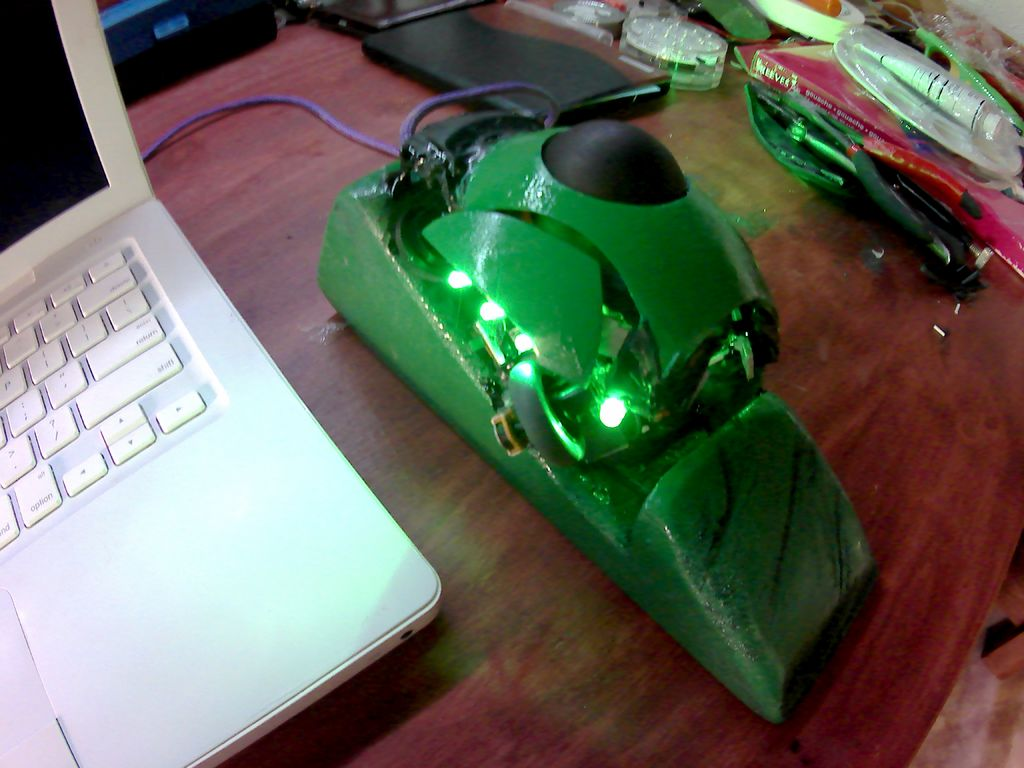
Most computer mice spend their lives being shoved across desks like tiny plastic hockey pucks. A trackball mouse flips that familiar routine: the device stays put while you roll the ball with your thumb, fingers, or palm. It is a wonderfully odd little machine, part computer accessory and part desk toy you are technically allowed to fidget with during meetings.
Building a DIY trackball mouse gives you something store-bought hardware rarely delivers: control. You choose the ball size, button positions, case angle, scroll behavior, sensor, grip, and personality. Want a compact thumb trackball for travel? Go for it. Want a palm-sized sphere that looks like it escaped from a spaceship control panel? Also valid. This guide explains how to roll your own trackball mouse using approachable electronics, practical mechanical design, and enough patience to survive the occasional mysteriously backward cursor.
Why Build a DIY Trackball Mouse?
A traditional mouse needs desk space. A trackball does not. That makes a custom trackball especially appealing for compact desks, couch setups, keyboard trays, standing workstations, mobile carts, and the mysterious corner of your desk currently occupied by coffee mugs and cables of unknown origin.
The real attraction, however, is customization. Commercial trackballs are built for average hands, average desks, and average people who apparently never want a button exactly where their thumb naturally rests. A homemade trackball mouse can be designed around your own grip and workflow. You can add a scroll wheel, programmable buttons, a tilt base, a detachable wrist rest, RGB lighting, or a mode switch that turns the ball into a scrolling control instead of a cursor controller.
There is also a practical maker advantage. A trackball is an excellent electronics project because it combines several useful skills in one device: microcontroller programming, USB HID configuration, switches, sensors, 3D printing, enclosure design, soldering, and troubleshooting. When you finish, you do not merely have a project sitting on a shelf. You have a daily-use tool that can quietly remind you that you built your own mouse like a competent wizard of office equipment.
Choose Your Trackball Build Path
There is no single correct way to build a custom trackball mouse. Your ideal approach depends on your budget, tools, confidence level, and tolerance for tiny screws rolling under furniture.
Option 1: A Directional Trackball Breakout
The simplest route uses a compact trackball breakout module. These modules typically provide separate up, down, left, right, and click signals. Instead of reading the surface of the ball with a high-resolution optical sensor, the module detects directional movement mechanically or magnetically and sends simple signals to your microcontroller.
This approach is excellent for a first DIY trackball mouse. You can connect the breakout to a microcontroller board with native USB support, map the directional signals to cursor movement, and add buttons with only a modest amount of wiring. The result will not necessarily behave like a premium CAD trackball, but it is a reliable way to learn the fundamentals.
Option 2: An Optical-Sensor Trackball
A more advanced custom trackball uses an optical navigation sensor, similar in concept to the sensor inside a modern mouse. The sensor watches the surface of the ball and reports movement along two axes. This is the route for builders who want smoother cursor motion, more precise tracking, and a device that feels closer to a polished commercial trackball.
Optical-sensor builds require more care. The sensor, lens, illumination, and ball surface must sit at the correct distance and orientation. A small mechanical error can turn your carefully designed pointing device into a digital Ouija board. Still, once the geometry is correct, this design can be extremely satisfying.
Option 3: Adapt an Open-Source Trackball Design
The most practical middle path is to start with an existing open-source hardware design and customize it. Several maker projects use a 3D-printed shell, a large ball, roller bearings, a USB-capable microcontroller, and QMK firmware or similar mouse firmware. You can treat the original files as a foundation rather than a sacred artifact carved into stone tablets.
Change the case angle. Move the thumb buttons. Resize the ball cup. Print a left-handed version. Add a detachable base. The point is not to reinvent every screw from scratch. The point is to create a custom trackball mouse that fits your hand and your habits.
What You Need to Build a Trackball Mouse
| Part | Purpose | Helpful Notes |
|---|---|---|
| USB-capable microcontroller | Acts as the mouse brain | Choose a board that supports USB HID mouse functions. |
| Trackball module or optical sensor | Detects movement | Use a breakout for simplicity or an optical sensor for higher precision. |
| Trackball | The moving control surface | Pool, billiard, resin, acrylic, or purpose-made balls can work depending on the design. |
| Three support rollers or bearings | Supports the ball smoothly | Three points create a stable support arrangement. |
| Tactile or mouse switches | Left, right, middle, and extra clicks | Choose switches with a feel you enjoy; you will hear them a lot. |
| Scroll wheel or encoder | Scrolling and optional extra controls | A rotary encoder can double as a button. |
| 3D-printed case or fabricated enclosure | Holds the components together | Prototype in cheap material before printing the “final” version. |
| Wire, solder, screws, and tools | Assembly and repair | Also acquire a small container for screws. Trust this advice. |
Design the Mechanics Before You Touch a Soldering Iron
The mechanical design determines whether your DIY trackball mouse feels elegant or feels like steering a shopping cart with one defective wheel. Begin with the ball size. Small balls work well for thumb-operated designs and compact cases. Large balls are usually more comfortable for finger or palm control because they allow fine movement without squeezing your hand into a cramped claw pose.
Next, decide how the ball will be supported. Most full-size trackball builds use three rollers or bearings arranged around the lower portion of the ball. Three contact points keep the ball stable while allowing it to rotate smoothly. Too much pressure creates drag. Too little support allows wobble. You are aiming for the Goldilocks zone: smooth enough to spin, stable enough to stop where you intend.
Do not overlook the ball cup. The opening should expose enough of the ball for comfortable control without allowing it to pop out when you get enthusiastic during a spreadsheet emergency. A shallow cup feels open and easy to reach, while a deeper cup protects the ball but can make cleaning more annoying.
Ball Material and Surface Texture
A billiard ball is popular in larger DIY trackballs because it is durable, round, and pleasantly weighty. It also has a smooth, consistent surface that works well in many mechanical designs. However, an optical sensor may prefer a surface with enough visual texture to track accurately. A glossy, perfectly uniform ball can look beautiful while giving the sensor absolutely nothing interesting to read.
Before final assembly, test your chosen ball with the sensor. If tracking is inconsistent, try a ball with more visible texture, a matte finish, or a lightly patterned surface. Do not attack a premium billiard ball with sandpaper immediately. Test first. Let science save you from creating a very expensive cue-ball-shaped regret.
Angle and Hand Position
Your enclosure angle matters more than most first-time builders expect. A flat case may work for finger-operated trackballs, while a tilted enclosure can reduce awkward forearm rotation for some grips. Start with a cardboard, foam, or rough 3D-printed mockup before committing to a polished final enclosure.
Keep the most-used buttons close to the fingers that will operate them. A left click should not require a thumb yoga pose. A scroll wheel should be reachable without shifting your entire hand. If you have to reposition your hand every few seconds, the design needs another revision, not a pep talk.
Wire the Electronics and Create USB HID Control
The microcontroller translates physical movement and button presses into standard USB mouse commands. A computer does not need to know that your mouse was assembled on a desk beside a soldering iron and a suspiciously large pile of failed test prints. It simply sees a USB HID device.
For a breakout-based trackball, connect the directional outputs and button signal to digital input pins. Add pull-up resistors in firmware or hardware as appropriate for the module. Then connect your left, right, middle, and auxiliary buttons to additional input pins. The firmware reads the pin states and sends movement or button commands through USB.
For an optical-sensor build, follow the specific wiring requirements of your sensor board or reference design. Optical mouse sensors often use a serial interface and may require a dedicated lens, LED, and carefully controlled spacing. Treat the datasheet as your map. Guessing at sensor pinouts is less “maker spirit” and more “smoke signal.”
Firmware Choices
QMK is a strong choice for advanced custom input devices, especially if you want programmable buttons, scrolling layers, drag-scroll modes, configurable sensitivity, or integration with a custom keyboard. It supports pointing-device features and lets builders map mouse behavior directly in firmware.
CircuitPython can be friendlier for quick prototypes, particularly on compatible microcontroller boards. It can emulate a standard USB mouse, handle button inputs, and make experimentation less intimidating. Arduino-style firmware is another good route when using boards that support native USB HID mouse functions.
Regardless of firmware, begin with the smallest test possible. First verify one button. Then verify cursor movement. Then verify scrolling. Add fancy features after the basic mouse behaves. A working left click is more valuable than twelve RGB effects attached to a cursor that only travels diagonally into the void.
Build Your DIY Trackball Mouse Step by Step
-
Prototype the grip.
Use cardboard, foam, modeling clay, or a quick draft print to test the height, angle, ball position, and button locations.
-
Test the controller.
Upload a simple USB HID test program and confirm the computer recognizes the board as a mouse-capable device.
-
Test the sensor or breakout module.
Read movement data before installing anything in a case. It is much easier to debug wires while you can still see them.
-
Install switches and scrolling hardware.
Mount your primary buttons first. Add secondary buttons only after you confirm the main grip is comfortable.
-
Assemble the ball support.
Install the rollers or bearings evenly. Check that the ball spins freely without wobbling or rubbing the enclosure.
-
Fit the sensor carefully.
For optical designs, keep the sensor, lens, and ball aligned exactly as required. Small spacing errors can have large effects on tracking.
-
Close the enclosure only after extended testing.
Use the device for an hour before calling it finished. Your hand will reveal problems that a five-minute bench test politely ignores.
Tune Sensitivity, Scrolling, and Buttons
A trackball that tracks perfectly in a test window can still feel wrong in daily use. Cursor sensitivity is the first setting to tune. If you need multiple spins to cross a wide display, increase sensitivity. If the cursor overshoots every button by three counties, lower it.
For a large finger-operated trackball, many users prefer moderate sensitivity and enough acceleration to make broad screen travel easy. For a tiny thumb trackball, higher sensitivity may feel more practical because there is less physical travel available. The correct setting is not the most aggressive one. It is the setting that lets you select text, drag windows, and land on small interface targets without muttering at your monitor.
Consider adding a drag-scroll mode. In this mode, holding a specific button temporarily changes ball movement from cursor motion to scrolling. It is particularly useful for long documents, code windows, spreadsheets, and social feeds that somehow contain more content than the Library of Congress.
Extra buttons can handle browser back and forward, copy and paste, window switching, layer changes, or media controls. Start conservatively. Too many controls can make a trackball feel like a miniature aircraft cockpit. Unless you are actually flying an aircraft, three to five well-placed functions usually beat a forest of mystery buttons.
Common DIY Trackball Problems and Fixes
The Cursor Moves Backward
Reverse the affected axis in firmware. If left moves right, invert the X direction. If up moves down, invert the Y direction. This is common and not a sign that your trackball has developed opinions about geometry.
The Ball Feels Sticky
Check for misaligned rollers, excess pressure, debris, rough bearing surfaces, or a ball rubbing against the cup. Clean the contact points and verify that all three supports touch the ball evenly. A ball that feels sticky will make every click feel like a tiny negotiation.
Tracking Jumps or Drops Out
For optical builds, inspect the sensor spacing, lens orientation, illumination, power connections, and ball surface. Confirm that the sensor has enough texture to read. For directional breakout modules, inspect wiring and make sure the module is firmly mounted.
Buttons Trigger Randomly
Use proper pull-up or pull-down configuration, keep signal wires tidy, and add software debouncing when necessary. Mechanical switches naturally bounce for a brief moment when pressed. Your firmware should interpret one intentional press as one click, not as an enthusiastic drum solo.
Ergonomics: Make the Trackball Fit You, Not the Other Way Around
A trackball can reduce desk movement, but it is not automatically comfortable for every person. The best result comes from a relaxed shoulder, supported forearm, neutral wrist position, and controls that do not require excessive force or reach. A beautifully printed case is still a bad case if it makes your wrist bend sideways like a confused flamingo.
Use your prototype during normal work. Edit text. Browse websites. Drag files. Play a slow-paced game. If you notice thumb strain, move the buttons. If your wrist bends, adjust the tilt. If your shoulder lifts, lower the device or move it closer. Good ergonomic design is rarely dramatic. It simply disappears because your hand stops complaining.
Conclusion: Your Desk, Your Rules
Building a custom trackball mouse is a rewarding way to combine electronics, 3D printing, firmware, and real-world usability. Start simple, test each subsystem independently, and treat your first enclosure as a prototype rather than a museum piece. The best DIY trackball mouse is not necessarily the most complicated one. It is the one that tracks smoothly, fits your hand, and makes you smile every time someone asks, “Wait, you built that?”
Hands-On Experiences: What It Feels Like to Live With a Homemade Trackball Mouse
The first day with a homemade trackball mouse can be humbling. You plug it in, the computer recognizes it, and for one glorious second you feel like a hardware genius. Then you try to click a browser tab and the cursor launches across the screen as though it has spotted a better life in another country.
That early awkwardness is normal. A trackball changes the relationship between your hand and the cursor. Instead of pushing an entire device across a desk, you make smaller rotational movements. The muscles involved are different, the timing is different, and your brain briefly behaves as though it has never operated a computer before. Give it a few days. After the adjustment period, the ball begins to feel less like a strange gadget and more like a natural extension of your hand.
The most surprising part of a custom trackball is how quickly small design details become obvious. A button moved just five millimeters can make the difference between a comfortable click and repeated thumb strain. A slightly steeper case angle can make a device feel calm and relaxed instead of cramped. A ball that spins freely can make basic cursor movement feel almost luxurious, while a ball with one rough roller can turn opening a spreadsheet into a personal test of character.
Cleaning also becomes part of the ownership experience. Commercial mice hide their secrets inside sealed shells. A DIY trackball is more honest. You will eventually remove the ball and discover lint, dust, skin oils, pet hair, and perhaps one crumb that has apparently been living in the bearing area since the previous administration. The good news is that maintenance is usually easy. Wipe the ball, clean the rollers, remove debris, and enjoy the oddly satisfying improvement in glide.
Another memorable experience is tuning the firmware. You may begin with an ambitious plan involving multiple layers, drag scrolling, media controls, browser navigation, precision mode, gaming mode, and a button that probably orders coffee. Then daily use teaches you a valuable lesson: the best shortcut is the one you remember. Many builders end up using a simple layout with left click, right click, scroll, back, forward, and one modifier button for scrolling or precision control.
Custom trackballs also encourage iteration. You may print a version that is technically functional but aesthetically resembles a failed kitchen appliance. That is fine. Version two gets smoother roller mounts. Version three gets better button placement. Version four gets a cleaner cable exit, a stronger base, and perhaps a color that does not scream “prototype made during a power outage.”
Over time, the device becomes personal in a way few computer accessories do. The marks on the case, the sound of the switches, the exact amount of friction in the ball, and the button layout all become familiar. It stops being just a DIY mouse. It becomes your mouse: a small, slightly eccentric machine built around the shape of your hand and the rhythm of your workday.