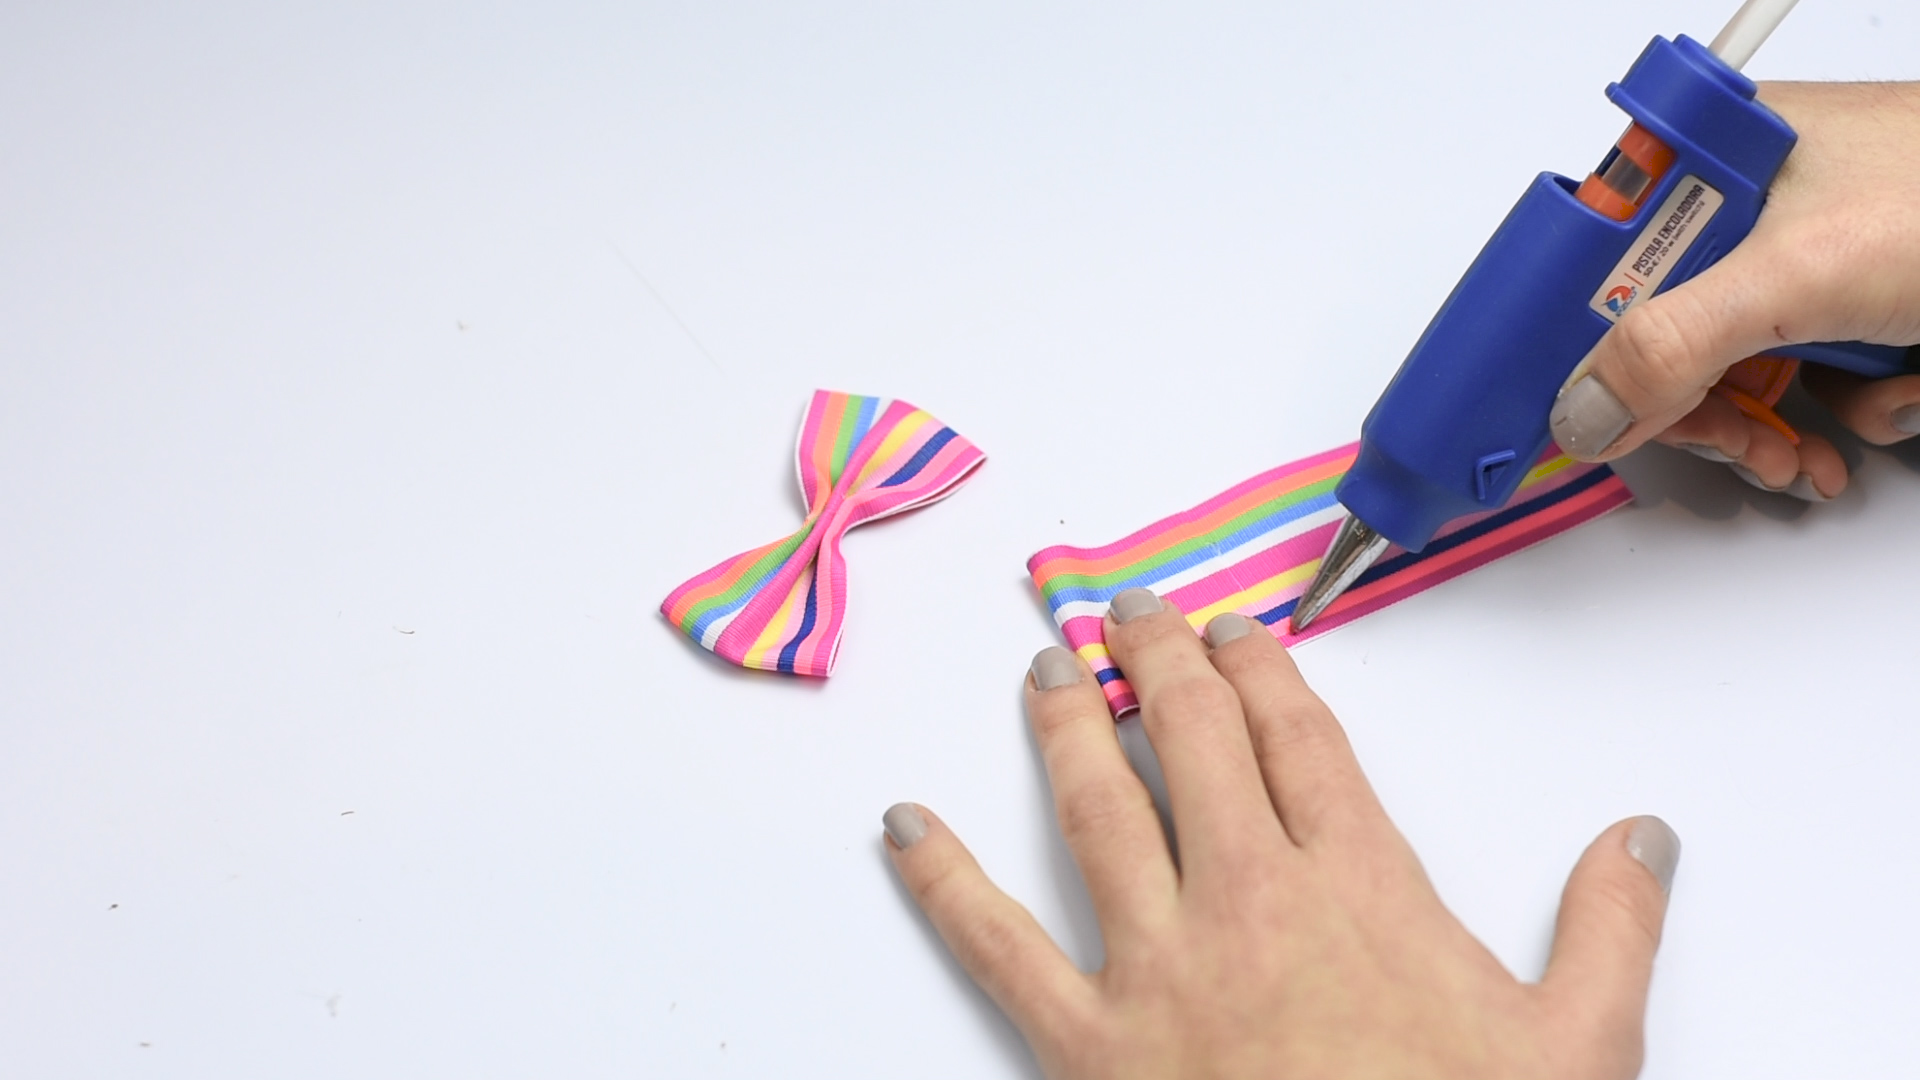
Baby hair bows are tiny accessories with big personality. One little bow can turn a plain onesie into a “yes, I was styled by my personal assistant” moment. The good news? You do not need a craft room, a sewing degree, or a mysterious drawer full of professional tools to make adorable baby hair bows at home. With ribbon, fabric, a clip or soft headband, and a careful eye for safety, you can create sweet, comfortable bows for everyday outfits, photos, baby showers, birthdays, and handmade gifts.
This guide explains how to make baby hair bows in 14 practical steps, from choosing baby-safe materials to attaching the bow securely. You will also learn sizing tips, no-sew options, clip versus headband choices, common mistakes, and real-life crafting experience that can save you from hot-glue chaos. The bow may be small, but the technique mattersespecially when the wearer is a baby who believes every object is either a snack, a science experiment, or both.
Before You Start: Baby Hair Bow Safety Comes First
Baby hair accessories should always be made and used with supervision. Bows can include small parts such as clips, embellishments, beads, rhinestones, buttons, and glued ribbon centers. For babies and toddlers, small detachable pieces can become choking hazards. Keep designs simple, avoid loose decorations, and test every bow before use by gently pulling on the ribbon, clip, and center wrap.
Never let a baby sleep while wearing a hair bow, headband, or clip. Remove bows during naps, bedtime, car rides, and anytime the baby is not actively supervised. A beautiful bow is not worth a safety risk. Think of baby bows like cupcakes: delightful, photo-worthy, and not something you leave unattended near a curious little person.
Materials You Need to Make Baby Hair Bows
Basic Supplies
For a classic baby hair bow, gather the following supplies:
- Grosgrain ribbon, satin ribbon, cotton fabric, or soft knit fabric
- Small alligator clips, snap clips, nylon headbands, or soft elastic headbands
- Sharp fabric scissors
- Hot glue gun or fabric glue
- Needle and thread for extra security
- Measuring tape or ruler
- Lighter or fray-check product for sealing ribbon ends
- Felt circles or small fabric pads for backing
Best Ribbon and Fabric Choices
Grosgrain ribbon is one of the best materials for DIY baby hair bows because it has texture, holds shape well, and is easier to control than slippery satin. Satin ribbon looks elegant but can slide around like it has somewhere better to be. Cotton fabric works beautifully for soft, puffy bows, while knit fabric is ideal for baby headbands because it stretches gently.
For newborn bows and small baby bows, use ribbon that is about 3/8 inch to 1 inch wide. For older babies, 1-inch to 1.5-inch ribbon can create a fuller look without overwhelming the baby’s head. A good everyday bow size is around 2 to 3 inches wide. Oversized bows are adorable in photos, but comfort should always win.
How to Make Baby Hair Bows: 14 Steps
Step 1: Choose the Bow Style
Decide whether you want a classic ribbon bow, a boutique-style bow, a fabric bow, or a simple tied bow. Beginners usually do best with a classic folded ribbon bow because it is neat, fast, and forgiving. If one side comes out slightly larger than the other, congratulationsyou have made a bow with personality.
Step 2: Pick a Baby-Friendly Attachment
Choose an attachment based on the baby’s hair. For babies with fine or little hair, soft nylon headbands are usually more practical than clips. For babies with enough hair to hold a clip, a small lined alligator clip can work well. Lining the clip with ribbon makes it softer, prettier, and less slippery.
Step 3: Measure and Cut the Main Ribbon
Cut one piece of ribbon about 6 to 8 inches long for a small baby bow. If you want a wider bow, use a longer ribbon. For a tiny newborn bow, start with 5 inches. For a fuller baby bow, try 8 to 10 inches. Measure first, cut once, and keep the scrapsyou will absolutely convince yourself they are useful later.
Step 4: Seal the Ribbon Ends
Ribbon ends can fray, so seal them before forming the bow. Carefully pass the cut edge near a lighter flame for a second, without letting it burn, or use a fray-check product. Adults should handle this step only. If using cotton or knit fabric, fold the raw edges inward or use fabric glue to keep them tidy.
Step 5: Fold the Ribbon Ends to the Center
Lay the ribbon flat with the patterned side down. Bring both ends toward the center so they slightly overlap. This creates a loop shape. Add a small dot of hot glue or fabric glue where the ends overlap. Press gently until the glue sets. The goal is secure, not crunchy. Too much glue can make the bow stiff and bulky.
Step 6: Create the Bow Shape
Turn the ribbon loop over so the smooth side faces up. Pinch the center from top to bottom to create folds. You should see a bow shape forming immediately. If the folds look uneven, adjust them with your fingers. This is the bow’s “face,” so take a few seconds to make it cute.
Step 7: Secure the Center Pinch
Wrap thread around the pinched center several times and tie it tightly at the back. You can also use a small piece of floral wire, but thread is softer and better for baby accessories. A glued center wrap alone may not be strong enough, so thread adds extra durability.
Step 8: Cut the Center Ribbon
Cut a narrow ribbon piece about 2 to 3 inches long. This will wrap around the middle of the bow and hide the thread. A 1/4-inch ribbon works well for small bows. You can use the same color for a clean look or a contrasting color for a playful style.
Step 9: Wrap the Center
Place one end of the narrow ribbon on the back of the bow and glue it down. Wrap it around the front center, pull it snugly, and glue the other end at the back. Trim extra ribbon if needed. Make sure no dried glue edges are sharp or scratchy.
Step 10: Line the Clip
If using an alligator clip, line it with ribbon. Cut a strip long enough to cover the top of the clip and part of the inside. Add a thin line of glue to the clip, press the ribbon into place, and let it cool. Lining the clip helps protect fine baby hair and gives the bow a finished boutique look.
Step 11: Attach the Bow to the Clip or Headband
For a clip, add glue to the top of the lined clip and press the bow firmly onto it. For a headband, place the bow where you want itusually slightly off-centerand glue or stitch it in place. Stitching is recommended if the bow will be used often. Glue is fast, but thread is the dependable friend who actually shows up on moving day.
Step 12: Add a Soft Backing
Cut a small felt circle or oval and glue it over the back where the bow meets the clip or headband. This covers rough edges and adds comfort. For baby hair bows, the back matters almost as much as the front. Babies are not known for politely ignoring scratchy things.
Step 13: Test the Bow
Before placing the bow on a baby, test it carefully. Tug lightly on the bow, center wrap, clip, and backing. Check for loose pieces, sharp glue spots, or decorations that could come off. If anything wiggles, re-glue or stitch it. If it still feels questionable, retire it to doll-accessory duty.
Step 14: Style and Store the Bow
Place the bow gently in the baby’s hair or on a headband. Do not make headbands tight; they should sit comfortably without leaving marks. Store bows in a small box, drawer organizer, or ribbon holder so they do not get crushed. Keep them out of reach when not in use.
No-Sew Baby Hair Bow Method
If sewing is not your favorite hobby, you can still make baby hair bows with glue. Cut a rectangle of fabric about 5 inches by 2 inches. Fold the long edges into the center and glue them down. Fold the short ends into the center and glue again. Pinch the middle, wrap it with a small strip of fabric, and attach it to a nylon headband or lined clip.
This no-sew method is excellent for soft cotton bows and knit bows. It also works well when you need several bows quickly, such as for baby shower favors or matching sibling outfits. Just remember that glued bows should be checked often because baby accessories take more abuse than expected. Tiny hands are surprisingly powerful. They may look like marshmallows, but they grip like determined raccoons.
How to Choose the Right Bow Size
Bow size depends on the baby’s age, head size, hair thickness, and the occasion. For newborns, a 2-inch bow on a soft nylon headband is usually enough. For babies 3 to 12 months old, 2.5- to 3-inch bows are versatile for everyday wear. For birthdays or photo shoots, larger bows can be cute, but they should still be lightweight.
Comfort is the secret ingredient. A bow that looks adorable but keeps sliding, pulling, or bothering the baby will not last long. The best baby hair bow is soft, secure, and light enough that the baby forgets it existsat least until the photo session begins and everyone starts making duck noises behind the camera.
Design Ideas for Baby Hair Bows
Everyday Baby Bows
For daily use, choose neutral colors such as cream, blush, dusty pink, white, tan, gray, navy, or soft floral prints. These match many baby outfits and look sweet without shouting for attention.
Holiday Baby Bows
For holidays, use seasonal colors and textures. Try red velvet for Christmas, pastel gingham for Easter, orange and black ribbon for Halloween, or sparkly gold accents for birthdays. Avoid loose glitter because it tends to travel everywhere, including places no glitter has any business visiting.
Personalized Gift Bows
Baby hair bows make thoughtful handmade gifts. Create a set with three sizes or colors and package them on a simple card. You can make a “first photos,” “everyday outfits,” or “special occasion” bow set. Keep gift bows simple and safe, especially if the baby is very young.
Common Mistakes to Avoid
The first mistake is using too much glue. A small amount is usually enough. Thick glue blobs can make the bow uncomfortable and messy. The second mistake is adding heavy decorations. Rhinestones, charms, beads, and buttons may look cute, but they are not ideal for baby accessories unless they are extremely secure and used only under close supervision.
Another mistake is making headbands too tight. A baby headband should stretch gently and never leave deep marks. Measure the baby’s head when possible, and choose soft nylon or elastic. Finally, do not skip the safety test. Every handmade baby bow should be checked before each use.
Cleaning and Caring for Baby Hair Bows
Most handmade baby bows should not be tossed into the washing machine. Spot clean them with a damp cloth and mild soap, then let them air dry. If the bow becomes misshapen, gently fluff it with your fingers. Avoid soaking bows with glued parts because water can weaken the adhesive.
Store bows flat or clipped to a ribbon organizer. If you make many bows, sort them by color or size. This prevents the classic morning mystery: one sock missing, one bottle leaking, and the perfect bow hiding somewhere in the laundry basket like it has entered witness protection.
Extra Experience: Real-Life Tips for Making Baby Hair Bows
After making several baby hair bows, you quickly learn that the simplest bows are often the best ones. The first few attempts may look uneven, and that is completely normal. Ribbon has a personality. Satin slips, grosgrain behaves better, and cotton fabric sometimes acts like it needs a nap. Start with inexpensive ribbon so you can practice without feeling dramatic about every crooked fold.
One helpful experience is to make a sample bow before cutting a whole batch. For example, if you want ten pink bows for a baby shower, make one test bow first. Try it on the clip or headband, check the size, and see whether it looks balanced. A ribbon that seems perfect on the roll may look too wide once it is folded. Testing saves time, supplies, and the emotional journey of realizing you made ten bows that resemble tiny folded napkins.
Another practical tip is to work in stages. Cut all ribbon pieces first, seal all ends, fold all loops, then wrap all centers. This assembly-line method keeps your bows consistent and helps you avoid stopping every two minutes to find the scissors that are definitely right in front of you. A small tray or muffin tin can help organize clips, center wraps, felt pads, and finished bows.
When making bows for babies with very fine hair, lined alligator clips work better than plain metal clips. Some crafters add a small strip of velvet ribbon or silicone grip inside the clip, but it must be firmly attached and checked often. For babies with almost no hair, soft nylon headbands are usually the easiest option. They are stretchy, comfortable, and cute without needing hair to hold onto.
Color planning also matters. If you are building a baby bow collection, start with five useful colors: white, ivory, blush, dusty rose, and a darker neutral like navy or brown. Then add seasonal colors later. This keeps the collection practical instead of becoming a rainbow explosion that requires its own storage unit.
For gifts, presentation makes handmade bows feel special. Clip each bow to a piece of cardstock, write the size or age suggestion, and include a short safety note reminding parents to supervise use and remove accessories during sleep. This small detail shows care and makes your handmade gift look polished.
Finally, do not chase perfection too hard. A baby hair bow is meant to be sweet, soft, and safe. Slightly imperfect handmade bows have charm. Babies wiggle, cameras blur, and the bow may end up sideways within five minutes anyway. The goal is not factory-level symmetry; the goal is a comfortable accessory made with love, common sense, and maybe only a little glue on your fingers.
Conclusion
Learning how to make baby hair bows is a fun, affordable, and creative project for parents, grandparents, gift-givers, and craft lovers. With a few basic supplies, you can make ribbon bows, fabric bows, clip bows, and soft headband bows in many colors and styles. The most important rule is to balance cuteness with safety. Choose soft materials, avoid loose embellishments, secure every piece well, and always supervise babies while they wear hair accessories.
Once you understand the basic 14-step method, you can customize baby bows for everyday outfits, holidays, birthdays, photo shoots, and handmade gifts. Start small, practice the center pinch, keep your glue neat, and enjoy the process. A tiny bow may not solve every parenting challenge, but it can make a baby outfit look delightfully finishedand honestly, some days that feels like a victory worth celebrating.
Note: This article is based on real craft practices and child-safety guidance. Baby hair bows should be worn only under adult supervision and removed during sleep, car rides, or any unsupervised moment.