Removing wallpaper is one of those home projects that sounds simple until you are standing in a room full of damp paper strips, mysterious glue, and a wall that appears to be fighting for its life. The good news? You do not need magic, a demolition crew, or a dramatic renovation montage. You need patience, the right method, and a plan that does not involve angrily clawing at the wall like a raccoon in a pantry.
The best way to remove old wallpaper depends on what kind of wallpaper you have, how it was installed, and what condition the wall is in underneath. Some wallpaper peels off like a dream. Some needs warm water. Some requires scoring, soaking, scraping, and a firm but respectful conversation. This guide walks you through the easiest ways to remove wallpaper, including dry peeling, hot water, vinegar solution, commercial wallpaper remover, and steam.
Whether you are preparing to paint, install new wallpaper, or simply erase a design choice from 1987, this step-by-step guide will help you remove wallpaper without wrecking your drywall.
Before You Start: Figure Out What Kind of Wallpaper You Have
Not all wallpaper behaves the same. Before you grab a scraper and declare war, test a small section near a seam or corner.
Peel-and-Stick Wallpaper
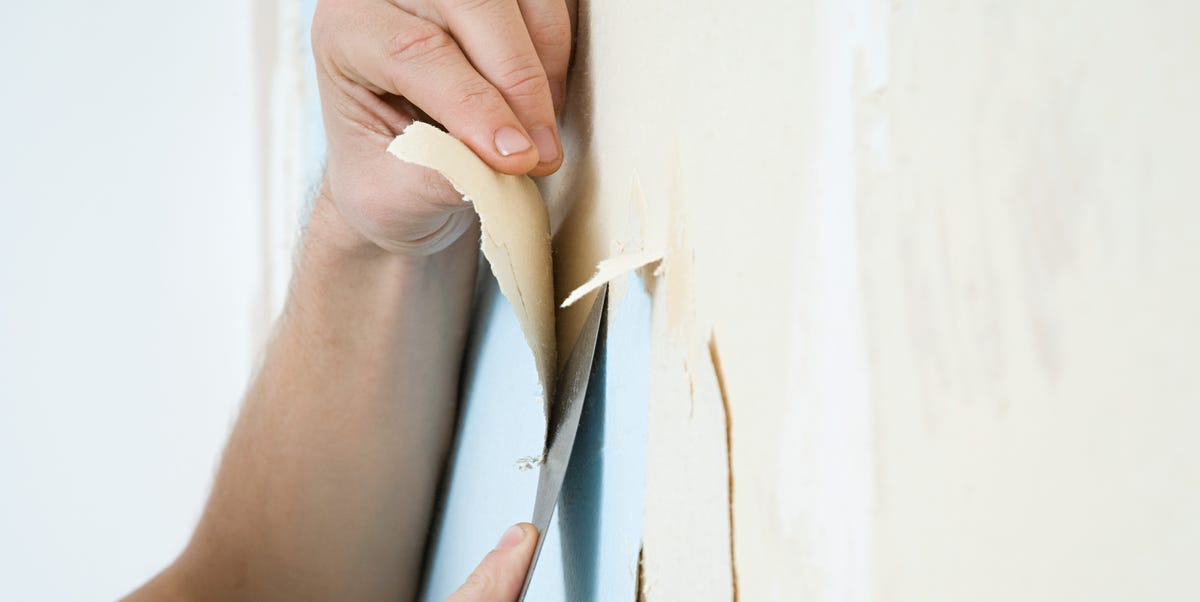
Peel-and-stick wallpaper is usually the easiest to remove. Lift one corner with your fingernail or a putty knife, then pull slowly at a low angle. If it was applied to a clean, primed wall, it may come off in large sheets. If it was applied over dirty paint, weak paint, or an unprimed surface, it may pull off some paint with it.
Strippable Wallpaper
Strippable wallpaper is designed so the decorative top layer peels away, often leaving a paper backing behind. That backing usually needs to be soaked with warm water before it can be scraped off.
Traditional Wallpaper
Traditional wallpaper is usually attached with paste and may need water, remover solution, or steam to loosen the adhesive. Older wallpaper can be stubborn because the glue may have hardened over time or because multiple layers were installed on top of each other.
Vinyl Wallpaper
Vinyl wallpaper resists moisture, which is great when it is on the wall and annoying when you want it gone. Water cannot easily reach the glue unless you score or perforate the surface first.
Tools and Supplies You Will Need
You do not need a professional toolbox, but a few simple items make the job much easier:
- Drop cloths or plastic sheeting
- Painter’s tape
- Putty knife or wallpaper scraper
- Spray bottle or pump sprayer
- Bucket
- Sponge
- Wallpaper scoring tool
- Hot water
- Dish soap, white vinegar, or wallpaper remover
- Wallpaper steamer, if needed
- Rubber gloves and safety glasses
- Trash bags
- Joint compound and sandpaper for wall repairs
A quick safety note: if you are working near outlets or switches, turn off power to that area before removing covers or using water nearby. Wallpaper removal is wet work, and electricity does not enjoy being invited to that party.
Step 1: Prepare the Room
Wallpaper removal is messy. Even when things go well, you will end up with wet paper, glue residue, and small bits of wallpaper that somehow migrate across the room like confetti with bad intentions.
Move furniture away from the walls. Cover the floor with drop cloths or plastic sheeting. Tape plastic over baseboards if you want easier cleanup. Remove wall plates from outlets and switches after shutting off power. Take down artwork, shelves, hooks, mirrors, and anything else attached to the wall.
Keep a trash bag nearby so you can toss paper strips as you go. Wet wallpaper becomes slippery and sticky, so letting it pile up on the floor is a great way to invent a new dance move called the Renovation Slide.
Step 2: Try the Dry Peel Test
Always start with the least aggressive method. Use a putty knife to lift a corner or seam. Pull the wallpaper back slowly at a 45-degree angle.
If it comes off in large sheets, congratulations. The wallpaper gods have smiled upon you. Continue peeling carefully. If the decorative layer comes off but leaves a paper backing, that is still good news. You can soak the backing and remove it next.
If the wallpaper tears into tiny pieces or refuses to budge, stop pulling. Random yanking can damage drywall paper, leaving you with repairs that take longer than the wallpaper removal itself.
Step 3: Use Hot Water for Strippable Wallpaper
For many walls, hot water is the simplest and cheapest wallpaper removal solution. Fill a spray bottle or pump sprayer with hot water. Work in small sections, about three to four feet wide. Spray the wallpaper or backing until it is damp, but not dripping like a rainforest documentary.
Let the water sit for five to ten minutes. The goal is to soften the glue behind the paper. Once the adhesive loosens, slide a scraper under the paper and lift it away from the wall.
Use gentle pressure. Hold the scraper at a low angle so you remove wallpaper Hold the scraper at a low angle so you remove wallpaper instead of carving the wall. If the paper starts drying out, spray again. Wet wallpaper is much easier to remove than half-dry wallpaper, which has the personality of old chewing gum.
Step 4: Use a Vinegar or Dish Soap Solution for Stubborn Areas
If plain hot water is not enough, mix a simple wallpaper removal solution. A common DIY option is hot water with a small amount of dish soap. Another popular choice is equal parts hot water and white vinegar.
Dish soap helps break down surface grime and adhesive residue. Vinegar can help soften stubborn paste. The smell is not exactly spa-like, but it is cheaper than many commercial removers and works well for many wallpaper jobs.
Spray the solution onto the wallpaper, wait several minutes, then scrape. For thick paper or old adhesive, you may need to repeat the process. Do not rush the soaking time. Wallpaper removal is less about brute force and more about convincing glue to give up peacefully.
Step 5: Score Vinyl or Water-Resistant Wallpaper
If water beads up on the wallpaper instead of soaking in, you are probably dealing with vinyl or coated wallpaper. In that case, use a wallpaper scoring tool to make small holes in the surface. These tiny perforations let water or remover solution reach the adhesive underneath.
Press lightly. The goal is to pierce the wallpaper, not shred the drywall. Move the scoring tool in overlapping circles or random passes across the wall. After scoring, apply hot water or wallpaper remover and let it soak in.
Be careful not to over-score. Too many deep cuts can damage drywall, especially if the wall was never primed before the wallpaper was installed.
Step 6: Use Commercial Wallpaper Remover When Needed
Commercial wallpaper removers are designed to break down old adhesive. They are useful for large rooms, multiple wallpaper layers, or paper that laughs at your homemade vinegar spray.
Follow the product instructions closely. Most removers need to be mixed with water, sprayed or rolled onto the wall, and allowed to sit before scraping. Wear gloves and eye protection, and keep the room ventilated.
Gel removers can be helpful because they cling to vertical surfaces instead of running down the wall. This gives the solution more time to penetrate the wallpaper and soften the glue.
Step 7: Try a Wallpaper Steamer for the Toughest Jobs
A wallpaper steamer uses hot steam to soften adhesive. It can be one of the best ways to remove old wallpaper that has been on the wall for decades, especially if there are multiple layers.
Fill the steamer according to the manufacturer’s instructions. Hold the steam plate against one section of wallpaper until the paper softens. Then scrape while the area is still warm and damp. Work slowly and avoid holding the steamer in one spot too long, especially on drywall.
Steam is powerful, but it is not harmless. Too much moisture or heat can damage drywall, loosen joint compound, or soften paint underneath. Use steam as a controlled tool, not a fog machine for your renovation drama.
Step 8: Remove Wallpaper Glue
Once the paper is gone, you are not finished yet. Wallpaper glue often remains on the wall as a shiny, sticky, or rough residue. If you paint over glue, the paint may crack, bubble, or look uneven. That is how walls say, “You skipped a step.”
Mix hot water with a few drops of dish soap. Use a sponge to scrub the wall in sections. For stubborn glue, add a little white vinegar to the water. Wipe the wall with clean water afterward to remove any residue from the cleaning solution.
Run your hand over the dry wall. If it still feels tacky or rough, clean it again. A smooth, clean wall is the foundation for a professional-looking paint or wallpaper finish.
Step 9: Repair the Wall
Even careful wallpaper removal can leave small gouges, torn drywall paper, nail holes, or uneven patches. Let the wall dry completely before making repairs. This may take several hours or overnight depending on how much water you used.
Use joint compound to fill dents and scratches. Let it dry, then sand smooth. If you exposed torn drywall paper, seal it with a suitable primer before patching. This helps prevent bubbling when you apply joint compound or paint.
After sanding, wipe away dust with a damp cloth. The wall should feel clean, dry, and smooth before you move to primer or paint.
Step 10: Prime Before Painting or Re-Wallpapering
Primer is your insurance policy. It seals the surface, improves paint adhesion, and helps prevent leftover adhesive from causing problems. If you plan to install new wallpaper, primer also makes future removal much easier. Your future self will thank you, possibly with snacks.
Choose a primer based on your wall condition and final finish. For walls that had heavy glue residue or stains, a stain-blocking primer may be useful. For clean drywall, a quality wall primer is usually enough.
Best Way to Remove Old Wallpaper: Which Method Should You Choose?
The best wallpaper removal method is the gentlest one that works. Start with dry peeling. If that fails, use hot water. If the paper resists, add dish soap, vinegar, or commercial remover. If the wallpaper is vinyl, score it first. If the wall is covered in ancient, layered wallpaper, consider a steamer.
Here is a simple decision guide:
- Peel-and-stick wallpaper: Pull slowly from a corner.
- Strippable wallpaper: Peel the top layer, then soak the backing.
- Traditional wallpaper: Use hot water, remover solution, and scraping.
- Vinyl wallpaper: Score first, then soak and scrape.
- Very old wallpaper: Try remover solution or a steamer.
- Multiple layers: Work one layer at a time and be patient.
Common Wallpaper Removal Mistakes
Scraping Too Hard
Aggressive scraping can gouge drywall. Keep the scraper flat and let moisture do most of the work.
Skipping the Soak Time
If the wallpaper is not coming off easily, it probably needs more time to absorb water or remover. Spray, wait, then scrape.
Over-Wetting Drywall
Drywall can absorb water and become soft. Use enough moisture to loosen glue, but avoid soaking the wall endlessly.
Painting Over Glue
Wallpaper glue under paint can cause bubbling, peeling, and uneven texture. Always wash the walls thoroughly.
Ignoring Wall Repairs
Small dents and gouges become very obvious after painting. Patch, sand, and prime before finishing.
Can You Paint Over Wallpaper Instead?
Sometimes painting over wallpaper is possible, but it is not always the best choice. If the wallpaper is smooth, firmly attached, clean, and free of peeling seams, painting over it may work with proper prep and primer. However, if the wallpaper is textured, damaged, vinyl-backed, bubbling, or layered, removal is usually the better long-term solution.
Painting over failing wallpaper is like putting a tuxedo on a raccoon. It may look okay for a minute, but the underlying chaos remains.
How Long Does Wallpaper Removal Take?
A small powder room with cooperative wallpaper may take a few hours. A large room with old vinyl wallpaper and multiple layers may take a full weekend. The timeline depends on the wallpaper type, wall condition, room size, and whether the wall was primed before installation.
Plan more time than you think you need. Wallpaper removal rewards patience and punishes overconfidence.
Extra Experience: Real-World Tips for Removing Wallpaper Without Losing Your Mind
After you remove wallpaper once, you understand why people talk about it like a survival story. The project is not complicated, but it is physical, repetitive, and occasionally humbling. The most useful experience-based advice is simple: do not start by attacking the whole room. Start with one test section. Pick a hidden corner, try peeling, then try water, then try scoring if needed. That small test tells you what kind of battle you are facing.
Another practical tip is to work from top to bottom. Gravity is free labor. When you spray the upper section first, moisture naturally travels downward and helps soften the area below. Pulling from the top also allows larger strips to release more cleanly. If you start in the middle of the wall, you often create ragged edges that are harder to manage.
Keep your scraper clean. This sounds minor, but glue builds up on the blade and makes scraping less effective. Wipe it often with a damp rag. A clean scraper slides under paper more smoothly and reduces the chance of gouging the wall.
Use warm water in batches. Water cools quickly, especially in a spray bottle. If your solution stops working as well, it may simply be too cool. Refill with hot water and try again. Old wallpaper paste responds better to warmth than to cold, half-hearted misting.
Do not soak the entire room at once. Work in manageable sections. If you wet too much wallpaper, some areas will dry before you reach them, and you will have to spray again. A three-foot or four-foot section is usually enough. Spray, wait, scrape, clean, repeat. It is not glamorous, but it works.
For stubborn wallpaper backing, patience beats pressure. Many people damage drywall because they scrape harder when the real solution is to rewet and wait. If the backing comes off in tiny crumbs, it is usually not ready. Spray it again, give it a few minutes, and try another pass.
Trash management matters more than expected. Wet wallpaper is heavy, slippery, and weirdly clingy. Put scraps directly into a contractor bag or lined trash can. Do not let them dry on your floor, because dried glue can stick to surfaces and create another cleanup project you did not ask for.
Finally, do not judge the wall while it is still wet. Damp drywall can look blotchy, scary, and ruined even when it is perfectly fine. Let it dry completely before deciding how much repair is needed. Once dry, patch only what needs patching, sand lightly, prime properly, and move forward. Wallpaper removal is messy, but it is also incredibly satisfying. Few home projects deliver such a dramatic before-and-after without replacing cabinets, floors, or your entire personality.
Conclusion
The best way to remove old wallpaper is to identify the wallpaper type, protect the room, start with the gentlest method, and increase your approach only when needed. Dry peel first. Use hot water for paper backing. Score vinyl wallpaper before applying solution. Bring in commercial remover or a steamer for stubborn, older layers. Then clean off every bit of wallpaper glue, repair the wall, sand smooth, and prime before painting or adding new wallpaper.
Wallpaper removal is not always fast, but it is absolutely doable. With patience, warm water, the right scraper, and a sense of humor, you can take a room from “grandma’s guest bathroom in 1992” to fresh, clean, and ready for its next chapter.