Building a backyard fence is one of those DIY projects that starts with a dream and a tape measure. Maybe you want privacy from the neighbor’s trampoline circus. Maybe your dog has developed Olympic-level escape skills. Or maybe your yard simply needs a clean border that says, “This is where the barbecue kingdom begins.” Whatever your reason, learning how to build a fence is completely doable when you plan carefully, measure twice, dig safely, and resist the urge to eyeball everything like a pirate reading a treasure map.
A good DIY backyard fence does more than stand upright. It marks property boundaries, improves privacy, adds curb appeal, protects pets and children, and frames your outdoor space like a picture. The best fence plans balance function, budget, climate, maintenance, and design. A six-foot wood privacy fence may be perfect for a suburban backyard, while a picket fence, split-rail fence, vinyl panel fence, shadowbox fence, or chain-link fence with privacy slats may be better for other spaces.
This guide walks through the process from planning and permits to posts, rails, pickets, gates, finishes, and backyard fence design ideas. Bring patience, gloves, and a sense of humor. Fence building is honest work, and the ground always has opinions.
Start With a Smart Fence Plan
Before buying lumber, sketch your fence layout. Draw the yard, house, existing structures, trees, slopes, gates, and corners. Mark the proposed fence line and measure the total linear footage. This tells you how many posts, rails, panels, pickets, bags of concrete, screws, hinges, and gate latches you will need.
Next, confirm your property lines. Do not assume the old fence, hedge, or “that’s where my uncle said the line was” is accurate. Check your property survey, contact your local assessor’s office, or hire a surveyor if the boundary is unclear. A fence built on the wrong side of the line can turn a weekend project into a neighborhood soap opera.
Also check local building codes, zoning rules, and HOA guidelines. Many areas limit backyard fence height to around six or eight feet, but exact rules vary by city, county, and neighborhood. Front-yard fences often have stricter height and visibility requirements. Some municipalities require a fence permit, especially for tall fences, corner lots, pool enclosures, or fences near sidewalks and easements.
Call 811 Before You Dig
Fence posts require digging, and digging requires caution. Before any excavation, contact 811 or your state’s 811 center a few business days before the project. Utility companies will mark approximate underground lines with flags or paint. This step is free in many areas and can help prevent dangerous damage to gas, water, electrical, cable, sewer, or communication lines.
Never treat utility marks as decoration. Avoid digging directly on or near marked lines. If a post hole must be close to a marked utility, hand dig carefully and consider moving the fence line or post location. A slightly adjusted fence is much better than a surprise geyser, blackout, or dramatic visit from the gas company.
Choose the Best Backyard Fence Material
Wood Fence
Wood is the classic DIY fence material because it is attractive, customizable, and widely available. Cedar, redwood, pine, and pressure-treated lumber are common choices. Wood works well for privacy fences, picket fences, shadowbox fences, board-on-board fences, lattice-top fences, and horizontal slat designs. The tradeoff is maintenance. Wood fences need staining, sealing, or painting every few years, depending on climate and exposure.
Vinyl Fence
Vinyl fencing is popular for homeowners who want a clean look with less maintenance. It comes in panels and kits, often with matching posts and rails. Vinyl does not need staining and resists rot, but installation still requires accurate layout, level posts, and careful spacing. Always follow the manufacturer’s instructions because vinyl systems vary.
Chain-Link Fence
Chain-link fencing is durable, practical, and usually more affordable than decorative wood or metal options. It is excellent for pets, side yards, gardens, and utility areas. Add privacy slats, climbing plants, or screening fabric if you want more seclusion.
Metal, Aluminum, and Composite Fences
Aluminum and metal fences provide a polished look and strong boundary without blocking the view. Composite fences cost more upfront but offer durability and lower maintenance. These materials are good options when long-term performance matters more than the lowest initial price.
Backyard Fence Designs Worth Considering
A fence should solve a problem and look like it belongs. Here are several popular DIY backyard fence designs:
- Privacy fence: Tall, solid panels or tightly spaced pickets block views and create a secluded outdoor room.
- Shadowbox fence: Alternating pickets on both sides offer airflow, partial privacy, and an attractive look from either side.
- Picket fence: Short, charming, and traditional. Best for front yards, gardens, and decorative boundaries.
- Horizontal slat fence: Modern and clean, with boards running side to side instead of vertically.
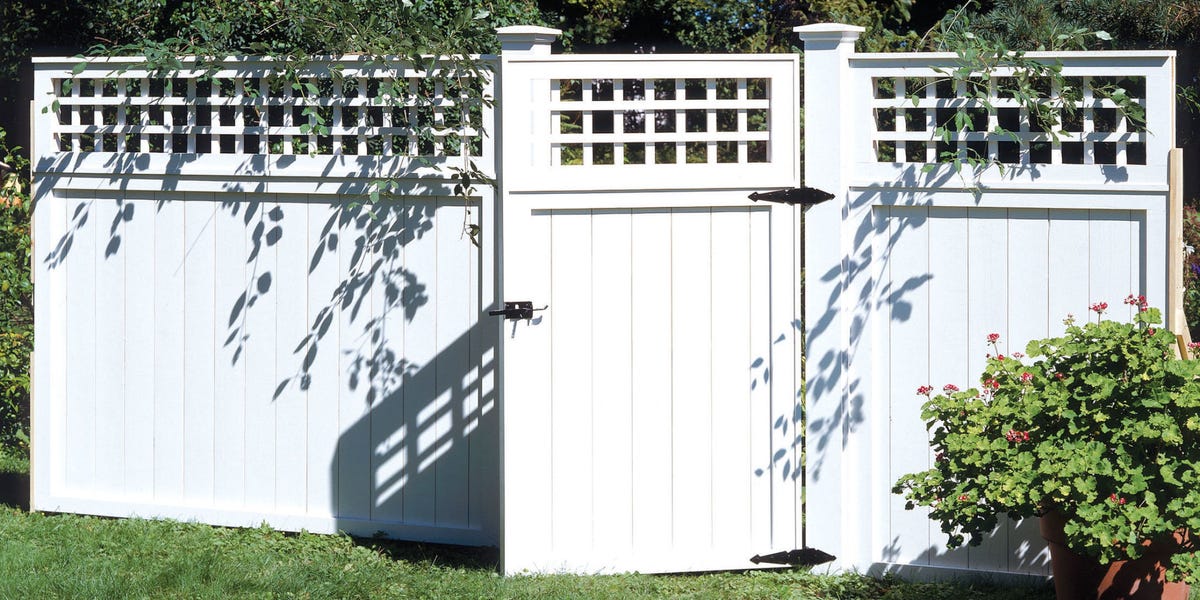
- Lattice-top fence: Combines privacy below with light, air, and climbing plants above.
- Split-rail fence: Rustic and open, ideal for large yards, country-style homes, and decorative boundaries.
- Board-on-board fence: Overlapping boards provide excellent privacy and reduce gaps caused by wood shrinkage.
For extra style, add an arbor gate, decorative post caps, stained wood, climbing roses, ornamental grasses, or layered shrubs. Plants soften hard fence lines and make even a plain privacy fence feel intentional.
Tools and Materials You Will Need
Your exact list depends on the fence style, but most wood fence projects require a tape measure, stakes, mason’s line, spray paint, level, post level, post-hole digger, digging bar, shovel, circular saw, drill, exterior screws or galvanized nails, concrete mix, gravel, 4×4 posts, 2×4 rails, pickets or panels, gate hardware, safety glasses, gloves, and hearing protection.
A power auger can save time on long fence runs, but it is not always the best choice near utilities, roots, rocks, or tight spaces. For many homeowners, a manual post-hole digger plus determination gets the job done. Determination may not be sold in the tool aisle, but you will need plenty of it.
Lay Out the Fence Line
Use stakes and mason’s line to mark the fence perimeter. Pull the line tight so it represents the outside face of the posts or the finished fence line. If your fence runs parallel to the house, start with that line first, then square the corners.
The 3-4-5 method helps create square corners. Measure three feet along one string and four feet along the perpendicular string. The diagonal between those two marks should be five feet. If it is not, adjust the strings until the measurement is correct.
Mark post locations every six to eight feet on center for most wood fences. Keep spacing consistent. For prebuilt panels, your post spacing must match the panel width. For component-built fences, you have more flexibility and can follow yard contours more easily.
Dig and Set Fence Posts
Fence strength begins underground. A beautiful fence with weak posts is just a sail waiting for a windy day. Dig post holes about three times the width of the post. For many wood fences, holes are roughly one-third the height of the post, plus a few inches for gravel. In cold climates, dig below the frost line to reduce frost heave.
Add three to six inches of gravel to the bottom of each hole for drainage, then tamp it firmly. Set the post in the hole, align it with the string line, and check that it is plumb on all sides. Brace posts with temporary 2×4 supports so they do not shift.
Pour concrete around the post according to the product directions. Leave the concrete slightly below grade and slope the top away from the post so water drains instead of collecting around the wood. Let the concrete cure fully before attaching rails or panels. This waiting period is not glamorous, but it keeps your fence from doing interpretive dance later.
Attach Rails or Fence Panels
Once the posts are set, install horizontal rails or attach prebuilt panels. For a traditional wood privacy fence, use two rails for fences up to about four feet tall and three rails for taller fences. Place the bottom rail several inches above the ground and the top rail several inches below the picket tops. A middle rail adds strength to taller fences.
Use exterior-rated screws or galvanized nails. Pre-drill near rail ends to reduce splitting. Stagger rail joints so they do not all meet on the same post. This improves strength and reduces weak points along the fence line.
If you are using preassembled panels, lift each panel into position, check for level, and fasten it securely to the posts. Panels are faster, but they are less forgiving on uneven ground. Component-built fences take longer but can better follow slopes and dips.
Install Pickets Like a Pro
Start with the first picket perfectly plumb. That first board is the boss; every other picket will follow its lead. Use a spacer block to keep gaps consistent between boards. Check plumb every few pickets because small errors add up over long runs.
For a privacy fence, attach pickets tightly or use an overlapping board-on-board pattern. For a shadowbox fence, alternate pickets on opposite sides of the rails so the fence looks finished from both yards. For picket fences, keep spacing uniform and align the tops with a string line or cut them after installation for a crisp finish.
Build and Hang the Gate
Gate planning deserves special attention. Gates get used, slammed, leaned on, and occasionally treated like gym equipment by children. Use sturdy gate posts, quality hinges, and a reliable latch. Plan the opening wide enough for normal use. A three- to four-foot gate works for people and wheelbarrows, while wider openings may be needed for riding mowers or larger equipment.
Build the gate frame square and add diagonal bracing to prevent sagging. The diagonal brace should transfer weight from the latch side down toward the hinge side. Leave clearance under the gate so it does not drag on grass, gravel, snow, or uneven soil. If you want the entrance to feel special, add an arbor, trellis, or matching gate cap.
How to Build a Fence on a Slope
Sloped yards need either a contour fence or a stepped fence. A contour fence follows the natural slope, with rails and pickets running parallel to the ground. This looks smooth on gentle slopes and works especially well with component-built fences.
A stepped fence uses level panels that step up or down from post to post. It works well with preassembled panels and steeper grades. The downside is that triangular gaps may appear under panels, so you may need gravel boards, custom pickets, or landscaping to close the spaces.
Finish and Maintain Your Fence
Wood fences last longer when protected from moisture and sun. Let pressure-treated lumber dry before staining unless the product label says otherwise. Clean the surface, remove dirt and mildew, and apply exterior stain or sealer. Stain is often more forgiving than paint because it allows wood to breathe and is less likely to peel when moisture moves through the boards.
Walk the fence twice a year. Tighten loose fasteners, check gate hinges, trim plants away from boards, and look for rot at the base of posts. Keep soil and mulch from piling against wood pickets. Your fence is tough, but it does not want to be buried like a treasure chest.
Common DIY Fence Mistakes to Avoid
- Skipping permits, HOA rules, or property-line confirmation.
- Forgetting to contact 811 before digging.
- Setting posts too shallow or above the frost line in cold regions.
- Ignoring drainage at the bottom of post holes.
- Using indoor screws or fasteners that rust quickly outdoors.
- Failing to brace posts while concrete cures.
- Building a gate opening too narrow for future equipment.
- Installing pickets without checking plumb as you go.
DIY Fence Cost and Time Expectations
The cost to build a fence depends on material, height, length, terrain, gate count, local prices, and whether you rent tools. A simple DIY wood fence can save labor costs, but you still need lumber, concrete, fasteners, tools, permits, finish, and disposal supplies. Professional fence installation usually costs more, but it may be worth it for rocky soil, steep slopes, long runs, tight deadlines, or complex gates.
For a moderate backyard, expect the project to take more than one day. Day one often disappears into layout, digging, and setting posts. Day two may involve rails and panels. Day three, if needed, is for gates, pickets, cleanup, and wondering why your arms feel like cooked spaghetti.
Experience Notes: What Building a Backyard Fence Teaches You
Anyone who has built a fence learns quickly that the project is part construction, part geometry, and part negotiation with the earth. On paper, a fence line is straight, clean, and confident. In real life, it may pass through roots, compacted clay, mystery rocks, sprinkler lines, ant colonies, and one stubborn spot where the shovel bounces like it hit a buried cannon.
The first lesson is that planning saves sweat. A homeowner who spends an extra hour marking post locations, checking gate swing, and measuring panel lengths will usually save several hours later. It is much easier to move a stake than to move a post set in concrete. The second lesson is that string line is truth. Your eyes will lie to you, especially across a long yard. A tight mason’s line keeps the fence honest.
The third lesson is that post holes are the real project. People imagine the satisfying part will be attaching pickets, and that is fun, but the fence is won or lost in the holes. A deep, properly sized, well-drained hole gives the fence strength. A shallow hole gives the fence a future appointment with gravity.
Another practical experience: build with a helper whenever possible. One person can build a fence, but two people make the work safer and far less frustrating. Holding a post plumb while bracing it, lifting a panel into place, or hanging a gate is much easier when someone else is there. Choose a patient helper. Fence building is not the moment for dramatic sighing.
Gate installation is where many DIY fences reveal their personality. A gate that looks square on the ground may behave differently once hung. Check the opening, brace the frame, use strong hinges, and leave enough clearance. If the gate swings freely and latches smoothly, celebrate. That small click of the latch feels like a trophy.
Design choices also matter more than beginners expect. A plain fence can look elegant with post caps, a warm stain, a lattice top, or plants along the base. Horizontal slats feel modern. Shadowbox fences feel neighbor-friendly. Picket fences feel cheerful. A privacy fence with shrubs in front looks softer and more expensive than boards alone.
Finally, a fence teaches patience. Concrete needs curing time. Wood needs maintenance. Soil conditions vary. Measurements need checking. But when the final board is fastened and the yard suddenly feels complete, the effort makes sense. You have not just built a barrier. You have shaped an outdoor room, created privacy, improved daily life, and earned the right to stand back with a cold drink and say, “Yep, I built that.”
Conclusion
Learning how to build a fence is a practical DIY skill that can transform a backyard. The key is to slow down before you speed up: confirm rules, call 811, choose the right material, draw a clear plan, set strong posts, install straight rails, build a dependable gate, and finish the fence for long-term durability. Whether your dream is a full privacy fence, a friendly picket fence, a modern horizontal design, or a garden fence with an arbor gate, the best results come from careful planning and steady work.
A backyard fence is more than lumber, posts, panels, and concrete. It is privacy for morning coffee, safety for kids and pets, structure for landscaping, and a finished edge for outdoor living. Build it right, maintain it well, and your fence will quietly do its job for yearswithout asking for much more than an occasional wash, stain, and appreciative nod.