Built-in shelves have a special kind of design magic. One minute they are innocent storage. The next, they are the entire personality of a room. They frame a fireplace, make a home office feel smarter, turn an awkward wall into a feature, and quietly whisper, “Yes, someone here owns a candle that costs more than dinner.”
But here is the funny part: most built-ins do not start out looking magazine-worthy. Many begin as plain white shelves, dated wood cabinets, builder-grade bookcases, or a slightly chaotic mix of books, baskets, cords, framed photos, mystery chargers, and one lonely vase that has been working overtime since 2014. The good news? A built-in shelf update does not always require ripping out cabinets or calling a contractor with a clipboard and dramatic measuring tape.
With the right paint, trim, lighting, styling, and a little discipline about what gets displayed, built-in shelves can look polished, intentional, and expensiveeven when the budget is more “weekend DIY” than “architect-designed library.” This guide breaks down how to update built-in shelves so they look like they belong in those fancy magazines, without making your living room feel like a furniture showroom where no one is allowed to sit.
Why Built-in Shelves Make Such a Big Design Impact
Built-in shelves are not just shelves. They are architecture. Unlike freestanding bookcases, built-ins become part of the room’s bones. They can make a blank wall feel finished, add storage without eating up floor space, and give personal objects a more permanent, curated home.
That is why a built-in bookcase makeover can transform an entire room faster than swapping a rug or buying new throw pillows. Shelves sit at eye level, cover a large visual area, and naturally attract attention. When they look good, the whole room feels more designed. When they look cluttered, dated, or half-finished, they quietly drag everything down like a bad haircut in family photos.
The best built-in shelf updates combine two goals: function and beauty. You need places for books, games, electronics, baskets, documents, or dishes. But you also need negative space, color balance, texture, lighting, and a few personal pieces that make the shelves feel like your homenot a catalog page with no pulse.
Start With a Shelf Audit Before You Touch a Paintbrush
Before buying paint, wallpaper, brass lights, or yet another decorative bowl, take everything off the shelves. Yes, everything. This is the moment when the room will look worse before it looks better. That is normal. DIY projects love a dramatic middle act.
Once the shelves are empty, sort items into four groups: keep, relocate, store, and donate. Books you actually love can stay. Beautiful objects with meaning can stay. Random paperwork, half-burned candles, outdated electronics, and the souvenir mug that never really matched anything can move along.
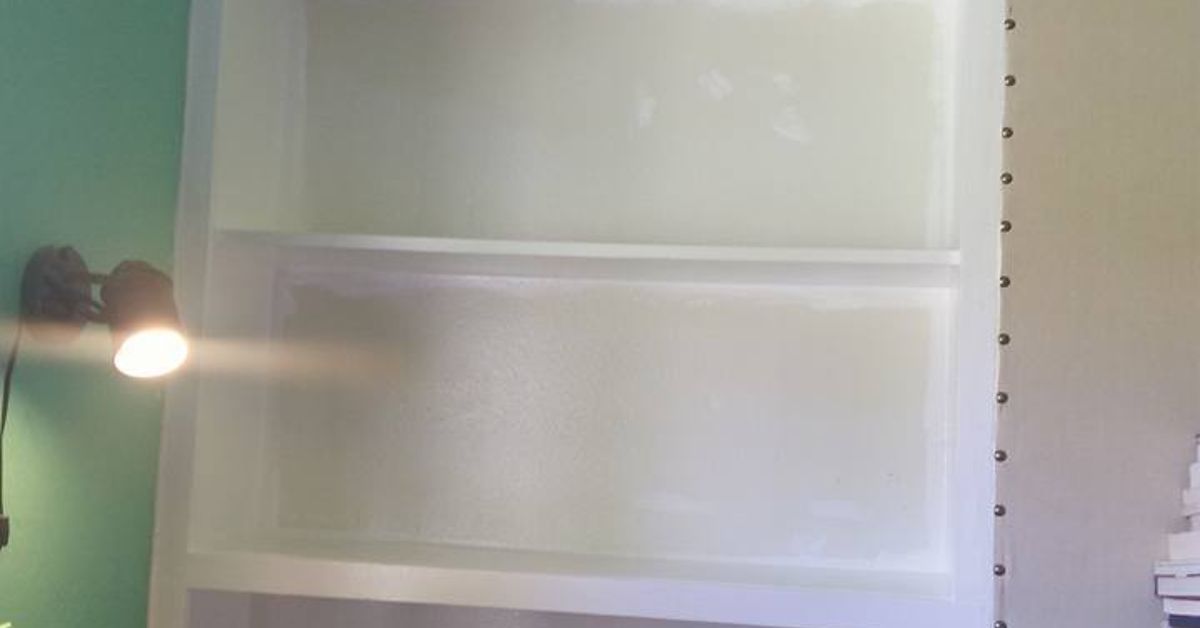
This blank-slate step matters because styling built-in shelves is easier when you are not trying to decorate around clutter. Empty shelves also reveal what the built-ins themselves need. Are the backs scuffed? Do the shelves sag? Is the trim too thin? Does the paint look yellow? Are there visible nail holes, rough edges, or gaps around the wall? These little flaws are exactly what separate “fine” from “finished.”
Choose a Design Direction: Cozy Library, Modern Gallery, or Classic Cabinetry
A common mistake is updating built-in shelves without deciding what they should become. You do not need a 42-page design presentation. You just need a direction.
Option 1: The Cozy Home Library Look
This style works beautifully for living rooms, dens, offices, and reading corners. Think rich paint colors, layered books, warm lamps, framed art, and a few collected objects. The shelves can feel full, but not messy. The goal is “well-read and charming,” not “book avalanche with a side of panic.”
Option 2: The Clean Modern Built-in Look
If your home leans modern, keep the palette tighter. Use fewer objects, more negative space, simple ceramics, sculptural pieces, and books grouped by tone or subject. A smooth satin or semi-gloss finish can help the built-ins feel crisp and architectural.
Option 3: The Classic Custom Cabinet Look
This is the style that makes basic shelves look expensive. Add crown molding, base trim, face frames, cabinet doors, quality hardware, and a paint color that coordinates with the room’s existing millwork. The more the shelves look integrated with the home’s architecture, the more custom they feel.
Paint Is the Fastest Way to Modernize Built-in Shelves
Paint is the superhero of built-in shelf updates. It can hide dated wood tones, unify mismatched sections, create contrast, or make inexpensive bookcases look like intentional millwork.
For a bright and timeless look, paint the built-ins the same color as the walls or trim. This creates a seamless effect and helps the shelves feel like part of the architecture. White, soft cream, warm gray, and greige are popular choices because they make rooms feel open and flexible.
For a magazine-style focal point, consider a bold color. Deep green, navy, charcoal, mushroom brown, oxblood, and inky blue can make built-in shelves feel dramatic and sophisticated. A moody color works especially well when the room has good natural light, warm wood floors, brass accents, or neutral furniture.
For a subtle custom touch, paint only the backs of the shelves. This adds depth without overwhelming the room. It is also a smart choice if you like your existing white or wood shelving but want more personality.
Best Paint Finish for Built-ins
Satin and semi-gloss finishes are practical for built-in shelves because they are easier to wipe clean than flat paint. If the shelves will hold books, baskets, toys, or daily-use items, durability matters. Use a quality primer, especially over glossy paint, stained wood, laminate, or dark colors. Sand lightly between coats for a smoother finish. Your future self will appreciate the extra effort, even if your current self is covered in paint dust and questioning every decision.
Add Trim and Molding for a Custom Look
Trim is what makes built-ins look built in. Without it, shelves can look like boxes pushed against a wall. With it, they suddenly look intentional, finished, and much more expensive.
Crown molding at the top helps shelves meet the ceiling gracefully. Base molding at the bottom connects the unit to the room. Face-frame trim on the front edges makes thin shelves look thicker and more substantial. Small decorative molding can also hide seams between separate bookcase units, which is especially helpful for IKEA-style built-in hacks.
If your built-ins surround a fireplace, doorway, window, or TV, consistent trim is even more important. Matching the shelf trim to the home’s existing baseboards and crown molding helps the update feel original to the house. That is the secret: the best built-in shelf makeover should not scream, “I was installed last Saturday.” It should say, “I have always been this charming.”
Upgrade the Back Panel With Wallpaper, Beadboard, or Wood Slats
The back of a built-in shelf is prime design real estate. Leaving it plain is fine, but upgrading it can create depth and texture.
Wallpaper is great for adding pattern behind books and decor. Grasscloth wallpaper brings texture. Small-scale prints add charm. A bold geometric pattern can make modern shelves pop. Peel-and-stick wallpaper is a renter-friendly or commitment-shy option, although proper surface prep is still important.
Beadboard creates a classic cottage or coastal look. Fluted panels and vertical wood slats feel more contemporary. Painted plywood panels can cover damaged backs and provide a smoother surface. If the shelves are open and highly visible, this one change can make the entire unit look more layered and designer-approved.
Install Lighting to Create That Fancy Magazine Glow
Lighting is one of the biggest differences between ordinary built-ins and magazine-worthy built-ins. A shelf with no lighting can look flat. A shelf with warm, focused lighting suddenly has depth, shadow, and a little bit of drama. Basically, lighting is the shelf’s Instagram filter.
Picture lights installed above built-ins create a library-inspired look. LED strip lights hidden under shelves give a sleek, modern glow. Small puck lights can highlight art, ceramics, or glassware. If hardwiring is not possible, battery-operated or rechargeable lights can still create a polished effect.
Choose warm white bulbs rather than harsh cool light. Warm lighting makes books, wood, brass, and neutral decor look inviting. Cool lighting can make even a beautiful shelf feel like it is being interrogated.
Balance Open Shelving With Closed Storage
Not everything deserves to be on display. Board games, printer paper, tangled cords, pet supplies, extra candles, and remote controls are useful, but they are not exactly giving “editorial home tour.” Closed storage keeps real life nearby without letting it visually take over.
If your built-ins already have lower cabinets, use them wisely. Add bins, drawer organizers, or labeled baskets inside so the hidden areas do not become clutter caves. If your shelves are open from top to bottom, consider adding cabinet doors to the lower section or using matching baskets on the bottom shelves.
A strong built-in shelf design usually mixes display and storage. The upper shelves can show books, art, pottery, and meaningful objects. The lower shelves or cabinets can handle the practical items. This keeps the room beautiful and livable, which is the entire point.
How to Style Built-in Shelves Like a Designer
Once the structure looks good, styling brings it to life. The trick is to make the shelves feel collected, not cluttered. You want variation, rhythm, and breathing room.
Use Books as the Foundation
Books make shelves feel warm and authentic. Mix vertical rows with horizontal stacks. Place a small bowl, framed photo, or ceramic object on top of a horizontal stack to vary height. Keep some shelves book-heavy and others more decorative so the arrangement does not feel too rigid.
Add Art for Height and Personality
Small framed art, leaning prints, family photos, and even a small canvas can add height and personality. Leaning art against the back of the shelf creates an effortless layered look. Hanging a small frame on the front edge of a built-in can also create a rich, collected effect.
Mix Shapes and Textures
Use a mix of round, square, tall, short, shiny, matte, smooth, rough, old, and new. Try ceramics, baskets, wood boxes, glass vessels, metal objects, plants, sculptural pieces, and framed art. If everything is the same height or material, the shelves can look flat.
Repeat Colors Without Matching Everything
Pick a loose color palette and repeat it across the shelves. For example, you might use warm whites, black, brass, natural wood, and soft green. Repetition makes the shelves feel cohesive. Perfect matching makes them feel like a store display. There is a difference, and your shelves know it.
Leave Negative Space
Negative space is not empty space. It is design breathing room. Leave some gaps between objects so the eye can rest. A few open areas make the styled pieces look more important and prevent the shelves from becoming visually noisy.
Built-in Shelf Update Ideas for Different Rooms
Living Room Built-ins
Living room built-ins often frame a fireplace or TV. Keep the styling balanced but not perfectly mirrored. If one side has a tall vase, the other side might have vertical books and framed art. Use baskets or cabinet doors for remotes, games, and media accessories. If there is a TV, darker paint behind it can help the screen blend in.
Home Office Built-ins
Office shelves need to work hard. Combine attractive storage boxes, reference books, file holders, and a few decorative pieces. Avoid over-styling if you actually use the space daily. A beautiful office that cannot hold paperwork is just a stage set with Wi-Fi.
Kitchen or Dining Room Built-ins
Use built-in shelves to display dishes, serving bowls, glassware, cookbooks, and baskets. Keep everyday pieces within reach and place more decorative items higher up. If the shelves are near food prep areas, choose washable paint and avoid delicate objects that collect grease or dust.
Bedroom Built-ins
Bedroom shelves should feel calm. Use fewer colors, soft textures, framed photos, small lamps, storage boxes, and books. Avoid packing every shelf full. The goal is restful, not “tiny museum of everything you have ever owned.”
Small Details That Make Built-ins Look Expensive
Magazine-worthy built-ins often come down to details. Caulk the gaps where shelves meet the wall. Fill nail holes. Touch up paint. Align books and objects carefully. Replace dated knobs or pulls with brass, matte black, polished nickel, or wood hardware. Add matching baskets. Hide cords. Use cord covers, cable clips, or closed storage to keep electronics from spoiling the view.
Another designer trick is to make shelves look thicker. Thin shelf edges can feel cheap, especially on large built-ins. Adding trim to the front edge creates the illusion of substantial custom shelves. It is a small carpentry move with a big visual payoff.
Also consider scale. Tiny objects scattered across large shelves can look messy. Larger piecessuch as oversized books, tall vases, framed art, and substantial bowlsoften look more polished. Fewer, larger accessories usually beat many tiny ones. Your shelf does not need 37 mini objects having a conference.
Common Built-in Shelf Mistakes to Avoid
The first mistake is overfilling. Built-ins are storage, yes, but they are also visual space. If every inch is packed, nothing stands out.
The second mistake is using only books or only decor. All books can look heavy. All decor can look artificial. A mix feels more natural.
The third mistake is ignoring lighting. Even beautifully styled shelves can disappear in a dim room. Add lamps, picture lights, or shelf lighting whenever possible.
The fourth mistake is choosing a paint color without testing it. Built-ins cover a lot of surface area. A color that looks subtle on a paint chip can become very loud on an entire wall of shelves. Test samples in morning, afternoon, and evening light.
The fifth mistake is forgetting function. If your family uses the shelves daily, do not style them in a way that requires museum-level caution. Leave room for real life. Fancy magazines are inspiring, but they do not have to find the missing game controller at 9 p.m.
A Practical Weekend Plan for Updating Built-in Shelves
If you want a realistic built-in shelf update, break it into stages. On Friday evening, empty the shelves and sort everything. Clean the surfaces, remove dust, and decide what stays. On Saturday, patch holes, caulk gaps, sand rough spots, and prime if needed. If you are painting, apply the first coat and let it dry properly. Rushing dry time is how shelves become sticky little regret ledges.
On Sunday, apply the final coat, reinstall hardware, add lighting, and begin styling. Start with books, then add larger objects, then layer smaller accents. Step back often. Take photos with your phone because photos reveal imbalance faster than staring at the shelf while holding a vase and doubting your entire personality.
If trim or electrical work is involved, the project may take longer. That is fine. A polished built-in shelf makeover is not a race. It is a sequence of small decisions that add up to a room-changing result.
Budget-Friendly Ways to Get a High-End Built-in Look
You do not need a luxury budget to make built-ins look elevated. Paint existing shelves instead of replacing them. Add inexpensive molding. Use peel-and-stick wallpaper on the backs. Install battery-powered picture lights. Shop your own home for books, pottery, baskets, and framed art. Use thrifted frames and spray-paint them in a consistent finish. Replace random storage bins with matching woven or fabric baskets.
One of the best budget tricks is editing. Removing clutter is free. Rearranging books is free. Grouping similar colors is free. Leaving negative space is extremely free. Sometimes the most expensive-looking choice is simply not putting every object you own on display.
Extra Experience: What I Learned From Making Built-ins Look Magazine-Worthy
The biggest lesson from updating built-in shelves is that the project is less about buying new things and more about making better decisions. At first, it is tempting to solve every shelf problem with shopping. Need height? Buy a vase. Need warmth? Buy a basket. Need personality? Buy a sculpture shaped like something mysterious and expensive. But the shelves usually improve most when you slow down and edit.
One experience that stands out is how much paint can change the mood of a room. A plain white built-in can look clean, but in some rooms it also looks unfinished, especially if the surrounding walls are already light. Painting the shelves a deeper color can make the entire wall feel intentional. It creates contrast, frames the objects, and gives even ordinary books more presence. The key is testing the color first. A deep green might look elegant in daylight but nearly black at night. A navy might look classic in one room and too cold in another. Sampling paint is not the glamorous part of the project, but it saves you from repainting a wall of shelves while muttering things your family pretends not to hear.
Another useful lesson is that styling gets better when you work in layers. Start with the largest items first: big books, art, baskets, tall vases, and storage boxes. Then add medium pieces, such as bowls, framed photos, ceramics, and plants. Small objects should come last, and only if they add something. When small pieces go on the shelf too early, they spread everywhere like decorative confetti.
I also learned that personal items matter more than perfect items. A built-in shelf looks richer when it includes pieces with a story: a framed family photo, a book you actually read, a bowl from a trip, a handmade object, or an old box from a grandparent. Magazine shelves look beautiful, but the best home shelves look beautiful and lived-in. They should tell visitors something about the people who live there.
Lighting was another surprise. Even a simple picture light can make built-ins feel more finished. It creates shadows, highlights texture, and gives the shelves a warm evening glow. If hardwiring is not possible, rechargeable lights are a practical shortcut. The difference between unlit shelves and softly lit shelves is the difference between “nice storage” and “wait, did you hire a designer?”
Finally, the most important experience is learning when to stop. Shelf styling can become a loop. You move one vase, then three books, then a basket, then suddenly it is midnight and you are negotiating with a ceramic bird. The best trick is to style the shelves, leave the room, come back later, and remove one or two things. A little restraint makes everything look more confident. Built-in shelves do not need to prove they are stylish. When the color, lighting, trim, and objects work together, they simply are.
Conclusion: The Fancy Magazine Look Is Really About Intention
A built-in shelf update does not have to be complicated, but it does need intention. Paint gives the unit a new identity. Trim and molding make it feel custom. Wallpaper, beadboard, or wood panels add depth. Lighting creates atmosphere. Styling turns storage into a story.
The real secret is balance. Combine books with art, storage with display, color with breathing room, and beauty with function. Your shelves should look polished, but they should also make sense for your life. After all, a home is not a showroom. It is where the good books, extra blankets, family photos, board games, and slightly dramatic vases all learn to live together.
Update your built-ins thoughtfully, and they can become the kind of feature that makes the whole room feel finished. Maybe even fancy. Maybe even magazine fancy. Just do not be surprised if guests suddenly start saying, “Wow, have these shelves always looked like this?” Smile politely. Let them think you have always been this effortlessly stylish.