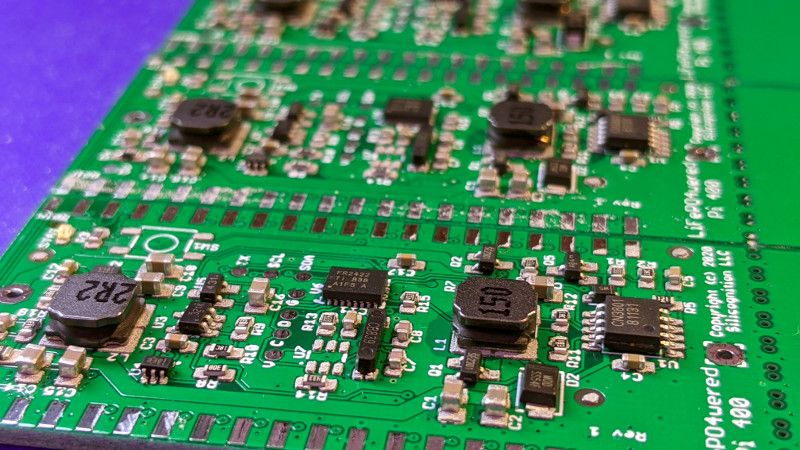
The Raspberry Pi 400 is one of those devices that makes hardware people grin before they even plug it in. A full Raspberry Pi computer tucked inside a tidy keyboard? Very retro. Very practical. Very “I suddenly want to build a tiny command center on my desk.” But when makers started imagining a sleek UPS add-on for the Raspberry Pi 400, the dream quickly discovered a few potholes in the road.
A Raspberry Pi 400 UPS add-on sounds simple at first. Add a battery, monitor power loss, keep the computer alive during an outage, and trigger a graceful shutdown before the microSD card throws a tiny digital tantrum. Easy, right? Not quite. The Raspberry Pi 400 has a 40-pin GPIO header, but its power behavior is not identical to older Raspberry Pi boards. That small design difference turns a neat plug-in UPS cartridge into an engineering puzzle.
This article breaks down what happened, why the Raspberry Pi 400 is tricky to power through GPIO, what a good UPS add-on should do, and how makers can approach the problem without accidentally building a warm plastic regret sandwich.
Why a UPS Add-On for Raspberry Pi 400 Makes Sense
A UPS, or uninterruptible power supply, is not just for office servers with blinking lights and serious-looking fans. For a Raspberry Pi 400, it can be genuinely useful. The Pi 400 can run desktop tasks, light development work, classroom projects, home automation dashboards, retro computing setups, and portable experiments. In all those uses, sudden power loss is annoying at best and damaging at worst.
Raspberry Pi computers rely heavily on microSD storage unless you boot from USB. When power disappears during a write operation, the system may reboot cleanly, or it may come back acting like it forgot where it parked its operating system. A UPS gives the Pi enough time to save work, stop services, and shut down properly.
For headless projects, the benefit is even bigger. A Raspberry Pi 400 used as a network tool, classroom coding station, portable terminal, or workshop computer may not always have someone nearby to unplug it politely. A smart UPS can detect power failure and tell the operating system, “Please wrap things up before the battery goes from heroic to exhausted.”
The Raspberry Pi 400 Is Not Just a Pi 4 in a Fancy Hat
The Raspberry Pi 400 is closely related to the Raspberry Pi 4. It uses a Broadcom BCM2711 processor, has 4GB of memory, includes a 40-pin GPIO header, and draws power through USB-C. It also places nearly all ports along the back edge of the keyboard, including Ethernet, USB, micro HDMI, microSD, USB-C power, and GPIO.
That layout is elegant for a desktop computer. It is less elegant for traditional Raspberry Pi HATs. Standard HATs were designed for the vertical 40-pin header on a board-shaped Raspberry Pi. On the Pi 400, the header is horizontal on the back of the keyboard, so many HATs stick out awkwardly unless you use an adapter. In everyday maker language: it works, but it looks like your keyboard grew a circuit-board tail.
This is where the cartridge-style UPS idea becomes attractive. Instead of stacking a HAT vertically, a custom add-on could slide into the rear GPIO port like an old-school game cartridge. It could include a battery, power management circuit, pass-through GPIO header, and a clean enclosure. The concept is charming, practical, and delightfully nerdy.
The Clever UPS Cartridge Idea
One early design concept for a Raspberry Pi 400 UPS add-on used an 18650-style battery approach and aimed to fit neatly into the back of the machine. The idea was not merely to strap a power bank to the keyboard with hope and double-sided tape. The goal was a proper integrated UPS: external power would feed the Raspberry Pi 400 through its normal USB-C input, while the add-on would charge the battery and stand ready to take over when power failed.
In theory, the UPS would monitor whether the Pi was receiving external power. If mains power disappeared, the battery circuit would maintain the 5V rail long enough to keep the Pi alive. The Pi would then either continue running briefly or trigger a clean shutdown. A button could allow battery startup or manual shutdown. A pass-through GPIO header would preserve access for other hardware.
That is a solid design goal. It avoids asking users to modify the Pi 400 internally, preserves the keyboard form factor, and makes the add-on feel like a natural accessory instead of a science fair emergency blanket. Unfortunately, the Raspberry Pi 400 had a surprise waiting behind the GPIO pins.
The Problem: GPIO Power Is Not Business as Usual
On many Raspberry Pi boards, powering through the 5V pins on the GPIO header has been a common, if not always beginner-friendly, approach. Many UPS HATs and PoE add-ons depend on that pathway. The Raspberry Pi 400 changes the story.
The Pi 400 includes circuitry that prevents normal powering through the GPIO 5V pins. In practical terms, this means an add-on cannot simply push enough current into the GPIO 5V rail and expect the Pi 400 to boot or run like a standard Pi 4. The design appears intended to reduce back-powering problems, which can happen when power flows into parts of the board in unintended ways. That protection makes sense from a product reliability perspective. For UPS designers, however, it is the kind of surprise that makes coffee taste like betrayal.
The issue is not that the GPIO header is useless. The GPIO pins still matter for sensors, buttons, communication buses, and general maker chaos. The issue is specifically power delivery. A UPS that expects to feed the Pi 400 through the GPIO 5V pins runs into current limits and switching behavior that make reliable operation difficult.
Why the 5V and 3A Power Budget Matters
The Raspberry Pi 400 is designed around a 5V USB-C power input, with a recommended supply current of 3A. That does not mean the board always consumes 15 watts constantly. Actual draw depends on workload, USB peripherals, HDMI use, storage, network activity, and whether the CPU is lounging or sprinting.
Still, a UPS must be designed for worst-case moments, not just calm idle conditions. Boot, browser use, USB drives, keyboards, mice, Wi-Fi, Ethernet, and HDMI can all add demand. A weak boost converter may appear fine on the bench and then collapse when the Pi opens a browser tab with the enthusiasm of a caffeinated squirrel.
This is why “5V output” is not enough information. A useful Raspberry Pi 400 UPS add-on needs stable 5V delivery, enough current headroom, low voltage drop, quick switchover, thermal control, battery protection, and a shutdown signal path. Otherwise, it becomes less of a UPS and more of a decorative reboot generator.
Battery Choice: 18650, Li-Ion, or LiFePO4?
Many Raspberry Pi UPS designs use 18650 lithium-ion cells because they are compact, rechargeable, widely available, and capable of decent current output when sourced from reputable brands. However, not all 18650 cells are equal. Cheap mystery cells with fantasy capacity ratings should be treated like a raccoon offering financial advice: interesting, but not trustworthy.
LiFePO4 cells are also attractive for maker UPS projects. They usually offer better cycle life and a more stable safety profile than some other lithium chemistries, though they have different voltage characteristics. That means the charger, protection circuit, and boost converter must match the chemistry. You cannot casually swap battery types and expect the electronics to applaud.
A proper UPS add-on should include overcharge protection, over-discharge protection, short-circuit protection, current monitoring, and thermal awareness. It should also make battery status available to software, ideally through I2C or GPIO signaling. Without those features, the battery may keep the Pi alive, but the system remains blind to how close it is to shutdown.
Boost Converters: Small Parts, Big Heat
The boost converter is the heart of many battery-backed Raspberry Pi power systems. It turns battery voltage into the 5V required by the Pi. On paper, many converter chips look heroic. In practice, heat tells the truth.
If a boost converter claims several amps of output, that rating depends on the circuit layout, inductor, diode or synchronous switching design, PCB copper area, airflow, input voltage, and thermal limits. A converter that is stable at 1A may become a tiny stovetop at 2A. In a Pi 400 UPS add-on, heat is especially important because the accessory may sit near the back of a keyboard enclosure with limited airflow.
For UPS duty, the converter may only need to run long enough for a graceful shutdown. That is easier than powering the Pi 400 for hours. A short-duration emergency supply can use smaller batteries and less aggressive thermal design. But if the goal is true mobile operation, the design must be much more robust.
Safe Shutdown Is the Real Feature
A common mistake is to think a Raspberry Pi UPS is mainly about runtime. Runtime is nice. Safe shutdown is the real prize.
A smart UPS add-on should detect external power loss immediately. It should notify the Pi through a GPIO pin, I2C register, daemon, or service. The Pi should then start a controlled shutdown sequence. That sequence might stop databases, close files, halt background services, sync storage, and finally power down.
The UPS should then remove power only after the operating system has halted. If mains power returns, a good design should handle restart behavior predictably. Some projects should auto-boot when power returns. Others should remain off until the user presses a button. The correct behavior depends on the use case.
Best Design Direction for Raspberry Pi 400 UPS Add-Ons
Because the Pi 400 does not behave like older boards when powered through GPIO, the cleaner design path is to work through the USB-C power input. That may mean an inline UPS module between the wall supply and the Pi 400, or a cartridge-style rear accessory that also routes power through USB-C. The latter is harder mechanically, but it keeps the elegant form factor.
A practical Raspberry Pi 400 UPS design should include:
- USB-C power input and output designed for the Pi 400’s 5V needs
- Battery charging matched to the chosen cell chemistry
- Fast power-fail detection
- Software-visible battery and power status
- Graceful shutdown support
- Thermal testing under real Pi 400 workloads
- Protection against reverse polarity, overcurrent, and deep discharge
- A mechanical design that does not block ports or stress the GPIO connector
The GPIO header can still play a role. It can carry status signals, I2C communication, button input, or pass-through access for other projects. But relying on GPIO as the main power path is where the design becomes unpleasant.
Who Actually Needs a Raspberry Pi 400 UPS?
Not every Raspberry Pi 400 owner needs a UPS. If you use the Pi 400 for occasional coding lessons, retro games, or casual browsing, a normal shutdown habit may be enough. But a UPS becomes valuable when the Pi 400 is doing something persistent or sensitive.
Home Lab Users
If the Pi 400 runs scripts, dashboards, DNS tools, monitoring software, or network utilities, sudden outages can interrupt services and corrupt logs. A UPS gives the machine time to exit gracefully.
Students and Classrooms
In classrooms, power cables get kicked. It is practically a law of physics. A UPS can prevent lost work and reduce the number of “my project disappeared” moments that make teachers stare into the middle distance.
Portable Makers
The keyboard form factor makes the Pi 400 appealing for portable demos. Battery backup makes it easier to move between benches, displays, and events without shutting down every time.
Embedded Desktop Projects
Some users turn the Pi 400 into a kiosk, control console, or lightweight workstation. A UPS helps when reliability matters more than raw battery runtime.
Buying Tips for Raspberry Pi 400 UPS Solutions
If you are shopping for a UPS solution, read compatibility notes carefully. A UPS HAT that works perfectly on a Raspberry Pi 4 may not power a Raspberry Pi 400 through the GPIO header. Look for explicit Pi 400 support, USB-C power routing, and software shutdown documentation.
Check the continuous current rating, not just peak current. Confirm whether batteries are included. Verify the battery chemistry. Look for I2C monitoring if you want detailed status. Read comments from real users, especially those using the Pi 400 rather than a Pi 3 or Pi 4.
If you are building your own, test in stages. First test charging. Then test regulated output with a dummy load. Then test switchover. Then test the Pi 400 at idle. Then test under load. Finally, test graceful shutdown. Do not skip thermal testing. Electronics that are “probably fine” have a way of becoming “definitely not fine” after ten minutes in a small enclosure.
Hands-On Experience: What It Feels Like When a Pi 400 UPS Project Gets Real
The first emotional stage of building a Raspberry Pi 400 UPS add-on is optimism. The Pi 400 sits on the desk looking clean and friendly. The GPIO header is right there. The battery holder fits nicely in a mockup. The enclosure sketch looks like something a retro computer company might have shipped in 1987. You think, “This will be tidy.” This is the point where the universe quietly pulls up a chair.
Then testing begins. The first lesson is that power projects are less forgiving than sensor projects. If an I2C temperature sensor fails, you get nonsense readings. If a UPS power path fails, the Pi reboots, the filesystem complains, or a converter gets hot enough to make you reconsider your hobbies. A Raspberry Pi 400 UPS add-on teaches respect quickly.
The second lesson is that the Pi 400’s form factor is both the attraction and the trap. A normal Raspberry Pi board gives you open space above the header, mounting holes, and predictable HAT geometry. The Pi 400 gives you a long keyboard body, rear-facing ports, and a horizontal GPIO connector. A board that looks compact in CAD may block the microSD slot, crowd the HDMI cables, or tilt under cable strain. The “cartridge” idea is beautiful, but it requires mechanical discipline.
The third lesson is that runtime expectations need to be realistic. A tiny battery can keep a microcontroller alive for ages, but a Raspberry Pi 400 is a real computer. With HDMI, networking, USB peripherals, and a desktop environment, current draw rises quickly. A small UPS should be treated as an emergency landing system, not a cross-country battery pack. Its job is to let the Pi land safely, not fly to Chicago.
The fourth lesson is that software matters as much as hardware. A UPS that keeps the Pi alive but never tells it power has failed is only half useful. The best experience comes when the operating system receives a clear signal, logs the event, stops services, and shuts down automatically. Testing that script is not glamorous, but it is the difference between a professional-feeling project and a battery-powered shrug.
The fifth lesson is humility. The Raspberry Pi 400 is still a wonderful little computer, but it is not a generic Raspberry Pi 4 with a keyboard glued on top. Its power path was designed with consumer-style safety and reliability in mind. For everyday users, that is sensible. For hardware hackers, it means the old assumptions need checking before ordering PCBs. The project is still possible, but the cleanest route is through USB-C power management, not GPIO back-powering.
In the end, the experience is valuable precisely because it is not all plain sailing. It shows how real hardware design works: the idea is easy, the prototype is educational, and the final product demands patience. A good Pi 400 UPS add-on is not just a battery. It is power electronics, thermal design, mechanical design, firmware, Linux shutdown handling, and user experience squeezed into one small accessory. That is why the project is frustrating, fascinating, and absolutely worth studying.
Conclusion
A Raspberry Pi 400 UPS add-on is a smart idea with a stubborn reality attached. The Pi 400’s keyboard form factor practically invites a cartridge-style accessory, but its GPIO power behavior complicates traditional UPS HAT designs. A reliable solution should respect the Pi 400’s USB-C power path, provide clean 5V delivery, monitor battery status, and trigger a graceful shutdown when power fails.
For makers, the big takeaway is simple: do not assume the Pi 400 behaves exactly like a standard Raspberry Pi 4. It shares much of the family DNA, but power delivery is different enough to matter. Build carefully, test under load, watch the heat, and treat safe shutdown as the star feature. The result may not be plain sailing, but with the right design approach, it can still be a very satisfying voyage.