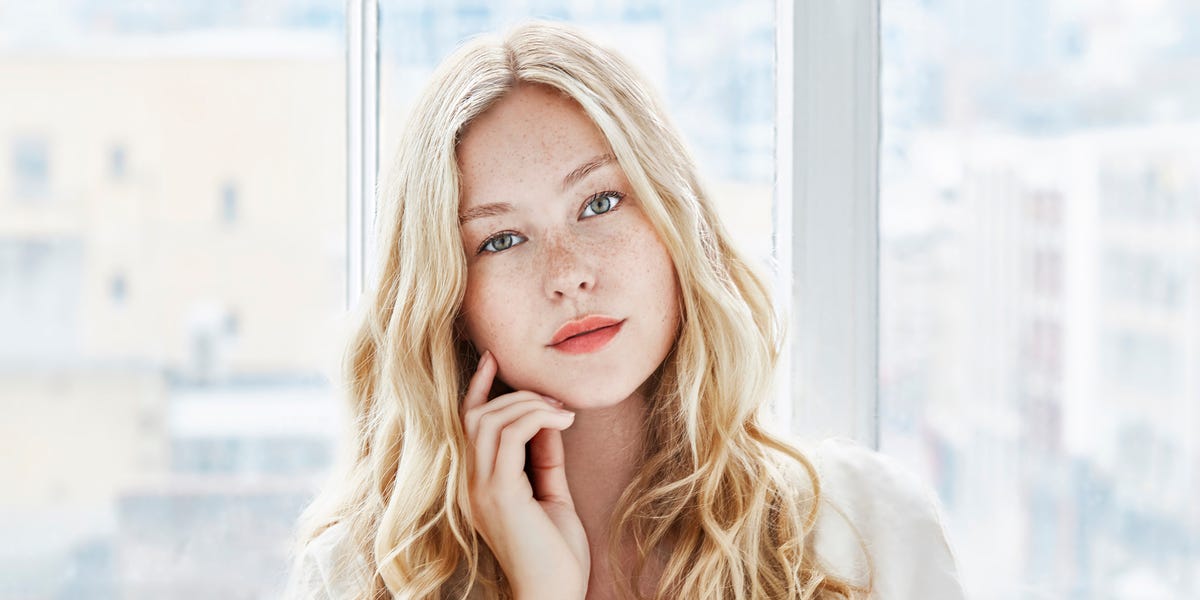
Curling your hair with a flat iron sounds like one of those beauty tricks invented by someone with three hands, perfect lighting, and zero fear of forehead burns. But good news: you do not need salon-level magic to master it. A straightener can create soft beach waves, polished curls, loose bends, face-framing swoops, and “I woke up like this” textureeven if you absolutely did not wake up like that.
The secret is learning the motion: clamp, rotate, glide, release. Once your wrist understands the dance, a flat iron becomes one of the most versatile styling tools in your bathroom. This step-by-step tutorial explains how to curl hair with a flat iron or straightener safely, how to prep your hair, what temperature to use, how to avoid awkward dents, and how to make curls last longer without turning your hair into a crunchy helmet.
Why Use a Flat Iron to Curl Hair?
A flat iron is not just for sleek, pin-straight styles. Because the plates are smooth and heated on both sides, they can shape hair as you twist and glide. Compared with a traditional curling iron, a straightener often creates a softer, more modern curl with relaxed ends. Think less pageant ringlet, more effortless coffee-run-but-make-it-fashion wave.
Flat iron curls are especially helpful when you want volume, texture, or movement without packing multiple hot tools. For travel, busy mornings, or tiny bathrooms with exactly one available outlet, this is a practical win. It also works on short, medium, and long hair, as long as you use the right section size and technique.
What You Need Before You Start
Before curling your hair with a straightener, gather your styling tools and products. Having everything ready prevents the classic half-curled panic where one side looks glamorous and the other side looks like it has questions.
Essential Tools
- A flat iron with rounded edges, preferably 1 inch wide for most hair lengths
- Heat protectant spray or cream
- Sectioning clips
- A wide-tooth comb or detangling brush
- Lightweight hairspray or texture spray
- Optional: shine serum, dry shampoo, or finishing cream
Choose the Right Flat Iron
For curling, the best flat iron has rounded outer edges, smooth plates, and adjustable temperature settings. A 1-inch straightener is the most flexible choice because it works well on short bobs, shoulder-length hair, and long layers. Wider plates can create looser waves on long hair, but they are harder to maneuver near the roots and around the face.
Ceramic plates are usually beginner-friendly because they heat evenly and glide smoothly. Titanium plates can get hotter and may work well for thick, coarse, or resistant hair, but they require more control. If you are new to flat iron curls, choose a tool that lets you lower the heat instead of forcing your hair to survive one blazing temperature setting like it is auditioning for a barbecue commercial.
How to Prep Your Hair for Flat Iron Curls
Preparation matters. The curl does not begin when the iron touches your hair; it begins with clean, dry, protected, detangled strands. A little prep can be the difference between glossy waves and crispy confusion.
Step 1: Start With Completely Dry Hair
Never use a regular flat iron on wet or damp hair unless the tool is specifically designed for wet-to-dry styling. When hair contains water, high heat can cause steam, swelling, and damage inside the strand. Your hair should be 100% dry before you curl it with a straightener.
If you washed your hair, blow-dry it first or let it air-dry fully. For smoother curls, blow-dry with a paddle brush or round brush to stretch the hair and reduce frizz. For more grip, style on second-day hair or add a small amount of dry shampoo or texture spray.
Step 2: Apply Heat Protectant
Heat protectant is not optional. It helps create a protective barrier and can reduce moisture loss, friction, and damage from hot tools. Spray or apply it evenly from mid-lengths to ends, then lightly mist the roots if needed. If using a spray on dry hair, let it dry for a few seconds before applying the iron.
Use enough product to coat your hair lightly, but do not soak it. Hair that feels wet, sticky, or heavy will not glide well through the plates. If your heat protectant makes your hair damp, wait until it dries completely before styling.
Step 3: Detangle and Section
Brush or comb through your hair so the iron can move smoothly. Knots cause snagging, and snagging causes dents, frizz, and muttered words we do not need to print.
Divide your hair into sections. For most people, three layers work well: bottom, middle, and top. Clip away the upper sections and begin at the nape of your neck. Working in organized layers keeps your curls even and prevents random straight pieces from hiding in the back like little rebels.
Best Flat Iron Temperature for Curling Hair
The right temperature depends on your hair type, texture, condition, and how easily it holds a curl. Use the lowest effective heat setting. More heat does not automatically mean better curls; it often just means more damage.
Suggested Heat Settings
- Fine, fragile, or color-treated hair: 250°F to 300°F
- Normal or medium-textured hair: 300°F to 350°F
- Thick, coarse, or resistant hair: 350°F to 400°F
- Very damaged or breaking hair: avoid heat styling until hair improves
If your curl does not form, slow your glide slightly before raising the heat. If your hair smells hot, feels rough, or looks frizzy immediately after styling, lower the temperature. Your hair should look styled, not startled.
How to Curl Your Hair With a Flat Iron: Step-by-Step Tutorial
This is the classic flat iron curl technique. Practice with the iron turned off first if you are nervous. It helps train your wrist without heat, and yes, it feels a little sillybut so does burning one perfect diagonal line into your thumb.
Step 1: Take a Small Section of Hair
Start with a 1-inch section. Smaller sections create tighter, more defined curls. Larger sections create loose waves. If your hair is thick, use smaller sections so heat can reach the full strand evenly.
Step 2: Clamp the Flat Iron Near the Root
Place the flat iron about 1 to 2 inches away from your scalp. Hold it vertically for classic curls or slightly diagonal for softer waves. Avoid clamping too hard; a gentle grip allows the hair to slide smoothly.
Step 3: Rotate the Iron Away From Your Face
Turn the flat iron 180 degrees away from your face. For a more defined curl, rotate it a full 360 degrees. The hair should wrap around the outside of the iron as you twist. Keep your wrist relaxed and your motion smooth.
Step 4: Glide Slowly Down the Hair
After rotating, pull the straightener down toward the ends in one steady motion. Imagine curling a ribbon with scissors: the twist creates the shape, and the glide sets it. Do not stop halfway unless you want a bend or crease.
Step 5: Release and Let the Curl Cool
Once the iron reaches the ends, release the curl and let it cool before touching it. Hair sets as it cools, so brushing it immediately can flatten the curl. For extra hold, cup the curl in your palm for a few seconds before letting it drop.
Step 6: Repeat Around Your Head
Continue curling 1-inch sections. Around your face, curl away from your face for a flattering, open look. For the back, alternate directions to create natural movement and prevent the curls from merging into one giant tube.
Step 7: Break Up the Curls
When all curls are cool, gently separate them with your fingers or a wide-tooth comb. For beachy texture, shake the roots lightly. For polished waves, brush through softly and add a touch of shine serum to the ends.
Step 8: Set the Style
Finish with a flexible-hold hairspray or texture spray. Hold the can about 8 to 12 inches away and mist lightly. Too much hairspray can make flat iron curls stiff, and nobody wants hair that moves as one solid unit during a breeze.
How to Create Different Curl Styles With a Straightener
Once you learn the basic movement, you can adjust your technique to create several looks. The main variables are section size, iron angle, rotation amount, and glide speed.
Loose Beach Waves
Use 1.5-inch sections, start curling around cheekbone level, rotate the iron 180 degrees, and glide quickly. Leave the last inch of hair straighter for that relaxed, beachy finish. Add texture spray and finger-comb.
Polished Curls
Use 1-inch sections, rotate the iron 360 degrees, and glide slowly. Curl every section in the same direction for a smoother, more formal look. Once cooled, brush gently for soft, glossy waves.
Messy Modern Waves
Alternate curl directions and leave the ends out. Start some curls near the root and others at mid-length. This creates a more lived-in style, perfect for casual days, brunch, or pretending your hair naturally behaves this well.
S-Waves
Instead of rotating the iron, bend a section into an “S” shape and press the flat iron over each curve for a few seconds. Move down the strand, forming one bend in one direction and the next bend in the opposite direction. This creates soft vintage-inspired waves or editorial texture.
Face-Framing Bends
For curtain bangs or front layers, clamp the hair lightly, turn the iron away from the face, and glide outward. Keep the motion soft and quick. The goal is a bend, not a tight curl sitting beside your cheek like a punctuation mark.
Flat Iron Curl Tips by Hair Length
Short Hair
Use a narrow 1-inch or smaller flat iron. Take small sections and rotate just 180 degrees. On short hair, a full twist may create curls that are too tight. Focus on bending the mid-lengths and ends for shape and volume.
Medium-Length Hair
Medium hair is ideal for flat iron curls because there is enough length to twist and glide, but not so much that the curl gets weighed down. Use 1-inch sections and alternate directions for a natural finish.
Long Hair
Long hair may need smaller sections or a slightly slower glide so the heat reaches the strand evenly. For long, loose waves, begin curling at mid-length and leave the ends softer. If curls fall quickly, pin each curl while it cools.
Flat Iron Curl Tips by Hair Type
Fine Hair
Fine hair needs lower heat and lightweight products. Too much serum or cream can make curls collapse. Use mousse or texture spray before styling, curl in small sections, and let each curl cool fully before touching.
Thick Hair
Thick hair benefits from careful sectioning. Do not grab huge pieces unless you want the outside curled and the inside confused. Use enough heat to style efficiently, but avoid repeated passes over the same section.
Curly or Coily Hair
For curly or coily hair, begin with stretched, fully dry hair. A smooth blowout first can reduce the number of flat iron passes needed. Use a moisturizing heat protectant, work in small sections, and avoid heat if your hair is already dry, brittle, or breaking.
Color-Treated Hair
Color-treated hair can be more vulnerable to dryness and heat damage. Use lower heat, apply heat protectant generously, and finish with a lightweight shine product. Avoid daily hot tool styling when possible.
Common Mistakes When Curling Hair With a Flat Iron
Mistake 1: Using Too Much Hair at Once
Large sections may look faster, but they often produce weak curls that fall out. Smaller sections give better shape and longer-lasting results.
Mistake 2: Clamping Too Hard
A death grip on the flat iron creates creases. Hold the tool firmly enough to guide the hair, but lightly enough that the strand can glide.
Mistake 3: Moving Too Fast
If you glide too quickly, the curl may not form. Slow down slightly, especially on thick or resistant hair. However, do not stop in one place for too long because that can cause heat marks.
Mistake 4: Touching Curls Before They Cool
Warm curls are still setting. Let them cool completely before brushing, combing, or fluffing. Patience is annoying, but flat curls are more annoying.
Mistake 5: Skipping Heat Protectant
Heat protectant should be part of every hot tool routine. It will not make your hair invincible, but it helps reduce the stress of styling.
How to Make Flat Iron Curls Last Longer
If your curls disappear by lunch, you may need more prep, smaller sections, or better cooling time. Long-lasting curls depend on both technique and product balance.
- Start with dry hair that is not overly soft or slippery.
- Use mousse, texture spray, or dry shampoo for grip.
- Curl smaller sections for stronger shape.
- Let curls cool before brushing them out.
- Use flexible hairspray instead of heavy finishing products.
- Sleep on a silk or satin pillowcase to reduce frizz.
- Refresh the next day with dry shampoo and a few touch-up curls.
Troubleshooting: Why Are My Flat Iron Curls Not Working?
Your Hair Is Slipping Through Too Fast
Try using a little texture spray before curling. Also slow your glide slightly and make sure you are rotating the iron enough to create shape.
Your Curls Have Dents
You may be clamping too tightly or pausing during the glide. Keep the iron moving in one fluid motion and reduce pressure.
Your Ends Look Too Curled
Leave the last inch of hair out of the iron or glide through the ends more quickly. Straighter ends create a modern, relaxed look.
Your Curls Fall Flat Quickly
Use smaller sections, add styling product before curling, and let each curl cool completely. Fine or very long hair may also need light hairspray before and after styling.
Safety Tips for Curling Hair With a Straightener
Flat irons get extremely hot, so treat them with respect. Keep the tool away from your scalp, ears, fingers, and countertops that dislike being melted. Use a heat-resistant mat, unplug the tool when finished, and keep it away from children and pets.
Limit heat styling if your hair feels brittle, breaks easily, or has recently been chemically processed. When your hair is stressed, give it a break with heatless curls, braids, rollers, or air-dried styles.
Real-Life Experience: What Actually Helps When Learning Flat Iron Curls
The first time many people try to curl hair with a flat iron, the result is not a curl. It is often a mysterious bend, a half-wave, or one dramatic crimp that looks like the hair made a sudden left turn. That is completely normal. Flat iron curling is a wrist skill, and wrists are stubborn little machines until they understand the assignment.
One of the biggest lessons is to practice the motion without heat. Take a section of hair, clamp the cool iron, rotate it away from the face, and glide down. Do that a few times while looking in a mirror. The mirror can make directions confusing, especially when working on the opposite side of your head. If you keep turning the iron the wrong way, pause and think of the front pieces: both sides should move away from your face, like opening curtains.
Another experience-based tip is to start in the middle layer, not the front. The front pieces are the most visible, so they create unnecessary pressure. Practice on the lower back or middle side sections first. By the time you reach the face-framing hair, your wrist will be warmer, smarter, and less likely to betray you.
Section size also matters more than beginners expect. If a curl looks limp, the section was probably too large, the glide was too fast, or the iron was not rotated enough. If the curl looks too tight, use a larger section, glide faster, or leave the ends out. Small changes make a big difference. Flat iron curls are like pancakes: the first one may be questionable, but the batch improves quickly.
Product balance is another real-world lesson. Too much oil, leave-in cream, or serum before styling can make curls fall flat because the hair becomes too slippery. On the other hand, hair with zero grip may not hold either. For most people, the sweet spot is heat protectant first, then a light texture spray or flexible hairspray after the curls cool. If your hair is freshly washed and silky, dry shampoo can add grip even when your hair is technically clean.
Finally, do not judge the style before it is finished. Flat iron curls often look too separated or too “done” at first. Let everything cool, then rake through with fingers, shake the roots, and add a small amount of finishing spray. The magic usually happens after the curls relax. That is when the style shifts from “I curled every strand individually at 7:14 a.m.” to “Oh, this? Just casual effortless movement.” Beauty may be an illusion, but at least this one comes with good hair.
Note: Use heat tools carefully and choose the lowest effective temperature for your hair. If your hair is actively breaking, shedding excessively, or feels severely dry, skip the flat iron and focus on conditioning, trims, and low-heat styling until your hair feels stronger.
Conclusion
Learning how to curl your hair with a flat iron or straightener takes a little practice, but the method is simple once you understand the rhythm: prep, protect, section, clamp, rotate, glide, cool, and finish. The best results come from fully dry hair, a heat protectant, small sections, controlled temperature, and a smooth wrist motion. Whether you want beach waves, polished curls, soft bends, or quick everyday texture, your straightener can do far more than straighten.
Start slowly, keep the iron moving, and remember that the goal is not perfection on the first try. The goal is learning how your hair responds. Once you figure out the right section size, heat setting, and glide speed, flat iron curls become one of the easiest ways to create stylish, flexible hair at homewithout needing a drawer full of tools or a professional stylist hiding behind your bathroom door.